Now Reading: How to Change Battery in Garage Door Remote Easily and Quickly
- 01
How to Change Battery in Garage Door Remote Easily and Quickly
If your garage door remote stops working, daily routines can quickly turn frustrating. You press the button, but nothing happens—the garage door stays closed, and you’re left standing there, wondering what went wrong. In most cases, the solution is simple: the battery in your garage door remote is dead. Learning how to change the battery in your garage door remote is a quick, cost-effective fix that anyone can do at home. This small skill can save you time, money, and unnecessary stress.
Many people feel nervous about opening electronic devices, but changing a garage door remote battery is much easier than most expect. With the right guidance, you can finish the job in minutes, avoid calling a technician, and get your garage door working smoothly again.
This guide will walk you through every step, share expert tips, and answer common questions so you feel confident and prepared. Whether you have a basic remote or a newer smart model, you’ll find everything you need here.
Why Garage Door Remote Batteries Need Changing
Garage door remotes rely on small batteries to power their signal. Over time, these batteries lose energy and can no longer send a strong signal to your garage door opener. Most remotes use coin cell batteries (like CR2032 or CR2016), but some use AAA or AA batteries. The battery type and how often you use your remote will affect how long the battery lasts.
On average, garage door remote batteries last 1 to 2 years with regular use. Cold weather, frequent use, and leaving the remote in a hot car can all shorten battery life. If you notice your garage door opens slower, only works from close range, or stops working entirely, it’s probably time for a new battery.
A surprising detail: Some remotes have a small LED light that becomes dim when the battery is low. Others may work only at certain angles or after multiple presses. Don’t wait for the remote to stop working completely—replace the battery as soon as you see these signs.
Tools And Materials You’ll Need
Before you begin, gather the right tools and materials. This makes the process smoother and helps avoid damaging your remote.
Essential items:
- New battery (check your remote model for the correct type)
- Small Phillips or flathead screwdriver
- Clean, flat workspace
- Small bowl or tray (for holding screws)
- Soft cloth (optional, for cleaning)
Optional but helpful:
- Magnifying glass (for reading battery numbers or handling tiny parts)
- Tweezers (for removing the battery)
- Gloves (to avoid fingerprints on the battery)
If you’re not sure which battery your remote uses, check the user manual or look for the battery code printed inside the remote or on the old battery itself.

How To Identify Your Garage Door Remote Model
Not all remotes are the same. Finding your exact remote model helps you choose the right battery and follow the correct steps. Here’s how to identify your remote:
- Check the Brand Name: Most garage door remotes have the brand (like LiftMaster, Chamberlain, Genie, or Craftsman) printed on the front or back.
- Model Number: Look for a model number, usually on the back or inside the battery compartment. It may look like “971LM” or “ACSCTG Type 1.”
- Compare Online: If you can’t find a number, search for images of your remote on the brand’s website or manuals online.
Knowing your model is useful not just for batteries but also for troubleshooting, programming, or finding replacement parts.
Step-by-step Guide: Changing The Battery In Your Garage Door Remote
Every remote is a bit different, but most follow a similar process. Let’s break down the steps so you can work confidently, no matter your remote’s brand or model.
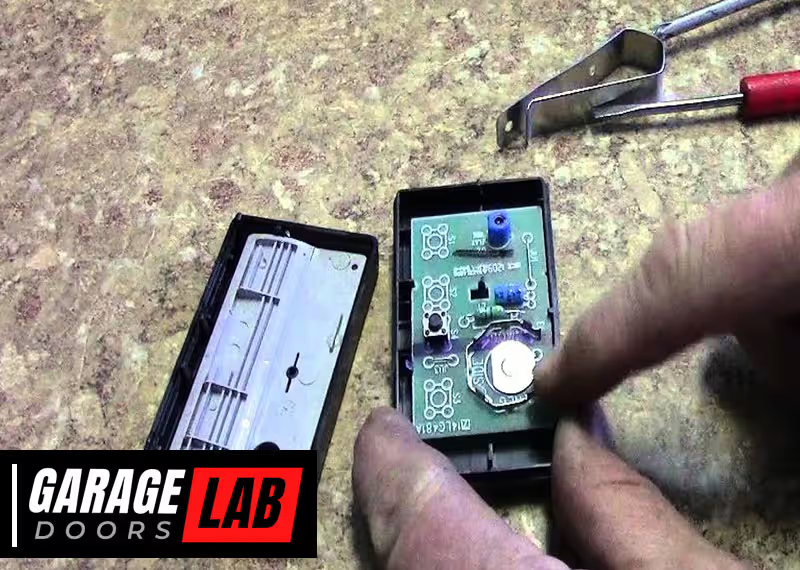
1. Open The Remote’s Battery Compartment
Most remotes have a back cover that either slides, snaps, or screws open.
- Sliding Cover: Hold the remote firmly and slide the back cover off. Some covers need a bit of pressure.
- Snap Cover: Use your thumb or a small flathead screwdriver to gently pry open the cover at the notch.
- Screwed Cover: Use a small Phillips screwdriver to remove the screw(s), and carefully lift the cover.
Pro tip: Keep all screws in a small bowl so you don’t lose them.
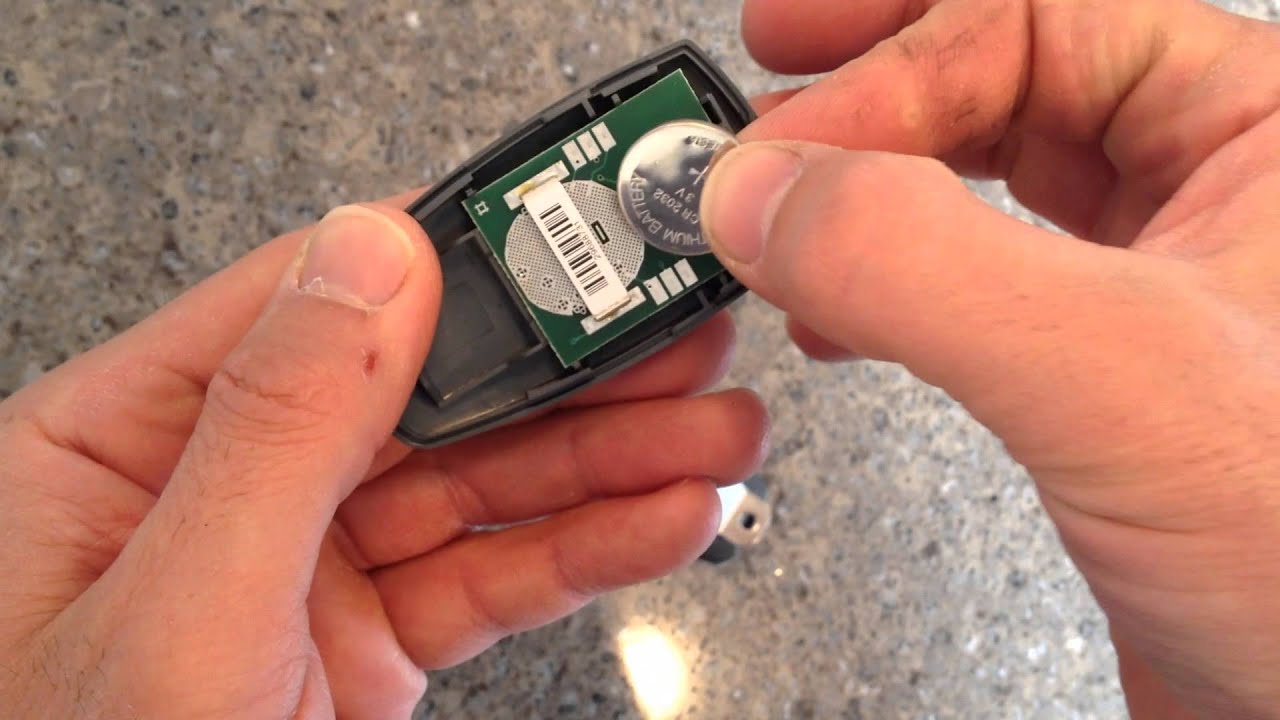
2. Remove The Old Battery
Once the compartment is open, you’ll see the battery. Note the battery’s position—which way the “+” side faces—so you can insert the new one correctly.
- Use your finger, a small flathead screwdriver, or tweezers to gently lift the battery out.
- If it’s stuck, work slowly to avoid bending contacts or damaging the remote.
3. Clean The Battery Compartment (optional)
Dust and dirt can cause poor contact between the battery and the remote. Use a soft, dry cloth or a cotton swab to wipe the battery compartment. Do not use water or cleaning sprays.
4. Insert The New Battery
Insert the new battery in the same orientation as the old one. The “+” symbol should face the same way it did before. Press the battery in gently but firmly.
- If your remote uses AA or AAA batteries, match the “+” and “-” symbols to the markings inside the compartment.
5. Close The Remote
Replace the cover and secure it:
- Slide or snap the cover back into place.
- If there were screws, tighten them gently—do not overtighten, or you could strip the threads.
6. Test The Remote
Stand a few feet from your garage door and press the button. The door should respond immediately. If not, double-check that the battery is installed correctly and the contacts are clean.
7. Dispose Of The Old Battery Properly
Do not throw batteries in the trash. Used batteries can leak chemicals and harm the environment. Take them to a recycling center or follow your city’s disposal guidelines.
Garage Door Remote Battery Types: Comparison And Features
There are several battery types used in garage door remotes. Here’s a quick comparison of the most common ones:
| Battery Type | Shape | Common Models | Average Lifespan |
|---|---|---|---|
| CR2032 | Coin cell | LiftMaster, Chamberlain | 1-2 years |
| CR2016 | Coin cell | Genie, Linear | 1-2 years |
| AA | Cylindrical | Older Genie, some universal remotes | 2-3 years |
| AAA | Cylindrical | Craftsman, some universal remotes | 2-3 years |
| LR44 | Button cell | Specialty remotes | 1-2 years |
Not all remotes use the same battery—even within the same brand. Always check before buying replacements.
Step-by-step Example: Changing Battery In A Liftmaster Remote
Let’s walk through a real-world example. The LiftMaster 893LM is a popular model. It uses a CR2032 coin cell battery.
- Slide off the back cover by pushing it down with your thumb.
- Remove the old CR2032 battery using your fingertip or a small flathead screwdriver.
- Insert the new battery with the “+” side facing up.
- Slide the cover back on until it clicks.
- Test the remote by pressing the button near your garage door.
If you have a different brand, the process is very similar. The main difference is how you open the cover and the battery type.
What To Do If Your Remote Still Doesn’t Work
Sometimes, replacing the battery doesn’t fix the problem. Here’s what to check next:
- Check Battery Orientation: Make sure the new battery is installed with the correct side up.
- Clean Contacts: Use a dry cloth or a pencil eraser to gently clean the metal contacts.
- Try a Different Battery: Even new batteries can be faulty. Try another one from a different package.
- Check for Physical Damage: Cracks, corrosion, or water damage can stop the remote from working.
- Reprogram the Remote: Some remotes lose their connection after a battery change. Follow your user manual to reprogram.
- Test the Wall Button: If the door opens from the wall button but not the remote, the remote is likely the problem.
If you’ve tried all these steps and it still doesn’t work, you may need a new remote or professional repair.
How To Extend Battery Life In Your Garage Door Remote
Battery life depends on several factors. Here are some practical ways to make batteries last longer:
- Keep the Remote Indoors: Extreme heat or cold shortens battery life.
- Avoid Unnecessary Button Presses: Each press uses power.
- Clean Regularly: Dust and debris can cause battery drain.
- Use Quality Batteries: Cheap batteries may die faster or leak.
- Remove Battery if Not Used: For long trips or storage, take the battery out.
A detail many people miss: Some remotes use “wake up” features that drain the battery slowly, even when not in use. If you rarely use your remote, check battery life every six months.
Common Mistakes When Changing Garage Door Remote Batteries
Mistakes can damage your remote or cause frustration. Here’s what to avoid:
- Wrong Battery Type: Always double-check the battery code before buying.
- Forcing the Cover: If it won’t open easily, check for hidden screws or tabs.
- Touching Battery Contacts with Bare Hands: Oils from your skin can reduce contact quality. Use gloves or hold batteries by the edges.
- Mixing Old and New Batteries: Always replace all batteries at the same time if your remote uses more than one.
- Losing Small Parts: Work over a tray or towel to keep screws and covers from rolling away.
Table: Symptoms And Their Likely Causes
To help diagnose problems, here’s a quick reference for common remote issues:
| Symptom | Possible Cause | Solution |
|---|---|---|
| Remote not working at all | Dead battery, wrong installation | Replace battery, check orientation |
| Works only up close | Weak battery | Replace battery |
| LED light is dim or off | Low battery, dirty contacts | Replace battery, clean contacts |
| Remote works sometimes | Battery not seated, poor contact | Reseat battery, clean terminals |
| Remote lost programming after battery change | Remote reset | Reprogram using opener instructions |
How To Choose The Right Replacement Battery
With so many options in stores, it’s easy to get confused. Here’s what really matters:
- Check the Battery Code: Look for codes like CR2032, CR2016, LR44, AA, or AAA. Match exactly.
- Buy Quality Brands: Duracell, Energizer, or Panasonic are reliable. Off-brand batteries can be weaker or leak.
- Expiration Date: Choose batteries with a long shelf life (look for expiration date on the package).
- Voltage: Most coin batteries are 3V, but always check your remote.
One insight: Some universal remotes can use multiple battery types. If you’re unsure, bring your old battery to the store for comparison.
Safety Tips When Replacing Batteries
Changing a battery is simple, but safety matters:
- Keep Batteries Away from Children: Coin batteries are a choking hazard and dangerous if swallowed.
- Do Not Mix Battery Types: Using different types together can cause leaks or poor performance.
- Dispose of Batteries Properly: Take used batteries to a recycling center.
- Avoid Water: Never use water to clean inside the remote.
- Check for Corrosion: If you see white powder or green buildup, clean carefully with a dry cloth. Severe corrosion may mean you need a new remote.

Special Cases: Smart Garage Door Remotes
Many newer garage door openers have smart remotes that connect to Wi-Fi or use rechargeable batteries. These may need different steps:
- Rechargeable Remotes: Plug into a USB charger using the supplied cable. Charging usually takes 1-2 hours.
- Non-removable Batteries: Some smart remotes are sealed; contact the manufacturer for service.
- App-Based Controls: If you use your phone as a remote, check your phone’s battery instead.
Always check your smart remote’s manual for battery replacement instructions.
What If I Lost My Garage Door Remote?
If your remote is lost or stolen, replace it quickly to keep your home secure. Here’s what to do:
- Erase Old Remote Codes: Use the “Learn” button on your garage door opener to erase old codes and reprogram new remotes.
- Buy a Replacement Remote: Use your opener’s brand and model number to find a compatible remote.
- Consider Upgrading: Universal remotes or smart openers add convenience and security.
Professional Help: When To Call A Technician
Most people can change a garage door remote battery easily. But call a technician if:
- The remote still doesn’t work after battery change and troubleshooting.
- The remote is physically damaged or corroded.
- You have trouble with opener wiring or the opener itself.
A professional can test the remote, check the opener, and recommend repairs or upgrades.
Environmental Impact Of Battery Disposal
Batteries contain metals and chemicals that can harm the environment. Recycling keeps these materials out of landfills and allows them to be reused. Many hardware stores and recycling centers accept household batteries.
According to the US Environmental Protection Agency, Americans throw away billions of batteries each year. Recycling helps reduce pollution and saves natural resources. For more information, visit the EPA’s battery recycling page.
Upgrading To Universal Or Smart Remotes
If you’re tired of changing batteries often or want more features, consider upgrading to a universal remote or a smart remote.
- Universal Remotes: Work with many brands, sometimes with longer battery life.
- Smart Remotes: Control your garage door from your phone, even when you’re away from home.
- Rechargeable Models: Some new remotes have built-in rechargeable batteries, saving money and hassle.
Compare costs, features, and compatibility before upgrading.
Table: Old Vs. New Garage Door Remote Features
To help you see the differences, here’s a comparison:
| Feature | Traditional Remote | Smart Remote |
|---|---|---|
| Battery Type | Coin cell or AA/AAA | Rechargeable or built-in |
| Control Distance | Up to 100 feet | Anywhere with internet |
| Battery Change Needed | Yes, every 1-2 years | No (recharge as needed) |
| Security | Basic encryption | Advanced encryption, app lock |
| Price | $10-$30 | $40-$100+ |
One insight: Smart remotes can alert you if your garage door is left open, adding safety and peace of mind.
Frequently Asked Questions
How Do I Know Which Battery My Garage Door Remote Needs?
Check the old battery for a code like CR2032, CR2016, AA, or AAA. It’s also usually printed inside the battery compartment or in your user manual. If unsure, search your remote’s brand and model online for battery details.
Can I Use Rechargeable Batteries In My Garage Door Remote?
Most remotes are designed for standard disposable batteries. Rechargeable batteries may have lower voltage or not fit correctly, causing performance issues. Always use the type recommended by the manufacturer.
How Often Should I Change My Garage Door Remote Battery?
On average, you should replace the battery every 1-2 years. If you use the remote often or notice weaker performance, replace it sooner.
My Remote Stopped Working After I Changed The Battery. What Should I Do?
Double-check the battery orientation and that the contacts are clean. Try another new battery. If the remote still doesn’t work, it may need reprogramming or could be damaged.
Is It Safe To Throw Old Batteries In The Trash?
No. Used batteries can leak chemicals and harm the environment. Take them to a recycling center or a store that accepts batteries for safe disposal.
Changing the battery in your garage door remote is a simple skill that brings real benefits. It saves you time, keeps your home secure, and puts you in control of a common household device. With the clear steps and expert tips above, you can handle this task with confidence, avoid common mistakes, and make your remote last longer.
Next time your garage door remote slows down or stops working, you’ll know exactly what to do.


