Now Reading: Factory Reset Liftmaster Garage Door Opener: Step-by-Step Guide
- 01
Factory Reset Liftmaster Garage Door Opener: Step-by-Step Guide
Are you struggling with your Liftmaster garage door opener and thinking about hitting the reset button? You’re not alone.
Many homeowners find themselves needing to factory reset their garage door opener, whether it’s to fix a glitch, update settings, or simply start fresh. But before you dive into this task, wouldn’t it be great to know you’re doing it correctly and efficiently?
In this guide, we’ll explore everything you need to know about resetting your Liftmaster garage door opener. Imagine the peace of mind you’ll have knowing your garage door is functioning perfectly again. Ready to take control and make your life just a bit easier? Let’s get started!
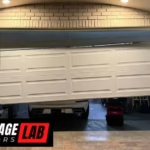
Preparation For Reset
Resetting your Liftmaster garage door opener can be an empowering task. Whether you’re troubleshooting issues or simply want a fresh start, preparation is key. By carefully gathering the right tools and ensuring safety measures, you can make the reset process smooth and stress-free. Let’s dive into the practical steps to prepare for a successful reset.
Gather Necessary Tools
Before you start, have your tools ready. You’ll need a small ladder to reach the opener, a screwdriver to loosen screws, and possibly a flashlight if your garage is dimly lit. A notebook might come in handy to jot down steps or settings you might want to remember later.
Have you ever found yourself halfway through a task only to realize you forgot something crucial? Gathering everything beforehand saves you from running around. This simple step helps maintain focus and efficiency.
Ensure Safety Measures
Your safety should be your top priority. Start by unplugging the garage door opener from the power source. This prevents accidental activation while you work on it.
Consider wearing gloves to protect your hands from any sharp edges or mechanical parts. If your garage door is heavy, ask someone to assist you. Working together can make the process safer and more enjoyable.
What other safety precautions can you think of that might be unique to your garage? Reflecting on your environment ensures you’re fully prepared.
Remember, preparation is not just about tools and safety—it’s about setting yourself up for success. As you organize your workspace, think about how each step contributes to a smoother reset experience. With everything in place, you’ll be ready to tackle the reset with confidence.

Credit: support.chamberlaingroup.com
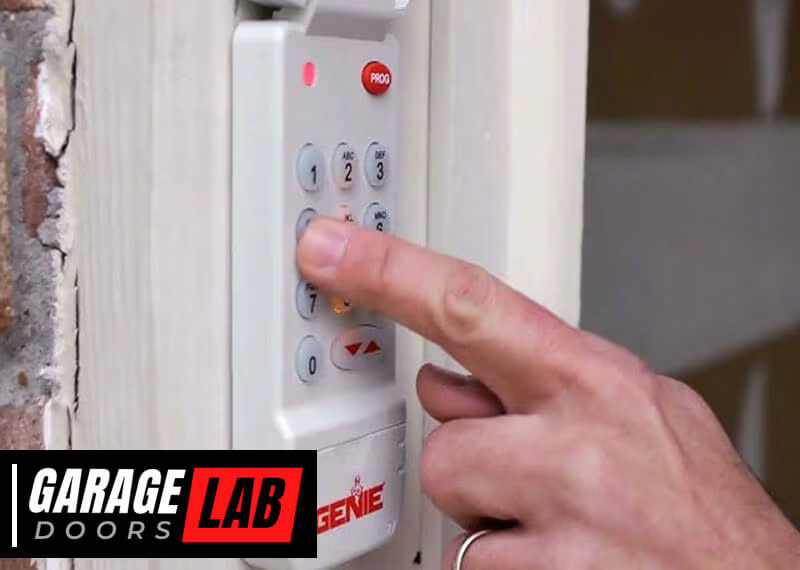
Locate The Control Panel
Finding the control panel is key to resetting your LiftMaster garage door opener. This panel is the brain of your opener. It holds the essential functions. Knowing its location makes the reset process easier. Let’s break down the steps to locate it and access it safely.
Identifying The Control Panel
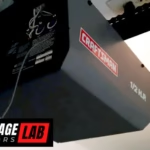
Most LiftMaster garage door openers have a control panel. It’s usually part of the motor unit. This unit hangs from the ceiling of your garage. The panel is often a small box with buttons and lights.
Check the manufacturer’s manual. It often shows where the control panel is. Look for a cover or a button on the motor unit. It’s usually labeled clearly for easy identification.
Accessing The Panel Safely
Safety is crucial when accessing the control panel. First, ensure the garage door is closed. This prevents accidental movement. Unplug the unit from the power source. This stops any electric shock risks.
Use a sturdy ladder if needed. Make sure it’s stable. Wear safety glasses and gloves. This protects you from dust or debris. Follow all safety guidelines in the manual. It ensures a safe and smooth reset process.
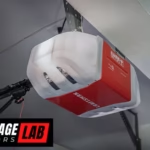
Initiate Factory Reset
Resetting your Liftmaster garage door opener can solve many problems. It erases all programmed settings, returning it to factory conditions. This process is important when troubleshooting issues or changing ownership.
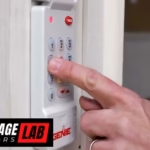
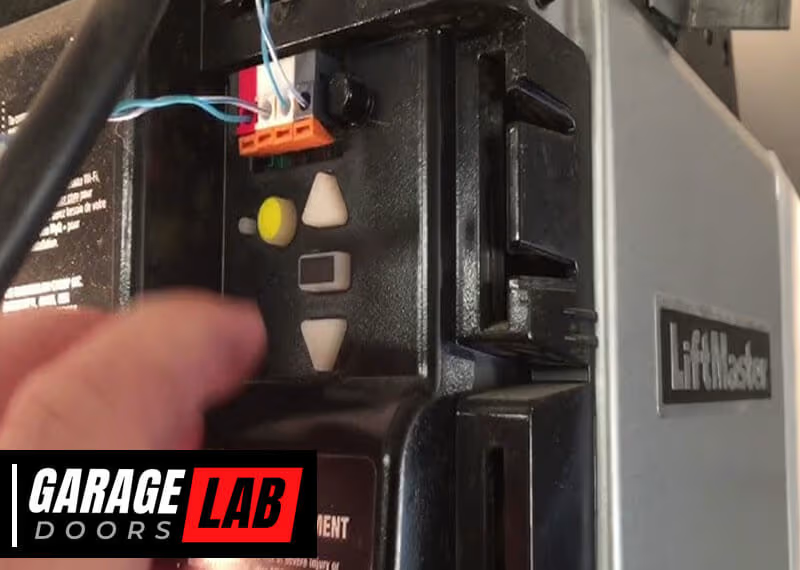
Pressing The Reset Button
Locate the reset button on your Liftmaster opener. It is usually near the antenna wire. The button is often marked “Learn” or “Reset”. Press and hold this button for about 10 seconds. This action will erase all existing codes and settings. Wait for the light to blink, indicating the reset process is complete.
Alternative Methods For Reset
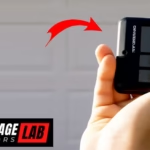
Some models require different reset procedures. Consult your Liftmaster manual for specific instructions. Disconnecting power is another method. Unplug the opener from the outlet. Wait for 30 seconds before plugging it back. This method may reset settings without pressing buttons. Another option involves using the remote. Press the remote button and the “Learn” button simultaneously. Hold them for several seconds to reset the opener.
Credit: support.chamberlaingroup.com
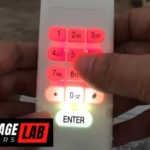
Reprogramming The Opener
Reprogramming the opener involves resetting the Liftmaster garage door system. This process restores factory settings, ensuring smooth operation. Clear instructions are vital for a successful reset, minimizing technical issues.
Reprogramming your Liftmaster garage door opener can seem daunting, but it’s a straightforward process that can save you time and frustration. Whether you’re setting up new remote controls or adjusting door settings, understanding the steps involved is essential. Let’s break down the process into manageable tasks so you can get your garage door opener functioning smoothly.Setting Up New Remote Controls
To set up new remote controls, start by locating the “Learn” button on your Liftmaster garage door opener. It’s usually found on the back or side of the motor unit. Press and release this button; a small LED light will illuminate, indicating that the opener is in programming mode.Next, press the button on your new remote control. The LED light on the motor unit should blink or turn off, confirming that the remote has been successfully programmed. Test the remote by pressing the button to ensure your garage door opens and closes as expected.What if you have multiple remotes? Simply repeat the process for each one. It’s a quick task that ensures all your remotes are synced with the garage door opener.Adjusting Door Settings
Adjusting the door settings might be necessary if your garage door isn’t closing all the way or stops halfway. Begin by identifying the adjustment screws on the opener, typically labeled “Up” and “Down.”Turn the “Up” adjustment screw to change how far the door opens. A small clockwise turn will make the door open further. Similarly, adjust the “Down” screw for the closing limit. If the door stops short, turn the screw clockwise to increase the closing distance.After making adjustments, test the door to see the changes. Remember to make minor adjustments and test each time until you find the perfect setting. This ensures your garage door operates safely and efficiently.Have you ever had to reprogram your opener and found it easier than expected? These simple tasks can empower you to maintain your garage door opener without always needing professional help.Testing The System
Resetting the Liftmaster garage door opener requires careful steps to ensure smooth operation. Start by locating the reset button and holding it until the light blinks, indicating a factory reset. Test the system by pressing the remote control button, checking if the door responds correctly.
Testing the system of your Liftmaster garage door opener after a factory reset is crucial. It ensures everything is working smoothly and safely. Imagine pressing the button, and nothing happens—frustrating, right? That’s why it’s essential to verify the functionality and troubleshoot any issues immediately. Let’s dive into the steps you need to take.###Verifying Functionality
Start by checking if the garage door opens and closes properly. Use the remote or wall-mounted button to test its operation. Does the door respond promptly? If yes, great! If not, there might be an issue with the signal or battery.Inspect the safety sensors. They should stop the door from closing if there’s an obstruction. Place an object in the path of the closing door. Does it reverse direction? If it doesn’t, the sensors might need alignment or cleaning.Next, check the manual release lever. It should allow you to open the door manually. Pull the lever and try lifting the door. Does it move without resistance? This feature is vital during power outages.###Troubleshooting Common Issues
Encountering problems is common, but most have simple fixes. If the remote isn’t working, check the battery. A weak battery often causes unresponsive remotes. Replace it and test again.If the door doesn’t open or close, inspect the tracks and rollers. Dirt or debris can obstruct movement. Clean them and see if it resolves the issue.Sometimes, the opener might make strange noises. This often indicates a need for lubrication. Apply garage door lubricant to the moving parts and listen for improvements.Is the door reversing unexpectedly? This might be due to misaligned sensors. Adjust them until the LED lights on both sensors are steady.What’s the most bizarre issue you’ve faced with your garage door opener? Share your experiences in the comments. You might find someone with a solution or similar story.Maintenance Tips
Regular maintenance of your Liftmaster garage door opener ensures its longevity. A factory reset might fix issues, but upkeep prevents them. Let’s explore some simple maintenance tips. These tips help keep your garage door opener running smoothly.
Routine Checks
Inspect the garage door and opener monthly. Look for loose bolts or screws. Tighten them to prevent further issues. Check the tracks for any debris or blockages. Clean them using a soft cloth or brush. Examine the safety sensors. Ensure they are aligned and free of dirt.
Test the door balance. Disconnect the opener and lift the door halfway. It should stay in place. If it doesn’t, adjust the springs. Regularly check the remote control batteries. Replace them if the signal weakens.
Handling Future Problems
Unusual noises indicate potential issues. Listen for grinding or squeaking sounds. These may require lubrication. Use a silicone-based spray for smoother operation. If the door reverses unexpectedly, test the safety sensors. They might need realignment or cleaning.
Keep an eye on the opener’s performance. Slow response times suggest motor issues. Consider professional inspection if problems persist. Be proactive. Address minor issues before they become major problems. This approach ensures your Liftmaster operates efficiently.

Credit: www.youtube.com
Frequently Asked Questions
How To Reset Liftmaster Garage Door Opener To Factory Settings?
Press and hold the “Learn” button on the LiftMaster opener until the LED light turns off. This process erases all remote codes, resetting the opener to factory settings. Reprogram remotes and keypads after completing the reset.
How To Factory Reset A Garage Door Opener?
Press the “Learn” button on the opener for 6 seconds to reset. Reprogram the remote after resetting. Consult the manual for specific instructions tailored to your model.
How Do You Reprogram Your Liftmaster Garage Door Opener?
Press the “Learn” button on the opener, then quickly press the remote button. Wait for the light to blink, confirming reprogramming. Repeat the process for each remote. Ensure door is closed during programming for safety. Consult the manual for detailed instructions specific to your model.
How To Reset Liftmaster Garage Door Opener Without Code?
Press the “Learn” button on the motor unit until the LED light goes off. This erases all codes. Reprogram remote controls by pressing the “Learn” button and then the remote button within 30 seconds.
How Do I Reset My Liftmaster Garage Door Opener?
To reset your Liftmaster, press and hold the learn button. Wait until the LED light turns off.
Conclusion
Resetting your Liftmaster garage door opener can solve many issues. It’s a simple process anyone can follow. Just ensure safety first. Disconnect power and follow the reset steps. This restores factory settings quickly. Your garage door will function smoothly again.
No more remote problems or code errors. Regular maintenance is important too. Check your opener every few months. Keep it clean and well-lubricated. This prevents future problems. Resetting is just one part of caring for your garage door. A little attention goes a long way in ensuring reliability and convenience.
Keep your garage door opener in top shape!