Now Reading: How Do I Reset a Chamberlain Garage Door Opener: Easy Steps
- 01
How Do I Reset a Chamberlain Garage Door Opener: Easy Steps
Have you ever found yourself standing in front of your garage, frustrated because your Chamberlain garage door opener is acting up? You’re certainly not alone.
Many homeowners encounter issues with their garage doors, and knowing how to reset your Chamberlain garage door opener can save you time and hassle. Imagine the relief of quickly getting your garage door back on track without having to call a technician.
We’ll guide you through the simple steps to reset your Chamberlain garage door opener. Whether it’s due to a power outage, a malfunction, or just a need to sync your remote, resetting it can often solve the problem. Keep reading to discover how you can restore your garage door opener to perfect working order and regain control over your daily routine.

Credit: support.chamberlaingroup.com
Reasons To Reset Your Garage Door Opener
Resetting a Chamberlain garage door opener can solve issues like remote control problems or security concerns. It helps ensure smooth operation and reliable performance. Follow simple steps to reset and maintain safety.
Resetting your Chamberlain garage door opener might seem unnecessary, but there are several compelling reasons to do so. Whether your remote has stopped working or you’re concerned about security, a simple reset can solve multiple issues. Understanding when and why to reset can save you time and hassle.###Security Concerns
Have you ever misplaced a remote or shared your access code and regretted it later? Resetting your garage door opener can safeguard against unauthorized access. By doing so, you ensure that only current, trusted devices can open your garage.###Malfunctioning Remotes
Imagine pressing your remote, only to find your garage door unresponsive. A reset can resolve this issue, often caused by a glitch in the system. It’s a quick fix that can spare you from unnecessary frustration.###New Home Purchase
When you move into a new home, resetting the garage door opener is a wise first step. You never know how many people have access to the existing system. A reset provides peace of mind and personal security.###Technological Upgrades
Have you recently upgraded to a new smartphone or a smart home system? Resetting your garage door opener can help ensure compatibility with new technology. This allows you to enjoy seamless integration and enhanced control.###Improving Performance
Is your garage door opener slow or inconsistent? A reset might improve its performance. By clearing any errors or memory issues, you can enhance its operation and reliability.###Routine Maintenance
Regularly resetting your garage door opener can be part of a maintenance routine. It helps you keep track of any issues and ensures your system is running smoothly. Think of it as a tune-up for your garage door’s brain.Consider these reasons the next time your garage door acts up or your security needs change. A simple reset could be the key to resolving your concerns. When was the last time you checked your garage door opener settings?Gather Necessary Tools
Resetting your Chamberlain garage door opener might seem daunting, but with the right tools at hand, it’s a task you can tackle with confidence. Knowing what you need before you start can save time and frustration. Imagine the satisfaction of fixing it yourself, armed with the essential equipment and a little bit of know-how. Let’s dive into what you should gather before you reset your garage door opener.
Tools You Might Need
To reset your Chamberlain garage door opener, you’ll likely need a few basic tools. A Phillips screwdriver is essential for opening the battery compartment and accessing other parts that might need adjustment.
A ladder is another tool you should consider having nearby. Garage door openers are usually positioned at a height that requires you to reach up safely. A sturdy ladder can make this task much easier.
A flashlight can be incredibly helpful, especially if your garage is dimly lit. It allows you to see the tiny buttons and settings on your opener, ensuring you don’t miss anything important.
Safety Precautions
Before you start, think about safety. Ensure your ladder is stable to prevent falls. A shaky ladder can lead to accidents, so double-check its placement.
Also, consider wearing protective gloves. They can prevent minor injuries from sharp edges or unexpected snags on the opener.
Unplugging the opener is a crucial step. It might seem obvious, but this simple action can prevent electric shocks or accidental activation during your work.
Have you ever tackled a home project only to realize you forgot something important halfway through? Gathering all necessary tools beforehand can prevent this common frustration.
By taking a few minutes to prepare, you can make resetting your Chamberlain garage door opener a smooth and rewarding process. What tools do you think are often overlooked but essential in projects like these?
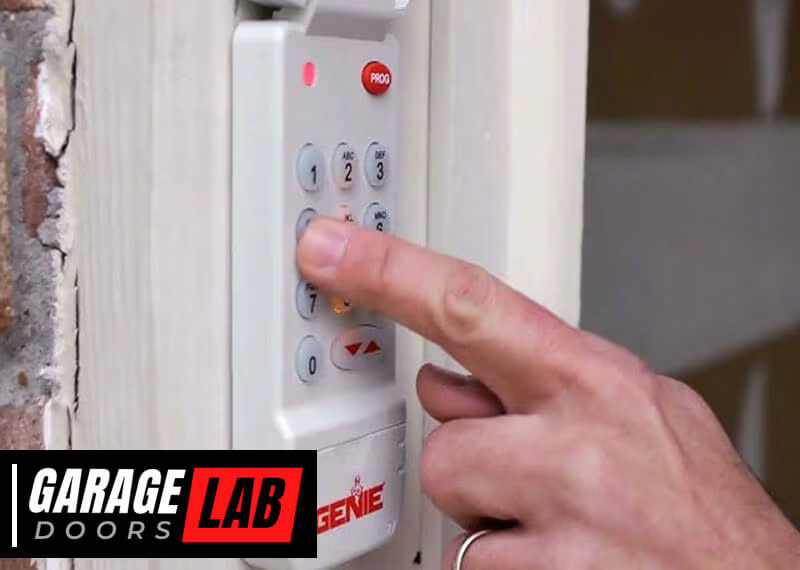
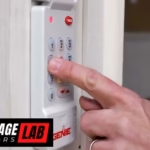
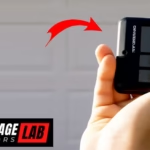
Locate The Learn Button
Resetting a Chamberlain garage door opener begins with locating the learn button. This button is crucial for programming new remote controls and keypads. It is often colored and positioned prominently. Knowing its location simplifies the reset process.
Identifying The Learn Button
The learn button is typically red, yellow, or purple. It stands out against the rest of the opener. You will find it near the antenna wire. It might be under a light lens cover. Identify this button before starting any reset or programming.
Common Locations On Different Models
Older models may have the button on the back or side. Check the motor unit for a small square button. Newer models often place it under the light lens cover. Look near the antenna wire for easy access.
Some units have the button on the bottom panel. You might need to remove the cover for access. This is common in models with enclosed motor units. Always consult the manual for your specific opener model.

Credit: www.youtube.com
Erase Existing Codes
Resetting your Chamberlain garage door opener is crucial for security. This involves erasing existing codes. Whether you’ve lost a remote or moved into a new home, clearing old codes prevents unauthorized access. Let’s explore the process to erase codes effectively.
Steps To Clear Remote Codes
Begin by locating the “Learn” button on the opener’s motor unit. This button is often near the antenna wire. Press and hold the “Learn” button. Wait until the indicator light turns off. This process typically takes about 6 seconds. Once the light is off, all remote codes are erased. Make sure to have new remotes ready for programming.
Confirming Code Erasure
To ensure codes are erased, test the remotes. Try using a remote to open the door. If the door does not respond, the codes have been successfully erased. You can now program new remotes with confidence. This ensures only authorized users can access your garage. Properly cleared codes enhance your garage’s security.
Program New Remote Controls
Programming new remote controls for your Chamberlain garage door opener might seem like a daunting task, but with a little guidance, you can tackle it easily. Imagine the convenience of controlling your garage door with just a click! Whether you’ve misplaced your old remote or simply want to add an extra one, programming a new remote is straightforward. Plus, once you master this, you’ll feel like a DIY pro in your own home.
Synchronizing New Remotes
First, you’ll need to synchronize your new remote with the garage door opener. Start by locating the “Learn” button on the opener unit; it’s usually near the antenna wire. Press this button until the indicator light turns on. This light shows that your opener is ready to pair with a new remote.
Next, press the button on your new remote. Hold it until the indicator light on the opener blinks or turns off. This signals that the remote and opener are now synchronized. It’s a simple process, but the satisfaction of seeing your remote work is unbeatable.
Testing New Remote Functionality
Once synchronized, it’s time to test the remote’s functionality. Stand at a safe distance and press the button on your remote. Watch your garage door closely to ensure it opens smoothly. If it does, your programming was successful!
If the door doesn’t respond, check the battery in your remote and repeat the synchronization steps. Do you ever wonder how technology makes life easier? This simple setup eliminates the hassle of manual operation.
Finally, consider testing the remote from various spots around your property to ensure it works from different angles. This ensures reliability, especially during bad weather when you don’t want to step outside. The sense of control over your home’s entry points is empowering.
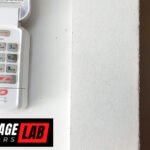
Reprogram Keypad Entry
To reset a Chamberlain garage door opener, begin by locating the “Learn” button on the motor unit. Press and hold it until the LED light turns off, erasing old codes. Next, enter your new code into the keypad and press the “Enter” button to program it.
Reprogramming your Chamberlain garage door opener’s keypad can seem daunting, but with a few straightforward steps, you can easily regain control over your garage access. Whether you’ve lost a code or simply want to update your security settings, resetting the keypad entry is a practical solution. Let’s dive into the process and make sure your keypad is set up and working perfectly.Setting Up The Keypad
Begin by locating the “Learn” button on your garage door opener. It’s usually on the back or side of the unit.Press and hold this button until the indicator light starts blinking. This signals that the system is ready to reprogram.Quickly move to your keypad and enter a new four-digit code. Press the “Enter” button afterward to confirm your new code. It’s like giving your garage a brand new password.Ensuring Keypad Works Properly
Test your new code immediately by entering it on the keypad and pressing “Enter”. Your garage door should respond by opening or closing.If it doesn’t work, repeat the process. Double-check that the batteries in your keypad are fresh, as weak batteries can affect performance.Why not try using your keypad at different times of the day? This ensures it’s consistently operational under varying conditions. What if you realize the keypad isn’t responsive at all hours? That might signal an interference issue or a need for repositioning.By following these steps, you can have a reliable garage door keypad that’s tailored to your security needs. Your proactive approach not only keeps your property safe but also gives you peace of mind. Isn’t it satisfying to know you hold the keys—literally and figuratively—to your own security?Troubleshooting Common Issues
Resetting a Chamberlain garage door opener can solve many issues. Sometimes, the problem isn’t obvious. Troubleshooting common issues helps identify the cause. Whether it’s the remote or keypad, understanding these issues is crucial. Let’s explore common problems with Chamberlain garage door openers.
Remote Not Responding
Sometimes, the garage door remote stops working. First, check the batteries. Replace them if they are old. Ensure the remote is in range of the door opener. Interference from other devices can also be a problem. Try moving other electronic devices away. If the remote still fails, consider reprogramming it. Follow the instructions in the user manual for this.
Keypad Malfunctions
Keypad malfunctions can be frustrating. Check the batteries first. Weak batteries may cause the keypad to stop responding. Ensure the keypad is clean. Dust and dirt can interfere with the keys. If cleaning doesn’t help, try resetting the keypad. Locate the “Learn” button on the garage door opener. Press and hold it until the indicator light turns off. This resets the keypad. Re-enter your code to test it.
Maintenance Tips For Longevity
Resetting a Chamberlain garage door opener enhances its performance and extends its lifespan. Begin by locating the “Learn” button on the device. Press and hold until the light turns off, then follow the manual’s instructions for reprogramming. Regular resets ensure smooth operation and longevity.
Maintaining your Chamberlain garage door opener is crucial for ensuring its longevity and optimal performance. Regular maintenance not only saves you from unexpected breakdowns but also extends the lifespan of your equipment. Imagine the frustration of a malfunctioning garage door when you’re in a hurry. By following some simple tips, you can avoid this hassle and keep your garage door opener running smoothly.Regular Check-ups
Regular check-ups are essential for keeping your garage door opener in tip-top shape. Set aside some time every few months to inspect the door opener. Look for any signs of wear and tear. Is there any unusual noise when the door operates? Tighten loose bolts and lubricate moving parts. This proactive approach can prevent minor issues from becoming major problems.Battery Replacement
The battery in your Chamberlain garage door opener is often overlooked. However, it’s a vital component that keeps the system running. Check the battery at least once a year. Is your remote control sluggish or unresponsive? These could be signs that it’s time for a battery replacement. Keep spare batteries on hand for quick swaps. This small step can save you from the inconvenience of a non-functional garage door opener.Maintenance doesn’t have to be complicated. A few simple actions can ensure that your Chamberlain garage door opener remains reliable for years. You wouldn’t wait for your car to break down before checking the oil, right? The same logic applies here. Regular attention to your garage door opener can keep it functioning smoothly and save you from unnecessary headaches.Do these maintenance tips resonate with you? Have you ever been caught off guard by your garage door opener failing? Share your experiences and insights in the comments below. Your story might just help someone else avoid a similar predicament.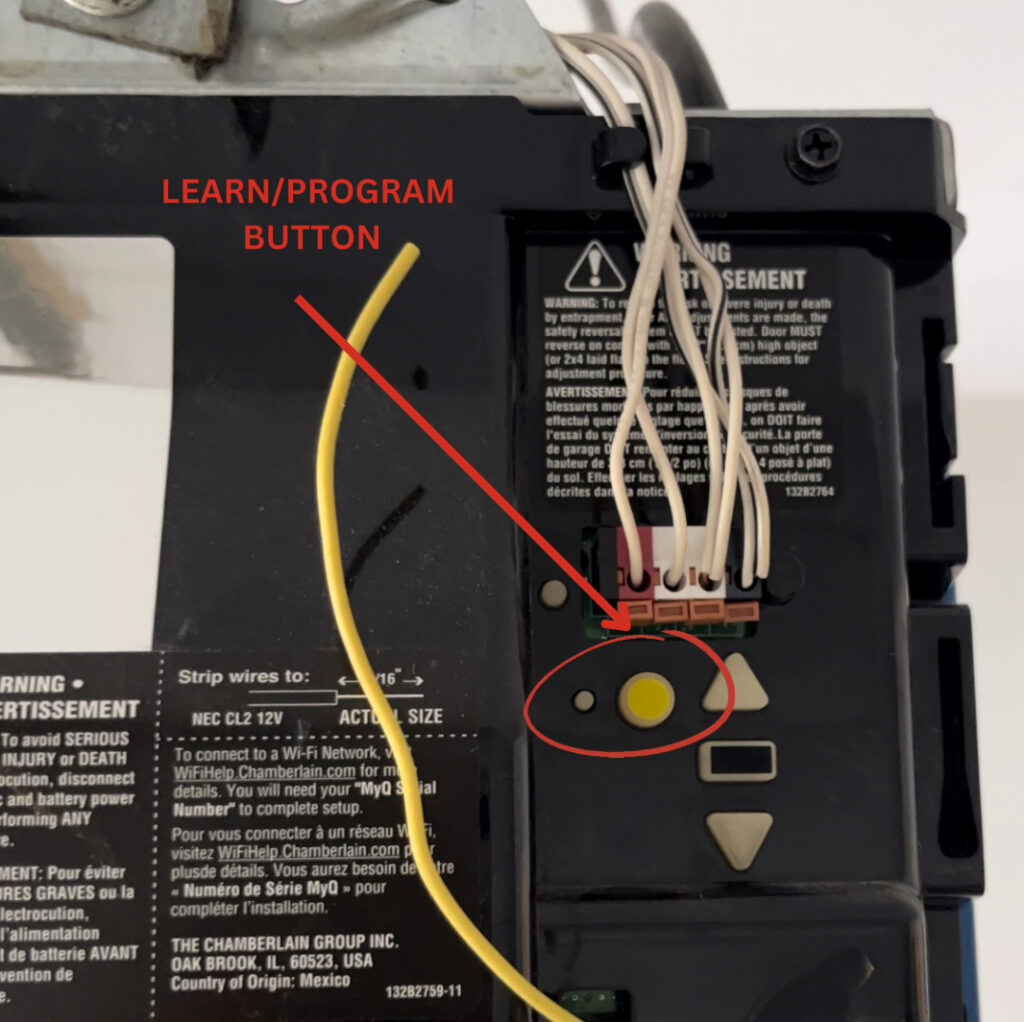
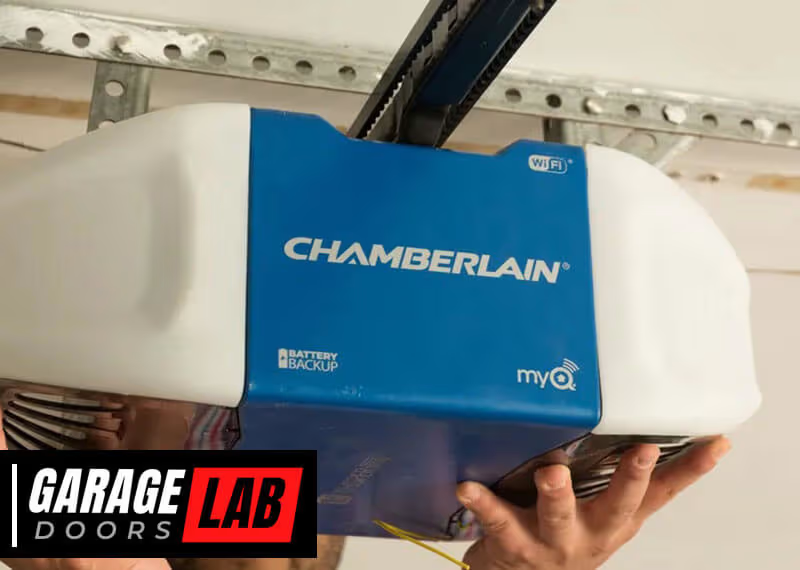
Credit: garagedoorbeasts.ca
Frequently Asked Questions
How To Reprogram A Chamberlain Garage Door Opener?
To reprogram a Chamberlain garage door opener, press the “Learn” button on the motor unit. Then, within 30 seconds, press and hold the desired button on your remote until the light bulb on the motor unit blinks. Test the remote to ensure successful programming.
How To Clear All Codes On A Chamberlain Garage Door Opener?
Press and hold the “Learn” button on your Chamberlain garage door opener until the LED light turns off. This will clear all codes. Reprogram your remotes and keypads afterward.
How Do I Reset The Garage Door Opener?
Press and hold the “Learn” button on your garage door opener until the indicator light turns off. Release the button, then press it again. Quickly press the remote button. The indicator light should flash, confirming the reset. Always refer to your specific model’s manual for exact instructions.
What Would Cause A Chamberlain Garage Door Opener To Stop Working?
A Chamberlain garage door opener may stop working due to power issues, dead remote batteries, misaligned sensors, or worn-out gears. Check for electrical connectivity and ensure sensors are clean and aligned. Replace batteries and inspect gears for wear. Resetting or reprogramming might be necessary for resolving technical glitches.
How Do I Reset My Chamberlain Garage Door Opener?
To reset, locate the “Learn” button. Press and hold until the light turns off.
Conclusion
Resetting a Chamberlain garage door opener can simplify your life. Follow the steps carefully. Ensure safety by disconnecting power first. Then, locate the “Learn” button. Press it until the LED light turns off. This means the system is reset. Test the opener with your remote.
It should work smoothly. If not, repeat the process. Always consult the manual for specific models. Regular maintenance can prevent issues. Keep your remote and opener in good condition. A functional garage door adds convenience to daily routines. Enjoy a hassle-free garage experience!