Now Reading: How to Reset Chamberlain Garage Door Keypad: Easy Guide
- 01
How to Reset Chamberlain Garage Door Keypad: Easy Guide
Imagine you’re in a rush, ready to start your day, but your garage door keypad isn’t cooperating. Frustrating, right?
A non-responsive keypad can throw a wrench in your routine and test your patience. But don’t worry, resetting your Chamberlain garage door keypad is simpler than you might think. In this guide, you’ll learn the step-by-step process to get your garage door keypad back to working order.
Whether you’re dealing with forgotten codes or technical glitches, we’ve got you covered. Stick around, and you’ll soon be able to glide in and out of your garage without a hitch. Let’s dive in and get your garage door back on track!
Tools And Materials Needed
Resetting a Chamberlain garage door keypad requires a few tools and materials. Gather a ladder, a small screwdriver, and the keypad’s manual. Ensure you have the new code ready for a smooth reset process.
Resetting a Chamberlain garage door keypad is a task many homeowners face at some point. Whether you’re dealing with a forgotten code or setting up a new keypad, knowing the right tools and materials makes the process straightforward and hassle-free. Having everything ready can save you time and frustration, letting you focus on getting your garage secure again.
###
Basic Tools You’ll Need
A small Phillips head screwdriver is often all you need to open the keypad’s battery compartment. If you’ve ever assembled furniture or toys, you probably already have one in your toolbox. Keep this handy, as you’ll use it to both open the keypad and reset it.
###
Fresh Batteries
Ensure you have the correct replacement batteries. Most Chamberlain keypads use either AA or AAA batteries, but it’s always best to check your specific model. Using fresh batteries ensures the keypad works efficiently, avoiding the need to troubleshoot issues that are simply due to low power.
###
Access To A Ladder
If your keypad is mounted at a height, a ladder will be necessary. Safety first—make sure it’s sturdy and stable. You want to reach the keypad comfortably to avoid any accidental falls.
###
User Manual Or Instructions
Having the user manual or specific instructions for your model can be incredibly helpful. If you misplaced the manual, you can often find a digital copy on the Chamberlain website. The manual will guide you through the reset process, ensuring you don’t miss any crucial steps.
###
Patience And Time
Though not a physical tool, having a bit of patience and time set aside for this task is essential. Rushing can lead to mistakes, which can be frustrating when you’re trying to ensure security. Set aside a quiet moment where you can focus on the task without interruptions.
Have you ever tried to reset something without the right tools, only to find yourself stuck midway? Gathering these items beforehand can save you from that common frustration. Preparing in advance makes the process smoother and more efficient, helping you get back to your day with peace of mind.

Credit: www.facebook.com
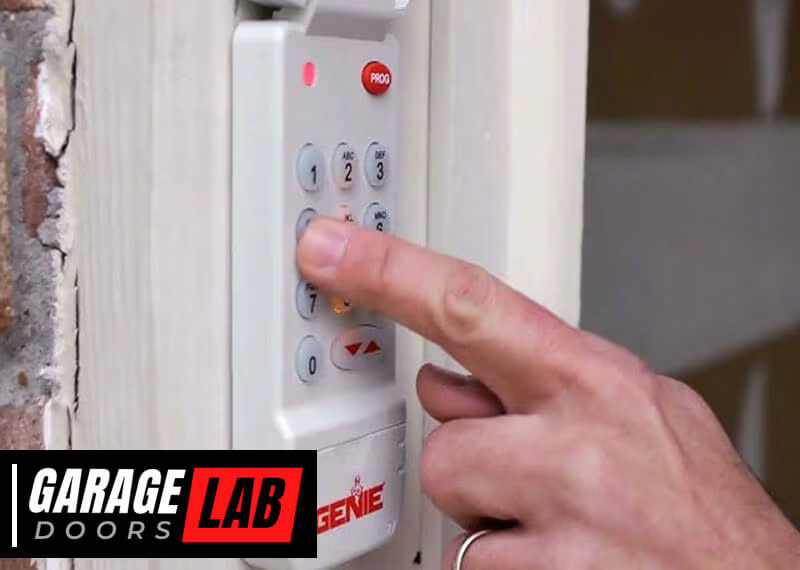
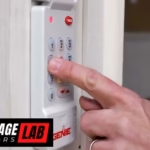
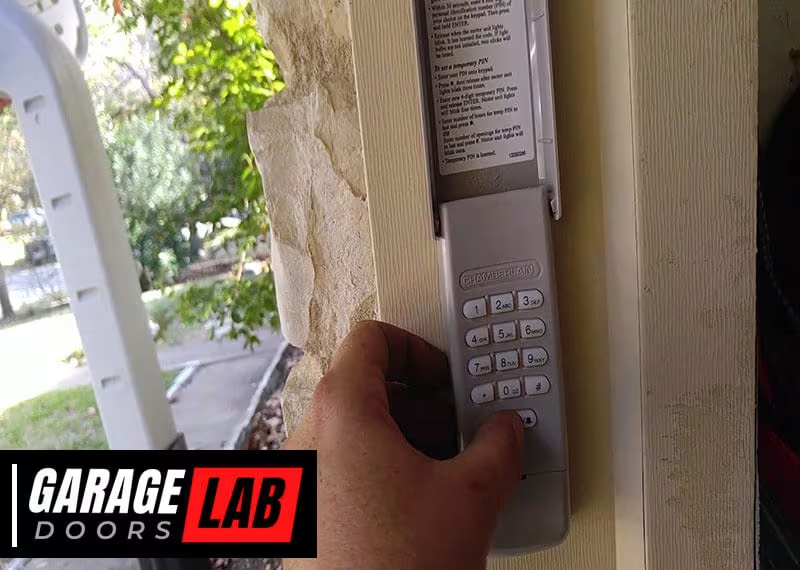
Locating The Learn Button
Resetting your Chamberlain garage door keypad begins with finding the Learn Button. This button is vital for syncing your keypad to the garage door opener. Without it, resetting becomes impossible. Understanding where to look can save you time and frustration.
The Learn Button is typically on the garage door opener unit. It’s often near the antenna wire. With a little patience, you can find it quickly.
Understanding The Learn Button
The Learn Button plays a crucial role in the resetting process. It allows new devices to connect with the garage door system. Pressing it initiates the programming mode. This button makes it possible to link your keypad with the opener.
Common Locations
The Learn Button is usually on the back or side of the garage opener. Check near the antenna wire. Some models have a panel you may need to open. The button is often red, yellow, or purple. Make sure to read the labels carefully.
Older models might have a different location. Check your manual for specific guidance. If still unsure, contact Chamberlain support for help.
Clearing The Keypad Memory
Resetting the Chamberlain garage door keypad involves erasing existing codes from its memory. Start by pressing the “Learn” button until the light turns off, clearing the stored access codes. This process ensures security and allows for new code input.
Resetting your Chamberlain garage door keypad can be essential for maintaining security and ease of use. One crucial step in this process is clearing the keypad memory. This ensures that any old codes are erased, allowing you to input new ones without interference. Imagine the peace of mind knowing only your current access code works, keeping unwanted guests at bay. Here, we’ll walk through the steps to clear the memory and explore why this step is so important.
Steps To Clear Memory
Clearing the memory of your Chamberlain garage door keypad is straightforward.
First, locate the “Learn” button on your garage door opener. It’s usually on the back or side of the motor unit.
Press and hold this button until the indicator light turns off. This signals that the old codes have been erased.
Finally, test the keypad to ensure it no longer responds to previous codes.
Feeling stuck? Check your manual for specific model instructions.
Importance Of Clearing Memory
Clearing the keypad memory is more than just a technical step—it’s a security measure.
Old codes can pose a risk if they fall into the wrong hands, compromising the safety of your home.
By clearing the memory, you ensure that only current codes work, keeping your access secure.
Have you ever had a code you forgot you shared with someone? Clearing memory eliminates this issue, giving you control over who can access your garage.
Remember, it’s not just about convenience, it’s about safeguarding your space.
How often do you review your security measures? Regularly clearing memory should be part of your routine.
Taking these steps can prevent unwanted surprises and keep your home safe.
Are you ready to enhance your home’s security by resetting your keypad?
Credit: garagedoorbeasts.ca
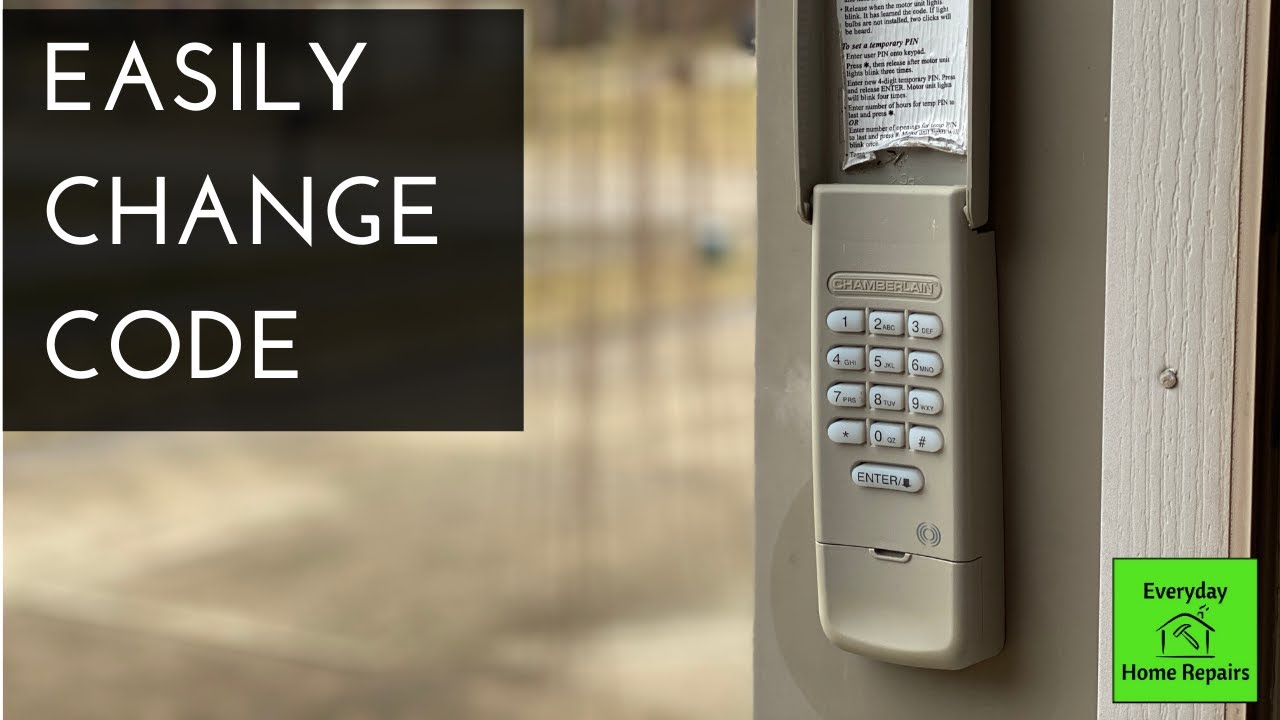
Setting A New Pin
Resetting your Chamberlain garage door keypad is simple. Press the “Learn” button on the motor unit, then enter a new four-digit PIN on the keypad. Finally, press the “Enter” button. Your new PIN is now set.
Setting a new PIN for your Chamberlain garage door keypad can feel like a daunting task, but it’s simpler than you might think. Whether you’re updating your code for security reasons or simply want a number that’s easier to remember, this process is straightforward. By taking a few minutes to reset your PIN, you ensure that your garage—and everything in it—remains secure.
###
Choosing A Secure Pin
When choosing a new PIN, security is key. Aim for a combination that isn’t easily guessed. Avoid common numbers like “1234” or birthdates.
Think about a number that holds significance only to you. Perhaps the last four digits of a friend’s phone number or a favorite sports team’s year of establishment.
Make sure it’s something you can remember without writing it down. If you jot it down, you risk compromising the security of your garage.
###
Programming The New Code
With your secure PIN in mind, it’s time to program it into the keypad. Start by locating the “Learn” button on your garage door opener. It’s usually on the back panel.
Press this button until the indicator light turns on. This signals that the system is ready to accept a new code.
Enter your new PIN on the keypad, followed by the “Enter” button. The light on the opener should blink, confirming that the new code is set.
Test your new PIN by entering it on the keypad to ensure it opens the garage door smoothly. If it doesn’t work the first time, don’t worry. Repeat the process and double-check each step.
Why not take this moment to set a reminder to change your PIN periodically? Regular updates add an extra layer of security to your home.
Testing The Keypad
Once you’ve reset your Chamberlain garage door keypad, the next crucial step is testing it to ensure that everything is working as expected. Imagine the convenience of effortlessly opening your garage door with a simple code. But, how can you be certain that your keypad is functioning correctly? This section will guide you through the testing phase, making sure your keypad performs flawlessly.
Ensuring Proper Functionality
Start by entering the new code you’ve set on your keypad. The garage door should respond smoothly, sliding open or shut without hesitation. If the door doesn’t budge, you might need to recheck the entered code. Double-check the keypad instructions to ensure you’ve followed the reset process correctly.
Consider testing the keypad at different times of the day. This will reveal if lighting conditions affect your ability to enter the code. Sometimes, a bright glare can make the keypad hard to read. Does your keypad light up properly in the dark?
Troubleshooting Common Issues
If the keypad isn’t working, don’t panic. Common issues include dead batteries or a keypad that hasn’t been reset properly. Swap out old batteries for new ones to rule out power issues. Are the keys sticking or unresponsive? A quick clean might solve the problem.
If you’re still facing issues, consult the manual for guidance. It’s a goldmine of information that can provide insights into uncommon problems. Sometimes, a simple reset can work wonders. Have you tried repeating the reset process?
Testing your keypad might seem tedious, but it’s essential for peace of mind. Imagine driving up to your house, ready to park, and the keypad fails. It’s a scenario nobody wants. By ensuring proper functionality and troubleshooting issues, you can avoid such hassles. What steps will you take to ensure your keypad remains reliable?
Maintaining Your Garage Keypad
Resetting a Chamberlain garage door keypad involves pressing the “Learn” button on the opener. Enter a new code on the keypad within 30 seconds. This simple process ensures security and functionality.
Maintaining your garage keypad is crucial for ensuring it continues to function smoothly. A well-maintained keypad not only enhances security but also extends the life of your garage door opener. Consider this: how often do you take a moment to inspect your garage keypad? Regular attention can prevent unexpected malfunctions and save you from potential headaches.
Regular Maintenance Tips
To keep your garage keypad in top shape, start with simple cleaning. Dust and debris can accumulate in the keypad, interfering with its operation. Use a soft, dry cloth to wipe the keypad surface gently.
Next, check the battery life regularly. If you notice a delay in response or if the keypad seems unresponsive, it might be time to replace the batteries. A quick battery swap can bring your keypad back to life and ensure it works when you need it most.
Test the keypad functions periodically. Enter your code and observe the garage door’s response. If it’s sluggish or unresponsive, troubleshooting could involve resetting the system or checking for any physical damage.
When To Seek Professional Help
Sometimes, despite your best efforts, the keypad may refuse to cooperate. If you’ve tried resetting the system and changing the batteries, yet the problem persists, it might be time to call in a professional.
A technician can diagnose issues that might not be apparent to the untrained eye. They can also ensure the entire garage door system is functioning correctly. Remember, it’s better to address small issues before they escalate into costly repairs.
Have you ever experienced a faulty garage keypad at the most inconvenient time? It can be frustrating. Professional help can not only fix the problem but also provide peace of mind knowing your garage security is intact.
Credit: www.youtube.com
Frequently Asked Questions
How Do I Reset My Chamberlain Keypad Code?
Press the “Learn” button on the garage opener. Enter a new four-digit code on the keypad. Press and hold the “Enter” button until the opener light blinks. Your new code is set.
How Do I Reconnect My Chamberlain Garage Door Keypad?
Press the “Learn” button on the garage motor unit. Enter your desired code on the keypad. Press and hold the “Enter” button until the motor unit light blinks. Test the keypad by entering your code and pressing “Enter” to ensure it operates the garage door.
How Do I Reset My Chamberlain Garage Door?
Press and hold the “Learn” button on the opener until the LED turns off. This clears codes. Then, press the “Learn” button again. Within 30 seconds, press your remote button. The LED will blink, confirming the reset. Repeat for additional remotes if needed.
How Do I Reset My Garage Door Opener Keypad?
Press the “Learn” button on the garage opener. Enter a new 4-digit code on the keypad. Press “Enter” to confirm.
How Do I Reset My Chamberlain Garage Door Keypad?
Locate the “Learn” button on your garage opener. Press it. Enter a new PIN.
Conclusion
Resetting your Chamberlain garage door keypad is simple. Follow each step carefully. Ensure you have your PIN ready. Check the battery if needed. Listen for beeps to confirm actions. Your security matters, so reset often. Keeping your keypad updated helps maintain safety.
Refer to the manual for detailed guidance. Practice makes perfect; try it a couple of times. With patience, you will master it. Enjoy the peace of mind a secure garage brings. Remember, an updated keypad means a safer home. Feel confident with your garage’s security system.