Now Reading: How to Reset Honda Garage Door Opener: Quick Guide
- 01
How to Reset Honda Garage Door Opener: Quick Guide
Have you ever found yourself stuck outside your garage, frantically pressing buttons, only to realize your Honda’s garage door opener needs resetting? You’re not alone.
Many Honda owners face this puzzling situation, and the frustration is real. But what if I told you there’s a straightforward way to fix this and regain control over your garage door? Imagine the convenience of a seamless entry every time you pull into your driveway.
In this guide, you’ll discover the easy steps to reset your Honda garage door opener, ensuring you never face this hassle again. Ready to unlock the solution? Let’s dive in.

Credit: www.hondaofmarysville.com
Preparation Steps
Resetting your Honda garage door opener requires some preparation. Proper preparation ensures a smooth process. This section will guide you through essential steps.
Gather Necessary Tools
Start by gathering all necessary tools. You will need a step ladder. A flashlight can be handy if working in dim light. Ensure you have the garage door remote. A pen and paper for notes might help.
Check Vehicle Manual
The vehicle manual contains crucial information. Locate the section about the garage door opener. It provides step-by-step instructions. Follow them closely for best results. The manual helps avoid mistakes during reset.

Credit: www.youtube.com
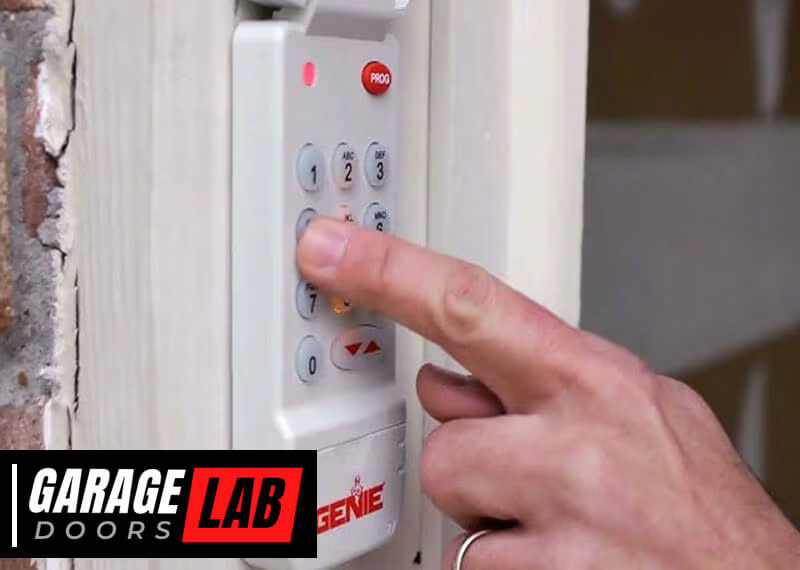
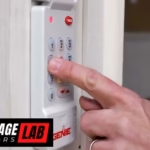
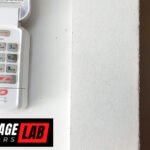
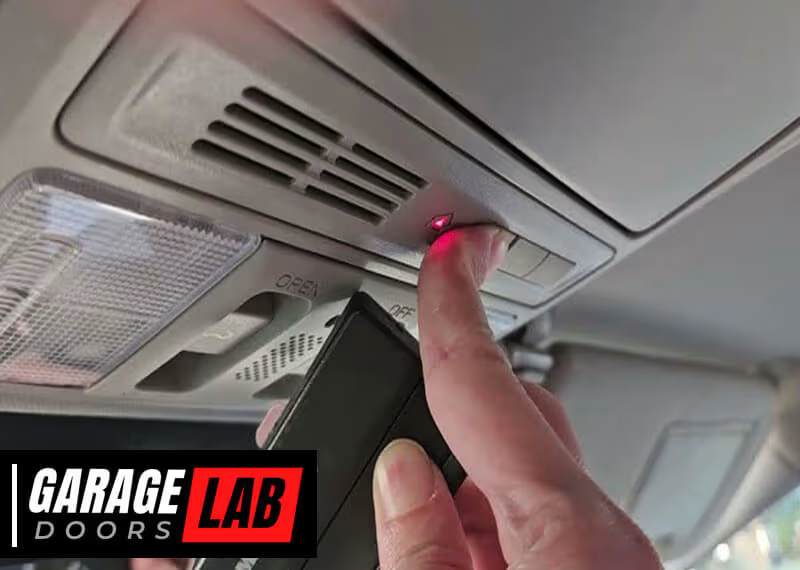
Locating The Garage Door Opener Controls
Locate the garage door opener controls near the rearview mirror in your Honda vehicle. Resetting involves pressing the appropriate button for a few seconds. Follow the manual instructions for precise guidance.
Locating the garage door opener controls in your Honda might seem tricky. It’s simpler than you think. Honda vehicles come equipped with built-in garage door opener systems. These systems allow for easy access to your home. The controls are usually located within the vehicle. Let’s dive into how you can identify and program these controls.Identify Control Buttons
Control buttons are often found on the rearview mirror. Some models may have them on the overhead console. They are small and usually grouped together. Look for three buttons marked with dots or icons. These buttons are your main controls. Pressing them allows you to operate your garage door.Find Programming Mode
Programming mode is essential for resetting. To enter this mode, press and hold the first and third buttons. Hold until the indicator light starts flashing. This signifies that the system is ready. You can now program or reset the controls. Always ensure your vehicle is parked safely. This prevents any unintended movements during programming.Resetting The Opener
Resetting your Honda garage door opener might sound intimidating, but it’s a straightforward process that can save you from the hassle of dealing with a malfunctioning system. Whether you’ve moved into a new home or just need a fresh start with your garage door settings, resetting the opener is a practical step to ensure security and functionality. Let’s walk through the simple steps of erasing old codes and entering new ones, so you can enjoy seamless access to your garage.
Erase Existing Codes
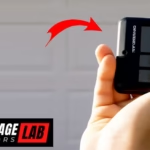
To start fresh, you first need to erase the old codes stored in your Honda garage door opener. Locate the “HomeLink” button inside your Honda vehicle. It’s often found on the ceiling or the rearview mirror. Press and hold the two outer buttons simultaneously. You’ll see the indicator light begin to flash rapidly, signaling that the old codes are being erased.
It’s crucial to hold the buttons for about 20 seconds to ensure complete erasure. This step wipes the slate clean, making room for your new code. Ever wondered why your garage door sometimes mysteriously opens or doesn’t respond? It could be interference from old, overlapping codes.
Enter New Code
With a blank slate, it’s time to enter the new code. Begin by pressing the button you wish to program until the indicator light begins to flash slowly. Hold your garage door remote close to the HomeLink panel and simultaneously press the remote button and the newly selected HomeLink button.
The light will change from a slow flash to a rapid one, indicating successful programming. Now, test the new code by pressing the HomeLink button you just programmed. Your garage door should respond promptly. Isn’t it satisfying when technology works exactly as you expect?
Resetting codes not only enhances security but also eliminates the frustration of unresponsive garage doors. Are you ready to enjoy a smoother, more reliable garage access experience? Give it a try and feel the difference.
Testing The New Setup
After programming your Honda garage door opener, testing the new setup is essential. This ensures everything operates smoothly. Checking the functionality helps prevent future inconveniences. Follow these simple steps to verify and troubleshoot your setup.
Verify Functionality
Stand near your garage door. Press the programmed button on your Honda remote. Observe the door as it responds. The door should open or close smoothly. Listen for any unusual noises during operation. If the door moves as expected, your setup is complete. Repeat the process a few times to ensure consistency.
Troubleshooting Common Issues
Sometimes, the garage door may not respond. First, check the battery in your remote. A weak battery can cause issues. Replace it if needed. Ensure you followed the programming steps correctly. Reprogram the remote if necessary. Check for any obstructions in the garage door path. Clear any objects blocking the sensors. If problems persist, consult your Honda manual. It contains specific troubleshooting advice.
Tips For Successful Programming
Resetting your Honda garage door opener can be straightforward. Follow some simple tips to ensure success. A smooth programming process requires attention to detail. Avoid common pitfalls and ensure your device is compatible. This guide will help you through each step, making the task easier.
Avoid Common Mistakes
Many people rush the programming process. This often leads to errors. Take your time and follow the instructions carefully. Read the manual before starting. Understanding each step reduces the chance of mistakes. Double-check your work as you go. Ensure the door opener button is pressed correctly. Watch for flashing lights indicating successful programming.
Using outdated codes can cause issues. Make sure your codes are current. Old codes might not work with newer systems. Check your garage door opener manual for the latest codes. Update your system if necessary. This ensures smooth operation.
Ensure Compatibility
Compatibility is crucial for successful programming. Not all Honda models work with every garage door opener. Check your car’s manual for compatible devices. Verify that your garage door system matches your Honda’s specifications. Some openers require special settings or adapters. Confirm your system supports these features.
Technology changes quickly. Newer models might have different requirements. Ensure your garage door opener is compatible with your Honda’s year and model. Compatibility ensures seamless operation and fewer programming issues.
Proper research prevents frustration. Check online forums for advice. Many Honda owners share their experiences. Learn from their tips and avoid common pitfalls. Following these guidelines will make the programming process easier.

Credit: www.hondaofmarysville.com
Frequently Asked Questions
How To Reset Honda Garage Opener?
Press and hold the two outer buttons on your Honda’s garage opener. Wait for the indicator light to flash. Release the buttons, then press the desired button to reset. For specific instructions, refer to your Honda owner’s manual.
How Do I Manually Reset My Garage Door Opener?
Disconnect the garage door opener from power. Pull the emergency release cord to manually open the door. Reconnect power and use the remote to re-sync. Test the door to ensure it operates correctly. Follow the manufacturer’s instructions for specific reset procedures if needed.
How Do I Clear My Programmed Garage Door Opener?
Locate the garage door opener’s “Learn” button. Press and hold it until the LED light turns off. This erases all programmed remotes. Reprogram remotes by pressing the “Learn” button, then pressing the remote button. Repeat for each remote. Consult the manual for specific instructions.
How Do I Reprogram My Honda Homelink?
Press and hold the HomeLink button until it blinks. Then, press your garage remote button until HomeLink blinks rapidly. Release both buttons. Test by pressing HomeLink to ensure successful programming. Consult your car’s manual for detailed instructions, as steps may vary slightly by model.
How Do I Reset My Honda Garage Door Opener?
Press and hold the two outer buttons until the light blinks. This erases old codes.
Conclusion
Resetting your Honda garage door opener can be simple. Follow these steps carefully. Ensure your remote is working properly. Check battery levels if needed. Refer to the manual for specific instructions. Remember, patience is key. Don’t rush the process. This guide helps you troubleshoot effectively.
Practice makes perfect, so try again if necessary. Success in resetting brings convenience to your garage access. Feel accomplished with your new skill. Enjoy smoother operations at home. Share this knowledge with friends who may need it. Stay confident and keep your garage secure.