Now Reading: Liftmaster Garage Door Keypad Reset: Simple DIY Guide
- 01
Liftmaster Garage Door Keypad Reset: Simple DIY Guide
Are you finding yourself locked out of your garage because your Liftmaster garage door keypad isn’t working as it should? Don’t worry, you’re not alone.
Many homeowners face this frustration, but the good news is that resetting your Liftmaster garage door keypad is simpler than you might think. Imagine the convenience of smoothly operating your garage door with just a few taps, without the need for calling in professional help.
In this guide, we’ll walk you through the easy steps to reset your keypad, ensuring that you regain access and control in no time. So, let’s dive in and get your keypad back to perfect working order, saving you time, hassle, and possibly even some repair costs.
Credit: aaagds.com
Reasons For Keypad Reset
Changing codes or fixing malfunction issues often requires a Liftmaster garage door keypad reset. Enhancing security or resolving connectivity problems might also necessitate this reset. Regular maintenance ensures smooth operation and safety.
Resetting your Liftmaster garage door keypad might seem like a hassle, but there are various reasons it could be necessary. Understanding these reasons can help you maintain a secure and efficient garage door system. Whether it’s a forgotten code or a security concern, addressing the need for a keypad reset ensures peace of mind.Forgotten Code
It happens to the best of us. You set a code months ago and now it’s slipped your mind. We’ve all been there, standing in front of the keypad, trying combinations that just don’t work. Resetting the keypad can be a simple solution to regain access without the frustration.Security Concerns
Safety is paramount. If you’ve ever experienced unauthorized access or suspect your code might be compromised, resetting the keypad is crucial. Changing your code regularly is a smart practice to keep your home secure. It’s like refreshing your digital passwords—necessary and prudent.System Malfunction
Technology isn’t perfect. Sometimes, your keypad might not respond correctly due to a glitch. A reset can restore functionality. Imagine pressing buttons with no result; it’s frustrating, right? A quick reset can be the remedy to such technical hiccups.New Homeowner
Moving into a new home? Congratulations! The previous owner’s code might still be active on your garage door keypad. Resetting it ensures you’re the only one with access. It’s like getting a new set of keys—personal and secure.Updating Your Code
As life changes, so do our preferences. If your current code no longer suits you, resetting the keypad allows you to update it. Perhaps you’ve shared it with too many people or simply want a fresh start. This flexibility keeps you in control.—Do you find yourself facing any of these situations? Addressing them promptly can save you time and worry. Resetting your Liftmaster garage door keypad might seem like a small task, but its impact on your security and convenience is significant.Tools Needed
Resetting your Liftmaster garage door keypad might seem challenging. With the right tools, the process becomes simple. Having these tools ready ensures a smooth reset. Let’s dive into the essentials.
Essential Screwdriver
A screwdriver is crucial. It helps open the keypad cover. This tool is often needed to unscrew the keypad panel. Make sure you have the correct size.
Step Ladder
A step ladder is handy. Many garage door keypads are mounted high. A sturdy ladder ensures safety while reaching the keypad.
Flashlight
A flashlight is vital. It helps illuminate the keypad area. This is especially useful in dim lighting conditions. Good visibility aids in resetting correctly.
New Batteries
Fresh batteries are important. Sometimes the keypad reset requires new power. Ensure you have the right battery type. This keeps the keypad functioning well.
User Manual
The user manual is your guide. It provides specific instructions for your model. Following the manual ensures a successful reset. Keep it nearby for quick reference.
With these tools, resetting your Liftmaster keypad is easy. Preparation is key to a quick and effective process.
Safety Precautions
Resetting a Liftmaster garage door keypad requires careful attention to safety measures. Ensure the garage door is fully closed before beginning. Disconnect power to prevent accidental operation during the reset process.
Resetting your Liftmaster garage door keypad is a straightforward process, but ensuring safety during this task is crucial. Imagine the frustration of dealing with an unexpected injury while focusing on home improvements. Prioritizing safety measures can save you from such hassles. Let’s dive into some practical safety precautions to keep in mind.Ensure Proper Lighting
Working in dim lighting can lead to errors and accidents. Make sure your garage is well-lit. Use a flashlight or a headlamp if necessary. Good lighting allows you to see clearly and prevents unnecessary mishaps.Wear Protective Gear
Safety goggles and gloves might seem excessive for keypad reset, but they protect your eyes and hands from unexpected hazards. Even a small splash of cleaning liquid or dust can irritate your skin or eyes. Protective gear is a simple way to stay safe.Keep Tools Organized
Having tools scattered around increases the risk of tripping or losing essential items. Organize your tools in a box or on a shelf. This helps you access what you need quickly and reduces clutter around your workspace.Disconnect Power Supply
Before starting, disconnect the power to your garage door opener. This prevents accidental activation while you work. It’s a straightforward step that protects you from potential electrical shocks or the door unexpectedly moving.Check The Ladder Stability
If you need to reach higher areas, ensure your ladder is stable. A shaky ladder can lead to falls. Place it on a flat surface and, if possible, have someone hold it while you climb.Be Mindful Of Surroundings
Clear any obstacles that might obstruct your movement. Check for items like boxes or tools lying around. A clutter-free area allows you to focus on the task without distractions.Test The System Safely
Once you’ve reset the keypad, test the system from a safe distance. This ensures everything works correctly without putting yourself in harm’s way. If something seems off, troubleshoot before using the door regularly.Have you ever overlooked a safety precaution while working at home? Reflecting on such experiences can highlight the importance of safety measures in everyday tasks. Following these precautions ensures a smoother and safer process when resetting your Liftmaster garage door keypad.Locating The Learn Button
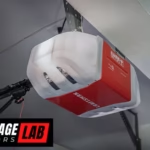
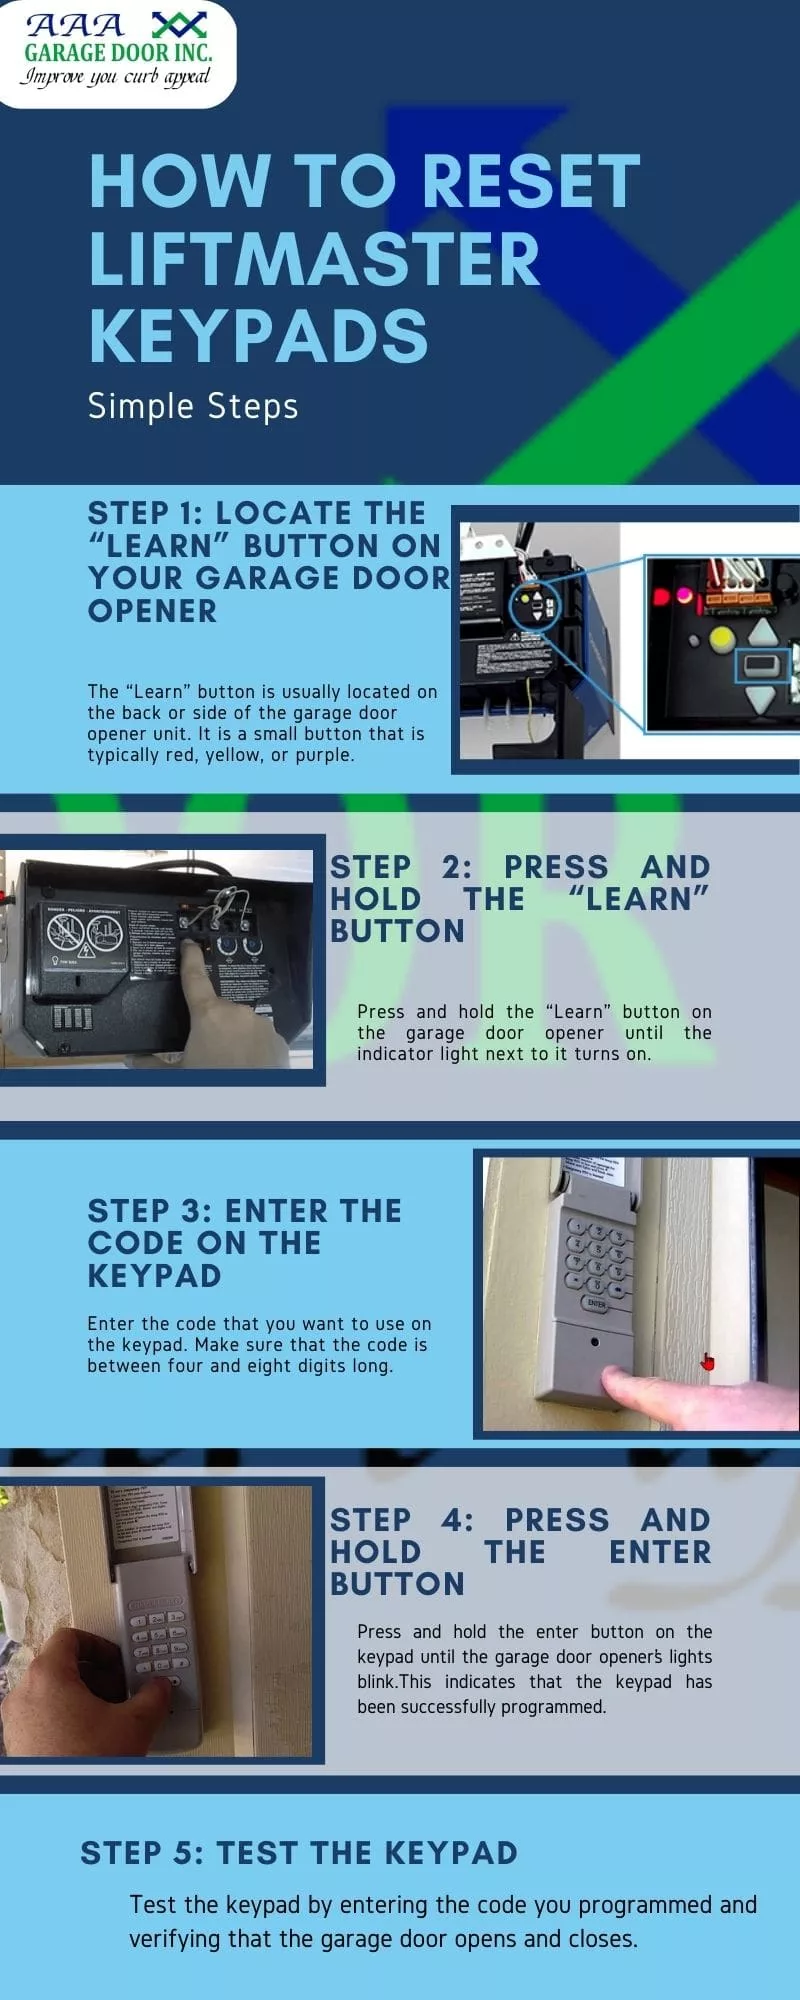
Locating the Learn Button on your Liftmaster garage door opener is crucial. This small button plays a big role in resetting your garage door keypad. Finding it can sometimes be a bit tricky. This guide will help you locate the Learn Button with ease.
Understanding The Learn Button
The Learn Button is typically a small, colored button. You can find it on the back or side of your garage door opener. It is often red, yellow, green, or purple. This button helps in programming new remotes or resetting the keypad.
Checking The Motor Unit
Look at the motor unit mounted on the ceiling. The Learn Button is usually near the light bulb on the unit. It might be under a light cover, so you may need to remove it.
Referencing The User Manual
Your Liftmaster manual can provide specific directions. It usually contains diagrams showing the location of the Learn Button. If lost, manuals are often available on the Liftmaster website.
Examining The Garage Door Opener
Inspect the back panel of the opener. The button might be near the hanging wires or antenna. It’s often placed alongside other control buttons and LED indicators.
Using A Flashlight For Assistance
If visibility is low, use a flashlight. It helps in identifying the Learn Button easily. This step is especially useful in poorly lit garages.
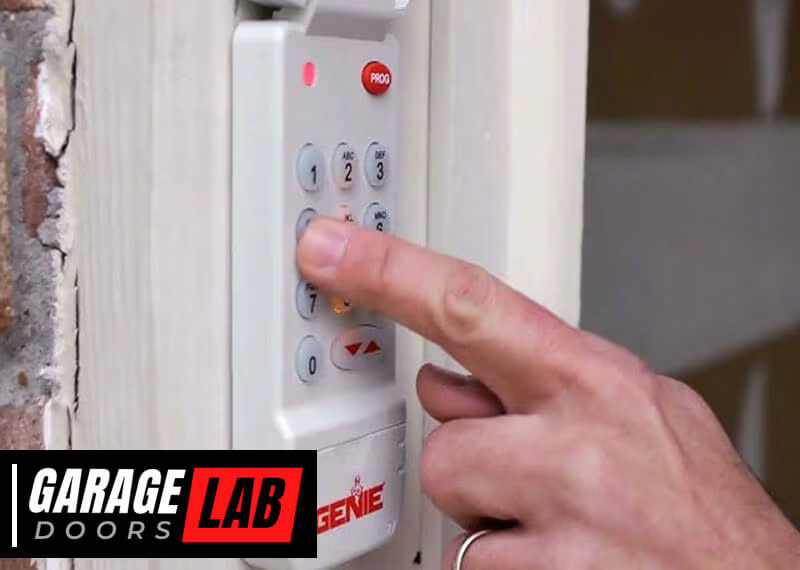
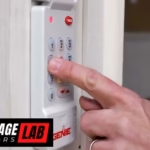
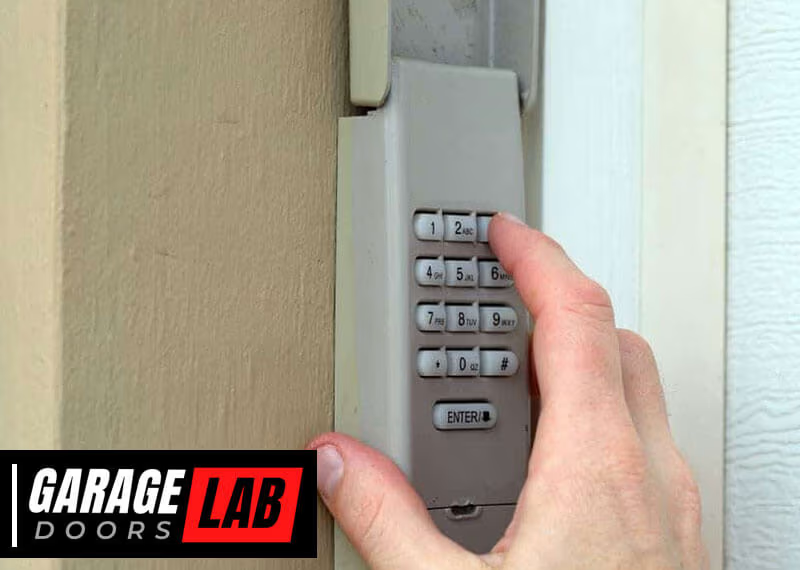
Step-by-step Reset Instructions
Resetting your Liftmaster garage door keypad is straightforward. Follow these simple steps to ensure your keypad works efficiently. This guide will help you reset your keypad without any hassle.
Prepare The Keypad
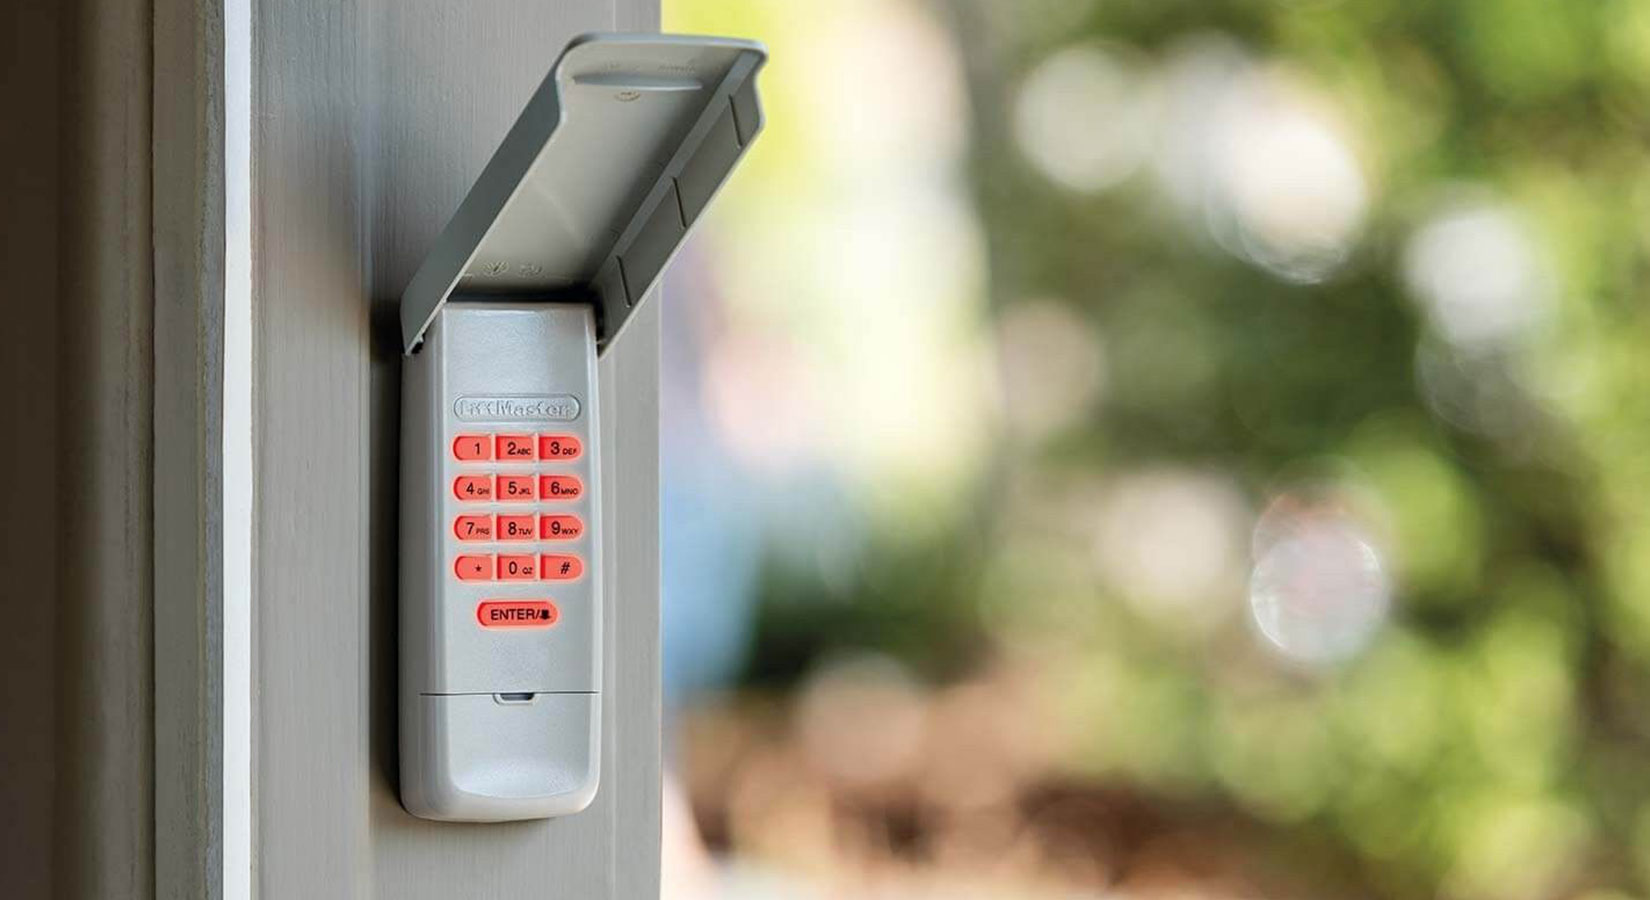
First, locate your keypad. Ensure you have easy access. Check the battery. Replace it if needed. A fresh battery ensures smooth operation. Gather all necessary tools. You may need a ladder.
Press The Learn Button
Find the “Learn” button on your garage door opener. Usually on the back or side. Press and hold this button. Hold it until the light blinks. This indicates it’s ready for new code.
Enter New Code
Return to your keypad. Enter your desired code. Ensure it’s easy to remember. Press the “Enter” button. This saves your new code. Double-check each button press for accuracy.
Test The Keypad
Test the keypad by entering your new code. Press “Enter” after typing. Watch the garage door. It should open or close. If it doesn’t, repeat the steps. Ensure each step is performed correctly.
Troubleshooting Common Issues
Are you frustrated with your Liftmaster garage door keypad? You’re not alone. Resetting the keypad can sometimes feel like solving a mystery. Troubleshooting is key to getting it back in working order. Let’s dive into some common issues you might face and how to tackle them effectively.
Keypad Not Responding
Imagine this: you’re standing in front of your garage, pressing buttons, and nothing happens. It’s as if the keypad has gone silent. Often, this issue is due to a simple power problem. Check if the keypad battery needs replacing. Sometimes, a quick battery swap is all it takes.
Another possibility is a miscommunication between the keypad and the garage door opener. Try to reset the system by unplugging the opener and plugging it back in. A fresh start might just be what your keypad needs.
Incorrect Code Entry
Have you ever entered your code, only to be greeted by an error beep? Double-check that you’re inputting the correct sequence. It’s easy to mistype when you’re in a rush. If you recently changed your code, ensure you remember the new one.
Consider writing down the code in a secure place. This prevents future mix-ups. But always be cautious of where you store it to keep your security intact.
Learn Button Malfunction
The Learn button is crucial for syncing your keypad with the opener. If it’s not working, your entire system could be off. Inspect the button for visible damage or dirt. A clean, intact button is essential for seamless communication.
If the button seems fine, but the problem persists, try resetting the opener. This can sometimes fix deeper connectivity issues. Have you ever had a button magically start working after a reset? It might just solve your problem.
Every garage door system has its quirks. Have you faced other keypad issues before? Share your experiences and solutions below. Let’s turn these common challenges into opportunities for learning!
Maintenance Tips
Maintaining your Liftmaster garage door keypad is essential for its longevity. Simple steps can prevent future issues. Routine care ensures smooth operation. Let’s explore key maintenance tips.
Regular Cleaning
Dirt and dust can affect keypad performance. Wipe the keypad with a soft cloth. Use mild soap if needed. Ensure no moisture enters the device. Regular cleaning keeps it responsive.
Battery Replacement
Weak batteries cause keypad failure. Replace them every six months. Always have spare batteries on hand. Use the correct type for your device. Strong batteries ensure reliable operation.
Weather Protection
Extreme weather affects keypads. Use a cover during heavy rain. Protect it from direct sunlight. Weather protection extends its lifespan. Simple precautions can prevent damage.
Credit: allsecurityequipment.com

Credit: allsecurityequipment.com
Frequently Asked Questions
How Do I Reset The Code On My Liftmaster Keypad?
Reset your LiftMaster keypad code by pressing the “Learn” button. Enter your new four-digit PIN, then press “Enter. ” The keypad will blink, confirming the reset. Test the new code to ensure it works. Always refer to your manual for specific instructions.
How Do I Reprogram My Liftmaster Garage Door Keypad?
Press “Learn” button on the opener. Enter a new PIN on the keypad, then press “Enter. ” Test the keypad to confirm.
How To Reset Garage Door Opener Keypad?
Locate the “Learn” button on your garage opener. Press it until the indicator light turns off. Enter a new code on the keypad, then press “Enter” to confirm. Test the new code to ensure it works. Always refer to your specific model’s manual for detailed instructions.
How To Reset Liftmaster Garage Door Opener?
Press and hold the “Learn” button on the garage door opener for 6 seconds. The indicator light will turn off, resetting all remote controls and keypads. Reprogram your remotes and keypads by pressing the “Learn” button again, then press the button on the remote to sync.
How Do I Reset My Liftmaster Garage Door Keypad?
Resetting a LiftMaster keypad involves a few steps. First, locate the “Learn” button on the motor unit. Press and release it. Then, within 30 seconds, enter a new four-digit code on the keypad and press enter. Your keypad is now reset.
Conclusion
Resetting your Liftmaster garage door keypad is straightforward. Following clear steps ensures success. Start by accessing the keypad and inputting the reset code. Double-check your entries for accuracy. Keep your new code secure and memorable. Regular maintenance prevents future issues.
A well-functioning garage door enhances your home’s safety. Use this guide for a smooth reset process. Troubleshooting tips help solve common problems. Enjoy reliable access to your garage with an updated keypad. Feel confident in managing your garage door settings.
Simplify your life with easy-to-follow instructions and a stress-free reset experience.