Now Reading: How to Reset the Garage Door Opener Remote in Minutes
- 01
How to Reset the Garage Door Opener Remote in Minutes
Resetting your garage door opener remote can feel confusing, especially if you’ve never done it before. Many people worry about losing access or making a mistake that leaves their garage unsecured. The good news is, with the right steps and some patience, you can reset almost any garage door remote yourself—without calling a technician.
Whether you lost your remote, bought a new house, or just want better security, learning how to reset your garage door opener remote is a useful skill for every homeowner.
This complete guide will walk you through everything you need to know: from understanding how garage door remotes work, to step-by-step reset instructions for popular brands, troubleshooting tips, safety advice, and even what to do if things go wrong. By the end, you’ll be ready to reset your remote with confidence and keep your garage—and your home—secure.
Why Reset A Garage Door Opener Remote?
Garage door remotes are small, convenient, and powerful. But sometimes, you need to reset them. Here’s why:
- Lost or stolen remotes: If someone finds your lost remote, they could access your garage. Resetting removes their access.
- New home move-in: Old remotes from previous owners may still work. Resetting ensures only your remotes open the door.
- Remote malfunction: If your remote isn’t working, a reset often fixes connection problems.
- Adding or removing remotes: Resetting makes it easy to pair new remotes or remove old ones.
- Security upgrades: Regularly resetting your remote reduces the risk of unauthorized entry.
Many people overlook these reasons, especially the risk from old remotes that still work after you move into a new house. Take control of your garage’s security by understanding when and why to reset your opener.
How Garage Door Opener Remotes Work
Before you start, it’s helpful to understand the basics. Garage door remotes use radio frequency signals to communicate with the opener unit inside your garage. Each remote and opener pair share a unique code, allowing only your remotes to open your door.
Most modern systems use rolling code technology. This means the code changes every time you press the button, making it much harder for thieves to “capture” and reuse the code. However, if the remote is lost or you want to clear all paired remotes, you must reset the opener and reprogram your devices.
Older systems may use dip switches—little toggle switches inside the remote and opener that must match. Resetting these is different from modern openers. Always check your opener’s age and type before starting.

Preparing To Reset Your Garage Door Opener Remote
Before you begin, take a few minutes to prepare. The right preparation prevents mistakes and saves time.
- Find your opener’s brand and model. Look on the motor unit in your garage (often on the ceiling). Write down the brand and model number.
- Gather all remotes and keypads. You’ll want to reset and reprogram each one.
- Get a step ladder. Most opener units are mounted above the garage door.
- Have your owner’s manual or search online for instructions. Each brand is a bit different, but the core steps are similar.
- Make sure you have new batteries. Weak batteries can cause pairing issues.
- Check for a “Learn” or “Program” button. This button is usually on the back or side of your opener unit.
Pro Tip: Take a photo of the wiring and settings before you start. If something goes wrong, you’ll know how to set it back.
General Steps To Reset A Garage Door Opener Remote
While every opener is a little different, the core reset process is similar for most brands. Here’s what to expect:
- Access the opener unit. Use a ladder to reach the motor near your garage ceiling.
- Locate the “Learn” or “Program” button. It’s usually a colored button (yellow, orange, purple, or red).
- Press and hold the button. Hold for 6–10 seconds. The indicator light will turn off (or blink), showing all remotes are erased.
- Reprogram each remote. Press the “Learn” button again (briefly), then press the remote button you want to pair. The light will blink or click to confirm.
- Test your remotes. Make sure each one works before you finish.
Important: Erasing all remotes means you must reprogram every device (including car homelink, wireless keypads, etc.). Don’t skip this step.
Step-by-step Reset Instructions For Major Brands
Different garage door opener brands have unique reset processes. Let’s look at the most common ones in detail.
Chamberlain, Liftmaster, And Craftsman
These three brands are popular in the US and share similar technology.
- Find the “Learn” button on the opener (usually near the antenna wire).
- Press and hold the “Learn” button for about 6 seconds until the LED goes out. This erases all paired remotes and keypads.
- To reprogram: Press and release the “Learn” button. Within 30 seconds, press the button on your remote until the opener light blinks.
- Repeat for each remote.
Example: If you just moved into a new house, this process ensures only your remotes will open the garage.
Extra Insight: Some LiftMaster openers have a MyQ system with a yellow “Learn” button. The process is the same, but reprogramming steps may take a few more seconds.
Genie
Genie openers use a similar approach but with different buttons.
- Locate the “Learn Code” button (usually under a light lens or near the wiring).
- Press and hold “Learn Code” for 10 seconds until the LED blinks or turns off. All remotes are now erased.
- To reprogram: Press “Learn Code” once. The LED will blink. Press your remote button 3 times (sometimes 2) until the door moves.
- Repeat for each remote.
Practical Tip: Genie often uses a “SmartSet” button—always check your manual if unsure.
Overhead Door
Overhead Door is owned by Genie, so their openers are very similar.
- Find the “Learn Code” or “Program” button.
- Press and hold for 10 seconds to erase all remotes.
- Reprogram remotes as with Genie: Press “Learn Code,” then your remote button a few times.
Not-So-Obvious: Overhead Door remotes sometimes need you to hold the remote button longer during pairing.
Linear
Linear openers use a “Learn” or “Radio Learn” button.
- Press and hold “Learn” for 10 seconds until the LED turns off.
- To reprogram: Press “Learn” once, then press your remote button.
- Wait for the light to blink to confirm.
Common Mistake: Many users forget to erase old codes before adding new remotes, leading to interference.
Marantec
Marantec openers are less common but have a unique process.
- Find the “Program” button (often inside the unit).
- Press and hold “Program” for about 5 seconds until the LED blinks.
- To reprogram: Place a working remote and new remote head-to-head, press the buttons together until the new remote’s LED flashes.
Extra Insight: Marantec uses a “copy” system, so at least one working remote is needed to add another.
Older Openers With Dip Switches
If your opener is over 25 years old, it might use dip switches.
- Open the remote and motor unit.
- Match the dip switch pattern inside the remote to the one on the opener.
- Change the pattern to a new code if you want extra security.
- Replace the remote’s battery.
Warning: Dip switch codes are less secure. Consider upgrading if you’re worried about break-ins.
What To Do If You Don’t Know Your Opener’s Brand
Sometimes the label is missing, or you can’t find the manual. Here’s what you can do:
- Take clear photos of your opener and remotes.
- Search the model number online—most brands have support pages.
- Visit your local hardware store with a photo—staff can often recognize common models.
- If all else fails, try the general reset steps above. Most openers use similar “Learn” button methods.
Pro Insight: Some universal remotes can “learn” codes from almost any opener, but resetting the opener itself is always more secure.
Common Problems When Resetting And How To Fix Them
Resetting sounds simple, but things don’t always go as planned. Here are solutions to the most common issues:
The Remote Won’t Reprogram
- Check the batteries. Old batteries are the #1 cause of failed pairing.
- Stay within range. Remotes need to be close to the opener during programming.
- Wait for the indicator light. Don’t rush. The opener’s light will confirm success.
- Try again. Sometimes it takes a few tries.
The Opener Erases Remotes, But Not Keypads
- Wireless keypads may require a separate reset or reprogramming step.
- Check your manual for keypad-specific instructions.
All Remotes Are Erased, But The Door Still Opens
- Homelink systems (built into cars) sometimes stay programmed. Erase and reprogram these too.
- Disconnect power for 1 minute to fully reset some openers.
The “learn” Button Doesn’t Respond
- Power cycle the opener (unplug, wait 30 seconds, plug in again).
- Check for stuck or broken buttons—older units may need cleaning.
- If nothing works, the control board may be faulty.
The Door Opens By Itself After Reset
- Radio interference or neighbors with similar remotes can cause this. After reset, change remote codes if possible.
- Move the opener’s antenna away from metal objects.
Safety Tips When Resetting Garage Door Remotes
Garage doors are heavy and powerful. Always work safely.
- Unplug the opener before opening the motor unit.
- Keep children and pets away during reset.
- Use a sturdy step ladder. Don’t stand on boxes or unstable surfaces.
- Don’t touch moving parts. Only work on the control panel.
- Test the safety sensors after resetting. Make sure the door reverses when blocked.
Little-Known Fact: Many accidents happen when people try to reset remotes while the door is moving. Always keep the door closed and unplugged when working.
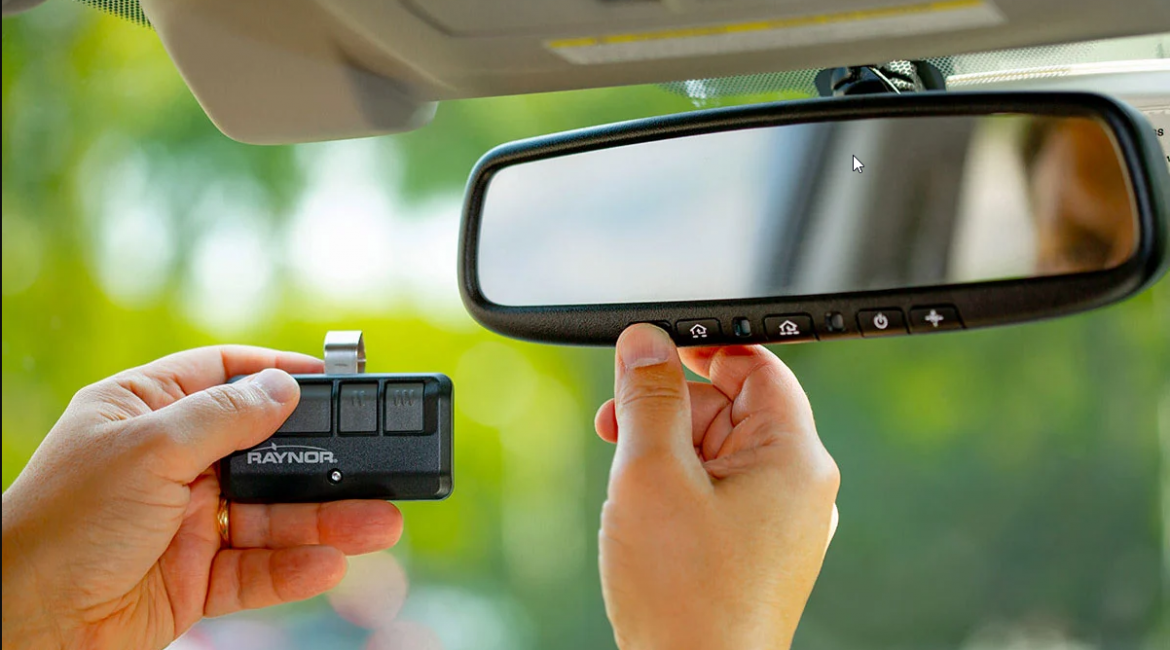
How To Reset A Remote For Built-in Car Systems (homelink)
Modern cars often have a built-in garage remote system called Homelink. Resetting these is a separate process.
- Clear existing codes. Hold the two outer Homelink buttons in your car until the indicator light flashes (about 20 seconds).
- Reprogram Homelink. Press and hold your remote near the Homelink button, then press both the Homelink button and your remote until the car light blinks.
- Pair with the opener. Press the “Learn” button on your garage opener, then press the Homelink button in your car.
Pro Insight: Some vehicles require turning the ignition key to “on” (but not starting the car) during programming.
Resetting A Wireless Keypad
Wireless keypads are handy but often forgotten during resets.
- Erase all codes on the opener as shown earlier.
- Reprogram the keypad. Enter your chosen PIN, then press the “Learn” button on the opener. Enter the PIN again to finish.
- Test the keypad.
Tip: Don’t forget to write down your new PIN in a safe place—many people forget it after changing.
Comparison: Key Features Of Top Garage Door Opener Brands
To help you understand differences between brands, here’s a side-by-side look at the main features:
| Brand | Learn Button Location | Reset Time (seconds) | Rolling Code | Wireless Keypad Support |
|---|---|---|---|---|
| Chamberlain | Back/Side of Motor | 6–10 | Yes | Yes |
| Genie | Under Light Lens | 10 | Yes | Yes |
| Linear | Side Panel | 10 | Yes | Yes |
| Marantec | Inside Motor | 5 | Yes | Yes |
| Older Dip Switch | Inside Remote/Motor | N/A | No | No |
Security Benefits Of Resetting Your Garage Door Remote
Many people don’t realize how vulnerable old remotes and codes can make your home. Here’s why resetting is smart:
- Prevents old remotes from working: If someone finds or steals your old remote, they can’t use it.
- Stops previous owners from entering: Essential when moving into a new home.
- Protects against code grabbers: Rolling code technology and resets make it nearly impossible to hack your garage.
- Lets you remove unused remotes: Reduce clutter and confusion.
Surprising Statistic: According to the FBI, about 9% of home break-ins in the US happen through the garage. Regularly resetting your remotes helps lower this risk.
When To Call A Professional
Resetting your remote is usually a DIY job. But sometimes, you need expert help:
- You can’t find the “Learn” button or it’s broken.
- The opener motor doesn’t respond to any reset steps.
- There are wiring issues or damaged parts inside the unit.
- You want to upgrade security to a smart system.
Don’t risk your safety or damage your opener—call a certified technician if you’re unsure.
How To Maintain Your Garage Door Opener System
After resetting, keeping your system in top shape is important.
- Check batteries in all remotes every 6–12 months.
- Clean the opener unit with a dry cloth—dust can cause problems.
- Test the door’s balance by lifting it halfway. It should stay in place.
- Lubricate moving parts twice a year for smooth operation.
- Update your codes every few years for maximum security.
Hidden Insight: Many openers have a “self-diagnosis” feature—check your manual to learn what the blinking light codes mean.
Cost And Time: What To Expect
Resetting a garage door opener remote is usually fast and free.
- Time needed: 10–30 minutes for most systems.
- Cost: $0, unless you need new remotes ($20–$50 each).
- Professional help: $75–$150 depending on your area.
Tip: If your opener is over 20 years old, consider upgrading to a modern, secure system.
Upgrading To Smart Garage Door Openers
If you’re resetting your remote because of lost security, you might want to consider a smart garage door opener. These systems let you control your garage from a smartphone, get alerts, and easily add or remove users.
Top benefits:
- Remote access: Open or close your door from anywhere.
- Activity logs: See who opened the door and when.
- Easy resets: Add or remove devices with a tap.
- Better security: Most use encrypted signals.
Example: Chamberlain MyQ and Genie Aladdin Connect are popular options.
Not-So-Obvious: Many smart systems work with older openers using an add-on hub, so you don’t need a full replacement.
For more on smart openers, see this Wirecutter guide.
Troubleshooting Table: Reset Problems And Solutions
Here’s a quick reference for fixing common reset issues:
| Problem | Possible Cause | Solution |
|---|---|---|
| Remote won’t program | Dead battery, too far from opener | Replace battery, move closer, retry reset |
| Opener ignores remote | Power issue, faulty learn button | Check power, try power cycling, inspect button |
| Keypad not working | Needs separate programming | Follow keypad reset steps after remote reset |
| Homelink in car not working | Wasn’t erased or reprogrammed | Reset Homelink system, pair again |
| Opener resets but remotes still open door | Did not hold learn button long enough | Repeat reset, hold learn button for full 10 seconds |
Non-obvious Mistakes People Make
- Not erasing all codes: Many users only add new remotes without erasing old ones, leaving security gaps.
- Forgetting to reprogram car systems: Homelink and similar car remotes stay paired even after a reset unless you clear them.
- Overlooking keypads: Wireless keypads often need a separate reset.
- Ignoring safety sensors: After a reset, always test the sensors to ensure the door reverses if something is in the way.
- Using old batteries: Even new remotes can fail to pair if the battery is weak.
Frequently Asked Questions
How Do I Know If My Garage Door Remote Has Been Reset?
After resetting, none of your old remotes should open the door. Only remotes you reprogram will work. Test all remotes and keypads to confirm the reset is complete.
Can I Reset My Garage Door Opener Without The Original Remote?
Yes. You don’t need the old remote to reset the opener. Just use the “Learn” or “Program” button on the opener motor unit. However, you will need a working remote to reprogram the system.
What Should I Do If I Lost All My Remotes?
If you’ve lost all remotes, perform a full reset on the opener. Then buy a compatible remote or use a universal remote to reprogram your system. Always erase old codes to prevent lost remotes from working.
Is It Safe To Reset The Garage Door Opener Myself?
Yes, it’s safe for most people. Follow the steps carefully, use a sturdy ladder, and keep the area clear. If you feel unsure or the opener is very old, consider calling a professional.
How Often Should I Reset My Garage Door Opener Remote?
There’s no strict rule, but reset your remote when you move into a new house, lose a remote, notice malfunction, or want better security. Regular resets (every few years) can help keep your home safe.
Resetting your garage door opener remote is a straightforward way to boost your home’s security and solve many common problems. With a little time and care, you can erase old remotes, add new ones, and keep your garage safe from unwanted access. Whether you’re a new homeowner or just want peace of mind, these steps will help you take control of your garage door system. If you hit any snags, don’t hesitate to ask for help or check out guides from trusted sources like Wikipedia. Your garage—and your peace of mind—are worth it.


