
Programming your garage door opener remote to your car is a common and incredibly convenient task. It allows you to open your garage door with the press of a button on your car’s built-in remote system, eliminating the need for a separate keychain remote.
This process, often referred to as “homelinking” or “car garage door opener programming,” can vary slightly depending on your car’s make and model, as well as the brand of your garage door opener. However, the underlying principles are generally the same.
This guide will walk you through the typical steps involved, common challenges, and essential tips to ensure a successful programming session.
Key Takeaways
- Compatibility is Key: Ensure your car’s built-in remote system is compatible with your garage door opener’s radio frequency and rolling code technology.
- Locate the “Learn” Button: This button on your garage door opener motor unit is crucial for initiating the programming process. Its location and appearance vary by brand.
- Car Remote Button Selection: Choose a button on your car’s remote that you don’t currently use for other functions to avoid conflicts.
- Synchronization Process: The car remote and garage door opener need to communicate and synchronize their signals. This usually involves pressing buttons on both devices in a specific sequence.
- Rolling Code vs. Fixed Code: Most modern openers use rolling codes for security, requiring a more complex programming process than older fixed-code systems.
- Troubleshooting Common Issues: Be prepared for potential problems like signal interference, incorrect button presses, or compatibility mismatches.
- Consult Manuals: Always refer to your car’s owner’s manual and your garage door opener’s manual for specific instructions.
Understanding Garage Door Opener Technology
Before diving into the programming steps, it’s helpful to understand the basic technology behind garage door openers and car remotes. Garage door openers operate on radio frequencies, transmitting a signal from the remote to the motor unit that opens and closes the door. Early systems used fixed codes, meaning the remote sent the same signal every time. This was less secure, as someone could “capture” the signal and open your garage.
Modern systems overwhelmingly use rolling codes (also known as hopping codes). With rolling codes, the signal changes with each use, creating a new, unique code every time. This significantly enhances security. Your car’s built-in remote system needs to be able to learn and replicate these rolling codes. This is often achieved through a technology called HomeLink, which is integrated into many vehicles. Other car manufacturers may have their own proprietary systems, but they function on similar principles.
The frequency bands used are typically around 315 MHz or 390 MHz, though variations exist. Compatibility between your opener and your car’s system is paramount. If your opener is very old or uses an uncommon frequency, you might encounter compatibility issues.

Credit: www.youtube.com
Preparing For The Programming Process
Successful garage door opener programming hinges on proper preparation. Rushing through this stage can lead to frustration and repeated attempts.
Gather Necessary Information And Tools
- Garage Door Opener Manual: This is your primary resource. It will detail the location of the “Learn” button, its color, and the specific sequence of button presses required. If you don’t have the physical manual, search online for your opener’s model number.
- Car Owner’s Manual: Your car’s manual will explain how to access and use its built-in remote programming features, including which buttons to use and the general procedure.
- A Sturdy Ladder: You’ll likely need to reach the garage door opener motor unit, which is usually mounted on the ceiling. Ensure the ladder is stable.
- A Helper (Optional but Recommended): Having someone to assist can make the process smoother, especially when you need to press buttons on both the car remote and the opener simultaneously or in quick succession.
- A Pen and Paper: To note down any codes or specific sequences if your manual suggests it.
Identify Your Garage Door Opener’s “learn” Button
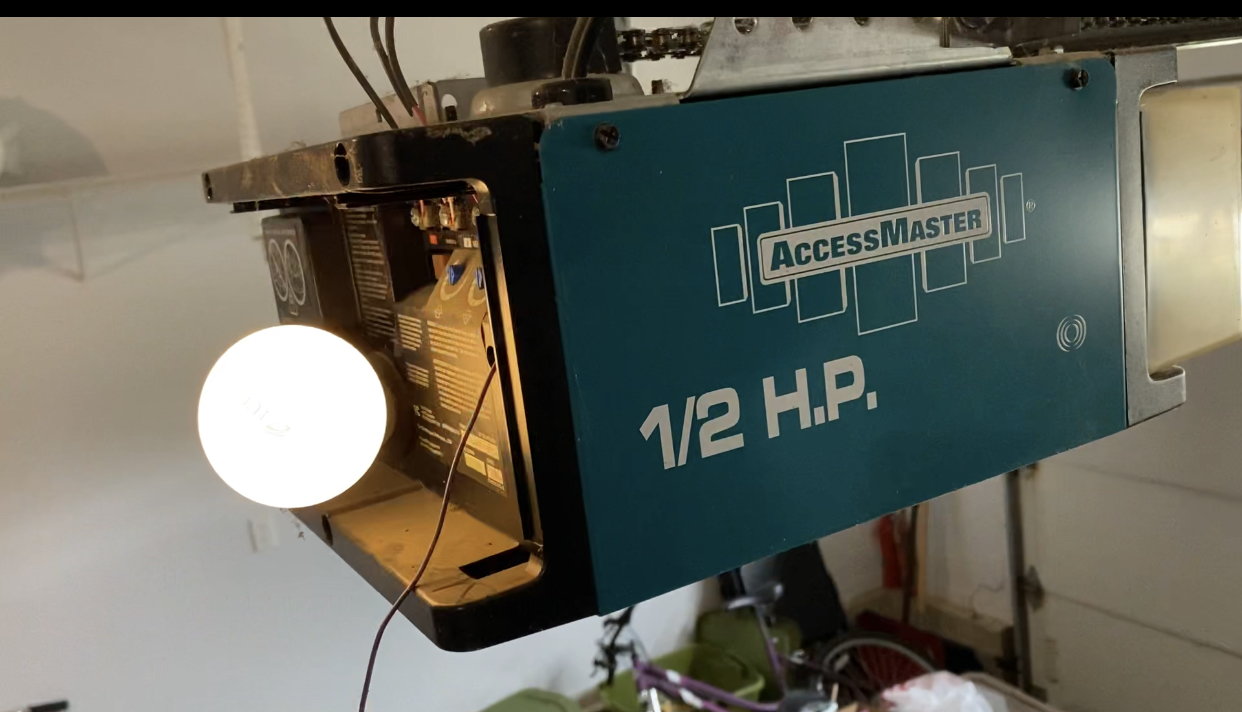
The “Learn” button on your garage door opener motor unit is the key to initiating the programming process. It’s used to pair new remotes or keypads. Its location and appearance vary significantly by manufacturer and model.
- Common Locations: Look for it on the back panel, side panel, or near the light bulb housing of the motor unit.
- Appearance: It’s often a small, colored button (red, orange, green, purple, or yellow are common). It might be labeled “Learn,” “Program,” or “Smart.” There might also be indicator lights nearby.
- Example: For LiftMaster, Chamberlain, and Craftsman openers manufactured after 1997, the Learn button is often square and colored (e.g., purple, red/orange, green, yellow). Genie openers might have a Learn button on the back or side.
If you cannot find the button, consult your opener’s manual or search online using your specific model number.
Identify Your Car’s Remote Buttons
Your car likely has three or four buttons on its integrated remote. These are the buttons you’ll be programming.
- Choose an Unused Button: Select a button that isn’t currently assigned to another function (like panic alarm or trunk release) to avoid conflicts.
- Understand Your Car’s System: Some cars require you to put the car’s ignition in a specific position (e.g., ACC or ON) or press a sequence of buttons on the car’s dashboard to enter programming mode. Your car’s manual is essential here.
Credit: www.doityourself.com
Programming Steps: The General Process
While specific sequences vary, most programming methods follow a similar pattern of initiating the opener’s learn mode and then transmitting a signal from the car’s remote.
Step 1: Clear Existing Remote Codes (optional But Recommended)
Before adding a new remote, it’s often a good idea to clear any previously programmed remotes. This prevents potential conflicts and ensures a clean slate.
- How to Clear: Locate the “Learn” button on your garage door opener motor unit. Press and hold this button for about 10-30 seconds (refer to your manual for the exact duration). An indicator light on the opener will usually blink or go out to confirm that the codes have been cleared.
- Warning: Clearing codes will erase all previously programmed remotes, keypads, and even wireless entry systems. You will need to reprogram them afterward. If you only want to add a new remote without affecting existing ones, you can often skip this step, but it’s good practice for troubleshooting. For a comprehensive guide on resetting, refer to this step-by-step guide.
Step 2: Enter Programming Mode On The Garage Door Opener
This is where you tell the opener that it’s ready to learn a new remote signal.
- Press the “Learn” Button: Briefly press and release the “Learn” button on the garage door opener motor unit.
- Indicator Light: A status light on the opener will typically illuminate or blink, indicating that it’s in programming mode. This mode usually lasts for about 30 seconds, so you need to act quickly.
Step 3: Program The Car’s Remote Button
Now, you need to get your car’s remote to send a signal that the opener can learn. This is the most variable step.
Scenario A: Using A Vehicle With Integrated Homelink (or Similar)
Many vehicles come with a built-in system like HomeLink. The process often involves synchronizing the car’s remote with the *original* garage door remote first, and then using that synchronized signal to program the opener.
- Position Car and Opener: Park your car within range of the garage door opener, ideally a few feet away. Ensure the garage door is closed.
- Clear Car Remote (if needed): Some HomeLink systems require clearing existing programming. Consult your car’s manual for instructions, which usually involves pressing and holding the two outer HomeLink buttons until the indicator light flashes rapidly.
- Simulate Original Remote Signal:
- Hold the original garage door remote (the one that currently works) about 1-3 inches away from the HomeLink buttons on your car’s visor or dashboard.
- Simultaneously, press and hold the desired HomeLink button you want to program and the “On/Off” or “Program” button on your original garage door remote.
- Continue holding both buttons until the HomeLink indicator light changes from a slow blink to a rapid flash, indicating it has learned the remote’s signal. This may take 10-20 seconds.
- Release Buttons: Release both the HomeLink button and the original remote button.
- Test the Synchronized Signal: Press and hold the programmed HomeLink button. The HomeLink light should flash rapidly, indicating it’s transmitting the learned signal.
Scenario B: Direct Programming To The Opener (less Common For Cars)
Some systems, especially older ones or specific aftermarket integrations, might allow direct programming from the car’s remote to the opener’s “Learn” button.
- Position Car and Opener: Park your car within range of the garage door opener. Ensure the garage door is closed.
- Press “Learn” on Opener: As described in Step 2, press and release the “Learn” button on the opener motor unit. The indicator light will start blinking or stay illuminated.
- Press Car Remote Button: Immediately press and hold the desired button on your car’s integrated remote.
- Observe Opener Light: Watch the indicator light on the garage door opener. It might blink, turn solid, or change color to indicate it has learned the signal. This usually happens within a few seconds.
- Release Button: Release the car remote button.
Step 4: Test The Programmed Car Remote
This is the moment of truth.
- Press the Programmed Button: From inside your car, press the HomeLink button (or the button you programmed on your car’s remote) that you just configured.
- Observe the Garage Door: The garage door should operate (open or close). If it doesn’t, you’ll need to troubleshoot.
Step 5: Reprogramming Other Buttons (if Necessary)
If your car has multiple remote buttons, you can repeat the process to program other buttons for different garage doors or security gates.
Troubleshooting Common Programming Issues
Even with clear instructions, programming can sometimes be tricky. Here are common issues and how to resolve them.
Issue 1: The Garage Door Doesn’t Respond
- Reason: The opener did not successfully learn the car remote’s signal.
- Solutions:
- Repeat the Process: Go back to Step 2 and carefully follow the sequence again. Ensure you’re pressing the buttons for the correct duration and within the 30-second programming window.
- Check Compatibility: Verify that your car’s HomeLink system (or equivalent) is compatible with your garage door opener’s frequency and code type. Many openers use rolling codes, which require a specific synchronization process (like Scenario A above). Older openers with fixed codes might require a different approach. You can find compatibility information on the HomeLink website (HomeLink Compatibility Checker) or by checking your opener’s manual.
- Interference: Other radio frequency devices (like wireless doorbells, security systems, or even LED lights) can sometimes interfere. Try programming when these devices are off or at a greater distance.
- Distance: Ensure your car is close enough to the opener motor unit during the programming process.
- Battery: Check the battery in your *original* garage door remote. A weak battery can prevent it from transmitting a strong enough signal during the synchronization step.
Issue 2: The Garage Door Opens, But Only With The Original Remote
- Reason: The car’s remote successfully learned the *initial* signal from the original remote, but it did not synchronize with the opener’s rolling code system.
- Solution: This almost always means you need to use the “Train” or “Learn” button on the garage door opener motor unit. The process described in Scenario A (Using a Vehicle with Integrated HomeLink) is designed to handle rolling codes. You must press the “Learn” button on the opener *after* synchronizing the car remote with the original remote.
Issue 3: The Car Remote Only Works Intermittently
- Reason: Weak signal, interference, or a partially learned code.
- Solutions:
- Replace Batteries: Ensure both your car’s key fob battery and the original garage door remote battery are fresh.
- Reduce Interference: Turn off potential sources of RF interference.
- Reprogram: Clear existing codes and try programming again, paying close attention to the timing and button presses.
- Check Antenna: Ensure the antenna wire hanging from your garage door opener motor unit is not damaged and is hanging freely.
Issue 4: Programming Mode Expires Too Quickly
- Reason: You’re taking too long between steps.
- Solution: Be prepared. Have your manuals ready, know where the buttons are, and perform the steps in rapid succession. If needed, have a helper assist.
Advanced Tips And Considerations
Beyond the basic steps, several advanced tips can enhance your programming experience and ensure long-term functionality.
Using Multiple Garage Door Openers
If you have more than one garage door opener (e. g. , a detached garage), you can program additional buttons on your car’s remote to control them.
- Process: Simply repeat the entire programming process for each additional opener, using a different, unused button on your car’s remote each time.
- Crucial: Ensure you are using the correct “Learn” button sequence for each specific opener model.
Understanding Fixed Code Vs. Rolling Code Openers
- Fixed Code: These are older systems. Programming is usually straightforward: press the Learn button on the opener, then press the desired button on your car remote. The car remote simply mimics the fixed signal.
- Rolling Code: Most modern openers use these. Direct programming from the car remote to the opener’s Learn button often doesn’t work. You usually need to first program the car’s integrated remote (like HomeLink) to *mimic* the original handheld remote, and *then* use the opener’s Learn button to train the opener to recognize the car’s synchronized signal. This is why Scenario A is the most common method for integrated car remotes.
The Importance Of The Opener Manual
I cannot stress this enough: your garage door opener’s manual is your best friend. While this guide provides a general overview, manufacturers have unique procedures. For instance:
- LiftMaster/Chamberlain/Craftsman: Often require pressing the “Learn” button, then pressing and holding the car remote button for a few seconds, then releasing and pressing it again. The color of the Learn button (purple, red/orange, green, yellow) often indicates the frequency or technology, which is vital for compatibility.
- Genie: May have a specific sequence involving the “Smart” button and the remote buttons. Some Genie openers use Intellicode, which is a rolling code system requiring a specific training process.
- Other Brands: Marantec, Overhead Door, Stanley, and others will have their own specific button locations and sequences.
When To Seek Professional Help
If you’ve tried all the steps and troubleshooting tips, and your car remote still won’t program, it might be time to call a professional.
- Compatibility Issues: Your car’s system might simply not be compatible with your opener, requiring a frequency bridge or a universal receiver kit.
- Faulty Opener/Remote: The garage door opener motor unit or your car’s remote system might be malfunctioning.
- Complex Systems: Some high-end or older systems can be particularly challenging to program.
A qualified garage door technician can diagnose the problem quickly and often has the tools and knowledge to resolve complex compatibility issues. While the cost of a service call might seem high, it can save you significant time and frustration. The average cost for garage door opener repair can range from $100 to $350, depending on the issue, but programming issues are often on the lower end of that spectrum. Understanding garage door costs can help you budget for potential repairs.
Example: Programming A 2018 Toyota Camry With Homelink To A Liftmaster 8500
Let’s walk through a specific, common scenario.
Scenario: You have a 2018 Toyota Camry with HomeLink and a LiftMaster 8500 garage door opener (which uses Security+ 2.0, a rolling code system).
Tools Needed:
- Your car’s owner’s manual.
- Your LiftMaster 8500 manual (or knowledge of its “Learn” button location).
- Original LiftMaster remote.
- Ladder.
Steps:
- Locate LiftMaster Learn Button: The LiftMaster 8500 has a small, square, purple “Learn” button located on the back panel, near the antenna wire.
- Clear HomeLink (Optional but Recommended): In the Camry, press and hold the two outer HomeLink buttons (usually 1 and 3) simultaneously until the HomeLink indicator light flashes rapidly. Release both buttons.
- Get Original Remote Ready: Have your working LiftMaster remote in hand.
- Synchronize Car and Original Remote:
- Hold the original LiftMaster remote 1-3 inches away from the HomeLink buttons on the Camry’s overhead console.
- Press and hold the desired HomeLink button (e.g., Button 1) on the Camry *and* the “On/Off” button on the LiftMaster remote simultaneously.
- Watch the HomeLink indicator light. It will first blink slowly, then change to a rapid flash after about 10-20 seconds. This means HomeLink has learned the signal pattern from the original remote.
- Release both the HomeLink button and the LiftMaster remote button.
- Enter LiftMaster Learn Mode: Immediately go to your LiftMaster 8500 motor unit. Press and release the purple “Learn” button. The red “Learn” indicator light will illuminate. You have about 30 seconds to complete the next step.
- Train the Opener: Return to your Camry. Press and hold the programmed HomeLink button (Button 1). The LiftMaster motor unit’s lights may flash, or you might hear a click, indicating it has learned the signal from the HomeLink system.
- Release the Button: Release the HomeLink button.
- Test: Press the HomeLink button (Button 1) again. The garage door should open or close.
If it doesn’t work:
- Ensure you used the purple Learn button for the LiftMaster 8500.
- Double-check the synchronization step (Step 4). Sometimes holding the remotes closer or further apart can help.
- Try clearing the HomeLink again and repeating the entire process.
Maintaining Your Garage Door Opener System
Programming is just one aspect of maintaining your garage door opener. Regular upkeep ensures smooth operation and longevity.
Lubrication
Just like any mechanical system, garage door components benefit from lubrication.
- Rollers and Hinges: Regularly lubricate the rollers and hinges of your garage door. Use a silicone-based spray lubricant designed for garage doors. This reduces friction and noise. For detailed instructions, refer to how to lube garage door rollers.
- Opener Chain/Screw Drive: Check your opener’s manual. Some chain-driven openers may require periodic lubrication of the chain, while screw drives typically do not need additional lubrication.
Adjustments
Over time, your garage door opener might need adjustments to ensure proper operation.
- Chain Tension: If you have a chain-driven opener, the chain’s tension can loosen. An improperly tensioned chain can cause noise and operational issues. Learn how to adjust the chain if needed.
- Force Settings: Garage door openers have force settings that determine how much force is applied before the opener stops or reverses. If your door is reversing unexpectedly, these settings might need adjustment. Consult your manual, as improper adjustment can be a safety hazard. Similarly, you might need to learn how to adjust a Chamberlain garage door opener if you own that brand.