
The 2023 Toyota 4Runner offers a blend of rugged capability and modern convenience, and one of the most appreciated features is its integrated HomeLink® garage door opener system. This built-in technology eliminates the need for bulky remotes cluttering your visor, offering a seamless way to activate your garage door, gate, or even home lighting with a simple press of a button.
Programming the HomeLink system in your 4Runner is a straightforward process, designed for user convenience. Whether you’re setting it up for the first time or need to re-program a button for a new opener, understanding the steps involved ensures you can take full advantage of this integrated system.
This guide will walk you through the entire process of programming your 2023 Toyota 4Runner’s HomeLink system. We’ll cover everything from identifying the correct buttons and understanding the initial setup to synchronizing with various garage door opener types, including rolling code and fixed code systems.
By following these detailed instructions, you’ll be able to confidently program your 4Runner to operate your garage door opener, enhancing your daily convenience and security.
Key Takeaways
- The 2023 Toyota 4Runner features an integrated HomeLink system for convenient garage door opener operation.
- Programming involves pairing your 4Runner’s HomeLink buttons with your existing garage door opener remote.
- The process typically requires two stages: Training the HomeLink button and then synchronizing it with the garage door opener receiver.
- Different types of garage door openers (fixed code vs. rolling code) may require slightly different synchronization steps.
- Always consult your 4Runner’s owner’s manual and your garage door opener’s manual for specific instructions.
- Safety precautions, such as ensuring the garage door path is clear, are crucial during the programming process.
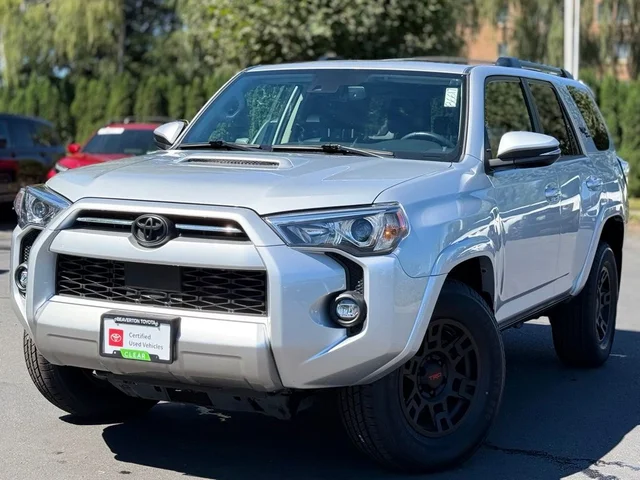
Credit: www.beavertontoyota.com
Understanding The Homelink System In Your 2023 Toyota 4runner
The HomeLink Connect system, integrated into the 2023 Toyota 4Runner, is a wireless remote control system that is compatible with a vast array of garage door openers, radio-controlled gates, and other radio-frequency devices. It’s designed to replace the multiple remote control devices you might currently be using.
The system consists of three programmable buttons, usually located on the rearview mirror or the overhead console, depending on your 4Runner’s trim level. These buttons are designed to learn and replicate the signals from your existing remote controls.
The technology behind HomeLink relies on radio frequency transmission. When you press a programmed HomeLink button, it transmits a specific radio signal that is recognized by the receiver unit of your garage door opener. This signal effectively acts as if your original remote control was pressed. The versatility of the HomeLink system means it can be programmed to operate a wide range of devices, making it a central control hub for your home access needs. For a comprehensive understanding of how garage door openers work, you can explore resources like Wikipedia’s Garage Door Opener page.
Locating Your Homelink Buttons
In most 2023 Toyota 4Runner models, the HomeLink buttons are conveniently located on the rearview mirror. You’ll typically find three buttons arranged horizontally or in a small cluster. Each button is designed to be programmed independently, allowing you to control up to three different devices. Some trims might place these buttons on the overhead console, so it’s always best to refer to your specific vehicle’s owner’s manual to pinpoint their exact location. The buttons are usually marked with a small HomeLink logo or simply numbered 1, 2, and 3.
How Homelink Works: Fixed Vs. Rolling Codes
Understanding the difference between fixed code and rolling code garage door openers is crucial for successful programming.
- Fixed Code Openers: These older systems transmit a single, unchanging radio signal. Once programmed, the HomeLink button will send this same signal every time it’s pressed. Programming is generally simpler for these types.
- Rolling Code Openers: Most modern garage door openers utilize rolling code technology for enhanced security. Each time the remote is used, a new, unique code is generated and sent. The opener and the remote synchronize their code sequences. This system prevents unauthorized access by making it difficult to “replay” a signal. Programming rolling code systems typically involves an extra step to synchronize the HomeLink button with the opener’s receiver.
The 2023 Toyota 4Runner’s HomeLink system is designed to work with both types of openers, but the programming sequence differs, especially during the synchronization phase for rolling code systems.

Credit: www.sheehyfordgaithersburg.com
Step-by-step Programming Guide For Your 2023 Toyota 4runner
Programming your 2023 Toyota 4Runner’s HomeLink system involves a few distinct steps. It’s recommended to have your original garage door opener remote and your garage door opener’s manual handy. Ensure your 4Runner is parked outside the garage, facing the door, and that the path for the garage door is clear.
Step 1: Prepare Your Garage Door Opener Remote
Before you begin programming the HomeLink buttons in your 4Runner, you need to prepare your existing garage door opener remote.
- Insert Batteries: Ensure the batteries in your original remote are fresh. Weak batteries can interfere with the programming process.
- Locate the “Learn” or “Program” Button: On your garage door opener’s motor unit (usually mounted on the ceiling in your garage), find the “Learn” or “Program” button. This button is often located near the antenna wire or on the back panel. The location varies significantly by manufacturer (e.g., Chamberlain, LiftMaster, Genie, Overhead Door). Consult your opener’s manual if you cannot find it.
- Note the Color of the Button: The color of this button can sometimes indicate the type of code system your opener uses (e.g., purple, green, yellow, or red/orange buttons often signify rolling code systems).
Step 2: Erase Existing Homelink Codes (optional But Recommended)
For security and to ensure a clean start, it’s a good practice to erase any previously programmed codes from your 4Runner’s HomeLink system.
- Press and Hold the Two Outer HomeLink Buttons: Simultaneously press and hold the left and right HomeLink buttons.
- Observe the Indicator Light: Keep holding the buttons until the HomeLink indicator light (usually a small LED near the buttons) changes from solid to flashing rapidly. This typically takes about 10-20 seconds.
- Release the Buttons: Once the light flashes rapidly, release both buttons. All previously learned codes are now erased.
Step 3: Train The Homelink Button
This is the phase where the HomeLink system “learns” the signal from your original remote.
- Position the Remotes: Place your original garage door opener remote within 1-3 inches of the HomeLink buttons on your 4Runner’s rearview mirror. Point the remote’s emitter towards the HomeLink buttons.
- Press and Hold the Desired HomeLink Button: Press and hold the HomeLink button you wish to program (e.g., Button 1).
- Press and Hold the Original Remote Button: While still holding the HomeLink button, press and hold the button on your original remote that operates your garage door.
- Observe the Indicator Light: Watch the HomeLink indicator light. It will initially flash slowly, then change to rapidly flashing once it has successfully captured the signal from your remote. This usually takes about 5-20 seconds.
- Release Both Buttons: Once the HomeLink indicator light flashes rapidly, release both the HomeLink button and the original remote button.
Example: If you are programming HomeLink Button 1 to open your garage door, you would press and hold Button 1 on the mirror, and simultaneously press and hold the button on your existing remote that opens the garage.
Step 4: Synchronize With The Garage Door Opener (rolling Code Systems)
If your garage door opener uses a rolling code system, the process isn’t complete after Step 3. You now need to synchronize the HomeLink system with the opener’s receiver in the garage. If you have a fixed code opener, you can skip this step and proceed to testing.
- Exit Your 4Runner: Get out of your vehicle.
- Locate the “Learn” Button on the Opener: Go to your garage and locate the “Learn” or “Program” button on the garage door opener motor unit.
- Press and Release the “Learn” Button: Press and quickly release the “Learn” button. The LED indicator light next to it should illuminate or blink, indicating it’s ready to learn a new remote signal. You typically have about 30 seconds to complete the next step.
- Return to Your 4Runner: Get back into your 4Runner.
- Press and Hold the Programmed HomeLink Button: Press and hold the HomeLink button you just programmed (e.g., Button 1) for about 2 seconds. Release the button.
- Observe the Garage Door: Your garage door opener’s lights may flash, or the opener unit might click. This indicates that the HomeLink system has been successfully synchronized.
- Test the HomeLink Button: Press the programmed HomeLink button again. The garage door should now operate. If it doesn’t, repeat Step 4, ensuring you press and release the “Learn” button on the opener and then press and hold the HomeLink button promptly.
Pro Tip: If your garage door opener system is older and uses a fixed code, the synchronization step (Step 4) is not required. After successfully training the HomeLink button (Step 3), you should be able to test it immediately.

Credit: www.youtube.com
Troubleshooting Common Programming Issues
While the HomeLink programming process is generally smooth, you might encounter a few hiccups. Here are some common issues and their solutions:
- HomeLink Indicator Light Doesn’t Flash Rapidly: This usually means the remote signal wasn’t captured correctly. Ensure the remote is close enough (1-3 inches) and that its battery is strong. Try repositioning the remote or using a different angle. For rolling code systems, ensure you are pressing and holding both buttons simultaneously for the required duration.
- Garage Door Doesn’t Operate After Programming:
- Fixed Code: If you skipped Step 4 assuming you had a fixed code system, try performing Step 4 as if you have a rolling code system. Some fixed code systems can still benefit from the synchronization process.
- Rolling Code: If Step 4 didn’t work, ensure you pressed and released the “Learn” button on the opener and then promptly pressed and held the HomeLink button within the 30-second window. You might need to repeat this synchronization step a couple of times. Make sure the HomeLink system actually learned the remote’s signal in Step 3.
- Interference: Radio frequency interference from other devices can sometimes disrupt the signal. Try programming at a different time of day or clearing the area of potential sources of interference.
- Compatibility Issues: While HomeLink is highly compatible, very old or unusual opener models might not be supported. Check the HomeLink website or your 4Runner’s manual for compatibility lists.
- Only One Button Works: Ensure you programmed each HomeLink button individually for each device. Don’t assume programming one button programs others.
- HomeLink Buttons Are Unresponsive: If the indicator light doesn’t illuminate at all when you press the buttons, try erasing existing codes again (Step 2). If that fails, there might be an issue with the HomeLink module itself, and you may need to consult a dealer.
Warning: Always ensure the garage door opener’s power is on during the programming process. If the opener loses power, it can sometimes reset and require re-programming.
Programming Multiple Devices And Advanced Tips
Once you’ve successfully programmed your first device, programming additional devices follows the same general procedure. However, there are some advanced tips and considerations to enhance your experience.
Programming Additional Devices
To program a second or third device (e.g., a second garage door, a gate opener, or home lighting control):
- Erase Codes (Optional): You can erase all codes again if you wish, or proceed to program a new button without erasing.
- Train the New HomeLink Button: Repeat Steps 3 and 4 from the main guide, using a different, unprogrammed HomeLink button on your rearview mirror.
- Synchronize (if necessary): If the new device uses a rolling code system, repeat the synchronization process (Step 4) with the corresponding garage door opener or receiver.
Example: To program HomeLink Button 2 for your driveway gate, repeat the training process using Button 2, and if it’s a rolling code gate, perform the synchronization step with your gate receiver.
Advanced Tips For Optimal Performance
- Use the Original Remote: Always use the original remote that came with your garage door opener for programming. After programming, you can store the original remote in a safe place as a backup.
- Check Compatibility: Before you start, it’s wise to check the HomeLink compatibility list on their official website (HomeLink Compatible Devices). This can save you time and frustration.
- Consider a HomeLink Transceiver: If your garage door opener is very old and not compatible with the direct programming method, you might need a HomeLink Transceiver (model HT300). This small device is installed near the opener motor and acts as a bridge to communicate with the HomeLink system. Consult your 4Runner’s manual or HomeLink’s support for details.
- Location Matters: The placement of your original remote relative to the HomeLink buttons is critical. If you have trouble, try slightly different distances and angles. In my experience, holding the remote’s emitter directly facing the center of the HomeLink buttons usually yields the best results.
- Keep Your Owner’s Manual Handy: The 2023 Toyota 4Runner owner’s manual provides specific details and diagrams for your vehicle’s HomeLink system, which can be invaluable during troubleshooting.
Homelink Vs. Aftermarket Remotes: A Comparison
When considering how to operate your garage door from your vehicle, you have two primary options: the integrated HomeLink system and traditional aftermarket remote openers. Both have their advantages and disadvantages.
Homelink System
| Feature | Description | Pros | Cons |
|---|---|---|---|
| **Integration** | Built directly into the vehicle (rearview mirror or overhead console). | Seamless, no extra clutter in the car. | Requires programming; compatibility can be an issue with very old openers. |
| **Convenience** | Operates with a simple button press. | Highly convenient, reduces visor clutter. | Limited to 3 devices per vehicle. |
| **Compatibility** | Works with most major brands of garage door openers and radio-controlled devices manufactured after 1990. | Broad compatibility with modern systems. | May require a transceiver for older or incompatible systems. |
| **Security** | Supports rolling code technology for enhanced security. | Advanced security features. | Fixed code systems are less secure. |
| **Cost** | Included as a factory feature in many vehicles; replacement modules are expensive if needed. | No additional purchase cost if factory-equipped. | If the module fails, replacement can be costly. |
| **Programming** | Requires a specific programming sequence involving the vehicle and the opener’s “learn” button. | Generally straightforward, though rolling codes add a step. | Can be confusing for some users, especially the synchronization step. |