
The garage door is more than just a large panel; it’s a sophisticated piece of engineering designed for security, convenience, and efficiency. At the heart of its automated operation lies the garage door opener, and often, the most direct interface a user has with this system is the remote control.
While many remotes feature multiple buttons, the fundamental operation typically revolves around a core set of functions. Understanding what these buttons do is crucial for everyday use and troubleshooting.
Most modern garage door opener remotes, whether they are the single-button variety or have multiple buttons, are designed with simplicity and functionality in mind. However, when you encounter a remote with three distinct buttons, it typically signifies a system that offers more than just the basic open/close function.
These extra buttons can enhance security, control additional devices, or provide access to specific features of your garage door opener system. This article will break down the common functions of the three buttons you might find on your garage door opener remote, exploring their purpose, how they work, and what they mean for your home’s security and convenience.
Key Takeaways
- Primary Button: Usually controls the main open/close function of the garage door, offering immediate access.
- Secondary Button: Often programmed for a secondary function, such as operating a second garage door, a gate, or an exterior light, providing extended convenience.
- Third Button: Frequently used for security features like vacation mode, vacation lock, or as a panic button, enhancing the overall safety of your home.
- Programming: Each button can be programmed independently, allowing for customization based on user needs and system capabilities.
- Troubleshooting: Understanding button functions is essential for diagnosing issues, from simple connectivity problems to more complex security settings.
- Compatibility: The specific functions of each button depend heavily on the garage door opener model and its features.
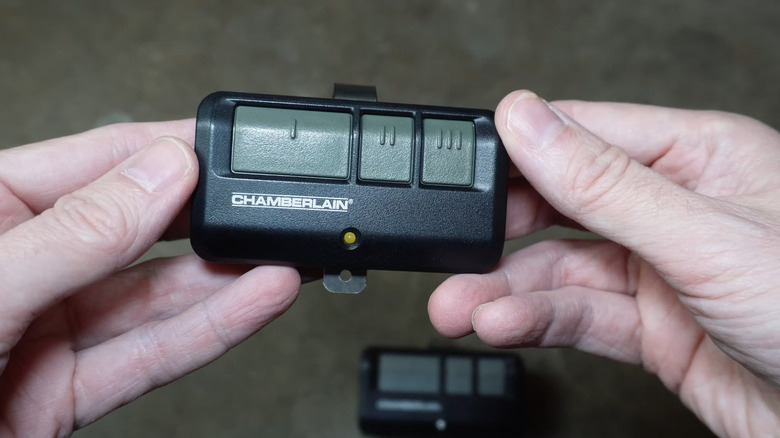
Credit: www.slashgear.com
The Anatomy Of A Three-button Garage Door Opener Remote
Garage door opener remotes have evolved significantly from their early, often single-button designs. The transition to multi-button remotes reflects the increasing complexity and feature sets of modern garage door opener systems. While the exact configuration and function of each button can vary significantly between manufacturers and models, a standard three-button remote typically follows a pattern that balances essential operation with enhanced control and security.
The primary goal of these remotes is to provide convenient, wireless access to your garage. This convenience is amplified when the remote can handle more than just opening and closing the door. For homeowners with multiple garages, integrated lighting systems, or advanced security needs, a three-button remote becomes an indispensable tool.
Understanding each button’s role empowers users to maximize the utility of their garage door system, ensuring both ease of use and peace of mind.
Button 1: The Main Operator, Open/close
The first button on your three-button garage door opener remote is almost universally dedicated to the primary function: opening and closing the garage door. This is the button you will use most frequently. When pressed, it sends a specific radio signal to the garage door opener unit installed in your garage. The opener then decodes this signal and initiates the corresponding action, either raising the door if it’s closed or lowering it if it’s open.
This button’s operation is straightforward. It’s typically the largest or most centrally located button, making it easy to identify and use quickly. The signal sent is unique to your opener, a security measure that prevents unauthorized access. When you press the button, the opener’s receiver listens for this specific code.
If it matches, the motor engages. The direction of the motor’s rotation is determined by the door’s current position and the opener’s programming. For instance, if the door is closed, the opener will move it upwards; if it’s open, it will move downwards.
In my experience, this button is the most critical for daily convenience. A malfunctioning primary button can be a significant daily annoyance, often indicating a need for battery replacement, remote reprogramming, or a more serious issue with the opener itself.
Many users program this button for immediate access, ensuring that pulling into their driveway or leaving their home is as seamless as possible. The reliability of this button is paramount, as it directly impacts the security and accessibility of your home’s largest entry point.
Button 2: Expanding Control, Secondary Functions
The second button on a three-button garage door opener remote is where the system’s versatility begins to show. This button is typically programmed to control a secondary function of your garage door opener system or an associated device. The possibilities for this button are diverse and depend heavily on the capabilities of your specific garage door opener model and any connected accessories.
Common uses for the second button include:
- Operating a Second Garage Door: If you have a two-car garage with two separate doors, or two separate garage structures on your property, the second button can be programmed to control the other door independently. This avoids the need for multiple remotes.
- Controlling a Gate Opener: Many homeowners also have an automatic gate for their driveway. The second button can be synced to operate this gate, consolidating access control into a single remote.
- Activating Exterior Lights: Some advanced garage door opener systems allow for the control of integrated or nearby exterior lighting. The second button can be used to turn these lights on or off, providing convenience and security when arriving home after dark.
- Operating Other Smart Home Devices: With the rise of smart home integration, some openers allow the second button to trigger other connected devices or smart home routines, such as turning on specific interior lights or activating a security system.
- Accessing a “Vacation Mode” or “Lockout” Feature: In some systems, this button might be used to engage or disengage a security feature that prevents the garage door from being opened by the primary remote, adding an extra layer of security when you are away.
The programming for this second button is usually distinct from the primary button. This means it sends a different code or a sequence that the opener recognizes as a command for the secondary function. The ability to program this button offers significant customization, allowing users to tailor their remote to their specific needs and property layout.
For example, a homeowner with a detached garage and a main house garage could use the first button for the main garage and the second for the detached one.
Button 3: Enhanced Security And Special Features
The third button on a three-button garage door opener remote often serves a role related to enhanced security or specialized functions. While less frequently used than the primary open/close button, it provides valuable features that can improve your home’s safety and the overall operation of your garage door system.
The specific function of the third button can vary widely, but some common applications include:
- Vacation Lock/Mode: This is a popular security feature. When activated, it disables the primary open/close function of the remote, preventing the garage door from being opened accidentally or by unauthorized individuals. This is particularly useful when the home is vacant for extended periods, such as during vacations. To re-enable normal operation, the button is typically pressed again, or the system is reset. This feature is a strong deterrent against opportunistic theft.
- Panic Button/Emergency Access: In some security systems, the third button might act as a panic button. When pressed, it could trigger an alarm, send an alert to a security monitoring service, or immediately close the garage door if it was open, providing a swift response in an emergency.
- Programming/Setup Mode: For certain opener models, the third button might be used in conjunction with other buttons or directly to initiate the programming or setup sequence for new remotes or keypads. This is less common for everyday use but is crucial for system maintenance and expansion.
- Intercom or Communication Features: In some high-end systems, particularly those integrated into smart home networks, the third button might activate an intercom function or initiate a communication link between the remote and a base station or smartphone app.
- Specific Device Control: Similar to the second button, it could be programmed to control a third distinct device, such as a different gate, a security light, or even a smart appliance.
It’s important to consult your garage door opener’s manual to understand the precise function of the third button on your specific remote. The security implications of features like vacation lock are significant, offering an added layer of protection for your home and belongings.
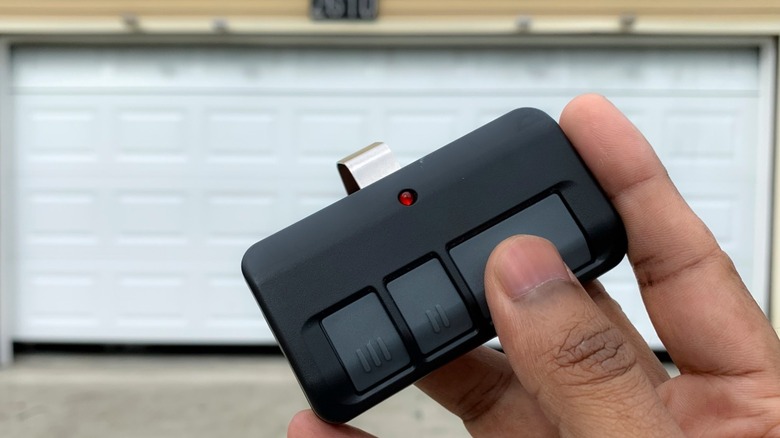
Credit: www.jalopnik.com
Understanding Button Programming And Compatibility
The functionality of each button on a three-button garage door opener remote is not fixed; it’s largely determined by how the remote is programmed to communicate with the garage door opener unit. This programming process involves establishing a unique code or sequence that the opener recognizes as a valid command for a specific action. Understanding this process is key to troubleshooting and customizing your remote’s functions.
The Programming Process: Linking Remote To Opener
Garage door opener systems use a rolling code or fixed code technology to ensure security. When you program a remote, you are essentially teaching the opener unit to recognize the specific signal emitted by that remote.
- Fixed Code: Older systems often used fixed codes. This meant the remote sent the same code every time. While simpler, this was less secure as the code could potentially be intercepted and copied.
- Rolling Code (Security+): Modern systems, like LiftMaster’s Security+ or Genie’s Intellicode, use rolling codes. Each time the button is pressed, the remote sends a new code from a vast, pre-determined sequence. The opener unit also advances its code sequence, so it always knows what code to expect next. This makes it significantly harder for unauthorized individuals to gain access.
The programming procedure typically involves:
- Accessing the Opener Unit: You usually need to locate a “Learn” or “Program” button on the garage door opener motor unit itself, often found on the back panel or near the antenna.
- Initiating Learning Mode: Pressing this “Learn” button puts the opener into a temporary mode where it’s ready to accept a new remote’s signal. There’s usually an LED indicator that confirms this mode.
- Transmitting the Remote Signal: Within a short timeframe (often 30 seconds), you press and hold the desired button on your remote.
- Confirmation: The opener unit will typically signal confirmation, often by blinking its lights or emitting a beep, indicating that the remote button has been successfully paired.
Each button on a three-button remote can be programmed independently. This means you could assign the first button to your primary garage door, the second to a gate, and the third to a vacation lock feature, all from the same remote. Resetting the system is also possible, which clears all programmed remotes and requires you to re-program them. For more detailed steps, you might find resources like how to reset Liftmaster garage door opener remote helpful.
Compatibility: Matching Remote To Opener
Not all remotes are compatible with all garage door openers. The remote must operate on the same radio frequency and use a compatible coding technology (fixed or rolling code) as the opener unit.
- Brand Specificity: Most often, remotes are designed for a specific brand of garage door opener (e.g., LiftMaster, Chamberlain, Genie, Craftsman, Overhead Door). While some brands share technology (Chamberlain and LiftMaster, for instance, often use compatible systems), a remote designed for a Genie opener will not work with a LiftMaster opener unless it’s a universal remote.
- Frequency: Garage door openers operate on specific radio frequencies, commonly 315 MHz or 390 MHz, though other frequencies exist. The remote must transmit on the same frequency as the opener’s receiver.
- Coding Technology: As mentioned, rolling code systems require remotes and openers that are synchronized. A newer rolling code remote won’t work with an older fixed code opener, and vice-versa.
- Universal Remotes: Universal remotes are designed to be programmed to work with a wide range of brands and models. These often have a dip switch system or a learning function to mimic the signals of existing remotes. However, they may not support all advanced features like vacation lock.
Before purchasing a new remote, it’s crucial to identify the brand and model of your garage door opener. This information is usually found on the motor unit itself. Checking the opener’s manual or the manufacturer’s website will confirm compatible remote models.
Attempting to use an incompatible remote will result in no response from the opener.
Common Scenarios And Troubleshooting
Understanding the functions of your three-button garage door opener remote is essential for everyday use and for troubleshooting when things don’t work as expected. Issues can range from simple user errors to more complex technical problems.
Scenario 1: The Main Button Isn’t Working
If the primary button (open/close) fails to operate the garage door, several factors could be at play:
- Dead Battery: This is the most common culprit. Garage door remotes rely on small batteries, typically coin cells, which can deplete over time. Replacing the battery is usually the first troubleshooting step.
- Remote Not Programmed: The remote might have lost its programming, or it might never have been programmed correctly in the first place. You may need to re-program the remote to the opener. This is a common issue after a power outage or if the opener’s memory was reset. Refer to guides on how to reset your garage door opener for general guidance.
- Range Issue: The remote might be too far from the opener unit. Try moving closer to the garage. Obstructions like metal objects or other electronic devices can also interfere with the signal.
- Opener Unit Problem: The issue might not be with the remote but with the opener unit itself. Check if the opener unit is receiving power and if its antenna is intact. The safety sensors at the bottom of the door track also need to be aligned; if they are blocked or misaligned, the door will not close.
- Interference: Other radio frequency devices in the vicinity can sometimes interfere with the remote’s signal.
Scenario 2: The Secondary Or Third Button Isn’t Performing Its Expected Function
If the secondary or third button is not controlling the gate, light, or engaging the vacation lock as intended:
- Incorrect Programming: The button may not have been programmed correctly for its intended function, or it might have been programmed for a different function. You’ll need to consult your opener’s manual for the specific programming steps for that particular button and feature. For example, reprogramming a Genie garage door keypad involves a different process than programming a remote button for a specific function.
- Feature Not Supported or Installed: The garage door opener system might not actually support the feature you’re trying to activate with that button. For instance, if you’re trying to control an exterior light, ensure that the opener system is designed to do so and that the light is properly connected.
- Device Malfunction: The device controlled by the secondary button (e.g., gate opener, light) might be malfunctioning or have its own power or connectivity issues.
- Vacation Lock Engaged (for Third Button): If the third button is intended for vacation lock, and it’s not working, it might be that the lock is already engaged, or the programming for this specific feature needs to be reset or re-applied.
Scenario 3: Remote Is Damaged Or Lost
If your remote is physically damaged or lost, you will need a replacement.
- Replacement Remote: Purchase a compatible replacement remote. Ensure it’s the correct model for your garage door opener brand and frequency. If you have a universal remote, you might be able to program it.
- Reprogramming: Once you have a new or existing compatible remote, you’ll need to program it to your opener unit. If you lost a remote, it’s also a good security practice to erase the opener’s memory and reprogram all your active remotes to ensure the lost one can no longer operate your garage door. This is a critical step for home security. Resources like how to reset garage door remote easily can guide you through this process.
By systematically addressing these potential issues, most problems with a three-button garage door opener remote can be resolved, restoring convenience and security to your home access.
Advanced Features And Customization
Beyond the basic open/close and secondary functions, some three-button garage door opener remotes offer advanced features or can be customized to suit specific user needs. These capabilities often depend on the sophistication of the garage door opener system itself.
Customizing Button Functions
As highlighted, the power of a multi-button remote lies in its programmability. Users are not always limited to the manufacturer’s default assignments.
- User-Defined Programming: Many systems allow users to decide what each button controls. For instance, if you have a single garage door but also an automatic gate, you can program Button 1 for the garage door and Button 2 for the gate. If you don’t need a vacation lock feature, you might program Button 3 to control a smart light.
- Multi-Function Buttons: Some advanced openers might allow a single button to perform different actions depending on how it’s pressed (e.g., a quick press for open/close, a long press for lights). This is less common on standard three-button remotes but is a feature found in some high-end systems.
The key to customization is understanding the programming interface of your specific garage door opener model. Consulting the owner’s manual is essential. The ability to tailor the remote’s functions can significantly enhance the convenience and integration of your garage door system with your home.
Vacation Lock And Enhanced Security Features
The third button, in particular, is often associated with enhanced security. The vacation lock feature is a prime example. When activated, it typically overrides the standard remote signals, preventing the door from opening. This is a crucial security measure for homeowners who are away for extended periods. It ensures that even if a thief somehow intercepts a remote signal or finds a lost remote, they cannot gain access to the garage.
Some systems might offer variations on this theme:
- Lockout Mode: Similar to vacation lock, this disables all remote access, requiring manual operation or a specific reset procedure to restore functionality.
- Personal Identification Number (PIN) Entry: While not directly a button function on the remote itself, some advanced systems might require a PIN entered via a keypad before the remote can activate the door, providing a dual-layer security approach.
- Temporary Access Codes: For visitors or service personnel, some systems allow the creation of temporary access codes or remotes that expire after a set time, managed through the opener unit or a smartphone app.
Integration With Smart Home Systems
The evolution of garage door openers has seen them become more integrated into the broader smart home ecosystem. While a basic three-button remote might not directly control smart home devices, the opener unit it communicates with often can.
- Opener as a Hub: Some garage door opener units can act as a central hub, connecting to your home’s Wi-Fi network. This allows them to be controlled via smartphone apps and integrated with platforms like Google Assistant or Amazon Alexa.
- Remote Activation of Routines: Through smart home integration, the opener unit can trigger smart home routines. For example, when the garage door opens (via Button 1), a smart home routine could turn on the garage lights, adjust the thermostat, or disarm a specific security zone.
- Remote Monitoring: Smart-enabled openers allow you to check the status of your garage door (open or closed) from anywhere via your smartphone, adding another layer of security and peace of mind.
While the three buttons on the remote itself might have specific, pre-defined roles, the underlying technology of the opener can unlock a much wider range of possibilities for customization and smart home integration. For instance, if your opener has smart capabilities, you might find resources on how to reprogram a Chamberlain garage door keypad relevant to managing access and settings.
The Future Of Garage Door Opener Remotes
The humble garage door opener remote, especially in its three-button configuration, is a gateway to convenience and security. However, the landscape of home access is rapidly evolving, moving beyond traditional radio frequency signals.
Beyond The Button: App-based Control
The most significant shift is the increasing prevalence of smartphone app control. Many modern garage door openers are Wi-Fi enabled, allowing users to open, close, and monitor their garage doors from anywhere in the world using a dedicated app. These apps often offer advanced features such as:
- Real-time Notifications: Get alerts when the garage door is opened or closed.
- Activity Logs: Review a history of who operated the garage door and when.
- Temporary Access: Grant temporary access to family members, friends, or service providers via the app.
- Integration with Voice Assistants: Control the garage door using voice commands through platforms like Alexa or Google Assistant.
This app-based control often complements or even replaces the need for physical remotes for many users, offering greater flexibility and control.
Biometric And Advanced Authentication
Looking further ahead, we may see more advanced authentication methods become standard. Biometric scanners (fingerprint or facial recognition) integrated into keypads or even directly into vehicle systems could provide