
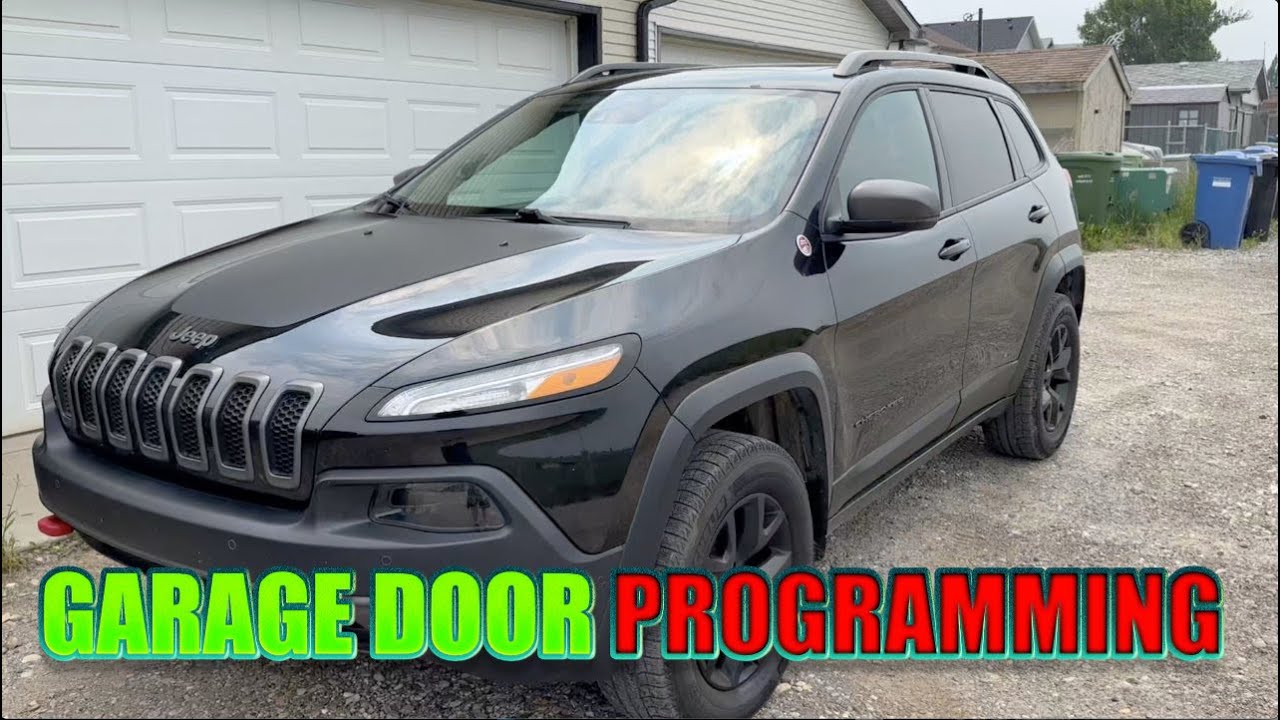
Programming your Jeep Cherokee’s garage door opener system offers unparalleled convenience, transforming your vehicle into a mobile command center for your home’s access. Gone are the days of fumbling for a separate remote while juggling groceries or wrangling children. With a few simple steps, you can integrate your garage door opener directly into your Jeep’s built-in system, providing seamless entry and exit.
This guide will walk you through the process, addressing common challenges and offering solutions to ensure a smooth and successful programming experience.
Key Takeaways
- Built-in Convenience: Your Jeep Cherokee likely has a HomeLink or similar integrated system to control your garage door opener, eliminating the need for a separate remote.
- Compatibility Check: Ensure your garage door opener’s frequency and rolling code technology are compatible with your Jeep’s system.
- Programming Steps: The process typically involves clearing existing codes, training the Jeep’s system with your garage door opener remote, and then synchronizing it with the opener itself.
- Troubleshooting: Common issues include outdated opener technology, radio frequency interference, and incorrect button presses.
- Safety First: Always ensure the garage door path is clear before programming and testing.
Credit: www.youtube.com
Understanding Your Jeep’s Garage Door Opener System
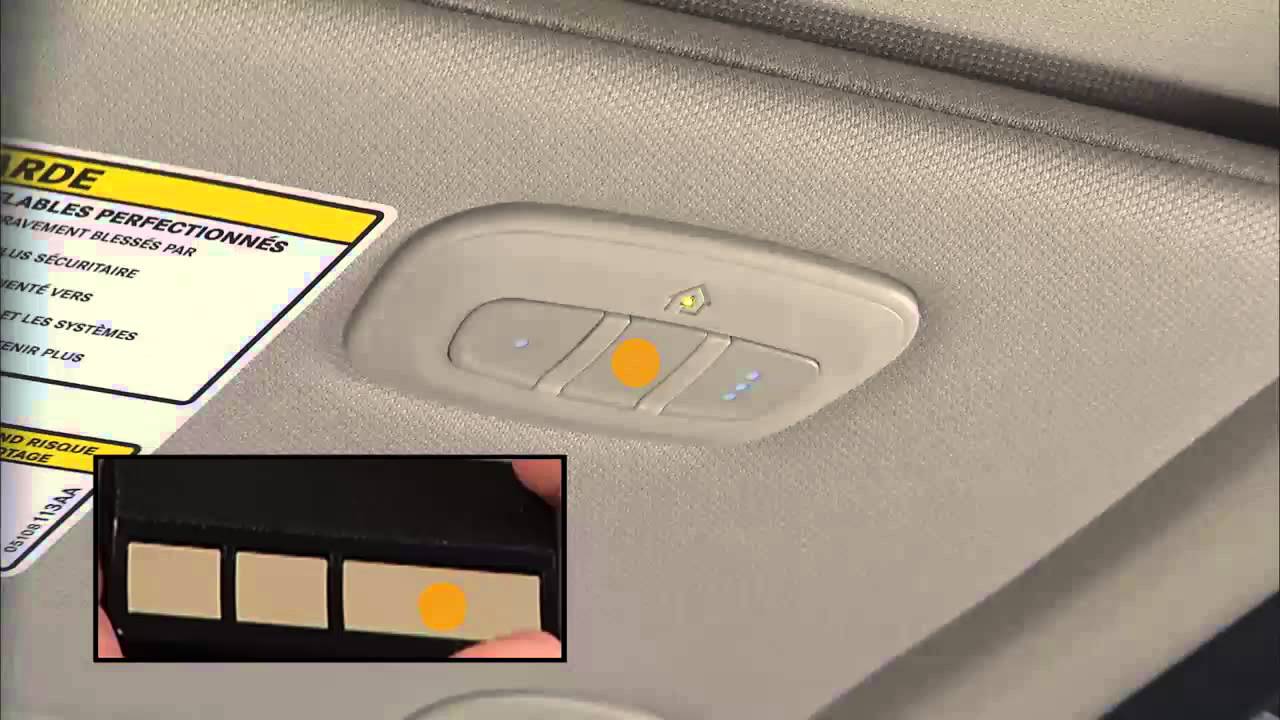
Most modern Jeep Cherokees are equipped with a universal garage door opener system, often referred to as HomeLink. This technology is designed to learn and replicate the signals from your existing garage door remote. The system typically consists of three to four programmable buttons located on the rearview mirror or overhead console. These buttons transmit radio frequency (RF) signals that your garage door opener unit can understand and act upon.
How Homelink Works
HomeLink utilizes a sophisticated radio frequency transmitter that can learn and emit signals from various garage door opener brands. The system operates on specific radio frequencies, and the complexity lies in its ability to handle both fixed code and rolling code technologies.
- Fixed Code: In older systems, a remote would transmit a specific, unchanging code to the opener. HomeLink can easily learn these codes by “listening” to the signal from your original remote.
- Rolling Code: Modern openers use rolling code technology for enhanced security. Each time you press the button, a new, unique code is generated from a complex algorithm. HomeLink is designed to work with these systems by first learning the current code and then going through a synchronization process with the garage door opener motor unit itself. This ensures that the vehicle’s transmitter and the opener are always on the same “wavelength,” maintaining security.
Identifying Your Garage Door Opener Type
Before you begin programming, it’s crucial to identify the type of garage door opener you have. This will determine the specific steps you need to follow.
- Brand and Model: The brand (e.g., Chamberlain, LiftMaster, Genie, Overhead Door) and model number of your garage door opener are usually found on the motor unit itself, often on a sticker.
- Frequency: Most openers operate on frequencies like 315 MHz or 390 MHz. HomeLink systems are compatible with a wide range.
- Rolling Code vs. Fixed Code: This is the most critical distinction. If your remote has a “Learn” or “Smart” button on the motor unit, it’s likely a rolling code system. Older remotes without this feature are typically fixed code. You can often find this information in your garage door opener’s manual or by searching online for your specific model.
A quick way to check compatibility is to look for the HomeLink logo on your garage door opener remote or packaging. Many manufacturers also provide compatibility checkers on their websites. If your opener is too old, it might not be compatible with the rolling code synchronization process, and you might need to purchase a HomeLink compatibility bridge or a newer opener.

Credit: infotainment.com
Preparing For The Programming Process
Successful programming requires a bit of preparation to ensure a smooth experience. Gathering the necessary items and understanding potential hurdles will save you time and frustration.
What You’ll Need
- Your Jeep Cherokee: Ensure it’s parked within range of your garage door opener.
- Original Garage Door Remote: This is essential for training the Jeep’s system. Make sure it has a fresh battery. A weak battery can cause programming failures.
- Your Garage Door Opener Manual: This will be invaluable, especially if you have a rolling code system, as it details the location and procedure for the “Learn” button.
- A Sturdy Ladder: You might need this to reach the motor unit of your garage door opener, especially if it’s mounted high on the ceiling.
- Patience: While generally straightforward, some systems can be finicky.
Safety Precautions
Safety is paramount when working with garage door systems.
- Clear the Path: Ensure that the garage door path is completely clear of any obstructions, including people, pets, and vehicles, before you begin programming and testing. Accidental activation can cause damage or injury.
- Stable Ladder Use: If using a ladder, ensure it’s placed on a stable, level surface and that you maintain three points of contact while climbing and working.
- Electrical Safety: Avoid touching any wiring or electrical components within the garage door opener unit.
Understanding Potential Interference
Radio frequency interference can sometimes disrupt the programming process. Common sources include:
- LED Lighting: Some LED lights, especially those in garages or nearby fixtures, can emit RF noise.
- Digital Wireless Devices: Wi-Fi routers, wireless security cameras, and other wireless devices operating on similar frequencies can interfere.
- Other Transmitters: If you live in a densely populated area, the sheer number of garage door openers and other RF devices can create a noisy signal environment.
If you suspect interference, try to temporarily turn off or move potential sources during the programming.
Step-by-step Programming Guide
The programming process is divided into two main phases: training the Jeep’s HomeLink system with your original remote, and then synchronizing it with the garage door opener motor unit if it’s a rolling code system.
Phase 1: Training The Homelink System
This phase involves teaching your Jeep’s buttons to mimic your existing garage door remote.
- Locate HomeLink Buttons: Identify the HomeLink buttons in your Jeep Cherokee. They are typically located on the rearview mirror assembly or in the overhead console.
- Clear Existing Codes (Recommended): To ensure a clean slate and avoid conflicts with previously programmed devices, it’s best to clear any existing HomeLink codes.
- Press and hold the two outer HomeLink buttons (usually buttons 1 and 3) simultaneously for about 10-20 seconds.
- The indicator light above the buttons will flash rapidly, then turn solid or go out, indicating that all previous codes have been erased.
- Prepare Your Jeep and Remote:
- Turn the ignition key of your Jeep Cherokee to the Accessory (ACC) position. Do NOT start the engine.
- Take your original garage door opener remote.
- Begin Training:
- Select one of the HomeLink buttons you wish to program.
- Hold your original garage door remote about 1-3 inches away from the HomeLink buttons.
- Press and hold the desired HomeLink button AND the button on your original remote simultaneously.
- Continue holding both buttons. The HomeLink indicator light will begin to flash slowly, then rapidly.
- Release both buttons once the indicator light flashes rapidly. This indicates that the HomeLink system has learned the code from your remote.
- Test the Button: Press the programmed HomeLink button. If your garage door opener is a fixed code system, the garage door should now operate. If it is a rolling code system, the light on the HomeLink button will likely turn solid, and the garage door will not open yet. You will proceed to Phase 2.
Phase 2: Synchronizing With Rolling Code Openers
If your garage door opener uses a rolling code system, you need to complete this additional step to synchronize the HomeLink system with the opener motor unit.
- Locate the “Learn” Button: Go to your garage door opener motor unit (usually mounted on the ceiling). Find the “Learn” or “Smart” button. This button is often colored (e.g., red, orange, purple, green) and may be located near the antenna wire or on the back panel. Consult your opener’s manual if you cannot find it.
- Press the “Learn” Button: Press and release the “Learn” button on the motor unit. You typically have about 30 seconds to complete the next step before the opener’s memory resets. The “Learn” button might flash or a red LED next to it will illuminate.
- Return to Your Jeep: Immediately go back to your Jeep Cherokee.
- Train the HomeLink System Again:
- Press and hold the already programmed HomeLink button in your Jeep.
- Hold it for about 2-5 seconds. The indicator light on the HomeLink button may flash, or the garage door opener unit itself may make a clicking sound.
- Release the HomeLink button.
- Test the System: Press the programmed HomeLink button again. Your garage door should now open and close.
Pro Tip: If the synchronization doesn’t work on the first try, repeat steps 1-5 of Phase 2. Sometimes it takes a couple of attempts. Ensure you are pressing and holding the HomeLink button for the correct duration.
Credit: www.youtube.com
Troubleshooting Common Issues
Even with careful preparation, programming can sometimes hit a snag. Here are common issues and their solutions:
Garage Door Does Not Respond After Programming
- Incorrect Remote Holding: Ensure the original remote was held close enough (1-3 inches) and in the correct orientation to the HomeLink buttons during Phase 1.
- Weak Remote Battery: Replace the battery in your original garage door remote.
- Outdated Opener: Your garage door opener may be too old and not compatible with the HomeLink system. Check the HomeLink compatibility website for information.
- Interference: As mentioned earlier, try to minimize potential RF interference during programming.
- Rolling Code Sync Failure: If you have a rolling code system, the synchronization step (Phase 2) is crucial. Ensure you pressed the “Learn” button on the opener and then quickly returned to your Jeep to press the HomeLink button. The timing is critical.
- Incorrect “Learn” Button Press: Some opener units require the “Learn” button to be pressed and held for a few seconds, while others just need a quick press and release. Refer to your opener’s manual.
Homelink Buttons Not Learning The Code
- Ignition Position: Double-check that your Jeep’s ignition is in the ACC (Accessory) position, not OFF or RUN.
- Remote Functionality: Verify that your original garage door remote works correctly when pressed on its own.
- HomeLink System Reset: If you’ve tried multiple times without success, try clearing the HomeLink codes again (holding outer buttons) and start the process from scratch.
Opener Works Intermittently
- Low Battery in Jeep: While less common, a failing battery in your Jeep can sometimes affect the HomeLink system’s performance.
- Antenna Placement: Ensure the antenna wire on your garage door opener motor unit is hanging freely and not obstructed or coiled up.
- Range Issues: If the range seems significantly reduced, it could be due to interference or a weakening transmitter in either the remote or the HomeLink system.
Clearing Homelink Codes
If you sell your Jeep or want to reprogram the buttons for a different device, clearing the codes is essential. As mentioned in Phase 1, press and hold the two outer HomeLink buttons (usually 1 and 3) simultaneously for approximately 10-20 seconds until the indicator light flashes rapidly. This erases all previously learned signals. You might need to do this if you’re experiencing issues after trying to program a new device. For more detailed guidance on clearing and resetting, you can refer to resources on resetting garage door openers.
Advanced Tips And Considerations
Beyond the basic programming, a few extra tips can enhance your experience and help you manage your integrated system.
Programming Multiple Devices
Your Jeep’s HomeLink system typically has three programmable buttons. You can use these to control multiple garage doors, gates, or even other RF-controlled devices like attic fans or security lights, provided they are compatible. The programming process for each button is identical to the steps outlined above.
Simply choose a different HomeLink button for each device you wish to control.
Reprogramming A Single Button
If you need to change the code for a single button (e. g. , you got a new garage door opener or want to replace a programmed device), you don’t need to clear all the HomeLink codes.
- Clear Only the Target Button: Press and hold the specific HomeLink button you want to reprogram for about 10-20 seconds. The indicator light will flash, indicating it has been cleared.
- Reprogram: Follow the standard Phase 1 and Phase 2 programming steps using your new remote and the cleared HomeLink button.
This allows you to keep other programmed devices functional while updating just one. For specific brands like LiftMaster, there are dedicated guides on how to reset Liftmaster garage door opener remotes, which can be helpful if you encounter issues with that brand.
Integrating With Other Smart Home Devices
While HomeLink is primarily designed for RF-based openers, the concept of vehicle integration extends to broader smart home ecosystems. Newer vehicles might offer integration with Wi-Fi or Bluetooth-enabled smart garage door controllers. These systems often allow for more advanced features like remote monitoring, status notifications, and voice control, going beyond the simple button press of HomeLink.
However, the HomeLink system itself is a dedicated RF solution.
Battery Maintenance For Remotes
The performance of your original remote directly impacts the HomeLink programming. Ensure you regularly check and replace the batteries in your garage door remotes. A dying battery can lead to failed programming attempts or intermittent operation. This is especially true for older remotes.
Understanding Garage Door Opener Frequencies
HomeLink is compatible with most garage door opener frequencies, commonly 315 MHz and 390 MHz. However, some very old or specialized systems might operate on different frequencies, rendering them incompatible. Always check your opener’s specifications if you encounter persistent issues.
Comparison Of Garage Door Opener Technologies
To better understand compatibility, consider the evolution of garage door opener technology.
| Feature | Fixed Code Openers | Rolling Code Openers (e.g., Security+ 2.0) | Smart Controller Add-ons (e.g., MyQ) |
|---|---|---|---|
| **Security** | Low | High | Very High (with encryption) |
| **Code Type** | Static, unchanging | Dynamic, changes with each use | Dynamic, often cloud-based |
| **HomeLink Compatibility** | Generally High | High (requires sync step) | Varies (often requires add-on module) |
| **Programming** | Simple remote-to-HomeLink transfer | Remote-to-HomeLink transfer + Opener Sync | App-based configuration |
| **Typical Age** | Pre-mid-1990s | Mid-1990s to present | Recent years |
| **Example Brands** | Older Chamberlain, Genie, Stanley | LiftMaster, Chamberlain, Genie, Overhead Door | MyQ (Chamberlain/LiftMaster), Guardian |
Note: While HomeLink is excellent for RF-based systems, modern smart controllers offer enhanced features like remote monitoring and smartphone control. You might need a specific adapter or module to integrate some smart controllers with HomeLink if they don’t offer direct compatibility.
Example Scenario: Programming A Liftmaster Security+ 2.0 Opener
Let’s walk through a practical example using a common scenario: programming a LiftMaster garage door opener with Security+ 2.0 technology (a rolling code system) into a Jeep Cherokee.
- Preparation: Ensure your Jeep is in ACC mode, your LiftMaster remote has a good battery, and you have your ladder ready. Locate the motor unit on your garage ceiling.
- Clear HomeLink: Press and hold the outer HomeLink buttons in the Jeep until the indicator light flashes rapidly.
- Train HomeLink: Hold the LiftMaster remote 1-3 inches from the HomeLink buttons. Press and hold the desired HomeLink button and the LiftMaster remote button simultaneously. Release when the HomeLink light flashes rapidly.
- Locate LiftMaster Learn Button: On the LiftMaster motor unit, find the Learn button. It’s usually square and colored (e.g., purple for Security+ 2.0).
- Press Learn Button: Press and release the LiftMaster Learn button. The red LED next to it should illuminate.
- Synchronize: Immediately return to your Jeep and press and hold the programmed HomeLink button for about 2-5 seconds. The LiftMaster motor unit should click, or its lights might flash, indicating it has received the signal.
- Test: Release the HomeLink button. Press it again. The garage door should now operate. If not, repeat steps 4-6, ensuring precise timing.
This process highlights the critical synchronization step required for rolling code systems like LiftMaster’s Security+ 2.0. If you encounter issues with LiftMaster specifically, consulting guides on how to open a Liftmaster garage door opener can sometimes provide context on the unit’s behavior.
Frequently Asked Questions
What If My Garage Door Opener Is Too Old For Homelink?
If your garage door opener is older than 1993 or uses a non-standard frequency, it may not be compatible with HomeLink. In such cases, you might need to purchase a HomeLink compatibility bridge or a newer garage door opener system. Some older systems might also have security vulnerabilities that make upgrading advisable.
How Do I Know If My Jeep Cherokee Has Homelink?
HomeLink buttons are typically integrated into the rearview mirror assembly or the overhead console. Look for buttons with symbols resembling radio waves or arrows pointing into a box. You can also consult your Jeep Cherokee’s owner’s manual, which will detail the features of your vehicle’s interior, including the universal garage door opener system.
Can I Program Homelink Without The Original Remote?
No, the original garage door opener remote is essential for the programming process. HomeLink works by learning the specific radio frequency signal emitted by your existing remote. Without it, you cannot train the HomeLink system to operate your garage door. If you’ve lost your remote, you’ll need to obtain a replacement and program that first before proceeding with HomeLink.
How Many Devices Can I Program To My Jeep’s Homelink System?
Most HomeLink systems in vehicles like the Jeep Cherokee have three programmable buttons. This allows you to control up to three different garage doors, gates, or other compatible RF-controlled devices. Each button can be programmed independently.
What’s The Difference Between Clearing Homelink Codes And Resetting The Opener?
Clearing HomeLink codes erases the learned signals from your Jeep’s built-in transmitter. Resetting the garage door opener motor unit erases the memory of all remotes (including your original one and the HomeLink system) that are programmed to it. You would typically clear HomeLink codes if you sell the vehicle or want to remove a specific device. You would reset the opener if you suspect security issues or are replacing all your remotes. Many resources exist for resetting garage door remotes in general.
Integrating your garage door opener with your Jeep Cherokee’s HomeLink system is a straightforward process that significantly enhances daily convenience. By understanding the technology, preparing adequately, and following the step-by-step instructions, you can enjoy the seamless operation of your garage door directly from your vehicle.
Remember to prioritize safety throughout the process and consult your owner’s manuals for specific details related to your vehicle and garage door opener. With a little patience, you’ll soon be enjoying the benefits of a fully integrated smart-access system.