
Imagine pulling into your driveway after a long day, and with a simple tap on your smartphone, your garage door glides open. No more fumbling for remotes or worrying if you left the garage open. This convenience is now within reach for many homeowners thanks to the integration of smart technology into everyday devices, including garage door openers.
LiftMaster, a leading name in garage door solutions, offers models that can seamlessly connect to your home’s Wi-Fi network, transforming your traditional garage into a connected space. This connectivity provides enhanced security, remote access, and greater control over your home’s entry points.
The process of connecting your LiftMaster garage door opener to your Wi-Fi might seem daunting at first, but with a clear understanding of the steps involved and a bit of patience, it’s a remarkably achievable DIY project. This guide will walk you through everything you need to know, from checking compatibility and gathering necessary tools to the step-by-step connection process and troubleshooting common issues.
By the end, you’ll be well-equipped to enjoy the benefits of a smart garage door opener, whether you have a newer MyQ-enabled model or are looking to upgrade.
Key Takeaways
- Compatibility is Crucial: Not all LiftMaster openers are Wi-Fi enabled. Check your model number and look for the MyQ logo or a yellow learn button.
- The MyQ App is Central: The MyQ app is your primary interface for controlling and monitoring your garage door opener once connected.
- Two Main Connection Methods: Depending on your opener model, you’ll either connect directly via built-in Wi-Fi or use a MyQ Smart Garage Hub for older models.
- Network Requirements: You’ll need a stable 2.4 GHz Wi-Fi network with a strong signal near your garage opener.
- Step-by-Step Process: The connection involves downloading the app, creating an account, and following on-screen prompts to link your opener to your network.
- Troubleshooting is Key: Common issues include Wi-Fi signal strength, incorrect passwords, and app glitches.
- Security Considerations: Always use strong passwords and be mindful of who you grant access to via the app.
Credit: support.suretyhome.com
Understanding Your Liftmaster Model And Wi-fi Capability
Before you can connect your LiftMaster garage door opener to your Wi-Fi, it’s essential to determine if your unit is actually capable of doing so. LiftMaster has been integrating smart technology into their openers for several years, primarily through their MyQ technology. This technology allows for remote monitoring and control of garage door openers and other MyQ-enabled accessories via a smartphone, tablet, or computer.
Identifying Myq-enabled Openers
The easiest way to identify if your LiftMaster opener has built-in Wi-Fi capabilities is to look for specific indicators on the unit itself or in its documentation.
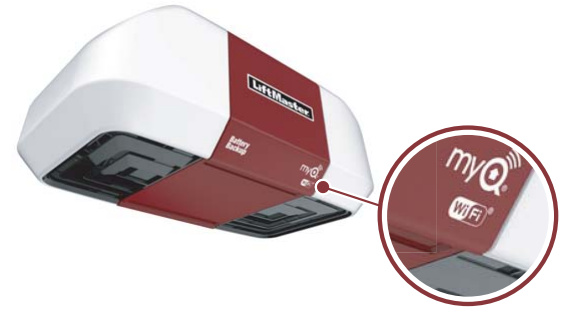
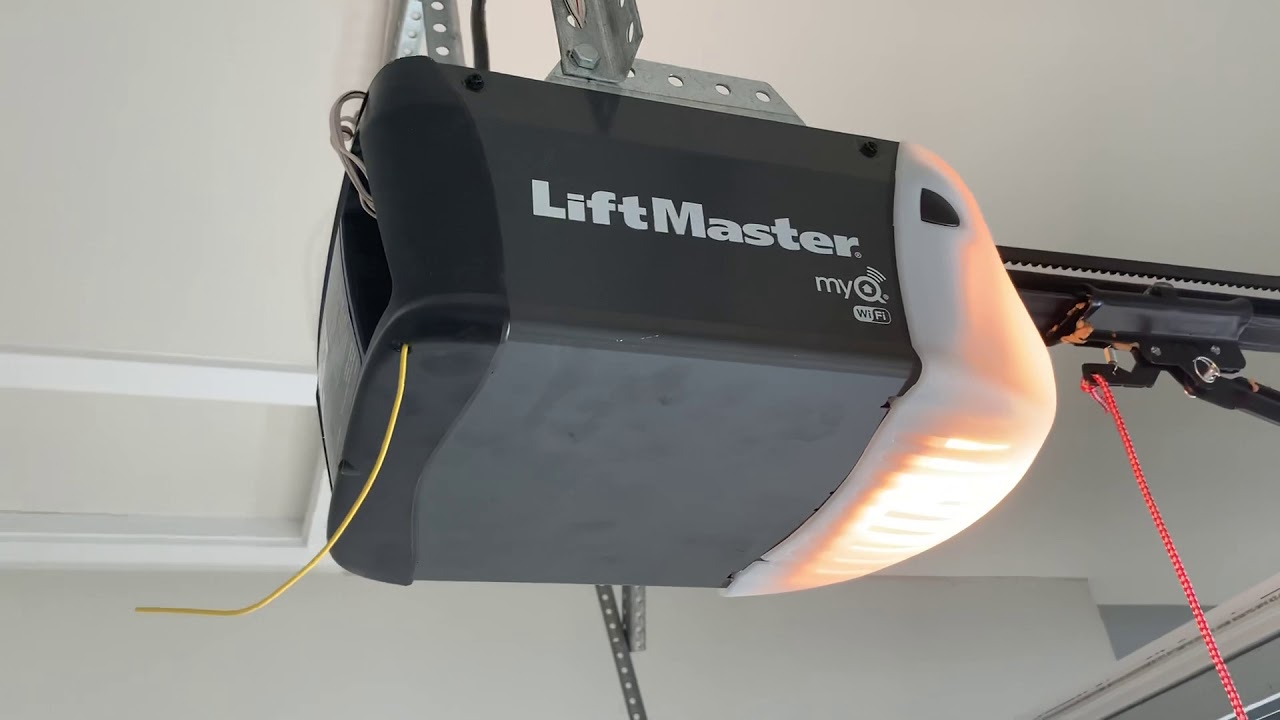
- The MyQ Logo: Many MyQ-enabled openers will have the MyQ logo (often a stylized “myQ”) visible on the motor unit.
- The Learn Button Color: LiftMaster openers manufactured since 1993 have a “Learn” button on the motor unit. If this button is yellow, it often signifies an opener that is compatible with MyQ accessories or has built-in MyQ functionality. However, for direct Wi-Fi connectivity, you’re typically looking for openers manufactured more recently, often from 2017 onwards, that explicitly state they have built-in Wi-Fi.
- Model Number Check: The most definitive method is to check your opener’s model number. You can usually find this on a sticker on the motor unit. Once you have the model number, visit the LiftMaster website and search for your specific model. The product page or specifications will clearly state if it features MyQ technology and built-in Wi-Fi.
- Remote Control: Some MyQ-enabled openers come with remotes that have a blue LED light or distinct button layout indicating MyQ compatibility.
When Built-in Wi-fi Isn’t An Option: The Myq Smart Garage Hub
If you discover that your LiftMaster opener does not have built-in Wi-Fi, don’t despair. LiftMaster offers a solution for older models: the MyQ Smart Garage Hub. This standalone device acts as a bridge, allowing you to add smart capabilities to your existing garage door opener.
The Smart Garage Hub consists of a hub that plugs into an outlet near your router and a sensor that you attach to your garage door. It communicates with your opener via radio frequency and connects to your home Wi-Fi network.
This enables you to control and monitor your garage door through the MyQ app, just as you would with a built-in Wi-Fi model. Installation of the Smart Garage Hub is generally straightforward and doesn’t require direct wiring to the opener itself.
Essential Tools And Information
Regardless of your connection method, ensure you have the following readily available:
- Your Wi-Fi Network Name (SSID) and Password: You’ll need these to connect the opener or hub to your home network.
- Smartphone or Tablet: An iOS or Android device is required to download and use the MyQ app.
- Ladder: To safely reach the motor unit of your garage door opener.
- Screwdriver: Potentially needed for mounting the Smart Garage Hub or accessing certain parts of the opener.
- Stable Wi-Fi Signal: Ensure you have a strong 2.4 GHz Wi-Fi signal in the location where your garage door opener or Smart Garage Hub will be installed. A weak signal is a common cause of connection issues.
Credit: www.youtube.com
Connecting A Liftmaster Opener With Built-in Wi-fi
For LiftMaster models that come equipped with integrated Wi-Fi, the connection process is designed to be as user-friendly as possible, primarily guided by the MyQ app.
Step 1: Download And Install The Myq App
Begin by downloading the MyQ app from your device’s app store (Apple App Store or Google Play Store). Once installed, open the app and follow the prompts to create a new account. This account will be used to manage your garage door opener and any other MyQ-enabled devices you may have. You’ll need to provide an email address and create a secure password.
Step 2: Prepare Your Garage Door Opener
Before initiating the connection within the app, you’ll need to put your garage door opener into its Wi-Fi setup mode. This process can vary slightly depending on the specific model, but generally involves pressing and holding the Program/Learn button on the motor unit.
- Locate the Program/Learn Button: This button is usually located on the back or side of the motor unit, often near the antenna and the wiring terminals. It might be accompanied by a red or orange LED light.
- Enter Setup Mode: Press and hold the Program/Learn button for approximately 10-15 seconds. The LED light next to the button should start blinking or turn solid, indicating it’s ready to be paired. Refer to your opener’s manual for the exact duration and visual cues for your specific model.
Step 3: Connect Through The Myq App
With your opener in setup mode and your MyQ account created, you can now proceed with the pairing process within the app.
- Add a Device: In the MyQ app, navigate to the option to add a new device. This is typically found under a “+” icon or a “Add Device” menu.
- Select Device Type: Choose “Garage Door Opener” or a similar option. The app will then guide you through the specific steps for connecting a LiftMaster opener.
- Connect to Wi-Fi: The app will prompt you to connect your smartphone to the opener’s temporary Wi-Fi network (often named something like “MyQ-xxxxxx”). Once connected to this network, the app will then ask you to select your home 2.4 GHz Wi-Fi network from a list and enter its password.
- Pairing Process: The opener will then attempt to connect to your home Wi-Fi network. This might take a minute or two. The LED light on the opener should change to indicate a successful connection (often solid blue or green, depending on the model).
- Device Confirmation: Once connected, the app will confirm that your garage door opener has been successfully added to your account. You may be prompted to name your opener (e.g., “Home Garage”) and set up any desired notifications.
Step 4: Test The Connection
After the setup is complete, it’s crucial to test the connection to ensure everything is working correctly.
- Open/Close Test: Use the MyQ app to open and close your garage door. Verify that the door responds promptly to your commands.
- Status Check: Ensure the app accurately reflects the current status of your garage door (open or closed).
- Notifications: If you’ve set up notifications, test them by opening or closing the door and checking if you receive alerts on your smartphone.
In my experience, the most common hiccup during this process is an incorrect Wi-Fi password entry or a weak Wi-Fi signal. Double-checking these can save a lot of troubleshooting time.

Credit: www.youtube.com
Installing And Connecting The Myq Smart Garage Hub
For homeowners with older LiftMaster openers that lack built-in Wi-Fi, the MyQ Smart Garage Hub is an excellent alternative. It provides the same smart functionality without requiring a complete opener replacement.
What’s In The Box?
The MyQ Smart Garage Hub kit typically includes:
- The MyQ Smart Garage Hub unit.
- A Door Sensor with mounting hardware.
- A Power Adapter for the hub.
- An Ethernet Cable (optional for initial setup, though Wi-Fi is the primary connection method).
- An Installation Manual.
Step 1: Position The Smart Garage Hub
The hub needs to be placed within range of your home’s Wi-Fi router and also within radio range of your garage door opener’s motor unit.
- Near the Router: For the initial setup and to ensure a strong Wi-Fi connection, it’s often best to temporarily place the hub near your Wi-Fi router.
- Garage Proximity: Once configured, you’ll mount the hub in your garage, typically on a ceiling joist or wall, ensuring it can reliably communicate with the opener. Avoid placing it near metal objects that could interfere with the signal.
Step 2: Install The Door Sensor
The door sensor is a small device that attaches to your garage door and communicates its open/closed status to the hub.
- Placement: Clean the surface of your garage door where you intend to mount the sensor. It’s usually placed on the top panel of the door, near the edge.
- Mounting: Use the provided adhesive strips or screws to securely attach the sensor. Ensure the sensor is positioned correctly relative to the hub so they can communicate. The instructions will specify the optimal alignment.
Step 3: Connect The Hub To Power And Network
- Power Up: Plug the power adapter into the Smart Garage Hub and then into a nearby electrical outlet.
- Wi-Fi Connection: The hub is designed to connect wirelessly to your home’s 2.4 GHz Wi-Fi network. Follow the instructions in the MyQ app to connect the hub. This typically involves putting the hub into pairing mode (often by pressing a button on the hub) and then using the app to select your Wi-Fi network and enter the password.
- Note: Some users find it easier to connect the hub via Ethernet cable to the router for the initial setup and then switch to Wi-Fi later, or if Wi-Fi setup proves difficult.
Step 4: Pair The Hub With Your Garage Door Opener
This is the crucial step where the Smart Garage Hub learns to communicate with your existing LiftMaster opener.
- Initiate Pairing in the App: Within the MyQ app, after setting up the hub, you’ll be guided to pair it with your garage door opener.
- Press Learn Button on Opener: You will likely be instructed to press the Learn button on your garage door opener’s motor unit. The specific color of the Learn button (often yellow, red, orange, or green) matters for LiftMaster openers. Follow the app’s precise instructions for your opener’s button color.
- Confirmation: The hub and opener will communicate. Once successful, the app will confirm the pairing, and the door sensor’s status will begin to appear in the app.
Step 5: Test And Mount The Hub
- Test Functionality: Before permanently mounting the hub, test the open/close functionality and status reporting through the MyQ app.
- Final Mounting: Once you’ve confirmed everything works, mount the Smart Garage Hub securely in its designated location in the garage, ensuring optimal communication range with both your Wi-Fi router and the opener.
Optimizing Your Wi-fi Connection For The Garage
A reliable Wi-Fi connection is paramount for the smooth operation of your smart garage door opener. Garages can present unique challenges due to their distance from the router and potential interference from building materials.
Understanding Wi-fi Signal Strength
Most smart garage door openers and hubs operate on the 2.4 GHz Wi-Fi band. While this band offers better range and penetration through walls compared to the 5 GHz band, it can also be more susceptible to interference from other devices like microwaves, cordless phones, and Bluetooth devices.
- Signal Strength Measurement: You can use various apps on your smartphone to measure Wi-Fi signal strength in the location of your garage opener. Look for a signal strength of at least -70 dBm for a stable connection, with -60 dBm or better being ideal.
- Interference: Be aware of potential sources of interference within or near the garage.
Strategies For Improving Wi-fi Signal In The Garage
If you’re experiencing weak or intermittent connections, consider these strategies:
- Relocate Your Router: If possible, move your Wi-Fi router closer to the garage. Even a few feet can make a significant difference.
- Use a Wi-Fi Extender or Mesh System: A Wi-Fi extender (also known as a repeater) can rebroadcast your Wi-Fi signal, extending its reach into the garage. A more robust solution is a mesh Wi-Fi system, which uses multiple nodes placed strategically throughout your home to provide seamless coverage, including areas like the garage.
- Consider a Wired Connection (for Hubs): If you’re using the MyQ Smart Garage Hub and have the ability to run an Ethernet cable from your router to the garage, a wired connection to the hub can provide the most stable and reliable internet access.
- Check Opener/Hub Placement: Ensure the opener’s Wi-Fi antenna (if applicable) or the Smart Garage Hub is positioned for optimal signal reception. Avoid placing them directly next to large metal objects.
- Upgrade Your Router: Older routers may not provide the strongest or most efficient signal. Upgrading to a newer router, especially one that supports the latest Wi-Fi standards (like Wi-Fi 6), can improve overall network performance.
Using The Myq App: Features And Benefits
Once your LiftMaster opener is connected to Wi-Fi, the MyQ app becomes your central command center for managing your garage. It offers a range of features designed for convenience and security.
Remote Monitoring And Control
- Open/Close Door: The primary function allows you to open or close your garage door from anywhere with an internet connection. This is invaluable if you forget to close the door or need to grant temporary access to a family member or service provider.
- Check Door Status: The app provides real-time updates on whether your garage door is open or closed, offering peace of mind.
Security And Alerts
- Customizable Notifications: You can set up alerts to notify you when the garage door is opened, closed, or left open for a certain period. This helps enhance security and prevent unauthorized access.
- Activity Log: The app typically maintains a log of all door activity, allowing you to review who operated the garage door and when.
User Management
- Grant Access: You can grant access to your garage door opener to other users (family members, trusted friends) via the MyQ app. Each user will need their own MyQ account, and you can assign specific permissions. This eliminates the need to share physical remotes.
Integration With Smart Home Ecosystems
- Voice Control: Many MyQ-enabled openers and hubs can integrate with popular smart home platforms like Amazon Alexa and Google Assistant. This allows you to open or close your garage door using voice commands, adding another layer of convenience. You’ll typically need to link your MyQ account within the respective smart home app (e.g., Alexa app, Google Home app).
- IFTTT: The MyQ app also supports integration with IFTTT (If This Then That), enabling you to create custom automations. For example, you could set up a recipe that automatically closes your garage door when your phone’s location indicates you’ve left home.
Potential Subscription Fees
It’s important to note that while basic functionality like remote control and status checks are usually free, some advanced features or extended monitoring capabilities within the MyQ app might require a subscription. LiftMaster occasionally updates its service offerings, so it’s wise to check the current terms and conditions for any associated fees.
For example, some features like extended history logs or advanced alerts may fall under a premium tier.
Troubleshooting Common Connectivity Issues
Even with the best setup, you might encounter problems connecting your LiftMaster opener to Wi-Fi or maintaining a stable connection. Here are some common issues and their solutions:
Issue 1: Opener/hub Fails To Connect To Wi-fi
- Incorrect Password: The most frequent culprit. Double-check that you’ve entered your Wi-Fi password correctly, paying attention to case sensitivity.
- Wrong Wi-Fi Band: Ensure you are connecting to a 2.4 GHz network. Many routers broadcast both 2.4 GHz and 5 GHz bands. The opener/hub may not support 5 GHz. Try temporarily disabling the 5 GHz band on your router during setup if you have trouble distinguishing them.
- Weak Wi-Fi Signal: As discussed earlier, a weak signal is a major cause of connection failure. Move the hub closer to the router, use an extender, or reposition the opener’s antenna if it has one.
- Router Settings: Some advanced router settings, like MAC address filtering or firewalls, might block new devices. Temporarily disable these settings to test the connection, then re-enable them and add the opener’s MAC address (usually found on the device) to your router’s allowed list if necessary.
- App Glitch: Close and reopen the MyQ app, or even restart your smartphone.
Issue 2: Intermittent Connection Or Unresponsive Opener
- Signal Fluctuation: This often points to a weak or unstable Wi-Fi signal. Implement the signal improvement strategies mentioned previously.
- Router Overload: If your router is handling too many devices, it might become sluggish. Try restarting your router.
- Interference: Identify and mitigate potential sources of wireless interference near the opener or hub.
- Opener/Hub Firmware: Ensure your opener or Smart Garage Hub has the latest firmware updates. These are usually applied automatically but can sometimes be manually checked or updated via the MyQ app.
Issue 3: Door Sensor Not Reporting Status Accurately
- Sensor Battery: The door sensor has a battery. If it’s low or dead, it won’t communicate properly. Replace the battery (usually a coin cell like a CR2032).
- Sensor Alignment: Ensure the sensor is correctly positioned relative to the hub’s antenna. Refer to the installation guide for optimal placement.
- Obstructions: Make sure nothing is physically blocking the signal path between the sensor and the hub.
Issue 4: App Not Showing Correct Door Status
- Sync Issue: Sometimes the app might be out of sync with the opener. Try refreshing the app or closing and reopening it.
- Connectivity Loss: If the opener lost its Wi-Fi connection, the app won’t receive updates. Address the underlying connectivity issue.
Resetting Your Connection
If all else fails, you may need to reset your LiftMaster opener’s Wi-Fi settings or the Smart Garage Hub.
- Opener Reset: This usually involves pressing and holding the Program/Learn button for an extended period (e.g., 30 seconds) until the indicator lights behave in a specific way. Consult your opener’s manual for the exact procedure. This will erase all programmed remotes and Wi-Fi settings, requiring you to re-program them. You can find guidance on how to reset your LiftMaster opener remotely at this link.
- Hub Reset: The Smart Garage Hub typically has a reset button, often recessed, requiring a paperclip to press. Holding this button for a specified duration will reset the hub to factory defaults.
Remember to always consult your specific LiftMaster model’s user manual for detailed instructions, as procedures can vary.