
Securing your home involves more than just locking doors; it extends to the often-overlooked entry point of your garage. Your garage door opener is a sophisticated piece of technology, but its convenience can become a security vulnerability if not managed properly. Over time, or when transferring ownership of a vehicle, it becomes crucial to erase garage door opener codes from your car. This process ensures that only authorized individuals can access your garage, preventing potential break-ins and safeguarding your property.
Many modern vehicles come equipped with built-in universal garage door opener systems, like HomeLink or similar technologies. These systems are designed to be programmed with the unique signals from your garage door opener, allowing you to open and close your garage with the press of a button on your dashboard or visor. However, when you sell your car, move out of a house, or simply want to enhance your security, clearing these stored codes is a vital step. Failure to do so could inadvertently grant access to the new owner of your vehicle or to anyone who might gain access to your old car. This guide will walk you through the essential steps to erase garage door opener codes from your car, ensuring your home remains secure.
Key Takeaways
- Security is Paramount: Erasing old garage door opener codes from your car is a critical security measure to prevent unauthorized access.
- Built-in Systems: Most modern cars have integrated systems like HomeLink that store opener codes.
- Types of Erasure: Codes can typically be erased from individual buttons or the entire system.
- Vehicle-Specific Procedures: The exact method varies by car manufacturer and the specific system installed.
- Consult Your Manual: The owner’s manual is the definitive guide for your vehicle’s system.
- When to Erase: Always erase codes when selling a car, moving, changing your opener, or if a remote is lost.
- Troubleshooting: If standard methods fail, professional assistance or contacting the manufacturer may be necessary.

Credit: raynor.com
Understanding Built-in Garage Door Opener Systems
Modern vehicles often feature integrated garage door opener systems, the most common being HomeLink. These systems are designed for convenience, allowing drivers to program their car’s buttons to operate their garage door, gate, or even home lighting. This eliminates the need for multiple remote controls. These systems work by learning the radio frequency (RF) signal emitted by your existing garage door remote. When you press a button in your car, it replicates that signal, communicating with your garage door opener motor.
The HomeLink system, for instance, typically consists of three or four buttons located on the visor, rearview mirror, or dashboard. Each button can be programmed to a different device. The programming process usually involves a synchronization step with your garage door opener’s Learn button (often found on the motor unit itself) to establish a secure connection. Understanding that your car is essentially storing and transmitting a specific RF signal is key to appreciating why clearing these codes is so important for security. If these codes are not erased, the new owner of the vehicle could potentially gain access to your garage.
How Universal Garage Door Opener Systems Work
Universal garage door opener systems, such as HomeLink, operate by mimicking the signals from your existing garage door remote. The process typically involves:
- Locating the Buttons: Identifying the programmable buttons within your vehicle. These are often marked with icons resembling a garage door or a house.
- Clearing Existing Codes: This is the first step in programming a new code or ensuring old ones are removed.
- Training the System: Holding your original garage door remote near the vehicle’s buttons and pressing both simultaneously. The car’s system learns the remote’s signal.
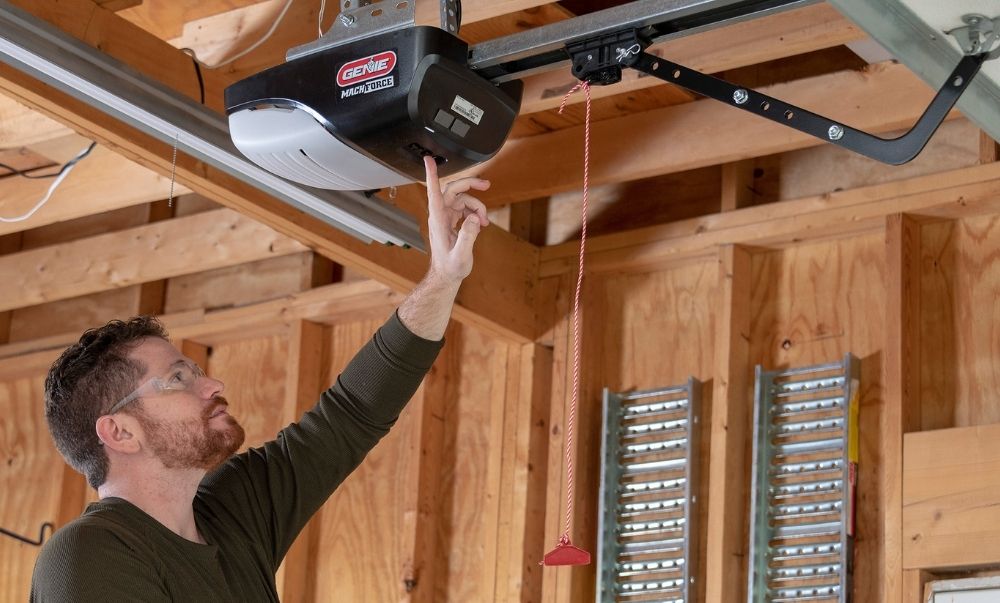
- Synchronizing with the Opener: For rolling code systems (most common for security), you’ll need to press the Learn button on your garage door opener motor unit and then press the programmed car button within a short timeframe to complete the pairing.
The data transmitted is a specific radio frequency signal. When you erase these codes, you are essentially instructing the vehicle’s system to forget those specific signals, rendering the buttons inactive for controlling your previous garage door opener.
The Importance Of Erasing Codes
The primary reason for erasing garage door opener codes from your car is security. Consider the following scenarios where this becomes critical:
- Selling or Trading In Your Vehicle: This is the most common and crucial reason. If you don’t erase the codes, the new owner will have the ability to open your garage door, potentially accessing your home and belongings.
- Losing a Car Key or Remote: While less common for built-in systems, if a physical key fob with integrated opener functionality is lost, erasing the associated codes from the car is a good preventive measure.
- Moving Out of a Property: If you’re moving and taking your garage door opener system with you, or installing a new one, it’s essential to clear any codes linked to the old system from your vehicle.
- Changing Your Garage Door Opener: If you upgrade or replace your garage door opener unit, its rolling codes will change. Any codes stored in your car will no longer work, but for security, it’s still wise to clear them.
- Concerns About Unauthorized Access: If you have any reason to believe your vehicle’s codes might have been compromised, erasing them is a proactive security step.
In my experience, many people overlook this simple but vital step when selling a car, unknowingly leaving a security gap. The process is usually straightforward, and taking a few minutes can save significant potential trouble.
Credit: store.geniecompany.com
Erasing Codes From Homelink Systems
HomeLink is a widely adopted integrated garage door opener system found in millions of vehicles. The process to erase codes from a HomeLink system is generally consistent across most manufacturers that use it, though minor variations may exist. The system typically allows for two types of erasure: erasing all programmed buttons at once, or erasing individual buttons.
Erasing All Programmed Homelink Buttons
This is the most comprehensive method and is recommended when selling a car or if you want to start fresh.
Steps:
- Turn on the Ignition: Place the key in the ignition and turn it to the Accessory (ACC) or ON position. Do not start the engine.
- Locate the HomeLink Buttons: Find the HomeLink buttons, usually on the rearview mirror, overhead console, or visor.
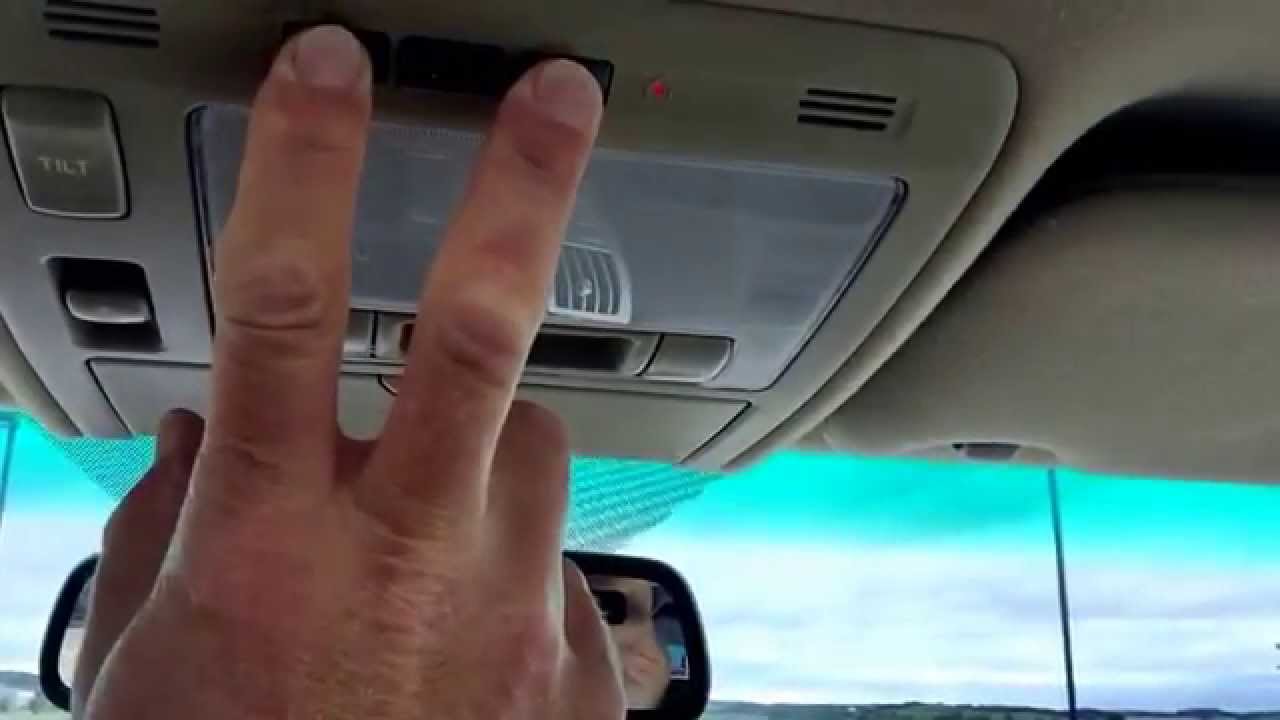
- Press and Hold the Two Outer Buttons: Simultaneously press and hold the first and third HomeLink buttons.
- Observe the Indicator Light: Continue holding the buttons for approximately 10-20 seconds. The HomeLink indicator light will typically flash slowly at first and then rapidly.
- Release the Buttons: Once the indicator light flashes rapidly, release both buttons. This action signals that all previously programmed channels have been cleared.
- Test the Buttons: Briefly press each HomeLink button. The indicator light should not illuminate, or it should flash rapidly, indicating no signal is being transmitted.
Example: On a 2020 Toyota Camry with HomeLink, you would follow these exact steps. The overhead console buttons would be pressed until the rapid flashing is observed.
Erasing A Single Homelink Button
If you only want to remove the code for a specific garage door and keep others programmed, you can erase individual buttons.
Steps:
- Turn on the Ignition: Ensure the car’s ignition is in the Accessory (ACC) or ON position.
- Locate the HomeLink Button to Erase: Identify the specific button that is programmed to the opener you wish to disconnect.
- Press and Hold the Target Button: Press and hold the single HomeLink button you wish to erase.
- Observe the Indicator Light: Hold the button for about 10-20 seconds. The indicator light will flash rapidly, indicating the code for that specific button has been cleared.
- Release the Button: Release the button.
- Test the Button: Press the button briefly. It should no longer activate your garage door opener.
Pro Tip: Erasing all buttons is generally the safest bet when selling a vehicle to ensure no residual codes remain.
Credit: www.youtube.com
Erasing Codes From Other Built-in Systems
While HomeLink is the most prevalent, other vehicle manufacturers may use their own proprietary systems or variations of universal openers. The fundamental principle of clearing codes remains the same: initiating a system reset. Always refer to your vehicle’s owner’s manual for the most accurate and specific instructions.
Generic System Reset Procedures
Many systems, even if not explicitly branded as HomeLink, follow a similar reset pattern. This often involves pressing and holding a combination of buttons until an indicator light changes or flashes.
Common Steps:
- Ignition ON: Turn the vehicle’s ignition to the ACC or ON position.
- Button Combination: Press and hold specific buttons (often the outer buttons of the programmed set) for an extended period (e.g., 15-30 seconds).
- Indicator Confirmation: Look for a visual cue like a flashing LED or a message on the dashboard display confirming the reset.
Manufacturer-specific Systems
Some automakers integrate their own systems or partner with different technology providers. For example:
- Ford: Ford vehicles often use HomeLink, but older models might have different integrated systems.
- GM: General Motors vehicles also commonly feature HomeLink.
- Chrysler/Dodge/Jeep/Ram: These brands frequently utilize HomeLink.
If your vehicle doesn’t appear to have HomeLink, consult your owner’s manual. It will detail the location of the buttons and the specific procedure for clearing any stored codes. You might find the buttons integrated into the rearview mirror, the overhead console, or even the dashboard itself.
Example: If you have a vehicle with an older integrated system, the process might involve pressing and holding three buttons for 30 seconds until the light flashes. Always verify with your manual.
Erasing Codes From Aftermarket Remote Starters And Controllers
Beyond integrated vehicle systems, many drivers install aftermarket remote start systems or standalone garage door controllers. These devices also store codes and require a specific procedure for erasure. The method will depend entirely on the brand and model of the aftermarket device.
General Steps For Aftermarket Devices
- Identify the Device: Determine the brand and model of your aftermarket remote starter or garage door controller. This information is usually found on the unit itself or in its documentation.
- Locate the Programming/Reset Button: Most aftermarket devices have a physical button for programming or resetting. This might be on the main control module, often located under the dashboard, or on a separate receiver unit.
- Consult the Manual: The manufacturer’s installation manual or user guide is the most reliable source for erasure instructions. These manuals are often available online on the manufacturer’s website.
- Initiate the Reset: Follow the manual’s instructions, which typically involve pressing and holding the programming button for a specific duration, sometimes while toggling the vehicle’s ignition or pressing other buttons.
- Confirmation: The device will usually provide an indicator (e.g., flashing LEDs, beeping sounds) to confirm the codes have been erased.
Example: A common aftermarket brand is Viper. To reset a Viper alarm/remote start system, you might need to press and hold a valet button while turning the ignition key. The specific sequence varies by model.
Importance Of Documentation
For aftermarket systems, keeping the installation manual is crucial. If you no longer have it, searching online for “[Brand Name] [Model Number] manual” or “[Brand Name] [Model Number] erase codes” should yield results. Without the correct manual, erasing codes can be challenging, and in some cases, you might need to contact the manufacturer’s technical support.
Troubleshooting Common Issues
Even with clear instructions, you might encounter problems when trying to erase garage door opener codes from your car. Common issues often stem from incorrect procedures, system glitches, or interference.
Codes Not Erasing
- Incorrect Button Press: Ensure you are pressing the correct buttons simultaneously and holding them for the specified duration. For HomeLink, it’s crucial to hold them until the rapid flashing occurs.
- Ignition Position: Double-check that the ignition is in the ACC or ON position, not OFF or fully START.
- System Glitch: Sometimes, the system might need a power cycle. Try turning the ignition off, waiting a minute, and then trying the erasure process again.
- Interference: Strong radio frequency interference in the area could potentially disrupt the process. Try performing the reset in a different location, away from other RF devices.
Buttons Still Seem To Work
- Incomplete Erasure: You might have only erased some of the codes, or the system didn’t fully register the erasure. Repeat the full system reset procedure.
- Multiple Systems: If your vehicle has multiple integrated opener systems or you have aftermarket devices, ensure you are targeting the correct one.
- Opener Malfunction: In rare cases, the garage door opener itself might be malfunctioning and not responding correctly, making it seem like the car’s codes weren’t erased.
When To Seek Professional Help
If you’ve followed all the steps in your owner’s manual and are still unable to erase the codes, consider these options:
- Dealership: Your car dealership’s service department can assist with integrated systems. They have access to specific technical bulletins and tools.
- Professional Installer: If it’s an aftermarket system, contact the company that installed it or a reputable car electronics installer.
- Manufacturer Support: Contact the customer support for either your vehicle manufacturer or the garage door opener manufacturer.
Example: If you have a 2018 Honda CR-V and are having trouble with its HomeLink system, a call to a local Honda dealership’s service department can often resolve the issue quickly. They are familiar with the specific programming nuances of their vehicles.
Reprogramming After Erasure
Once you have successfully erased the old codes, you will likely need to program new ones, especially if you are setting up the system to work with a new garage door opener or a different remote. The reprogramming process is essentially the reverse of erasure and involves training your car’s system to recognize your current garage door opener’s signal.
Reprogramming A Homelink System
The process for reprogramming a HomeLink system is similar to the initial setup.
- Turn on Ignition: Place the key in the ignition and turn it to ACC or ON.
- Select a HomeLink Button: Choose an unprogrammed HomeLink button you wish to use.
- Begin Training: Press and hold the chosen HomeLink button while holding your original garage door remote about 1-3 inches away from the HomeLink buttons.
- Observe Indicator: The HomeLink indicator light will likely change from steady to flashing.
- Synchronize with Opener (Rolling Codes):
- Press the Learn button on your garage door opener motor unit. You typically have 30 seconds to complete the next step.
- Immediately return to your car and press and hold the programmed HomeLink button for 2-3 seconds.
- Release the button.
- Your garage door opener should now be programmed to that HomeLink button. If it doesn’t work, repeat the synchronization step, as some systems require a second press.
- Test: Press the programmed HomeLink button to ensure it opens and closes your garage door.
Note: For fixed code systems, the synchronization step (pressing the Learn button on the opener) is not required.
Reprogramming Aftermarket Systems
Reprogramming aftermarket systems varies greatly by manufacturer. Always refer to the specific device’s manual. Generally, it involves:
- Locating the Programming Button: Find the designated button on the control module or receiver.
- Initiating Programming Mode: Often, this involves pressing and holding the button, sometimes in conjunction with the vehicle’s ignition or other actions.
- Transmitting the Signal: Pressing the button on your new garage door remote (or the button you want to associate with the opener) while the aftermarket system is in programming mode.
- Confirmation: The system will typically indicate success with an LED flash or beep.
Example: To reprogram a Chamberlain garage door opener remote to a car’s system, you would typically use the learning process described for HomeLink, ensuring the Chamberlain remote is functional and within range. For instructions on reprogramming a specific keypad, you might consult a guide like How to Reprogram Genie Garage Door Keypad in Minutes.
Data Comparison: Integrated Vs. Standalone Garage Door Remotes
While integrated systems offer convenience, understanding their differences and potential issues compared to traditional remotes is helpful.
| Feature | Integrated Vehicle System (e.g., HomeLink) | Standalone Garage Door Remote |
|---|---|---|
| Convenience | High; no extra fobs to carry. | Moderate; requires carrying a separate remote. |
| Programming | Can be complex, especially with rolling codes; requires car ignition access. | Generally simpler, often just pressing a learn button. |
| Security | Good with rolling codes; requires diligent code erasure upon vehicle sale. | Varies; rolling codes offer better security than fixed codes. |
| Loss/Theft | Erasing codes from the car is crucial; replacing integrated unit is expensive. | Easier to replace; security risk if not deactivated/reprogrammed. |
| Compatibility | Wide compatibility, but older fixed-code systems may not work with newer car systems. | Specific to opener brand/model, or universal models available. |
| Cost | Included with vehicle purchase; expensive to replace/repair. | Relatively inexpensive to purchase replacements. |
Integrated systems offer a sleek, convenient solution, but the responsibility of erasing codes when selling a vehicle shifts from managing a small remote to ensuring the car’s system is cleared. This is a critical difference in ownership responsibility.
Frequently Asked Questions
How Do I Know If My Car Has A Built-in Garage Door Opener System?
Most vehicles equipped with integrated garage door opener systems will have visible buttons on the rearview mirror, overhead console, or dashboard. These buttons often have icons resembling a garage door or a house. The most common system is HomeLink, and you can usually find references to it in your owner’s manual.
If you’re unsure, check your vehicle’s manual or search online for “[Your Car Make and Model] built-in garage door opener. “
Do I Need To Erase Codes If I’m Just Changing My Garage Door Opener?
Yes, it’s highly recommended. When you change your garage door opener, the rolling codes it uses will change. Any codes stored in your car will no longer work with the new opener. However, for security purposes, you should still erase the old codes from your car’s system to prevent any potential accidental activation or residual signals that could be exploited. Then, you’ll need to reprogram the car’s buttons to work with your new opener.
What Happens If I Don’t Erase The Codes Before Selling My Car?
If you don’t erase the codes, the new owner of your vehicle will be able to open your garage door simply by pressing the programmed buttons in the car. This poses a significant security risk, as they could gain unauthorized access to your home.
It’s a critical step in the process of selling or transferring vehicle ownership.
Can I Erase Codes From My Car Without The Original Remote?
Yes, you can erase codes from your car’s integrated system (like HomeLink) without the original garage door remote. The erasure process is a function of the car’s system itself and doesn’t require communication with the opener during the erasure phase. You only need the original remote (or proximity to the opener’s learn button) when you are programming new codes.
How Often Should I Check And Erase Garage Door Opener Codes?
You should perform a code erasure whenever the circumstances change regarding who should have access to your garage. This includes:
- Selling or trading in your vehicle.
- Giving the vehicle to a family member who is not authorized to access your garage.
- Moving out of a home with a garage door opener.
- Changing your garage door opener unit.
- If you lose a car key or remote that has garage opener functionality.
Regularly reviewing who has access is good security practice. For integrated systems, the most critical time is when the car leaves your possession.
Ensuring your garage door opener codes are properly managed is a fundamental aspect of home and vehicle security. Whether you’re using a built-in system like HomeLink or an aftermarket device, taking the time to erase old codes is a small effort that provides significant peace of mind.
By following the manufacturer’s guidelines for your specific vehicle and opener system, you can maintain control over who accesses your garage and protect your property effectively. Remember, proactive security measures are always the most effective.