
Reprogramming your Overhead Door garage door opener is a common task that can become necessary for various reasons, from setting up a new remote or keypad to troubleshooting connection issues. While the brand “Overhead Door” is a well-respected name in the industry, their openers, like most electronic devices, may require periodic recalibration. Understanding the process for reprogramming an Overhead Door garage door opener can save you time and the expense of calling a technician.
The primary reasons for needing to reprogram your opener usually involve security concerns, such as a lost or stolen remote, or simply wanting to add new access devices. It’s also a good troubleshooting step if your existing remotes or keypads are no longer communicating with the opener unit.
The underlying technology in most modern garage door openers relies on radio frequency signals that are paired with a specific receiver in the opener unit. When this pairing is disrupted or needs to be updated, reprogramming becomes essential. This guide will walk you through the general procedures, highlighting common methods and considerations for Overhead Door systems, ensuring you can regain control of your garage access with confidence.
Key Takeaways
- Safety First: Always disconnect power to the opener before beginning any reprogramming, and ensure the garage door is in a safe, open position.
- Identify Your Model: Different Overhead Door models have slightly different reprogramming procedures, so knowing your specific opener’s model number is crucial.
- Remote and Keypad Pairing: The most common reprogramming tasks involve pairing new or existing remotes and keypads to the opener’s receiver.
- Learn Button Location: The “Learn” or “Program” button on the opener motor unit is central to most reprogramming sequences.
- Clear and Re-Add: Often, reprogramming involves clearing all existing codes and then re-adding each desired remote or keypad individually.
- Troubleshooting: If standard reprogramming fails, check battery levels, ensure no other devices are interfering with the signal, and consult the owner’s manual.
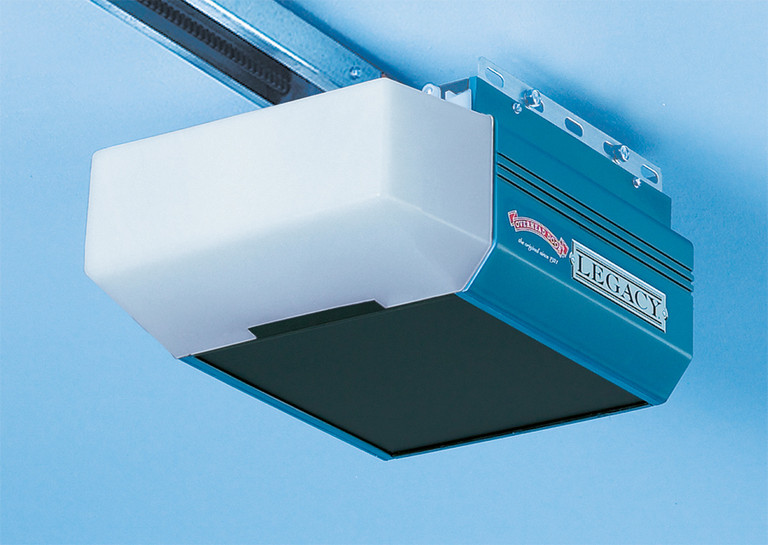
Credit: overheaddoorpartsonline.com
Understanding Your Overhead Door Opener
Before diving into the reprogramming process, it’s essential to have a basic understanding of how your Overhead Door opener works and what components are involved. Garage door openers are essentially radio transmitters (remotes and keypads) and a radio receiver (located in the motor unit).
The system relies on a unique code that the transmitter sends, which the receiver recognizes and acts upon. Over time, or due to security concerns, this code may need to be reset or updated.
Components Of An Overhead Door System
An Overhead Door garage door opener system typically consists of a few key parts relevant to reprogramming:
- Motor Unit: The main unit mounted on the ceiling, containing the motor, logic board, and receiver. This is where the “Learn” button is usually located.
- Remote Control: The handheld transmitter you use from your vehicle.
- Keypad: An external device, typically mounted near the garage door, that allows entry using a PIN code.
- Logic Board: The “brain” of the opener, which processes signals from remotes and keypads and controls the door’s movement.
Why Reprogramming Is Necessary
There are several common scenarios that necessitate reprogramming your Overhead Door opener:
- Lost or Stolen Remote/Keypad: For security reasons, if a remote or keypad is lost or stolen, you must clear all existing codes and re-program only the devices you still possess. This prevents unauthorized access.
- Adding New Devices: When you purchase new remotes or keypads, they need to be programmed to communicate with your specific opener.
- Replacing Batteries: Sometimes, after replacing batteries in a remote or keypad, the device may lose its programming and require re-pairing.
- Opener Malfunction: If your opener is not responding to any remotes or keypads, a full reset and reprogramming can often resolve communication issues.
- Security Updates: While less common for typical home users, some advanced systems might have periodic security updates requiring reprogramming.
Identifying Your Overhead Door Model
Overhead Door offers a range of opener models, and the exact location of the “Learn” button and specific programming sequences can vary. To ensure you follow the correct procedure, it’s crucial to identify your opener model.
- Check the Motor Unit: Look for a label on the side or back of the motor unit that displays the model number.
- Consult Your Manual: If you still have the owner’s manual, it will clearly state your model number and provide specific programming instructions.
- Online Resources: If you can’t find the label or manual, you can often identify your opener by its appearance on the Overhead Door website or by contacting their customer support with a description of your unit.
General Reprogramming Steps For Overhead Door Openers
While specific instructions can vary by model, most Overhead Door garage door openers follow a general pattern for reprogramming. This usually involves accessing a “Learn” button on the motor unit and then activating the device you wish to program.
Safety Precautions Before You Begin
Safety is paramount when working with garage door openers. The garage door mechanism is heavy and can cause serious injury if not handled correctly.
- Disconnect Power: Unplug the garage door opener from the electrical outlet. This prevents accidental activation while you are working.
- Secure the Door: If the garage door is open, ensure it is stable and won’t fall. If it’s closed, you might need to disengage the opener to move it manually if necessary, but for most reprogramming, keeping it in a stable position is fine. Refer to your manual for how to manually open a garage door if needed.
- Clear the Area: Make sure no one, including children or pets, is in the path of the garage door.
Locating The “learn” Button
The “Learn” button is the gateway to reprogramming your opener. Its location and appearance can differ slightly depending on your Overhead Door model.
- Common Locations: The Learn button is typically found on the motor unit that hangs from the ceiling. It’s often located near the antenna wire, on the back panel, or under a light cover.
- Appearance: It’s usually a small, colored button (often red, orange, green, or purple) accompanied by an LED indicator light.
- Example: On many Legacy® 800 or Destiny® 1200 series openers, the Learn button and its indicator light are located on the back panel of the motor unit.
Clearing Existing Codes
Before programming new remotes or keypads, it’s often best practice to clear all previously stored codes. This ensures that any old or lost devices are no longer recognized by the opener, enhancing security.
- Press and Hold the Learn Button: Locate the Learn button on your motor unit.
- Observe the LED: Press and hold the Learn button for approximately 10-30 seconds. The indicator light next to it will typically blink or turn off after a few seconds, indicating that the memory has been cleared.
- Release the Button: Release the button once you see the indicator light change.
- Test: Try pressing your existing remote buttons. They should no longer operate the garage door.
Programming A Remote Control
Once the codes are cleared, you can begin programming your remote controls.
- Press and Release the Learn Button: Briefly press and release the Learn button on the motor unit. The LED indicator light should illuminate.
- Press the Remote Button: Within 30 seconds, press and hold the button on your remote control that you wish to use to open/close the garage door.
- Observe the Opener: The opener’s lights may flash, or the opener may make a clicking sound, indicating that the remote has been successfully programmed.
- Test the Remote: Release the remote button and press it again. The garage door should now operate.
- Repeat for Other Remotes: If you have additional remotes, repeat steps 1-4 for each one, using a different button on the remote if desired, or programming a separate button for each remote.
Programming A Keypad
The process for programming an external keypad is similar to programming a remote.
- Press and Release the Learn Button: As before, press and release the Learn button on the motor unit. The LED indicator light will illuminate.
- Enter Your PIN on the Keypad: Within 30 seconds, enter your desired 4-digit PIN code on the keypad and press the Enter or Program button (the specific button may vary by keypad model).
- Enter Your PIN Again: The keypad will likely prompt you to enter the PIN again to confirm.
- Observe the Opener: Similar to remote programming, the opener’s lights may flash or click to confirm successful programming.
- Test the Keypad: Press the Enter or Program button on the keypad again. The garage door should operate.

Credit: overheaddoorkansascity.com
Advanced Reprogramming And Troubleshooting
Sometimes, the basic programming steps might not be enough, or you might encounter issues. Understanding advanced techniques and common troubleshooting tips can help resolve these problems.
Models With Dip Switches
Older Overhead Door models, and some other brands like LiftMaster or Craftsman, utilize DIP (Dual In-line Package) switches for programming. These are small switches inside the motor unit or on the remote itself that are set in a specific pattern to create a code.
- Locating DIP Switches: On the motor unit, they are often found under a light cover or on the back panel. On remotes, they are usually accessible by removing a battery cover.
- Matching the Code: To program a remote with DIP switches, you need to set the switches on the remote to match the pattern of the switches on the motor unit’s receiver board.
- Procedure:
- Ensure power is off to the opener.
- Locate the DIP switches on the motor unit and note their on/off pattern.
- Open the remote and set its DIP switches to match the motor unit’s pattern exactly.
- Replace the battery cover and plug the opener back in.
- Test the remote.
If you’re reprogramming a remote with DIP switches, you might also need to adjust the DIP switches on the opener’s receiver board if you’re changing the code for security reasons. This is a more involved process and requires careful attention to detail.
For most modern systems, rolling codes are used, which do not rely on DIP switches.
Reprogramming For Security Rolling Code (code Dodger®)
Many modern Overhead Door openers use Security+® or Code Dodger® technology. This system uses a rolling code that changes each time the remote is used, significantly enhancing security by preventing code grabbing.
When programming these systems, the process is generally as described in the “General Reprogramming Steps” section, focusing on the Learn button. The rolling code aspect means that the receiver “learns” the unique rolling code sequence of the remote, rather than a static code.
- Example: If you lose a remote for a Code Dodger® system, clearing the codes from the motor unit is essential. Then, you would reprogram your remaining remotes. The system automatically handles the rolling code sequence once the initial pairing is complete.
Troubleshooting Common Issues
Even with the correct procedure, you might run into problems. Here are some common issues and their solutions:
- Opener Not Responding:
- Check Power: Ensure the opener is plugged in and the circuit breaker hasn’t tripped.
- Check Batteries: Replace batteries in the remote or keypad. Low batteries are a frequent culprit.
- Antenna: Make sure the antenna wire on the motor unit is hanging down freely and is not damaged.
- Interference: Other radio frequency devices (like certain wireless doorbells or baby monitors) can sometimes interfere with the opener’s signal. Try to move such devices if possible.
- Remote Works Intermittently:
- Range: You might be too far from the opener. Try moving closer.
- Obstructions: Large metal objects between the remote and the opener can block the signal.
- Battery: Even if not completely dead, a weak battery can cause intermittent issues.
- Keypad Not Working:
- PIN Entry: Ensure you are entering the correct PIN.
- Battery: Keypads use batteries; replace them if they are low.
- Weather Damage: Outdoor keypads can be susceptible to water damage or extreme temperatures.
- Opener Lights Flash, But Door Doesn’t Move: This often indicates a safety sensor issue. Check that the safety sensors at the bottom of the door tracks are aligned and unobstructed. Refer to your manual for troubleshooting these sensors.
Resetting The Opener’s Memory
In some cases, a complete factory reset of the opener’s memory might be necessary. This is typically a more drastic step than just clearing codes.
- Procedure: The exact method for a full memory reset varies significantly by model. It often involves a specific sequence of button presses on the motor unit or accessing a diagnostic menu if available.
- Consult Manual: Always refer to your Overhead Door opener’s specific owner’s manual for instructions on how to perform a full memory reset. Incorrectly attempting a reset could potentially damage the logic board.
- When to Use: This is usually a last resort if standard reprogramming and troubleshooting fail.

Credit: www.ohdconcord.com
Comparing Programming Methods Across Brands
While this guide focuses on Overhead Door openers, it’s helpful to understand how their programming methods compare to other major brands like Chamberlain, LiftMaster, and Genie. Most modern openers from these brands use a similar “Learn” button and rolling code technology.
Key Differences In Programming
| Feature | Overhead Door | Chamberlain | LiftMaster | Genie |
|---|---|---|---|---|
| **Learn Button** | Usually colored (red, orange, green, purple) | Often purple, yellow, or green | Often purple, yellow, or green | Typically a “Smart Set” button or Learn button |
| **Code Type** | Security+® / Code Dodger® (rolling code) | Security+® / MyQ® (rolling code) | Security+® / Security+ 2.0® (rolling code) | Intellicode® (rolling code) |
| **DIP Switches** | Found on older models | Found on older models | Found on older models | Rarely used on modern units |
| **Reset Procedure** | Press & hold Learn button (varies by model) | Press & hold Learn button (varies by model) | Press & hold Learn button (varies by model) | Often involves unplugging and pressing buttons |
| **Typical Location** | Motor unit back/side, under light cover | Motor unit back/side, under light cover | Motor unit back/side, under light cover | Motor unit back/side, often with a red button |
Note: Always refer to the specific owner’s manual for your garage door opener model, as procedures can vary even within the same brand. For example, how to reset Liftmaster garage door opener remote is similar but might have slight variations in button color or sequence compared to an Overhead Door. Similarly, how to reprogram Genie garage door keypad will have its own unique steps.
Importance Of Compatible Accessories
When purchasing new remotes or keypads for your Overhead Door opener, ensure they are compatible with your specific opener model and its security technology. Using incompatible accessories will prevent successful programming.
- Check Compatibility: Look for the compatible security technology (e.g., Security+® 315 MHz, Code Dodger® 390 MHz) on the accessory packaging or in its product description.
- Overhead Door Specifics: While some accessories might work across brands (e.g., a universal garage door remote), it’s safest to use accessories specifically designed for Overhead Door openers to guarantee functionality.
Case Study: Troubleshooting A Non-responsive Remote
Sarah had recently moved into a new home that came with an Overhead Door garage door opener. She found two remotes in the car’s visor but noticed that only one of them worked intermittently. She decided to reprogram both remotes to ensure they were functioning correctly and to get rid of any old codes.
Step 1: Identify the Model: Sarah located the opener unit on the ceiling and found a label indicating it was an Overhead Door Legacy® 800 model.
Step 2: Safety First: She unplugged the opener from the power outlet.
Step 3: Locate the Learn Button: On the back of the motor unit, she found a red “Learn” button next to a red LED indicator light.
Step 4: Clear Existing Codes: Sarah pressed and held the red Learn button for about 20 seconds. The red LED turned off, indicating the memory was cleared.
Step 5: Program the First Remote:
- She pressed and released the red Learn button. The red LED illuminated.
- Within 30 seconds, she pressed and held the desired button on the first remote.
- The opener clicked, and the LED turned off.
- She unplugged the opener, plugged it back in, and tested the remote. It worked perfectly.
Step 6: Program the Second Remote: Sarah repeated Step 5 for the second remote. This time, after pressing the remote button, the opener clicked, but the LED did not turn off, and the remote did not work when tested.
Step 7: Troubleshooting the Second Remote:
- Battery Check: Sarah opened the second remote and replaced the battery with a new one.
- Reprogramming Attempt: She repeated Step 5 with the new battery. This time, the opener clicked, the LED turned off, and the remote worked when tested.
Outcome: Sarah successfully reprogrammed both remotes. The issue with the second remote was a weak battery, which is a common problem that can mimic programming difficulties. This experience highlights the importance of checking batteries and following the precise steps for your specific model.
Reprogramming For Different Access Methods
Beyond standard remotes, Overhead Door openers can be controlled by various access methods, each requiring a specific programming approach.
Programming Overhead Door Wireless Keyless Entry Systems
Wireless keyless entry systems, or keypads, offer convenient access without a remote. Overhead Door offers several models, such as the OCDT-BX or similar units.
- General Procedure:
- Access the Opener: Locate the Learn button on your motor unit.
- Initiate Programming: Press and release the Learn button. The indicator light should turn on.
- Enter PIN: On the keypad, enter your desired 4-digit PIN, followed by pressing the Enter or Program button.
- Confirm PIN: You will likely be prompted to enter the PIN again.
- Confirmation: The opener unit will signal successful programming (lights flash or click).
- Test: Press the Enter button on the keypad to operate the door.
- Important Considerations:
- PIN Choice: Choose a PIN that is easy for you to remember but difficult for others to guess. Avoid sequential numbers or birth dates.
- Battery Life: Keypads rely on batteries. If you experience issues, replacing the batteries is the first step.
- Weather Protection: Ensure the keypad is installed in a location that offers some protection from the elements, as extreme weather can affect its performance.
Reprogramming Older Models With Dip Switches
As mentioned earlier, older Overhead Door systems might use DIP switches. This method is less common in new installations but still prevalent in older garages.
- The Process:
- Safety: Disconnect power to the opener.
- Locate Switches: Find the DIP switches on the back of the motor unit’s receiver board (often under a cover). Note the pattern of the 8, 9, or 10 switches.
- Match Remote Switches: Open your remote control and locate its DIP switches. Carefully set them to match the exact pattern of the switches on the motor unit.
- Reassemble and Power Up: Close the remote and motor unit covers, and reconnect power to the opener.
- Test: Press the button on the remote. The door should operate.
- Security Implications: DIP switches use a fixed code, making them less secure than rolling code systems. If you have an older system with DIP switches, consider upgrading to a more secure model for better protection against code-grabbing. For information on upgrading, you might research the costs, factors, and savings tips for garage doors.
Using A Universal Remote
If your original remotes are lost or damaged and you can’t find replacements, a universal garage door remote can be an option. These remotes are designed to be programmed to a wide variety of opener brands and models.
- Programming a Universal Remote:
- Consult Manual: Universal remotes come with their own detailed instructions, often involving a sequence of button presses on the remote itself, and sometimes requiring access to the opener’s Learn button.
- Brand Selection: Many universal remotes require you to select the brand of your opener first, then cycle through codes until the opener responds.
- Learn Button Method: The most common method involves pressing the Learn button on the opener and then pressing a button on the universal remote within a specific timeframe.
- Compatibility: Always verify that the universal remote is compatible with Overhead Door openers and the specific security technology (e.g., Code Dodger®) your opener uses.