
When it comes to maintaining the functionality and security of your home, your garage door opener remote plays a pivotal role. For owners of Craftsman garage door openers, specifically those operating on the 315 MHz frequency, understanding how to program a new remote or an existing one is a common and essential task.
Whether you’ve lost your old remote, purchased a replacement, or simply want an extra one for a family member, the process is generally straightforward, though it requires attention to detail and the correct sequence of steps. This guide will walk you through the intricacies of programming your Craftsman 315 MHz garage door opener remote, ensuring you can regain or maintain convenient access to your garage.
Key Takeaways
- Locate the Learn Button: The primary step involves finding the “Learn” or “Program” button on your Craftsman garage door opener motor unit.
- Identify Remote Type: Craftsman uses different remote technologies; confirm your opener is 315 MHz and uses rolling code technology for security.
- Sequential Programming: Follow a precise order of button presses on the motor unit and the remote to establish a connection.
- Troubleshooting Common Issues: Be prepared to address potential problems like signal interference, battery issues, or incorrect button sequences.
- Safety First: Always disconnect power to the opener when performing physical adjustments and be mindful of the garage door’s movement.
- Consult Manuals: Referencing your specific Craftsman opener’s manual is crucial for model-specific nuances.
Understanding Your Craftsman 315 Mhz Remote System
Craftsman garage door openers, particularly those manufactured in the mid-2000s and later, often utilize a 315 MHz frequency. This frequency is important because it dictates the compatibility between your opener and the remote. Older Craftsman openers might use different frequencies (like 390 MHz), and attempting to program a 315 MHz remote to a non-315 MHz opener, or vice-versa, will not work. The 315 MHz system, especially when paired with rolling code technology, offers enhanced security by changing the access code with each use, making it significantly harder for unauthorized individuals to duplicate your signal.
The Importance Of Frequency And Technology
The 315 MHz frequency is a common standard for many garage door opener brands, including Craftsman. However, simply having the correct frequency isn’t always enough. Craftsman openers, like many others, have evolved to include rolling code technology (also known as Security+). This technology is a significant security upgrade over older fixed-code systems. With a fixed-code system, the remote sends the same code every time it’s pressed. A rolling code system generates a new, unique code each time the remote is activated, and this code is synchronized with the garage door opener’s receiver. This ensures that even if someone were to capture your remote’s signal, it would be useless for future access. When programming, you are essentially teaching the opener to recognize the unique, rolling codes transmitted by your specific remote.
Identifying Your Craftsman Opener Model
Before you begin the programming process, it’s crucial to identify your specific Craftsman garage door opener model. This information is typically found on a label located on the motor unit itself, often on the side or back. Look for a model number, such as “139.
xxxxxx” or a specific series name. Knowing your model number will allow you to consult your owner’s manual, which is the most authoritative source for programming instructions. Many manuals are available online through the Craftsman website or other resources if you no longer have the physical copy.
This step is vital because while the general process for programming 315 MHz remotes is similar, there can be slight variations in button placement or sequence depending on the exact model. For instance, some older models might have a different type of programming button or require a slightly different timing for button presses.

Credit: www.youtube.com
The Programming Process: Step-by-step Guide
Programming a Craftsman 315 MHz remote involves interacting with the motor unit mounted in your garage. The core of the process is to put the motor unit into “learn mode” and then activate the remote so the opener can recognize and store its signal.
Step 1: Locate The Learn Button On The Motor Unit
The learn button is the key to initiating the programming sequence. It’s usually a small, colored button (often red, orange, purple, or green, depending on the opener’s technology generation) found on the back panel of the garage door opener motor unit. You might need to remove the light cover to access it. If you have a Craftsman opener with an external antenna, the learn button is typically located near the antenna connection. Some models might have the button on the side. Carefully inspect the motor unit casing for this button.
Step 2: Prepare The Remote
Ensure the remote you are trying to program has a fresh battery. A weak battery can cause programming failures or intermittent operation. Remove the battery cover on the remote and replace the existing battery with a new one of the same type (usually a coin cell battery like a CR2032 or A23). Once the battery is in place, reattach the cover.
Step 3: Enter Learn Mode On The Motor Unit
With the remote ready, you need to activate the learn mode on the motor unit.
- Press and release the learn button on the motor unit.
- You typically have 30 seconds to complete the next step before the opener exits learn mode.
- A small LED light next to the learn button should illuminate, indicating that the opener is in learn mode and ready to receive a signal from a new remote.
Step 4: Program The Remote
Now, you need to “teach” the opener your remote’s signal.
- Immediately after pressing the learn button on the motor unit, press and hold the desired button on your Craftsman remote. This is the button you will use to open and close your garage door.
- Continue to hold the remote button for a few seconds.
- You should observe the LED light on the motor unit flash or turn off, and/or you may hear an audible click from the motor unit. This signifies that the opener has successfully learned and stored the remote’s code.
- Release the button on the remote.
Step 5: Test The Remote
Once the programming is complete, it’s time to test.
- Step away from the motor unit.
- Press the programmed button on your remote.
- Your garage door should begin to open or close. If it doesn’t, don’t worry; proceed to the troubleshooting section.
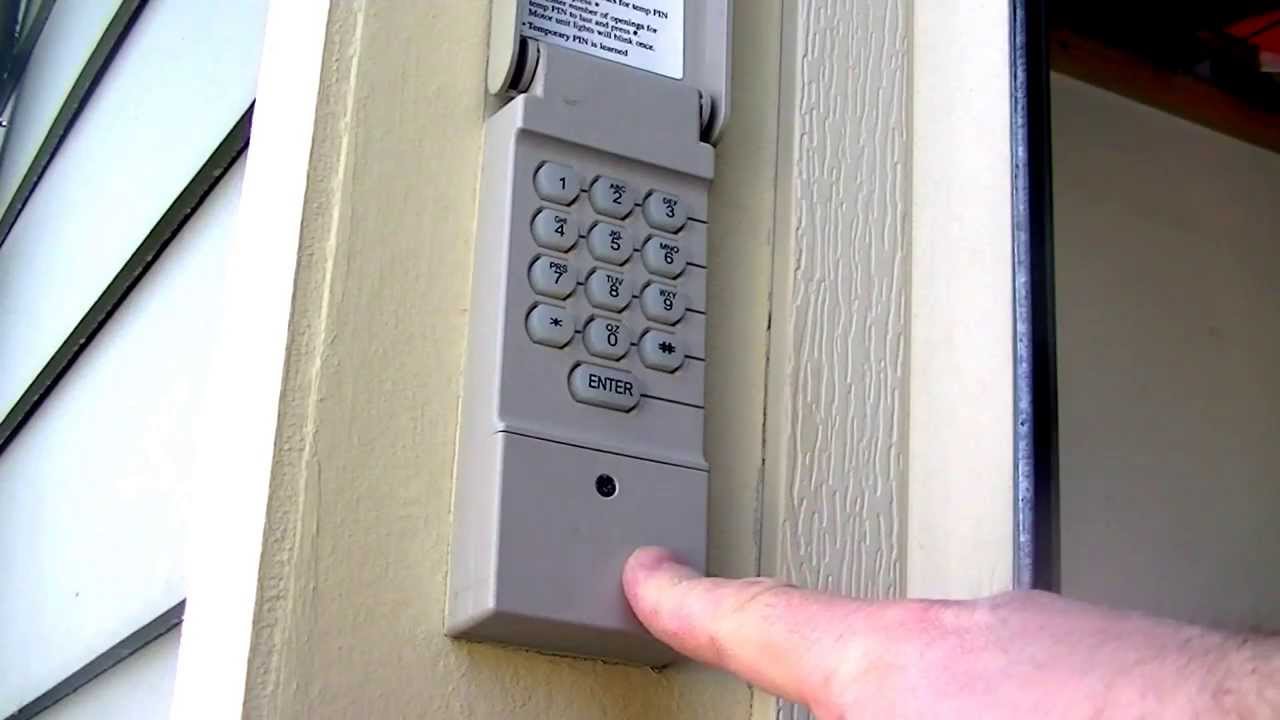
Credit: www.youtube.com
Troubleshooting Common Programming Issues
Even with clear instructions, programming can sometimes encounter hiccups. Here are some common issues and their solutions for Craftsman 315 MHz remotes.
Remote Not Responding After Programming
If you followed the steps and the remote still doesn’t operate the garage door, several factors could be at play:
- Incorrect Button Sequence or Timing: The 30-second window to program the remote after pressing the learn button is critical. If you took too long, you’ll need to repeat the process. Ensure you are pressing and releasing the learn button, then immediately pressing and holding the remote button.
- Battery Issues: Double-check that the battery in the remote is fresh and correctly installed. Sometimes, even new batteries can be faulty, or the contacts might be dirty.
- Signal Interference: Other wireless devices operating on similar frequencies (like wireless doorbells, some security systems, or even certain LED lights) can interfere with the signal. Try programming with other nearby devices temporarily turned off.
- Opener Memory Full: Most garage door openers have a limit on the number of remotes they can store. If your opener’s memory is full, you may need to erase all existing codes before adding a new one. Refer to your manual for instructions on how to clear the opener’s memory. This is often done by pressing and holding the learn button for an extended period (e.g., 10-30 seconds) until the LED light goes out. After clearing, you will need to reprogram *all* your remotes and keypads.
Opener Not Entering Learn Mode
If the LED light next to the learn button doesn’t illuminate when you press and release it:
- Power Interruption: Ensure the garage door opener has power. Check your circuit breaker.
- Faulty Learn Button: In rare cases, the learn button itself or the internal circuitry might be damaged.
- Incorrect Button Press: Make sure you are pressing and releasing the learn button, not holding it down. Holding it down for too long might initiate a memory clear sequence on some models.
Lost Remote Or Stolen Remote Concerns
If a remote is lost or stolen, the most secure course of action is to erase all programmed remotes from the opener’s memory and then reprogram only the remotes you currently possess. This ensures that the lost or stolen remote can no longer operate your garage door. The procedure for clearing the memory is generally consistent: unplug the opener, press and hold the learn button, plug the opener back in while still holding the learn button, and continue holding until the overhead LED flashes or turns off. Consult your manual for the exact procedure for your model. This process effectively resets the opener to a factory default state regarding remote access.

Credit: dooropenersandmore.com
Advanced Considerations And Maintenance
Beyond basic programming, there are a few other aspects to consider for optimal performance and longevity of your Craftsman garage door opener remote system.
Erasing All Codes
As mentioned in troubleshooting, erasing all codes is a security measure and a way to start fresh if programming fails repeatedly. The exact method can vary by model, but a common procedure involves pressing and holding the learn button for a specific duration (often 10-30 seconds) until the indicator light on the motor unit extinguishes.
Example: For many Craftsman openers, you would press and hold the learn button. The LED light will illuminate, then after about 10 seconds, it will flash or turn off. This indicates all codes have been erased. You must then reprogram any remotes or keypads you wish to use. You can find specific instructions for clearing memory on Craftsman’s support pages or within your owner’s manual.
Reprogramming Existing Remotes
If you’ve erased all codes or are adding a new remote to a system with existing remotes, you’ll need to reprogram each remote individually. The process described earlier (Steps 1-5) should be repeated for each remote you want to use.
It’s often a good idea to reprogram all your remotes at the same time to ensure they are all on the same system and working correctly. This is also an opportunity to check the batteries in your existing remotes.
Understanding Different Craftsman Remote Models
Craftsman has produced numerous remote models over the years, even within the 315 MHz frequency. While the programming steps are similar, the physical appearance of the remotes can differ. You might encounter single-button, multi-button, or even visor-clip style remotes. The key is to ensure the remote is compatible with your 315 MHz rolling code opener. If you purchased a replacement remote, it should be specified as compatible with your opener’s frequency and technology.
For a detailed guide on resetting Craftsman remotes specifically, you can refer to our dedicated article.
When To Consider Professional Help
While programming a Craftsman remote is a DIY-friendly task, there are instances where seeking professional assistance might be more efficient or necessary. If you’ve tried all the troubleshooting steps, consulted your manual, and are still unable to program the remote, there might be an issue with the opener’s logic board or a more complex wiring problem. Additionally, if you’re uncomfortable with electrical components or working on a ladder, it’s always safer to call a qualified garage door technician. The cost of a service call is often worth the peace of mind and ensures the job is done correctly and safely. Understanding the average costs associated with garage door services can help you budget for potential repairs.
Comparing Craftsman Remotes And Technologies
Craftsman has utilized various remote technologies over the years. While this guide focuses on the 315 MHz system, it’s useful to understand how it compares to other common types, especially if you’re troubleshooting or purchasing a new remote.
Craftsman 315 Mhz Vs. Other Frequencies
| Feature | Craftsman 315 MHz (Rolling Code) | Older Craftsman 390 MHz (Fixed Code) | Other Brands (e.g., Chamberlain, LiftMaster) |
|---|---|---|---|
| **Frequency** | 315 MHz | 390 MHz | Varies (e.g., 310, 315, 390 MHz) |
| **Security** | High (Rolling Code) | Low (Fixed Code) | Varies (Fixed Code to Advanced Rolling Code) |
| **Compatibility** | Specific 315 MHz openers | Specific 390 MHz openers | Varies by brand and opener model |
| **Programming** | Learn button on motor unit | Learn button on motor unit | Learn button, DIP switches, or keypad entry |
| **Age Range** | Mid-2000s to Present | Older models (pre-mid-2000s) | Varies widely by model and manufacturer |
Note: Fixed code systems are considered less secure because the signal is the same each time, making it susceptible to code grabbing. Rolling code systems offer significantly enhanced security.
Compatibility Considerations
When purchasing a new Craftsman remote, always verify its compatibility. Look for indications on the remote or its packaging that it is designed for 315 MHz frequency and Security+ (or a similar rolling code designation). If you have an older Craftsman opener that uses a different frequency or a fixed code system, you will need a remote specifically designed for that system. Trying to force compatibility between different technologies will not work and could potentially damage your opener.
Maintaining Your Garage Door Opener System
Proper maintenance ensures the longevity and reliability of your garage door opener and its remotes. While programming is a one-time setup (or occasional update), regular checks can prevent future issues.
Battery Replacement Schedule
The batteries in your remotes won’t last forever. A good practice is to replace them every 1-2 years, or whenever you notice the remote’s range diminishing or it becoming less responsive. Some Craftsman remotes have an indicator light that may flash or dim when the battery is low. Don’t wait until the remote stops working entirely, especially if it’s your primary means of entry. This proactive approach ensures you’re never locked out due to a dead battery.
Checking The Opener’s Performance
Regularly check the overall performance of your garage door opener. Listen for unusual noises, such as grinding or straining, which might indicate issues with the motor or the garage door springs (which are critical for safe operation). Ensure the door opens and closes smoothly without binding. If you notice any problems, it’s best to address them promptly. For instance, if the opener seems to be struggling, you might need to check if the garage door rollers require lubrication. You can find a guide on how to lube garage door rollers here.
Inspecting The Motor Unit And Antenna
Periodically inspect the motor unit for any signs of damage or wear. Ensure the wiring is secure and there are no frayed cords. Check that the antenna, if your model has an external one, is intact and properly positioned. A damaged antenna can significantly reduce the range and reliability of your remote signal.
Frequently Asked Questions
What If My Craftsman Remote Is Not Working After Programming?
First, ensure the battery is fresh and correctly installed. Try reprogramming the remote, paying close attention to the timing of button presses and the 30-second window. If issues persist, check for signal interference or consider clearing all codes and reprogramming all remotes.
If problems continue, the remote itself might be faulty, or there could be an issue with the opener’s receiver.
How Do I Know If My Craftsman Opener Is 315 Mhz?
The easiest way is to check the label on your garage door opener motor unit. It will typically list the model number and often the frequency. If the label is missing or unreadable, you can search for your opener model number online to find its specifications.
Many Craftsman openers from the mid-2000s onward use 315 MHz.
Can I Use A Remote For A Different Frequency With My Craftsman Opener?
No, you cannot. Garage door opener remotes and receivers operate on specific frequencies. A 315 MHz remote will only work with a 315 MHz opener, and vice versa. Attempting to use an incompatible remote will not work and could potentially cause damage.
Always ensure the remote is designed for your opener’s exact frequency and technology (e. g. , Security+).
How Do I Clear All Programmed Remotes From My Craftsman Opener?
To clear all codes, you typically need to press and hold the “Learn” button on the motor unit for an extended period (usually 10-30 seconds) until the indicator light turns off. Consult your owner’s manual for the exact procedure for your specific model, as holding the button for too short a time might only put it into learn mode, while holding it too long might initiate a different function.
After clearing, all remotes and keypads will need to be reprogrammed.
What Is The Range Of A Craftsman 315 Mhz Remote?
The typical range for a Craftsman 315 MHz remote is about 50 to 100 feet, depending on environmental factors. Obstructions like brick walls, metal doors, and other electronic devices can significantly reduce this range. Ensuring the remote and opener antennas are in good condition and free from interference can help maximize the operational range.
By following these comprehensive steps and understanding the nuances of your Craftsman 315 MHz garage door opener remote, you can confidently program new remotes, troubleshoot issues, and maintain the reliable operation of your garage access system.