
The Craftsman 315 garage door opener is a popular choice for homeowners due to its reliability and ease of use. Like any electronic device, its remote control operates on batteries that eventually deplete. Knowing how to change the battery in your Craftsman 315 garage door opener remote is a fundamental maintenance task that can save you time and frustration. A dead battery can leave you stranded outside your home or unable to secure your garage. This guide will walk you through the straightforward process, ensuring your remote is back to full power in no time.
Key Takeaways
- Identify the Remote Model: Craftsman uses various remote models, so confirm yours is a 315 MHz frequency model.
- Gather Necessary Tools: You’ll typically need a small Phillips head screwdriver and the correct replacement battery.
- Locate the Battery Compartment: Most remotes have a seam or small screws indicating where to open.
- Safely Remove the Old Battery: Note the orientation of the old battery before removal.
- Install the New Battery: Ensure the new battery is inserted with the correct polarity (+ and -).
- Test the Remote: After reassembly, test the remote to confirm it operates the garage door.
- Troubleshooting: If the remote doesn’t work, recheck battery orientation, try a new battery, or consider reprogramming.
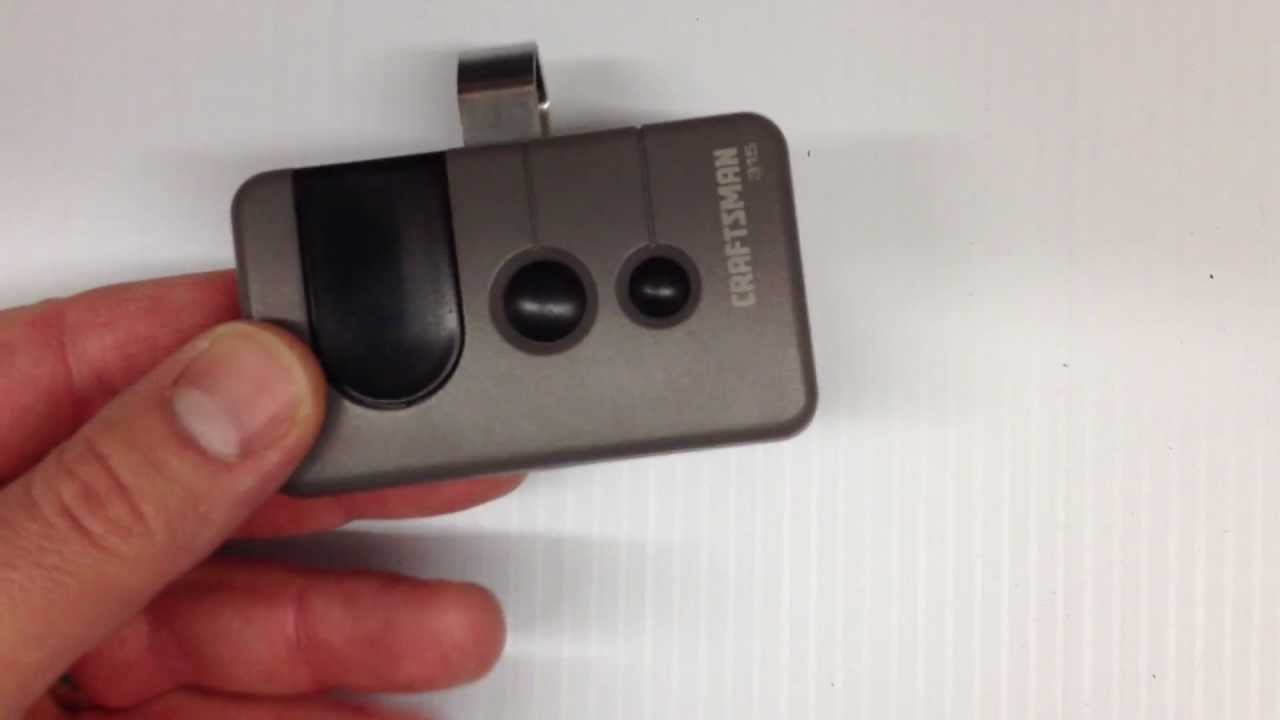
Credit: www.youtube.com
Understanding Your Craftsman 315 Garage Door Opener Remote
The Craftsman 315 MHz garage door opener system is a widely adopted technology. The “315” in its designation refers to the radio frequency it uses to communicate with the garage door opener motor unit. This frequency is crucial because remotes are typically designed to work with specific opener frequencies. While the Craftsman 315 garage door opener system is robust, the remote’s battery is its power source. These batteries are usually coin-cell lithium batteries, commonly the CR2032 type, known for their long life and stable voltage. Understanding your specific remote model is the first step. Craftsman has produced several remote designs over the years, but the fundamental battery replacement process remains remarkably similar across most 315 MHz models.
Common Craftsman 315 Remote Models
Craftsman offers a range of remotes, and identifying yours will help in finding the exact battery type and the most efficient way to open it. Some of the most prevalent models include:
- Craftsman 1-Button Remote (e.g., 971LM, 972LM, 973LM): These are often compact and simple, designed for basic open/close functionality. They typically use a single coin-cell battery.
- Craftsman 3-Button Remote (e.g., 139.53753): These offer more versatility, often controlling multiple garage doors or gates. They might use one or two batteries, depending on the design.
- Craftsman Remote with Visor Clip: Many remotes come with an integrated visor clip, which can sometimes affect how the casing is opened.
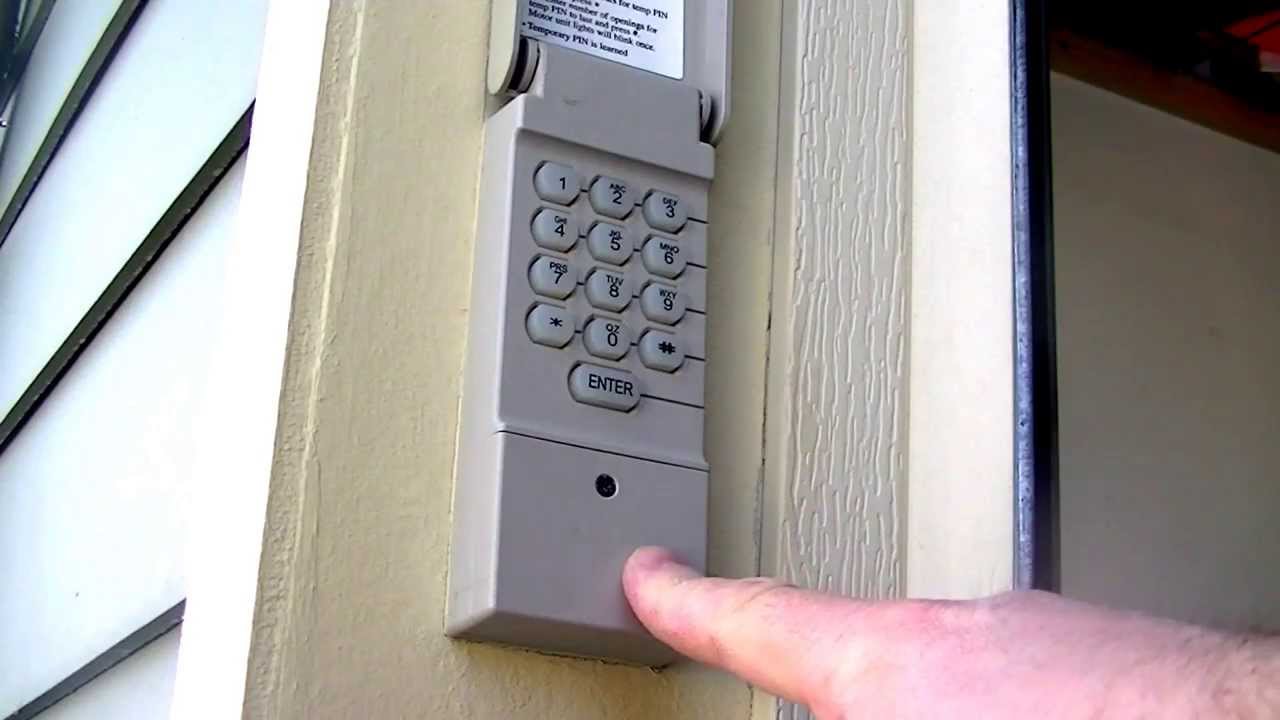
- Craftsman Keypad Remotes: While less common for battery replacement (as they are usually mounted externally), some older or integrated keypad models might have accessible batteries.
It’s always best to refer to the owner’s manual for your specific remote or opener model if you’re unsure. You can often find these manuals online by searching for the model number.
Why Battery Replacement Is Necessary
The primary reason for replacing the battery is, of course, depletion. Over time, the chemical reactions within the battery that produce electrical energy slow down and eventually cease. This leads to a weaker signal or no signal at all. Factors influencing battery life include:
- Frequency of Use: The more you open and close your garage door, the more power the remote consumes.
- Environmental Conditions: Extreme temperatures (hot or cold) can affect battery performance and lifespan.
- Battery Age and Quality: Older batteries or lower-quality batteries will naturally last a shorter duration.
- Signal Strength: If the remote needs to transmit a stronger signal (e.g., due to distance or interference), it will use more power.
A failing battery can manifest in several ways: the remote’s indicator light may dim or flicker, the range might decrease significantly, or it may stop working altogether. Proactive battery replacement, perhaps once a year, can prevent unexpected issues.

Credit: www.youtube.com
Tools And Materials Needed
Before you begin, ensure you have everything ready to make the process as smooth as possible. This minimizes the time you’ll be without a functioning remote and reduces the risk of damaging the remote.
The Right Replacement Battery
The most crucial item is the correct replacement battery. For most Craftsman 315 MHz remotes, this is a CR2032 3-volt lithium coin cell battery. These are widely available at supermarkets, drugstores, electronics stores, and online.
- Verify the Battery Type: Always check your remote’s manual or the old battery itself before purchasing a new one. While CR2032 is common, some older or specialized models might use a different type (e.g., CR2016, CR2450).
- Consider Battery Quality: Investing in a reputable brand can ensure longer battery life and more consistent performance.
Essential Tools
For most Craftsman 315 remotes, you’ll only need a few simple tools:
- Small Phillips Head Screwdriver: This is the most common tool required for removing the screws that hold the remote’s casing together. Ensure the screwdriver head fits snugly into the screw heads to avoid stripping them.
- Flathead Screwdriver or Plastic Pry Tool: In some cases, the remote casing might be held together by clips rather than screws, or screws might be recessed. A small flathead screwdriver or a plastic prying tool can help gently separate the casing halves. Using a plastic tool is preferable to avoid scratching the remote’s exterior.
- Soft Cloth: For wiping down the remote’s exterior or cleaning any battery residue.
Optional But Helpful Items
- Small Container: To keep track of any small screws you remove.
- Magnifying Glass: If the screws are very small or your eyesight isn’t what it used to be.
Having these items on hand will make the battery replacement process quick and efficient.
Credit: www.youtube.com
Step-by-step Guide To Changing The Battery
This section provides a detailed, sequential guide to replacing the battery in your Craftsman 315 garage door opener remote. The process is generally the same for most models, but always refer to your specific remote’s design.
Step 1: Locate The Battery Compartment And Open The Remote
Most Craftsman remotes are designed to be opened by removing a few screws or by gently prying apart the casing halves.
- Examine the Remote: Look for any small screws on the back or sides of the remote. These are usually the primary method of securing the casing.
- Remove Screws: If screws are present, use the appropriate Phillips head screwdriver to remove them. Place the screws in a small container so they don’t get lost.
- Separate Casing Halves: Once screws are removed (or if there are no screws), you’ll need to separate the two halves of the remote’s plastic casing.
- If Screws Were Present: The casing should now be loose. Gently pull the two halves apart. Sometimes, a small tab or clip might still hold them together, requiring a gentle wiggle or a small flathead screwdriver to release.
- If No Screws Were Present: Look for a small seam around the perimeter of the remote. You may need to insert a thin, flat object (like a flathead screwdriver or a plastic pry tool) into this seam and carefully work your way around to release the clips holding the casing together. Be gentle to avoid breaking the plastic.
Step 2: Identify And Remove The Old Battery
Once the remote is open, you’ll see the circuit board and the battery.
- Locate the Battery: The battery is typically a round, coin-shaped cell.
- Note the Polarity: Crucially, observe how the battery is oriented. There will be a positive (+) side and a negative (-) side. Usually, the positive side (often marked with a “+”) faces upwards. Take a mental note or a quick photo if you’re unsure.
- Remove the Battery:
- If the battery is held by a clip or small metal tab: Gently push the tab away from the battery to release it.
- If the battery is simply seated: You may be able to carefully slide a non-metallic tool (like a plastic pry tool or even a fingernail) under the edge of the battery and lift it out. Avoid using metal tools directly on the circuit board.
Step 3: Install The New Battery
This is where proper orientation is critical.
- Get the New Battery: Have your new CR2032 (or the correct type) battery ready.
- Orient Correctly: Place the new battery into the compartment with the correct polarity. Ensure the positive (+) side is facing the same direction as the old battery was (usually upwards).
- Secure the Battery: Gently press the new battery into place. It should sit snugly in its compartment. If there was a retaining clip, ensure it snaps back over the battery.
Step 4: Reassemble The Remote
Now, put the remote back together.
- Align Casing Halves: Carefully align the two halves of the remote’s casing. Ensure any buttons or internal components are correctly positioned.
- Snap or Screw Together:
- If clips were used: Gently press the casing halves together until they snap securely into place all around the seam.
- If screws were used: Align the halves and carefully reinsert the screws. Tighten them gently; do not overtighten, as this can strip the plastic threads.
Step 5: Test The Remote
The final and most important step is to check if the new battery has resolved the issue.
- Position Yourself: Stand at a reasonable distance from your garage door, similar to how you would normally operate it.
- Press the Button: Press the button on your remote that you use to open or close the garage door.
- Observe Operation: The garage door opener motor unit should activate, and the door should begin to move. The indicator light on the remote should also illuminate brightly.
If the remote works, congratulations! You’ve successfully replaced the battery. If it doesn’t work, don’t worry; proceed to the troubleshooting section.
Troubleshooting Common Issues After Battery Replacement
Sometimes, even after replacing the battery, the remote might not function as expected. This could be due to several reasons, ranging from simple installation errors to more complex issues.
Remote Not Working At All
If pressing the button yields no response:
- Re-check Battery Orientation: This is the most common culprit. Open the remote again and ensure the positive (+) and negative (-) terminals of the new battery are correctly aligned with the markings in the battery compartment. Even a slight misalignment can prevent it from working.
- Verify Battery Contact: Make sure the battery is making good contact with the terminals. Sometimes, the terminals can get slightly bent or corroded. You can gently clean them with a pencil eraser or a cotton swab dipped in rubbing alcohol (ensure it dries completely before reassembly).
- Try a Different Battery: While unlikely, the new battery itself could be faulty or depleted. Try installing another brand-new battery, preferably from a different pack.
- Check for Physical Damage: Inspect the remote for any cracks or damage to the casing or circuit board.
Remote Works Intermittently Or Has Reduced Range
If the remote sometimes works, or you have to be very close to the opener unit:
- Battery Contact Issues: Similar to the above, ensure the battery is making solid contact. A loose connection can cause intermittent operation.
- Low Signal Strength: The battery might be nearly depleted, even if new, or the remote’s antenna might be damaged.
- Interference: Other electronic devices operating on similar frequencies (like wireless doorbells or security systems) can sometimes interfere. Try operating the remote with potential sources of interference turned off.
- Environmental Factors: Extreme temperatures can temporarily affect battery performance.
Remote Lights Up, But Door Doesn’t Move
If the indicator light on the remote illuminates brightly, but the garage door opener unit doesn’t respond:
- Reprogramming Required: Sometimes, replacing the battery can cause the remote to lose its programming with the opener unit. You may need to reprogram the remote to the opener. This process varies by model but often involves pressing a “Learn” button on the motor unit. Refer to your garage door opener’s manual for specific instructions. For Craftsman openers, you might find helpful information on how to reset the remote and opener system.
- Opener Unit Issues: The problem might not be with the remote at all. Check if the garage door opener unit itself is receiving power. Look for indicator lights on the motor unit. The opener’s internal components or safety sensors could also be at fault.
- Range Extender or Signal Booster Issues: If you use any accessories that boost the remote’s signal, ensure they are functioning correctly.
Remote Buttons Stick Or Feel Unresponsive
If the physical buttons on the remote are difficult to press or don’t seem to register:
- Clean the Buttons: Dirt, grime, or sticky residue can accumulate around the buttons. You can try cleaning around the edges with a cotton swab lightly dampened with rubbing alcohol.
- Internal Obstruction: The internal rubber membrane or contact points under the buttons might be misaligned or damaged. This often requires disassembling the remote further, which can be tricky.
If you’ve tried these troubleshooting steps and the remote still isn’t working, it might be time to consider replacing the remote itself. You can find replacement remotes compatible with the Craftsman 315 MHz system.
When To Consider A Replacement Remote
While replacing the battery is usually a quick fix, there are instances where the remote itself may be beyond repair or simply too old to be reliable.
Signs Your Remote Needs Replacement
- Physical Damage: If the remote casing is cracked, buttons are missing, or internal components are visibly damaged, it’s likely time for a new one.
- Persistent Malfunctions: If you’ve tried replacing the battery multiple times, reprogrammed the remote, and still experience intermittent issues or poor range, the internal electronics might be failing.
- Obsolete Technology: Craftsman has updated its systems over the years. While the 315 MHz system is still common, newer openers might use Security+ 2.0 technology, requiring a different type of remote. Ensure any replacement remote is compatible with your specific Craftsman 315 garage door opener model.
- Battery Drain Issues: If a new battery consistently dies within a few weeks or months, it indicates a short or a faulty component within the remote that’s draining the power.
Choosing A Compatible Replacement Remote
When purchasing a new remote, ensure it explicitly states compatibility with Craftsman 315 MHz garage door openers. Look for model numbers that indicate this frequency. Some universal remotes can also be programmed to work with Craftsman systems, but always verify compatibility before buying. You can often find compatible remotes from brands like Chamberlain, LiftMaster, and Genie, as Craftsman garage door openers are manufactured by Chamberlain Group, which also owns LiftMaster and other brands.
When you replace the remote, you will need to reprogram the new remote to your garage door opener motor unit. The process is similar to reprogramming an existing remote after a battery change and involves using the “Learn” button on the opener.
Maintaining Your Garage Door Opener System
Regular maintenance ensures the longevity and optimal performance of your entire garage door system, not just the remote.
Lubrication
One key aspect of maintenance is proper lubrication. This reduces friction, noise, and wear on moving parts.
- Rollers and Tracks: Periodically, you should lubricate the garage door rollers and tracks. This helps the door move smoothly. A good quality garage door lubricant is recommended. For detailed steps, refer to our guide on how to lube garage door rollers.
- Opener Chain/Screws: If your opener uses a chain drive or a screw drive, it may also require occasional lubrication. Check your opener’s manual for specific recommendations. For chain-driven openers, ensuring the chain is properly tensioned is also important, as detailed in our article on how to adjust chain on garage door opener.
Checking Safety Features
Modern garage door openers have crucial safety features, including auto-reverse sensors.
- Photoelectric Sensors: These are typically located near the bottom of the door tracks. Ensure they are clean, aligned, and free of obstructions. If they become misaligned, the door may not close properly or may reverse unexpectedly.
- Force Settings: The opener has settings for how much force it applies before reversing. Periodically test this by placing a piece of wood (like a 2×4) on the ground in the door’s path. When the door hits it, it should automatically reverse. If it doesn’t, the force setting may need adjustment. Consult your opener’s manual for instructions on how to adjust these settings. For Chamberlain openers, you might find guidance on how to adjust a Chamberlain garage door opener.
Inspecting The Door And Opener Unit
- Door Balance: Ensure your garage door is properly balanced. A balanced door should stay open when partially lifted and should be easy to lift manually when the opener is disengaged. If it feels excessively heavy or slams shut, the springs may need adjustment by a professional.
- Opener Unit: Keep the motor unit clean and free of dust and debris. Check for any loose wires or connections.
Regular maintenance, including timely battery replacements in your remote, contributes to a safe and functional garage door system.
Frequently Asked Questions
What Kind Of Battery Does A Craftsman 315 Garage Door Opener Remote Use?
Most Craftsman 315 MHz remotes use a CR2032 3-volt lithium coin cell battery. However, it’s always best to confirm by checking the battery compartment of your specific remote or consulting its owner’s manual, as some older or specialized models might use a different battery type.
How Often Should I Replace The Battery In My Craftsman Garage Door Remote?
The lifespan of a remote battery can vary depending on usage frequency, battery quality, and environmental conditions. As a general rule, it’s advisable to replace the battery once a year as a preventative measure. You’ll know it’s time when the remote’s indicator light dims, the range decreases, or it stops working altogether.
Can I Use A Rechargeable Battery In My Craftsman 315 Remote?
No, it is generally not recommended to use rechargeable batteries in Craftsman garage door opener remotes. These remotes are designed for the stable, long-lasting power output of disposable lithium coin cell batteries. Rechargeable batteries often have a different voltage output and may not be compatible, potentially leading to performance issues or damage to the remote’s electronics.
My Remote Still Doesn’t Work After Changing The Battery. What Else Could Be Wrong?
If replacing the battery doesn’t solve the problem, several other issues could be at play. First, double-check that the new battery is inserted with the correct polarity (+ and – aligned properly). Ensure the battery is making good contact with the terminals. If it still fails, the remote may have lost its programming with the opener unit and needs to be reprogrammed. Consult your garage door opener’s manual for reprogramming instructions. If reprogramming doesn’t work, the remote itself might be damaged or faulty and may need to be replaced. You might also want to check the opener unit itself for power and any visible issues.
How Do I Know If My Craftsman Remote Is A 315 Mhz Model?
The frequency is usually indicated on the remote itself, often on the back casing or inside the battery compartment. Look for markings such as “315 MHz,” “315 Mhz,” or specific model numbers known to operate on this frequency (e. g.
, many Craftsman remotes starting with “971,” “972,” “973,” or “139. 5”). If you cannot find this information on the remote, check the owner’s manual for your garage door opener system, which will specify the compatible remote frequency.
A dead battery in your Craftsman 315 garage door opener remote doesn’t have to be a major inconvenience. By following these straightforward steps, you can quickly and easily replace the battery yourself, restoring full functionality to your remote. Remember to gather the correct tools and battery type beforehand, pay close attention to battery orientation during installation, and always test the remote afterward.
Regular maintenance of your garage door opener system, including proactive battery changes, ensures reliable access and security for your home.