Now Reading: How to Change Garage Door: Step-by-Step DIY Guide
- 01
How to Change Garage Door: Step-by-Step DIY Guide
Changing your garage door is one of those home improvement projects that can completely transform the look, function, and value of your house. Many homeowners think this task is only for professionals, but with the right tools, clear steps, and some safety awareness, you can handle it yourself.
Whether your old garage door is damaged, outdated, or you simply want to improve energy efficiency, learning how to change a garage door can save you money and give you a sense of accomplishment.
This guide will walk you through the full process of how to change garage door—from the first inspection to the last bolt. You’ll learn what tools you need, how to stay safe, and how to avoid common mistakes. Plus, you’ll find tables to help compare garage door types, materials, and insulation options. Let’s start your journey to a better, safer, and more attractive garage door.
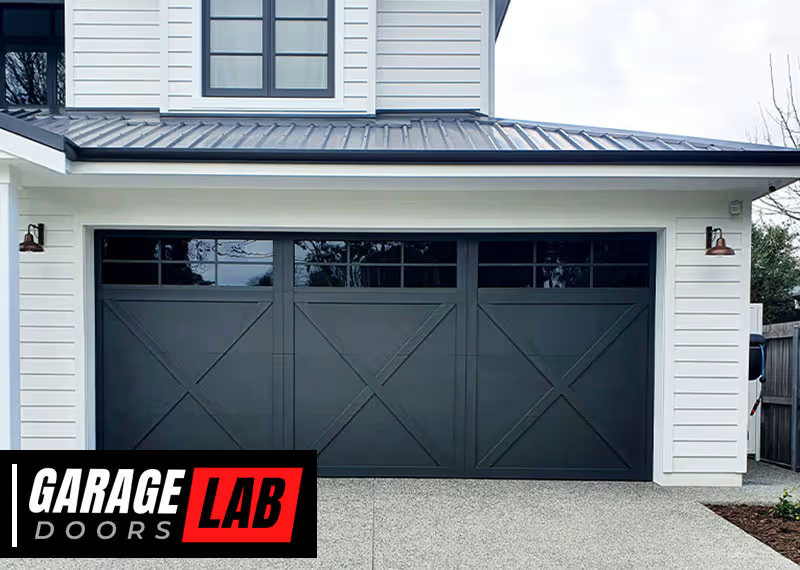
Why Change Your Garage Door?
A garage door is more than just an entrance. It affects your home’s security, energy efficiency, and even the first impression people get when they visit. Here are some reasons you might want to replace your current door:
- Visible damage: Dents, warping, or rot can make your door unsafe.
- Frequent repairs: If you call for repairs often, replacement is usually cheaper long-term.
- Improved insulation: New doors keep your garage warmer or cooler, saving energy.
- Modern appearance: A new design can boost your home’s curb appeal.
- Better security: Modern doors have stronger materials and advanced locks.
Changing your garage door is also a smart move if you plan to sell your house soon. According to Remodeling Magazine, homeowners can recoup up to 94% of the cost of a new garage door when they sell their home.
Planning: What You Need To Know Before You Start
Changing a garage door is not a small task. You need to plan carefully to avoid problems and stay safe.
Measure Twice, Buy Once
The most important step before buying a new door is to measure your garage opening accurately.
- Width: Measure from left to right at the widest point.
- Height: Measure from the floor to the top of the opening.
- Side room: Measure the space on both sides of the opening (at least 3.5 inches is typical).
- Headroom: Measure from the top of the opening to the lowest ceiling point (minimum 10-12 inches for most doors).
- Backroom: Measure from the opening to the back wall (door height plus 18 inches minimum).
Write all these numbers down. Don’t guess—small errors can cause big headaches.
Decide: Repair Or Replace?
Sometimes, you might not need a full replacement. If only one panel is damaged, or hardware is rusty, a partial repair may be enough. But if the door is old, noisy, or very heavy, or has multiple issues, replacement is the safer choice.
Choose The Right Door
Garage doors come in different materials, styles, and insulation levels. Here’s a simple comparison:
| Material | Pros | Cons | Best For |
|---|---|---|---|
| Steel | Strong, low maintenance, many styles | Can dent, may rust if scratched | Most homes |
| Wood | Classic look, easy to customize | Heavy, needs painting, can rot | Traditional homes |
| Aluminum | Lightweight, rust-resistant | Dents easily, less insulation | Modern homes, humid areas |
| Fiberglass | Resists salt-air, light, won’t warp | Can crack in cold, limited styles | Coastal homes |
| Vinyl | Durable, low maintenance | Limited colors, may fade | Busy families, harsh weather |
Consider your climate, budget, and style. Steel and wood are the most common choices.
Insulation: Is It Worth It?
If your garage is attached to your house, or you use it for more than parking, an insulated garage door can make a big difference in comfort and energy bills.
Insulation is measured by R-value. The higher the number, the better the insulation. Standard doors have R-values from 6 to 10, while premium doors can go up to 18 or more.
| R-Value | Best For | Estimated Energy Savings |
|---|---|---|
| 6-9 | Detached garages, mild climates | Low |
| 10-13 | Attached garages, mixed climates | Moderate |
| 14+ | Heated garages, cold/hot climates | High |
If you live in a place with extreme temperatures, pay extra for higher R-value.
Tools And Materials Checklist
Before you remove the old door, gather these tools:
- Adjustable wrench set
- Socket set and ratchet
- Cordless drill and bits
- Flathead and Phillips screwdrivers
- Pliers (locking and needle nose)
- Tape measure
- Level (at least 2 feet)
- Stepladder
- Safety glasses and gloves
- C-clamps or locking pliers
- Sawhorses (for panels)
Order your new garage door kit, which usually includes panels, tracks, springs, cables, rollers, hinges, and hardware. Double-check the box contents before starting.

Safety First: What You Must Know
Working with garage doors is not risk-free. Springs are under high tension and can cause serious injury if handled wrong. If you are not comfortable working with tools, or if your door uses torsion springs (the type mounted above the door), it’s wise to hire a pro for that part. Extension springs (mounted along the sides) are easier but still need care.
Always wear safety glasses and work gloves. Never try to remove a spring without the right tools. Never stand directly under the spring or door when working. If you have doubts, get help for the dangerous steps.
Step-by-step: How To Change Your Garage Door
Changing a garage door involves several clear steps. Take your time and follow them closely. Here’s how to do it:
1. Prepare The Work Area
Clear out your garage so you have plenty of room. Make sure you can fully open and close the old door. Disconnect your garage door opener (if you have one) and unplug it. Place your tools and new door parts nearby.
2. Release The Tension From The Springs
This is the most dangerous step. Springs store a lot of energy. For torsion springs, use a winding bar and follow the manufacturer’s instructions. For extension springs, open the door fully, clamp it open with C-clamps, and remove the tension from the cables.
Never try to cut or loosen a spring without releasing its tension. If unsure, call a garage door technician just for this part—it’s worth the peace of mind.
3. Remove The Old Door
- Remove the door panels one by one, starting at the top.
- Unscrew hinges, rollers, and track brackets as you go.
- Have a friend help hold panels steady—garage door panels are heavy.
- Once all panels are down, remove the old tracks, springs, and hardware.
Dispose of the old door according to your local recycling rules. Many cities have metal recycling centers.
4. Inspect And Repair The Door Frame
Check the frame for rot, cracks, or warping. Use a level to make sure the sides are plumb (vertical) and the header is straight. Repair or replace any damaged wood before installing the new door.
This step is often skipped by beginners. But a strong, square frame is key to a smooth, quiet door.
5. Install The New Tracks And Hardware
- Attach the new metal tracks to the sides of the opening using the brackets provided.
- Make sure tracks are perfectly vertical. Use a level.
- Attach any new supports or reinforcements if required by the manufacturer.
If your new door is heavier than the old one, you may need extra supports or a stronger spring system. Check the instructions.
6. Assemble And Hang The Door Panels
- Start with the bottom panel. Place it into the opening and secure it with hinges and rollers.
- Add the next panel above, connect the hinges, and insert rollers into the tracks.
- Repeat for each panel, working upwards. Use a friend to hold panels in place.
- Make sure panels are aligned and level at each step.
Take your time here. Crooked panels will cause the door to jam or wear out early.
7. Install The Springs And Cables
- Attach springs and cables as directed in the manual.
- For torsion springs, mount the spring bar, install the springs, and wind them the correct number of turns.
- For extension springs, hook them to the brackets and thread the cables through the pulleys.
This is another step where safety is critical. Double-check all connections, and never use makeshift tools.
8. Attach Door Hardware And Weatherstripping
- Install handles, locks, and any decorative hardware.
- Attach the bottom seal (weatherstripping) to keep out drafts, water, and pests.
- Add side and top weatherstripping for best insulation.
Many people forget the weatherstripping, but it can make your garage 10-20 degrees more comfortable year-round.
9. Test The Door Manually
Before you reconnect the opener, lift and lower the door by hand. It should move smoothly and stay in place when half open. If it’s hard to lift, or falls quickly, adjust the spring tension as needed.
A properly balanced door is safer and makes your opener last longer.
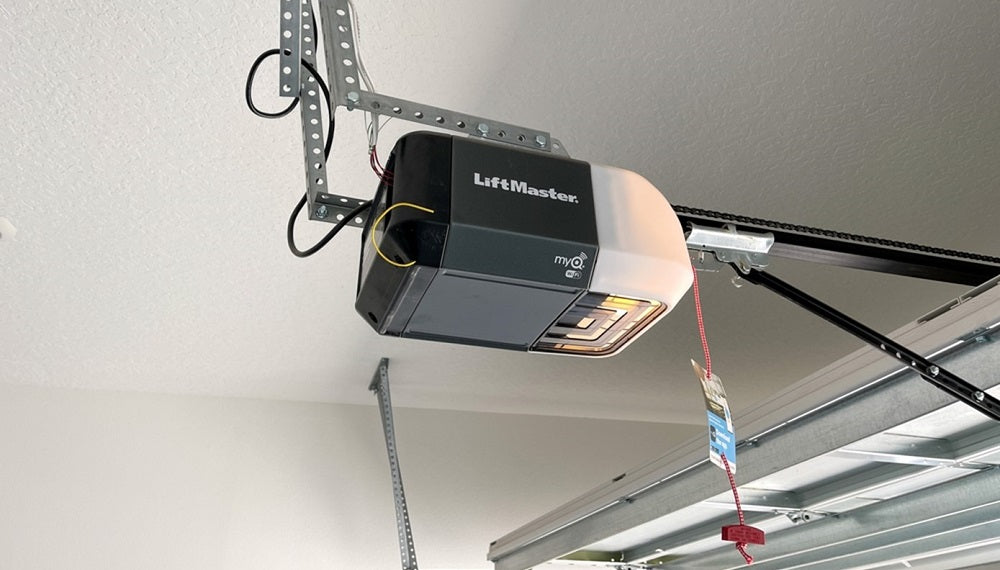
10. Reconnect The Opener And Test Everything
If you use an automatic opener, reconnect it according to the manufacturer’s instructions. Test the door with the remote and wall button. Make sure the safety sensors stop the door if anything is in the way.
Test the auto-reverse feature by placing a piece of wood under the door. If the door does not reverse, adjust the force settings or call a pro.
Comparing Garage Door Types: Which Is Right For You?
There are three main types of garage doors: Sectional, Roll-up, and Side-hinged. Each has benefits and drawbacks.
| Door Type | How It Opens | Best For | Drawbacks |
|---|---|---|---|
| Sectional | Panels slide up and curve along ceiling tracks | Modern homes, limited driveway space | More moving parts, needs headroom |
| Roll-up | Rolls into a coil above opening | Commercial use, small garages | Expensive, less insulation |
| Side-hinged | Swings open like barn doors | Historic homes, easy manual use | Needs clear space in front, less secure |
For most homes, sectional doors are the top pick for their balance of cost, style, and insulation.
Practical Tips For A Successful Garage Door Change
Changing your garage door is not just about following steps. Here are some expert tips that can make the process smoother:
- Label all hardware as you remove it. Use bags or small boxes and write where each piece belongs.
- Take photos before you start. If you get confused, you can check the pictures to see how things were before.
- Check your local building codes. Some cities require permits or have rules on garage door safety features.
- Inspect your opener. If your opener is more than 10 years old, consider replacing it while you have everything apart.
- Don’t skip lubrication. Use silicone spray or garage door lube on all moving parts after installation.
- Ask for help. Garage doors are heavy and awkward. At least one helper is recommended for safety.
Many beginners forget to check the alignment of the tracks at the end. Even a small twist can cause the door to stick or wear out parts quickly.
Common Mistakes To Avoid
Even handy homeowners make errors when replacing garage doors. Here are mistakes to avoid:
- Measuring wrong: Even a half-inch error can mean your new door won’t fit.
- Not securing the door: Panels can fall and cause injury if not clamped or supported.
- Skipping spring safety: This is the top cause of DIY injuries. Don’t rush this step.
- Misaligning tracks: Crooked tracks lead to noisy operation and fast wear.
- Forgetting weatherstripping: Skipping seals makes your garage drafty and lets in pests.
- Over-tightening bolts: This can strip holes or bend parts.
- Not balancing the door: An unbalanced door strains the opener and can break springs faster.
A little patience and double-checking each step can prevent these issues.
Cost: What To Expect
The cost of changing a garage door depends on the size, material, insulation, and whether you hire a pro. Here’s what you can expect (as of 2024):
- DIY cost (single door): $600 – $1,200 (materials only)
- Professional installation (single door): $1,200 – $2,500
- High-end custom doors: $3,000 – $10,000+
Add about $150-$300 for removing and disposing of the old door if you hire someone.
Energy-efficient and wind-rated doors cost more but may save money on insurance or energy bills.

When Should You Call A Professional?
Doing your own garage door replacement can save money, but it’s not for everyone. Call a pro if:
- You are not comfortable with heavy lifting or power tools
- Your door uses complex torsion springs
- The frame is damaged or needs major repair
- You want a warranty on labor
Professional installers can finish the job in 3-6 hours and will make sure your door is balanced and safe. Many offer a one-year warranty on their work.
Maintenance Tips After Installation
A new garage door needs regular care to keep working smoothly:
- Lubricate moving parts every 6 months.
- Tighten all bolts and screws yearly.
- Check balance by lifting the door halfway—it should stay in place.
- Wash panels with mild soap and water to keep them looking new.
- Inspect weatherstripping and replace if cracked or worn.
Don’t ignore small squeaks or jerky movement—these can signal loose parts or a need for lubrication.
Environmental And Security Upgrades
Modern garage doors can help the environment and improve your home’s security.
- Choose a door with recycled steel or eco-friendly insulation.
- Install windows with double glazing for light and better insulation.
- Upgrade to a smart opener for remote control and alerts.
- Add motion sensor lights outside your garage for safety.
If you want more information on the environmental impact of garage doors, see the Garage Door Wikipedia page.
Frequently Asked Questions
How Long Does It Take To Change A Garage Door?
For most DIYers, changing a garage door takes about 6-8 hours with two people. Pros can do it in 3-4 hours. Allow extra time if you need to repair the frame or install a new opener.
Can I Reuse My Old Garage Door Opener?
Usually yes, if your opener is in good shape and the new door is similar in weight and height. Some very old openers may not have enough power or the right mounting hardware for new doors.
Do I Need A Permit To Change My Garage Door?
In many cities, yes. Check with your local building department. Permits ensure your new door meets safety codes, especially for fire, wind, or earthquake zones.
What’s The Difference Between Torsion And Extension Springs?
Torsion springs are mounted above the door and use a twisting force. Extension springs run along the sides and stretch to open the door. Torsion springs last longer and are safer but are harder to install.
How Do I Know If My Garage Door Is Balanced?
A balanced garage door should stay in place if you lift it halfway and let go. If it moves up or down, the springs need adjustment. An unbalanced door is hard on your opener and can be dangerous.
Changing your garage door is a project that brings real results—better looks, comfort, and security for your home. With careful planning and attention to safety, you can do it yourself and enjoy the benefits for years. If you run into trouble, don’t hesitate to call a professional.
Your new garage door is an investment that pays you back every day.


