
A blinking light on your garage door opener can be a perplexing issue, turning a simple entry into a home into a moment of frustration. While seemingly minor, this blinking indicator is often a crucial diagnostic tool, signaling a problem that needs attention.
Ignoring it can lead to a malfunctioning opener, a security risk, or even damage to your garage door system. Understanding what the blinking light signifies is the first step towards a swift and effective resolution, ensuring your garage door operates smoothly and reliably.
This guide will equip you with the knowledge to diagnose and fix the common causes behind a blinking garage door opener light. We’ll cover everything from simple troubleshooting steps to more complex mechanical and electrical issues, empowering you to tackle this problem with confidence.
Key Takeaways
- A blinking light on a garage door opener is a diagnostic signal indicating a specific problem.
- Common causes include safety sensor misalignment, travel limit issues, remote control malfunctions, and internal opener problems.
- Always start with simple checks like verifying power, inspecting safety sensors, and checking remotes.
- Ensure safety sensors are clean, aligned, and free from obstructions.
- Resetting the opener, remotes, and keypads can resolve many electronic glitches.
- Check and adjust travel limits if the door stops prematurely or reverses unexpectedly.
- Lubrication and basic maintenance can prevent many issues.
- If the problem persists after these steps, professional diagnosis and repair may be necessary.
Understanding Garage Door Opener Light Codes
Garage door openers use blinking lights as a form of communication, similar to a Morse code for your mechanical assistant. These codes are designed to alert you to specific issues, helping technicians (or savvy homeowners) pinpoint the problem area quickly.
While the exact patterns and meanings can vary slightly between manufacturers like LiftMaster, Chamberlain, Genie, and Craftsman, there are common themes.
The most frequent culprit for a blinking light is related to the safety sensors. These are small, unobtrusive devices typically mounted near the bottom of the garage door tracks. Their primary function is to detect obstructions in the door’s path, preventing it from closing on a person, pet, or object. When these sensors are misaligned, blocked, or malfunctioning, the opener will often refuse to operate and signal this with a blinking light.
Another common reason for a blinking light is an issue with the travel limits or force settings. These settings tell the opener how far to open and close the door and how much force to apply. If these are improperly set, the opener might interpret the door’s movement as an obstruction or an overload, triggering a safety stop and a blinking light.
Remote control or wall button issues can also manifest as a blinking light. This might occur if the remote’s battery is low, the remote itself is damaged, or if there’s a communication problem between the remote and the opener unit. Sometimes, a simple reset of the opener’s memory can resolve these communication glitches.
Finally, the blinking light could indicate a more serious internal problem with the garage door opener motor, logic board, or drive mechanism. These issues often require professional attention.

Credit: www.youtube.com
Troubleshooting Common Blinking Light Causes
Before diving into specific repair steps, it’s crucial to perform a series of basic checks. Many blinking light issues can be resolved with simple maintenance or adjustments.
Power Supply And Connections
The most fundamental check is to ensure your garage door opener has a stable power supply.
- Check the Outlet: Ensure the opener is plugged into a functioning electrical outlet. Test the outlet with another device, like a lamp, to confirm it’s providing power.
- Inspect the Power Cord: Look for any visible damage to the power cord, such as cuts, fraying, or kinks. A damaged cord can interrupt power flow.
- GFCI Outlets: If your opener is plugged into a Ground Fault Circuit Interrupter (GFCI) outlet, check if the GFCI has tripped. Press the “Reset” button on the outlet.
Safety Sensor Inspection
The safety sensors are the most common reason for a blinking light, especially if the opener only attempts to move the door slightly or not at all.
- Locate the Sensors: They are usually mounted a few inches off the ground on either side of the garage door tracks. You’ll see one sensor with an indicator light, and the other is the receiver.
- Check for Obstructions: Ensure nothing is blocking the path between the two sensors. This includes tools, debris, or even spiderwebs.
- Clean the Lenses: Dust, dirt, or cobwebs on the sensor lenses can interfere with the beam. Gently wipe them clean with a soft, dry cloth.
- Inspect Alignment: The most critical step is ensuring the sensors are perfectly aligned. The indicator light on the transmitting sensor should be solid, and the receiving sensor should have a steady light (color may vary by model). If the light is blinking or off, the sensors are not communicating.
- Minor Adjustments: Gently wiggle each sensor housing until the indicator lights on both are solid. Sometimes, even a slight shift due to vibrations can misalign them.
- Secure Mounting: Ensure the sensors are securely mounted and not loose on their brackets.
- Wiring: Check the wires connecting the sensors to the opener unit. Look for any loose connections, cuts, or damage. Loose wires are a frequent cause of intermittent sensor failure.
Remote Control And Wall Button Issues
If the blinking light appears when you try to operate the opener, the issue might be with the remote or wall button.
- Battery Replacement: A low battery in your remote is a very common cause for it to stop working, and sometimes this can trigger a response from the opener’s light. Replace the battery with a fresh one.
- Remote Programming: The remote might have lost its programming with the opener. You may need to reprogram it. Refer to your opener’s manual for specific instructions. For LiftMaster, Chamberlain, and Craftsman openers, you can often find guides on how to reset your remote.
- Wall Button: If the remote works but the wall button doesn’t, the issue might be with the button itself or its wiring.
- Range Issues: Sometimes, the remote signal is weak due to interference or distance. Try operating the opener closer to the unit.

Credit: precisiongaragedoor.ca
Addressing Travel Limit And Force Setting Problems
If your garage door opens but stops prematurely, reverses unexpectedly, or the opener light blinks after a full cycle, it’s likely an issue with the travel limits or force settings. These settings dictate how far the door should travel and how much force is needed to move it.
Understanding Travel Limits
- Purpose: Travel limits tell the opener when to stop in both the fully open and fully closed positions.
- Adjustment: Most modern openers have electronic or mechanical adjustments for these limits. Consult your owner’s manual for the exact procedure for your model.
- Electronic Limits: Typically adjusted using buttons on the motor unit. You’ll usually open the door to the desired open position, set the limit, then close it to the desired closed position and set that limit. The blinking light pattern often indicates an error in setting these limits.
- Mechanical Limits: Older models might have screw-type adjustments on the side of the motor unit.
Understanding Force Settings
- Purpose: Force settings determine how much force the opener applies to move the door. This is a safety feature; if the opener encounters too much resistance (like an obstruction), it will reverse to prevent damage or injury.
- Adjustment: Similar to travel limits, force settings are adjusted on the motor unit.
- Too Low: The opener might stop prematurely or reverse, thinking there’s an obstruction, even when there isn’t.
- Too High: The opener might not reverse when it should, posing a safety hazard.
- Testing: After adjusting force settings, test the opener by placing a 2×4 piece of wood flat on the ground in the door’s path. The door should reverse upon contact.
Example: If your door stops about halfway up and the light blinks, it’s possible the upward travel limit is set too low, or the upward force setting is too sensitive. You would need to adjust these settings according to your opener’s manual. A common sequence for adjusting these on many models involves pressing and holding a specific button until the light blinks, then using up/down arrows to set the limits, followed by a confirmation press.
Resetting Travel Limits And Force Settings
In some cases, especially after a power surge or an unexpected shutdown, the opener’s memory for these settings can become corrupted. A full reset might be necessary.
- Locate the “Learn” or “Program” Button: This is usually on the motor unit.
- Press and Hold: Press and hold the “Learn” button until the indicator light goes out or changes color. This erases all programmed remotes and settings.
- Reprogram Remotes and Set Limits: You will then need to reprogram your remotes and re-establish the travel limits and force settings as described in your manual. For many LiftMaster and Chamberlain models, this process is detailed in guides on how to reset your garage door opener.
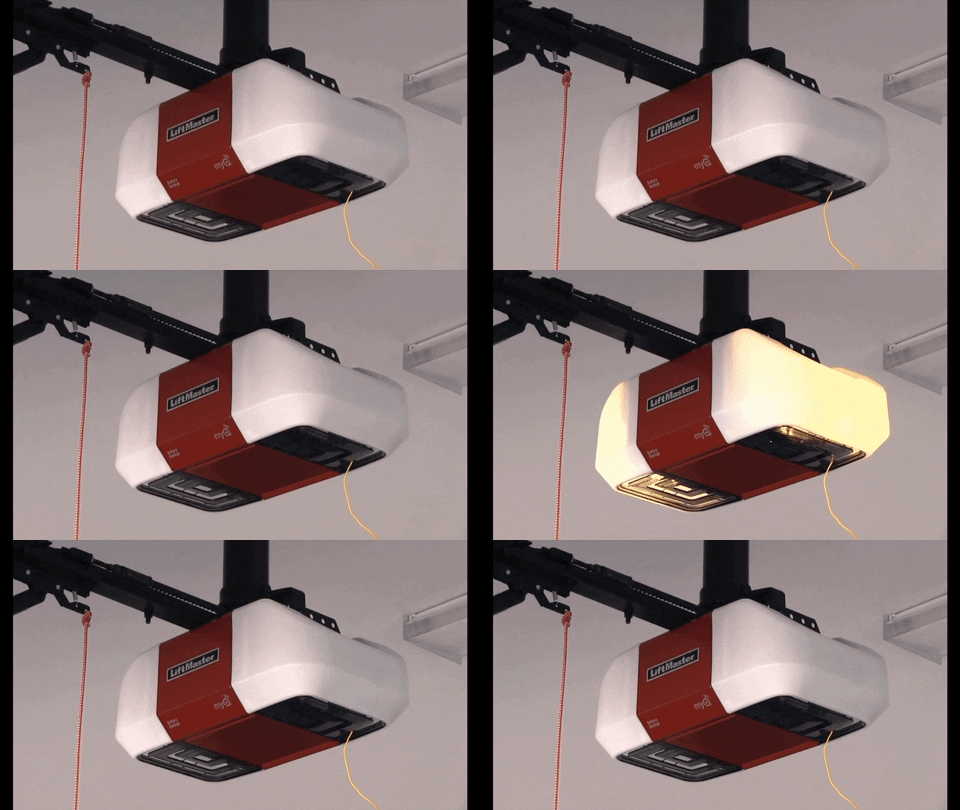
Credit: gdmedics.com
Diagnosing Internal Opener Issues
If you’ve exhausted the troubleshooting steps for sensors, limits, and remotes, the blinking light might be indicating a problem within the garage door opener unit itself.
Logic Board Malfunctions
The logic board is the “brain” of the garage door opener. It controls all functions, interprets signals, and dictates the opener’s actions.
- Power Surges: A sudden power surge or brownout can damage the logic board, leading to erratic behavior, including blinking lights.
- Age and Wear: Like any electronic component, logic boards can fail over time due to wear and tear.
- Symptoms: Besides blinking lights, a failing logic board might cause the opener to respond intermittently, not respond at all, or exhibit other unusual behaviors.
- Repair: Logic boards are typically not user-repairable. If diagnosed as faulty, the board will need to be replaced. This is often a job best left to a professional.
Motor And Drive System Problems
The motor drives the opener’s mechanism, and issues here can also trigger warning lights.
- Worn Motor: The motor itself might be wearing out, struggling to lift the door.
- Gear Stripping: The gears inside the opener’s housing can strip, especially if the opener is overworked or not properly maintained. This will prevent the drive mechanism from engaging correctly.
- Capacitor Failure: The starting capacitor for the motor can fail, preventing the motor from starting or running properly.
- Symptoms: These issues might be accompanied by grinding noises, a humming sound without door movement, or the door moving erratically. The blinking light serves as an alert that the motor or drive system is not functioning within its expected parameters.
Drive Chain Or Belt Issues
If your opener uses a chain or belt drive system, problems with these components can cause issues.
- Loose Chain/Belt: A loose chain or belt can slip, causing the opener to lose its grip and potentially stop mid-operation. This can trigger a blinking light due to the opener detecting a lack of progress. Refer to guides on how to adjust the chain for proper tension.
- Damaged Chain/Belt: Broken or worn-out links/sections can cause the drive to fail completely.
- Trolley Issues: The trolley that moves along the chain/belt can sometimes get stuck or disengage.
Pro Tip: Regular lubrication of the garage door rollers and opener mechanism is essential for smooth operation and can prevent undue stress on the motor and drive system, thus reducing the likelihood of such issues. You can find detailed instructions on how to lube garage door rollers to maintain optimal performance.
When To Call A Professional
While many garage door opener issues are DIY-friendly, there are times when professional expertise is essential. Recognizing these situations can save you time, frustration, and potentially prevent further damage or safety hazards.
Persistent Blinking Lights After Troubleshooting
If you’ve diligently followed all the troubleshooting steps, checked sensors, reset limits, reprogrammed remotes, and inspected power, and the blinking light persists, it’s a strong indicator of a more complex problem. This could involve internal electrical faults, motor issues, or complex mechanical failures that require specialized tools and knowledge.
Safety Concerns
Garage doors are heavy and powerful systems. If you’re uncomfortable with any step, notice frayed wiring, hear unusual grinding noises, or suspect a structural issue with the door itself, it’s best to step back and call a professional. Attempting repairs on complex electrical components or heavy mechanical parts without proper training can be dangerous.
Specialized Tools And Equipment
Some diagnostics and repairs require specialized tools, such as multimeters for electrical testing or specific wrenches for certain internal components. Professionals have these tools readily available.
Warranty Considerations
If your garage door opener is still under warranty, attempting DIY repairs could void the warranty. Contacting the manufacturer or a certified dealer is often the first step in such cases.
Cost-benefit Analysis
Consider the cost of replacement parts and your own time versus the cost of professional service. For older openers with multiple issues, the cost of repairs might approach the cost of a new unit. A professional can often advise on whether repair or replacement is more cost-effective. The average cost of a garage door opener replacement can range from $300 to $700, depending on the model and installation complexity, as noted in general cost guides like how much for a garage door.
Example: A homeowner spent hours trying to realign safety sensors, replace remote batteries, and reset their opener, but the red indicator light on their LiftMaster opener continued to blink rapidly. Upon calling a technician, it was discovered that a power surge had damaged the logic board. The technician replaced the board, reprogrammed the remotes, and the issue was resolved within an hour. This saved the homeowner from potentially attempting more complex, and possibly damaging, repairs themselves.
Maintenance Tips To Prevent Blinking Lights
Preventative maintenance is key to ensuring your garage door opener operates reliably and to minimize the chances of encountering a blinking light issue.
Regular Cleaning
- Sensors: Keep the safety sensor lenses clean. Wipe them down monthly with a soft, dry cloth.
- Tracks and Openers: Periodically clean dust and debris from the opener unit and the door tracks.
Lubrication
- Rollers and Hinges: Lubricate garage door rollers and hinges at least twice a year. Use a silicone-based spray or white lithium grease. This reduces friction and strain on the opener. A detailed guide on lubricating rollers can be very helpful.
- Opener Chain/Belt: Some chain openers may require periodic lubrication on the chain, while belt openers are typically maintenance-free in this regard. Check your manual.
Inspection
- Wiring: Regularly inspect all visible wiring for signs of damage, fraying, or loose connections.
- Mounting Hardware: Ensure that the opener unit, sensors, and track hardware are securely fastened.
- Door Balance: Check if the garage door is balanced by disengaging the opener (using the emergency release cord) and manually lifting the door. It should stay open on its own without assistance. If it’s too heavy or drifts down, the springs may need adjustment by a professional.
Remote And Battery Management
- Remote Batteries: Replace remote batteries at least once a year, or whenever you notice a weaker signal.
- Keypad Batteries: If you have a garage door keypad, check and replace its batteries regularly as well.
By incorporating these simple maintenance practices into your routine, you can significantly extend the lifespan of your garage door opener and prevent many common issues, including those that cause those frustrating blinking lights.
Frequently Asked Questions
What Does A Blinking Green Light On A Garage Door Opener Mean?
A blinking green light often indicates that the safety sensors are misaligned or obstructed. The green light typically signifies the status of the safety sensor beam. If it’s blinking, the opener is not receiving a clear signal between the two sensors, preventing operation for safety reasons.
My Garage Door Opener Light Blinks 10 Times. What Does That Mean?
A specific number of blinks, like 10, is a diagnostic code specific to the opener’s manufacturer and model. For example, on some LiftMaster and Chamberlain models, 10 blinks can indicate a problem with the travel limit settings or the force settings.
You would need to consult your opener’s manual or the manufacturer’s website to decipher the exact meaning of the 10-blink code for your specific unit.
Can A Loose Wire Cause The Garage Door Opener Light To Blink?
Yes, a loose wire is a common cause for blinking lights, particularly issues related to the safety sensors. If the wires connecting the safety sensors to the opener unit are loose, damaged, or disconnected, the sensors cannot communicate properly, leading the opener to signal a fault with a blinking light.
Loose wiring can also affect the wall button or other components.
If I Reset My Garage Door Opener, Will It Fix The Blinking Light?
Resetting the garage door opener can fix the blinking light if the cause is a temporary electronic glitch, corrupted memory in the logic board, or incorrect programming of travel limits or remotes. However, if the blinking light is due to a physical obstruction, a misaligned sensor, or a mechanical failure, a simple reset will not resolve the underlying problem. It’s a good first step for many electronic-related issues. For guidance on how to perform a reset, you can refer to this step-by-step guide.
How Often Should I Lubricate My Garage Door Opener?
You should lubricate the moving parts of your garage door system, including rollers, hinges, and the opener’s chain or screw drive (if applicable), at least twice a year. This helps reduce friction, wear, and strain on the opener motor. More frequent lubrication might be necessary in harsh climates or if you notice increased noise or resistance.
The blinking light on your garage door opener is more than just an annoyance; it’s a signal that demands attention. By systematically working through potential causes, from simple sensor checks to more complex internal diagnostics, you can often resolve the issue yourself.
Remember to prioritize safety, consult your owner’s manual, and don’t hesitate to call a professional if you’re uncertain or if the problem persists. Regular maintenance is your best defense against future blinking lights and ensures your garage door continues to operate smoothly and reliably for years to come.