Now Reading: How to Get Konnected Garage Door Opener into HomeKit Easily
- 01
How to Get Konnected Garage Door Opener into HomeKit Easily

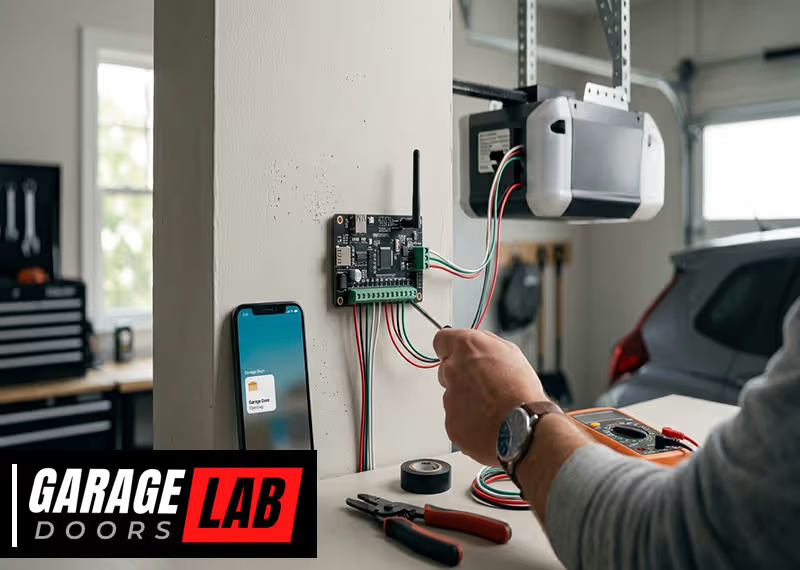
Bringing your garage door into the world of smart home automation can be a game-changer for convenience and security. If you own a Konnected Garage Door Opener, you may be wondering how to add it to Apple HomeKit. This integration lets you control your garage door with Siri, automate actions based on your location, and monitor the door’s status from anywhere. While Konnected is not natively HomeKit compatible out of the box, there are reliable methods to make this work. This guide will walk you through each step, explain your options, and help you avoid common pitfalls.
Many smart home enthusiasts find themselves lost when trying to connect devices that do not officially support HomeKit. You might see complex guides, confusing jargon, or solutions that only work half the time. Here, you’ll find a clear path, extra insights, and practical advice, even if you’re not a tech expert.
By the end, you’ll understand not just the “how,” but the “why” behind each step—so you can build a smarter home with confidence.
Why Integrate Konnected Garage Door Opener With Homekit?
Apple HomeKit is Apple’s platform for managing smart home devices. It offers a simple, secure way to control everything from lights to locks—and, yes, garage doors—using your iPhone, iPad, Apple Watch, or even your voice via Siri. But Konnected, while a popular solution for converting wired alarm and garage systems into smart devices, does not include built-in HomeKit support.
Adding your Konnected opener to HomeKit gives you:
- Voice control with Siri (“Open the garage door”)
- Automation based on location, time, or other devices
- Centralized control in the Apple Home app
- Enhanced security with Apple’s privacy standards
Without this integration, you’re limited to the Konnected app or web interface, which lacks these Apple ecosystem benefits.
Understanding The Challenge: Why Konnected Needs A Bridge
Konnected devices use open protocols like MQTT or their own cloud service. Apple HomeKit, however, requires devices to use a specific HomeKit protocol for native support. Most third-party hardware, including Konnected, can’t speak this “language” directly. That’s where software bridges come in.
A HomeKit bridge acts as a translator between your non-HomeKit device and the Apple Home app. The most popular and reliable solution for DIYers is Homebridge—a lightweight server that runs on a small computer (like a Raspberry Pi or your always-on PC) and makes thousands of smart devices HomeKit-compatible.
What You’ll Need Before You Begin
To connect your Konnected Garage Door Opener to HomeKit, you’ll need a few things. Make sure you have these items and information ready:
- Konnected Garage Door Opener: Properly installed and working with the Konnected app.
- Homebridge Server: A computer or device (Raspberry Pi, Mac, PC, or Docker container) to run Homebridge.
- Homebridge Konnected Plugin: Software that connects Homebridge to your Konnected device.
- Apple Device: An iPhone, iPad, or Mac with the Home app.
- Network Access: Your Konnected device and Homebridge server must be on the same Wi-Fi network.
- Konnected API Access: The Konnected device’s local IP address and API key (if required).
- Basic Technical Skills: Ability to follow instructions, copy-paste commands, and edit simple config files.
Many beginners overlook the importance of stable power and network connectivity for both Konnected and Homebridge. If either device loses power or Wi-Fi, HomeKit automations may fail.
Setting Up Homebridge: The Essential Bridge
The heart of this process is Homebridge. This open-source project is trusted by thousands of smart home users worldwide. Let’s walk through the installation.
Choosing The Right Platform For Homebridge
Homebridge runs on several platforms. Here’s a comparison to help you choose:
| Platform | Pros | Cons | Best For |
|---|---|---|---|
| Raspberry Pi | Low power, always-on, affordable | Requires SD card, setup time | DIY users, dedicated setup |
| Mac/PC | Easy install, no extra hardware | Must stay powered on | Users with spare computers |
| Docker | Flexible, runs on many systems | More technical knowledge needed | Advanced users, NAS owners |
Most users pick Raspberry Pi for reliability and low cost. A Raspberry Pi 3B+ or newer is recommended.
Installing Homebridge
- Prepare Your Device
- For Raspberry Pi: Flash Raspberry Pi OS to a microSD card.
- For PC/Mac: Open your terminal or command prompt.
- Install Node.js
- Homebridge requires Node.js (version 16 or newer). Install it from [nodejs.org](https: //nodejs.org/).
- Install Homebridge
- Open your terminal and run:
sudo npm install -g --unsafe-perm homebridge homebridge-config-ui-x
- This installs both Homebridge and its web interface.
- Start Homebridge
- On Raspberry Pi or Linux:
homebridge
- On Mac/Windows, use the Homebridge desktop app or run the same command.
- Access the Web UI
- Open your browser and go to `http: //
:8581` (default port is 8581). - Set a username and password.
- Make Homebridge Start on Boot
- For Raspberry Pi, use:
sudo hb-service install --user homebridge
Tip: Give your Homebridge device a static IP address in your router’s settings. This avoids connection issues later.
Installing And Configuring The Homebridge Konnected Plugin
With Homebridge running, now you need to install a Homebridge plugin that talks to your Konnected device.
Finding The Right Plugin
The most popular options are:
- Homebridge-konnected (official plugin)
- Homebridge-mqttthing (if your Konnected device uses MQTT)
- Homebridge-http-switch (for HTTP API control)
For most users, homebridge-konnected is the best choice. It’s actively maintained and supports garage doors, sensors, and more.
Plugin Installation Steps
- In the Homebridge web interface, go to the Plugins tab.
- Search for Konnected.
- Click Install on the plugin you want (e.g., homebridge-konnected).
Plugin Configuration
After installation, you’ll need to configure the plugin. This usually involves editing the config.json file, but the Homebridge web UI makes it simple.
Key settings you’ll need:
- Device IP Address: Find this in your router’s device list or the Konnected app.
- API Key or Token: Some setups require you to generate this in the Konnected app or web interface.
- Device Type: Select “Garage Door Opener.”
- Sensor Pins: If you have a sensor to detect open/closed status, specify the pin.
Here’s an example configuration for a typical setup:
{
"platform": "Konnected",
"devices": [
{
"name": "Garage Door",
"ip": "192.168.1.50",
"deviceId": "konnected-123456",
"accessToken": "your-api-key-here",
"sensors": [
{
"name": "Garage Door Sensor",
"pin": 1,
"type": "contact"
}
],
"actuators": [
{
"name": "Garage Door Relay",
"pin": 5,
"type": "relay"
}
]
}
]
}
Non-obvious Insight: Many users skip the sensor pin configuration, thinking the relay is enough. However, HomeKit requires feedback—so you must set up a sensor to accurately show open/closed status.
After saving, restart Homebridge from the web interface. Your Konnected Garage Door should now appear as a new accessory in HomeKit.
Adding Homebridge To Apple Homekit
Once your Konnected device shows up in Homebridge, you need to add Homebridge itself to the Apple Home app. This is how HomeKit “sees” your garage door.
Steps To Pair Homebridge With Homekit
- Open the Home app on your iPhone, iPad, or Mac.
- Tap the + icon, then Add Accessory.
- Scan the QR code from the Homebridge web UI (shown on the main page).
- Follow prompts to add the Homebridge bridge.
- You’ll see your Garage Door accessory appear. Assign it to a room for easier control.
Practical Tip: If you have multiple users in your home, invite them to your Home app for shared control. You don’t need to repeat the setup for each device.
Setting Up Automations And Scenes
Now that your Konnected Garage Door Opener is visible in HomeKit, you can create powerful automations. Here are some real-world examples:
- Location-based opening: Automatically open the garage door when you arrive home (using HomeKit automations and your iPhone’s location).
- Night lock-down: Close the garage door automatically at 10 PM if it’s open.
- Voice control: “Hey Siri, open the garage door.”
- Scenes: Include the garage door in “Goodbye” or “I’m Home” scenes.
Non-obvious Insight: For security, HomeKit may ask you to unlock your device (using Face ID, Touch ID, or passcode) before opening the garage door with Siri. This prevents accidental or unauthorized opening.
Common Issues And How To Fix Them
Even with careful setup, things can go wrong. Here’s how to solve the most frequent problems users face.
Homebridge Not Found In Homekit
- Check your network: Both Homebridge and your iPhone must be on the same Wi-Fi for the initial pairing.
- Restart devices: Power cycle your Homebridge server and iPhone.
- Check QR code: Use the latest QR code from the Homebridge UI.
Garage Door Accessory Not Showing
- Plugin configuration: Double-check your config for typos, especially IP addresses and sensor pins.
- Restart Homebridge: Many issues resolve with a full restart.
- Home app refresh: Close and reopen the Home app.
Door State Doesn’t Update
- Sensor wiring: Make sure the sensor is securely connected to the correct pin.
- Sensor type: Use the correct type (“contact” for magnetic switches).
- Polling interval: Some plugins allow you to set how often the sensor checks for status. Set it to 1-2 seconds for best results.
Delays Or Unreliable Operation
- Wi-Fi strength: Weak signal to Konnected or Homebridge can cause lag.
- Power supply: Use a quality power adapter for both devices.
- Network congestion: Avoid heavy streaming or downloads on the same network.
Security And Privacy Concerns
- API key safety: Never share your Konnected API key publicly.
- Homebridge updates: Keep Homebridge and plugins updated to fix security issues.
Comparing Homekit Integration Methods For Konnected
There’s more than one way to add your Konnected Garage Door Opener to HomeKit. Here’s a quick comparison:
| Method | Pros | Cons | Best For |
|---|---|---|---|
| Homebridge with Konnected Plugin | Reliable, supports sensors, easy updates | Requires extra hardware (Raspberry Pi, PC) | Most users, best long-term solution |
| Homebridge with MQTT Plugin | Flexible, works with other MQTT devices | More setup, MQTT broker needed | Advanced users, mixed smart home setups |
| Homebridge with HTTP Plugin | Simple, works with any device with HTTP API | No sensor support, less feedback | Quick tests or simple setups |
| Shortcut Automations (Manual) | No hardware needed | Manual, no real-time status, not secure | Basic control, temporary use |
Pro tip: Unless you have special needs, the direct Homebridge Konnected plugin is the best mix of reliability and features.
Advanced Options: Home Assistant And Other Bridges
If you already use Home Assistant or another smart home hub, you might consider integrating Konnected there and exposing devices to HomeKit via Home Assistant’s built-in HomeKit Bridge. This method offers even deeper automation but requires more technical skill.
Why choose Homebridge over Home Assistant? Homebridge is simpler for most users and requires less maintenance. Home Assistant is better if you want to connect many different brands and advanced automations.
Keeping Your Setup Secure And Reliable
Smart home security is crucial, especially for devices like garage doors. Follow these tips for peace of mind:
- Use strong, unique passwords for your Homebridge web interface and HomeKit home.
- Update regularly: Check for plugin and Homebridge updates at least once a month.
- Backup your configuration: Homebridge lets you export your setup. Store a copy on another device.
- Monitor logs: The Homebridge web UI shows logs. Watch for errors or repeated disconnects.
- Limit access: Only invite trusted users to your HomeKit home.
Stat: According to a 2023 smart home survey, over 70% of users experienced fewer issues after setting a static IP for their Homebridge server and keeping it updated.
Real-world Example: Step-by-step Walkthrough
Let’s summarize the entire process with a real-life scenario. Imagine you have a Konnected Garage Door Opener and a Raspberry Pi 4.
- Install Raspberry Pi OS on your Pi.
- Install Node.js (v16+) using official instructions.
- Install Homebridge and the homebridge-config-ui-x UI.
- Open Homebridge web UI at `http: //pi-ip-address:8581`.
- Search for and install the “homebridge-konnected” plugin.
- Enter your Konnected device details—IP, device ID, API key, sensor pin, and relay pin—in the plugin’s settings.
- Restart Homebridge.
- Open Home app on your iPhone, tap “Add Accessory,” and scan the Homebridge QR code.
- Assign the new garage door to your “Garage” room and test opening/closing from your phone.
- Set up automation: “Close garage door at 10 PM if open.”
This process, done carefully, usually takes under an hour for most users.
Troubleshooting: When Things Don’t Work As Expected
Even with careful setup, tech can misbehave. Here’s a quick guide to common issues and solutions.
Homebridge Not Discoverable
- Check your firewall settings—Homebridge uses ports 8581 and 51826.
- Try using an Ethernet connection for initial setup.
- Reboot your network router.
Home App Shows “no Response”
- Check power and Wi-Fi for both Homebridge and Konnected.
- Review your plugin config for errors (a missing comma can break everything).
- Update all software to the latest versions.
Siri Says “sorry, I Can’t Do That”
- Make sure you’re on the same Wi-Fi as your Homebridge server.
- If you have multiple Home Hubs (Apple TVs, HomePods), try rebooting them.
- Re-link Homebridge in the Home app if needed.
Expanding Your Smart Garage: What’s Next?
Now that your Konnected Garage Door Opener works with HomeKit, you can expand your smart garage experience.
- Add cameras to monitor your garage.
- Use HomeKit sensors for temperature or humidity.
- Combine with smart lighting for scenes like “Garage Arrival.”
- Track open/close history using HomeKit automations.
Always test new devices and automations to ensure safety—especially for anything that controls your garage door.

Frequently Asked Questions
How Secure Is Using Homebridge With A Konnected Garage Door Opener?
Homebridge uses your local network and does not send your device data to the cloud by default. Apple HomeKit applies strong encryption for all commands. For best security, always use strong passwords and keep your Homebridge server updated.
Will My Garage Door Still Work If The Internet Goes Out?
Yes, as long as your Homebridge server and Konnected device are powered and connected to your local Wi-Fi, you can control your garage door from within your home. Remote access (outside Wi-Fi) may not work without internet.
Can I Use Multiple Garage Doors With One Homebridge Setup?
Absolutely. You can add multiple Konnected devices or multiple relays/sensors to one Homebridge server. Just add separate entries for each door in your plugin configuration.
Do I Need A Raspberry Pi, Or Can I Use My Computer?
You can use a Raspberry Pi, Mac, Windows PC, or even a Docker container. The key is that the device runs all the time. A Raspberry Pi is popular because it’s small, reliable, and energy-efficient.
Where Can I Get More Help Or Find Updates For Plugins?
The best place to find support, updates, and guides is the official Homebridge GitHub page. You’ll find active communities, plugin documentation, and troubleshooting advice.
Smart home automation can feel overwhelming, but following these steps will bring your Konnected Garage Door Opener into HomeKit with minimal frustration. Take your time, double-check each step, and enjoy the convenience and security of a truly connected home.