Now Reading: How to Open Chamberlain Garage Door Remote: Easy Step-by-Step Guide
- 01
How to Open Chamberlain Garage Door Remote: Easy Step-by-Step Guide
How to Open Chamberlain Garage Door Remote: Easy Step-by-Step Guide
Opening a Chamberlain garage door remote is something many homeowners need to do, whether it’s to change the battery, troubleshoot, or program the remote to a new door opener. While the task may sound simple, it can be confusing if you’ve never done it before—or if you’re worried about damaging the remote. This guide will walk you through the process from start to finish, with clear explanations, step-by-step instructions, and troubleshooting advice. You’ll learn about the different types of Chamberlain remotes, tools you’ll need, common mistakes to avoid, and how to safely open and reassemble your device. By the end, you’ll feel confident handling your Chamberlain remote, even if you’re not a tech expert.
Understanding Chamberlain Garage Door Remotes
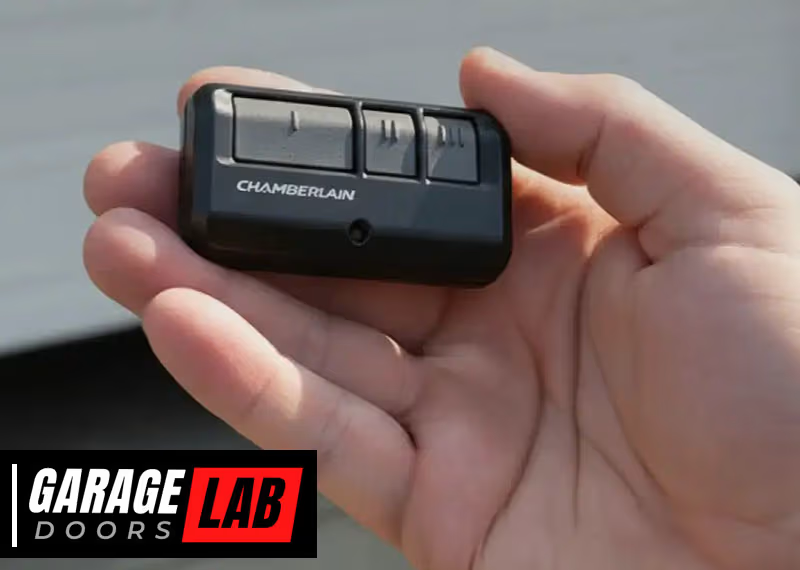
Before you start, it’s helpful to know what type of Chamberlain remote you have. Chamberlain makes several models, and the way you open them can be different. Some remotes are small and slim, while others are larger with more buttons. The design can affect how you open the case.
Common Types Of Remotes
- Keychain remotes – Compact, usually with one or two buttons. Popular for carrying on your keys.
- Visor clip remotes – Medium size, often with three buttons. These clip to your car’s sun visor.
- Multi-door remotes – Larger, with several buttons for multiple garage doors or gates.
- Smart remotes – May include digital screens or advanced features.
Each of these types usually has a plastic case that snaps together, sometimes with a visible screw.
Why Open A Chamberlain Remote?
There are several reasons you might need to open your Chamberlain remote:
- Battery replacement – The most common reason.
- Reprogramming – Some remotes need to be opened for programming.
- Cleaning – Dirt can affect button function.
- Repair – Fixing a stuck button or loose part.
Understanding your reason helps you prepare for what you’ll find inside.
Safety Precautions Before Opening
Working with any electronic device requires care. While a garage door remote is low-voltage and generally safe, it’s still important to be careful.
- Remove from keychain or visor before opening.
- Do not force the case open; you could break it.
- Work on a clean, flat surface to avoid losing small parts.
- Keep batteries away from children and pets.
- If your remote has been exposed to water, wear gloves to avoid contact with battery chemicals.

Tools You’ll Need
You don’t need a lot of tools to open a Chamberlain garage door remote, but having the right ones makes the job easier and safer.
- Small Phillips screwdriver – For remotes with screws.
- Flathead screwdriver or prying tool – For snapping open the case.
- Soft cloth – To protect the remote and your work surface.
- Replacement battery – Check your remote’s manual for the correct type (often CR2032 or similar).
- Tweezers (optional) – Helpful for removing small batteries.
- Small bowl or tray – To hold screws or parts.
Using the correct tools helps prevent damage to the remote.
Identifying How Your Chamberlain Remote Opens
The method to open your remote depends on its design. There are two main types:
1. Snap-together Case
- No visible screws.
- Usually opens by gently prying apart the seam.
2. Screw-secured Case
- At least one visible screw on the back.
- Requires a screwdriver to open.
If you’re not sure which type you have, look at the back of your remote. If you see a small screw, it’s the screw-secured type. If not, it’s probably snap-together.
Here’s a comparison of the two types:
| Type | Opening Method | Common Models | Tool Needed |
|---|---|---|---|
| Snap-Together | Pry open at seam | 953EV, 956EV | Prying tool |
| Screw-Secured | Remove screw, then open | 950CB, 953CB | Small screwdriver |
Knowing your remote’s type saves time and avoids mistakes.
Step-by-step: How To Open Chamberlain Garage Door Remote
Let’s break down the process so you can follow along easily. These steps cover both snap-together and screw-secured types. If your remote is a special model, always check the manual.
Step 1: Prepare Your Workspace
- Place a soft cloth on your table to protect the remote and catch small pieces.
- Gather your tools and replacement battery.
- Make sure you have enough light.
Step 2: Remove The Remote From Keychain Or Visor
- If your remote is attached to your keys or clipped to your car’s visor, remove it.
- This makes it easier to hold and prevents accidental damage.
Step 3: Identify Opening Points
- Look around the edge of the remote for a small gap or slot.
- For screw-secured remotes, locate the screw (usually on the back).
Step 4: Open The Case
For Snap-together Remotes:
- Insert the prying tool or flathead screwdriver into the slot or seam.
- Gently twist until the case starts to separate.
- Work your way around the edge, twisting gently to pop open each clip.
- Lift off the back panel once all clips are released.
For Screw-secured Remotes:
- Use the small Phillips screwdriver to remove the screw.
- Place the screw in your bowl or tray.
- Insert the prying tool at the seam and gently twist if necessary.
- Remove the back panel.
Pro Tip: Don’t force the case open. If it doesn’t budge, check for hidden screws under stickers or labels.
Step 5: Remove The Old Battery
- Note how the battery is positioned (which side is up).
- Use your finger or tweezers to carefully lift the battery out.
- Dispose of the old battery properly—many hardware stores recycle them.
Step 6: Install The New Battery
- Make sure the new battery matches the old one (type and orientation).
- Slide the battery into place.
- Ensure it sits flat and makes contact with the terminals.
Step 7: Inspect And Clean (optional)
- Check for dust, dirt, or corrosion inside the case.
- Wipe gently with a soft cloth.
- For corrosion, use a cotton swab with a little rubbing alcohol.
Step 8: Close The Remote
- Align the case halves carefully.
- Snap them together, or replace the screw.
- Make sure all clips are secure and the seam is tight.
Step 9: Test The Remote
- Press a button to see if the light comes on.
- Try opening your garage door from a short distance.
- If it doesn’t work, double-check the battery orientation.
Common Problems And How To Fix Them
Opening a Chamberlain remote isn’t usually hard, but sometimes things go wrong. Here’s how to handle the most common issues.
1. The Remote Won’t Open
- Double-check for hidden screws under labels.
- Use a plastic prying tool instead of metal to avoid scratches.
- If it still won’t open, check your model online for specific instructions.
2. Case Clips Break
- If a clip breaks, the remote may still work if the case holds together.
- Use a small piece of tape to secure the case if needed.
- For severe damage, consider replacing the remote.
3. Battery Is Stuck
- Gently wiggle the battery; don’t pry aggressively.
- Use plastic tweezers, not metal, to avoid short-circuiting.
- If the battery leaks, clean the contacts with a cotton swab and alcohol.
4. Remote Doesn’t Work After Reassembly
- Confirm the battery is facing the correct way.
- Check if the battery is new and compatible.
- Inspect for loose or bent contacts.
- Try resetting the remote by removing the battery for 30 seconds.
5. Lost Or Damaged Parts
- Keep screws and small parts in a bowl.
- If a screw is lost, take the remote to a hardware store for a replacement.

Replacing The Battery: Detailed Steps And Tips
Changing the battery is the most common reason to open your Chamberlain remote. Let’s look at battery replacement in detail.
Choosing The Right Battery
Most Chamberlain remotes use a CR2032 or similar coin battery. Check your manual or the old battery for the correct type. Using the wrong battery can damage your remote.
Handling The Battery Safely
- Don’t touch both sides of the battery at once; oils from your skin can reduce life.
- Use clean hands or gloves.
- Store unused batteries in a cool, dry place.
Extending Battery Life
- Only press remote buttons when needed.
- Remove the battery if you won’t use the remote for a long time.
- Store the remote indoors during extreme temperatures.
Here’s a quick comparison of common battery types for Chamberlain remotes:
| Battery Type | Voltage | Common Models | Estimated Life |
|---|---|---|---|
| CR2032 | 3V | 953EV, 956EV | 1-2 years |
| CR2016 | 3V | 950CB | 1 year |
| AAA | 1.5V | Older models | 2+ years |
Replacing the battery regularly prevents unexpected failures.
Special Cases: Unique Chamberlain Remote Models
Some Chamberlain remotes have special designs or features. Here’s how to handle a few:
Mini Remotes
These are tiny and may have a hidden screw inside the battery compartment. Open the battery cover first, then look for the screw.
Smart Remotes
Some smart models have screens or touchpads. Open these with extra care to avoid damaging the display.
Weatherproof Remotes
These have rubber seals inside to keep out water. Don’t lose or pinch the seals when reassembling.
If you have a rare model, search for your exact model number on the Chamberlain website or contact their support.
Programming Your Remote After Opening
Most of the time, changing the battery doesn’t erase the remote’s programming. But sometimes, especially with older remotes, you may need to reprogram it. Here’s how:
1. Find The “learn” Button
On your garage door opener (the unit in your garage ceiling), locate the Learn button. It’s often under a light cover.
2. Press The Learn Button
- Press and release the Learn button. An indicator light will turn on.
3. Press The Remote Button
- Within 30 seconds, press and hold the button on your remote you want to program.
- The opener’s light will blink or click to confirm.
4. Test The Remote
- Press the button again to see if the door opens.
If programming fails, try again or consult your opener’s manual.
Cleaning And Maintaining Your Remote
Keeping your Chamberlain remote clean helps it last longer and work reliably.
- Wipe the outside with a soft, damp cloth.
- For sticky buttons, open the case and clean carefully.
- Avoid using water or harsh chemicals inside the remote.
- Check for corrosion on battery contacts and clean with alcohol as needed.
Regular maintenance reduces the risk of malfunction.
When To Replace Your Chamberlain Remote
Sometimes, opening and fixing your remote isn’t enough. Here are signs you might need a new one:
- Remote is cracked or won’t stay closed.
- Buttons don’t work even after battery replacement.
- Remote only works from very close range.
- Internal parts are corroded or damaged.
A new remote is often under $40 and can be bought online or at hardware stores. Always check compatibility with your garage door opener.
Recycling And Environmental Tips
Used batteries and broken remotes shouldn’t go in the trash. Batteries contain chemicals that can harm the environment.
- Take old batteries to a recycling center or hardware store.
- If your remote is broken, see if your city has electronic waste recycling.
For more on safe recycling, the EPA’s recycling guide is a good resource.
Real-world Examples
Let’s look at a couple of scenarios to show how these steps work in practice.
Example 1: Visor Clip Remote
Sarah’s Chamberlain remote stopped working. She removed it from her car visor, found a small screw on the back, and used a Phillips screwdriver to open it. After replacing the CR2032 battery, she snapped the case shut. The remote worked right away.
Example 2: Keychain Remote With Stuck Battery
Mike’s small keychain remote wouldn’t open with a coin, so he switched to a plastic prying tool. The battery was wedged tightly, but a gentle push with tweezers got it out. He made sure to line up the new battery correctly.
After reassembly, he had to reprogram the remote using the garage opener’s Learn button, but it worked fine.
Expert Tips And Non-obvious Insights
Most guides cover the basics, but here are two things beginners often miss:
- Check for Firmware Updates: Some Chamberlain smart remotes can be updated via the MyQ app or website. If your remote has a screen or connects to Wi-Fi, check for updates to avoid compatibility issues.
- Label Your Remotes: If you have multiple garage doors or gates, use a small sticker or label to mark which button controls which door. This prevents confusion and accidental programming mistakes.
Also, if your remote is still under warranty, opening it yourself may void the warranty. If in doubt, contact Chamberlain support.

Summary Table: Key Steps And Troubleshooting
Here’s a quick reference for the main steps and common problems:
| Step | What to Do | Common Issue | Quick Fix |
|---|---|---|---|
| Open Case | Use prying tool or screwdriver | Case won’t open | Check for hidden screws |
| Replace Battery | Insert new, correct battery | Battery stuck | Use plastic tweezers |
| Close Case | Snap or screw shut | Case won’t close | Check battery position |
| Test Remote | Press button, check function | No response | Check battery orientation |
Frequently Asked Questions
What Battery Does A Chamberlain Garage Door Remote Use?
Most Chamberlain remotes use a CR2032 coin cell battery, but some older models may use CR2016 or even AAA batteries. Always check your remote’s manual or the old battery for the correct type.
How Do I Know If My Chamberlain Remote Needs A New Battery?
Common signs are reduced range, needing to press the button multiple times, or the light on the remote not turning on. If the remote stops working suddenly, try a new battery before replacing the remote.
Will Opening My Remote Erase Its Programming?
Usually, no. Simply changing the battery does not erase programming on most Chamberlain remotes. However, if the battery is out for a long time or the remote is very old, you may need to reprogram it.
Can I Use Any Coin Battery In My Chamberlain Remote?
No. Using the wrong type can damage the remote or cause it not to work. Always use the battery type recommended in your manual (often CR2032).
What Should I Do If My Remote Still Doesn’t Work After Changing The Battery?
Check the battery orientation, ensure the contacts are clean, and try reprogramming the remote. If it still won’t work, there may be an internal problem and you may need a replacement.
Opening a Chamberlain garage door remote is a simple task once you know the steps. With the right tools, careful handling, and attention to detail, you can change the battery, clean the inside, or troubleshoot issues without damaging your device. Always check your model for any special instructions, and remember to recycle used batteries responsibly. With these tips, your garage door remote will keep working smoothly for years.


