Now Reading: How to Reprogram Clicker Garage Door Remote in Minutes
- 01
How to Reprogram Clicker Garage Door Remote in Minutes
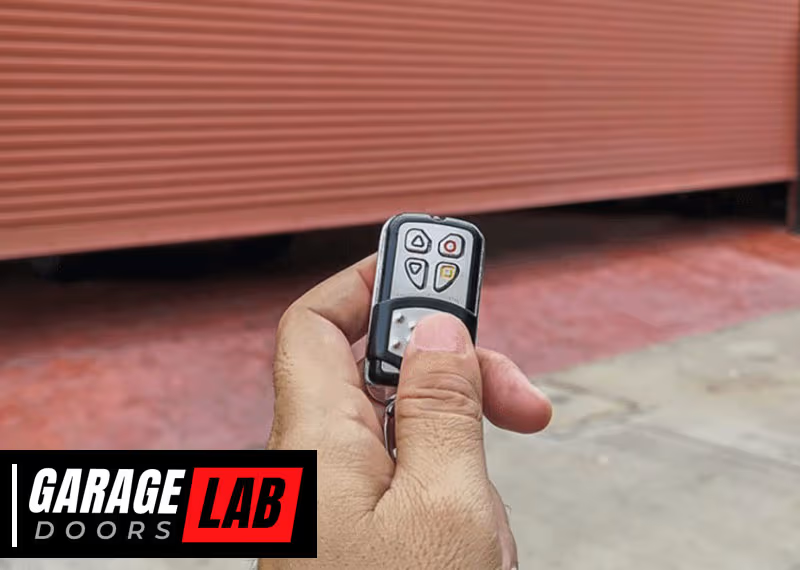
Reprogramming a garage door remote can seem like a technical task. But for many homeowners, learning how to reprogram a Clicker garage door remote is a practical skill that saves time and money. Whether you just moved into a new home, replaced your garage door opener, or lost a remote, knowing how to do this yourself is empowering. This guide walks you through every step, shares real troubleshooting tips, and explains why reprogramming your remote matters more than you might think.
Many people think reprogramming is only about pressing a few buttons. But sometimes, small mistakes can leave your garage door unresponsive or, worse, open to security risks. You’ll find clear instructions, answers to common questions, and advice based on real homeowner experiences.
Even if you have never worked with garage door openers before, this article will help you understand the process and get your remote working smoothly.
Understanding Clicker Garage Door Remotes
The Clicker brand is one of the most popular universal remotes for garage doors in the US. These remotes work with almost all major garage door opener brands—such as Chamberlain, Genie, LiftMaster, Craftsman, and more. They allow you to control one or two garage doors with a single remote, which is handy if you have multiple doors or switch vehicles often.
Universal compatibility is the main advantage of Clicker remotes. They are designed with a wide range of programming codes, making them suitable for both old and new garage door systems. Each remote uses radio frequencies and rolling codes, which means every time you use the remote, it sends a new code to the opener, making it safer from hacking.
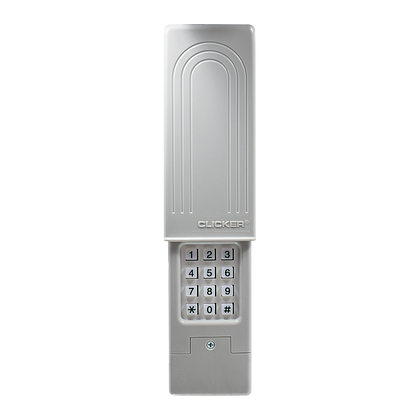
There are several models of Clicker remotes. Some are simple with just two buttons, while others have extra features like keychain designs or wireless keypads. Knowing your model can help you find the right instructions, but most Clicker remotes use a similar programming process.
Why Reprogram A Clicker Garage Door Remote?
People need to reprogram their garage door remotes for different reasons. Here are some of the most common situations:
- Lost or stolen remote: If someone finds or steals your remote, they could access your garage. Reprogramming your remote (and opener) keeps your home safe.
- New home: When moving in, previous owners may still have remotes programmed to your opener. Reprogramming ensures only you have access.
- Adding a new remote: If you buy a new Clicker remote, you must sync it with your garage door opener.
- Replacing batteries: Sometimes, after changing the battery, the remote may lose its programming.
- Changing garage door openers: Upgrading or replacing your opener requires reprogramming all remotes.
- Malfunctioning remote: If your remote stops working, reprogramming can often fix the problem.
Ignoring these situations can leave your garage vulnerable or unusable. Many homeowners forget to erase old codes when moving or after losing a remote, which is a common security mistake.
What You Need Before You Start
Before starting, prepare a few things to make the process easier and safer:
- Your Clicker remote (make sure it has fresh batteries)
- Access to your garage door opener unit (usually on the ceiling of your garage)
- A ladder (if the opener is out of reach)
- Your garage door opener brand and model number (optional, but helpful)
- The instruction manual (if available; can also be found online)
If your remote is old, check if it works with your specific opener model. Most Clicker remotes are universal, but very old openers (pre-1993) may not be compatible.
How Clicker Remotes Communicate With Garage Door Openers
Understanding how the remote and opener “talk” to each other helps you troubleshoot problems. Clicker remotes use radio frequencies (usually 300MHz, 310MHz, 315MHz, or 390MHz) to send a coded signal. Modern remotes use rolling code technology, which changes the code every time the remote is used. This prevents thieves from recording your signal.
When you program your remote, you are syncing it with your opener’s receiver. The process stores the remote’s unique code in the opener’s memory. When you press the remote, the opener recognizes the code and opens or closes the door.
Some older openers use DIP switches (small switches inside the remote and opener). The switches must match for the remote to work. Most Clicker remotes made after 1996 use the “learn button” method, which is simpler and more secure.
Step-by-step Guide: How To Reprogram A Clicker Garage Door Remote
Let’s walk through the full process. Follow these steps carefully for best results.
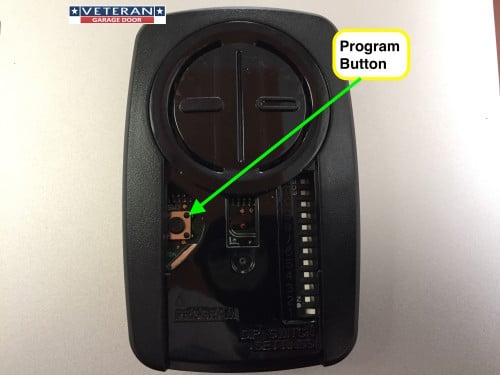
Step 1: Identify Your Garage Door Opener’s Learn Button
- Locate the garage door opener unit (usually hanging from the garage ceiling).
- Look for a “learn” button on the side or back of the opener. It may be behind a light cover or near the antenna wire.
- The learn button is often colored (yellow, red, orange, purple, or green). The color helps identify your opener’s system (see the table below).
| Learn Button Color | Frequency (MHz) | Year Range | Compatibility |
|---|---|---|---|
| Yellow | 390 or 315 | 2011-present | Security+ 2.0 |
| Purple | 315 | 2005-2011 | Security+ |
| Red/Orange | 390 | 1997-2005 | Security+ |
| Green | 390 | 1993-1997 | Billion Code |
If you cannot find a learn button, check your opener’s manual or look for DIP switches.
Step 2: Clear The Opener’s Memory (if Needed)
If you lost a remote or moved into a new home, it’s best to erase all previous codes from your opener. This prevents old remotes from working.
- Press and hold the learn button for about 6-10 seconds until the indicator light turns off.
- This removes all programmed remotes from the opener’s memory.
- You must now reprogram all remotes you want to use.
This step is often skipped but is critical for security, especially in homes with multiple previous owners.
Step 3: Prepare Your Clicker Remote
- Ensure the remote has fresh batteries.
- If your remote has multiple buttons, decide which button you want to use for this opener.
- Stand on a ladder if needed, so you can reach the opener safely.
Step 4: Enter Programming Mode
- Press and release the learn button on your garage door opener.
- The indicator light will turn on (and stay on for about 30 seconds).
- During this time, you need to sync your remote.
Step 5: Program The Remote
- Within 30 seconds, press and hold the button on your Clicker remote you want to program.
- Hold it until you see the opener lights blink or hear a click. This means the remote is now programmed.
- Release the button.
If the light does not blink, try again. The timing is important—if you wait too long after pressing the learn button, you’ll need to repeat the process.
Step 6: Test The Remote
- Step away from the opener.
- Press the button you programmed on your Clicker remote.
- The garage door should move. If not, repeat the process, checking battery strength and button timing.
Step 7: Program Additional Remotes (if Needed)
- Repeat Steps 4-6 for each additional remote.
- Each remote must be programmed individually.
Step 8: Secure Your System
- If you erased all old codes, make sure to reprogram all family remotes.
- Store spare remotes securely to prevent unauthorized access.
Special Cases: Programming To Multiple Doors Or Brands
Clicker remotes often have two buttons so you can control two different garage doors or gates. Here’s how:
- For each opener, repeat the same process, but use a different button on the remote.
- You can mix brands (e.g., one button for Chamberlain, one for Genie).
Some Clicker remotes support smart home integration or have extra features (like keypads or car visor clips). Always check your specific model’s manual for unique steps.
Troubleshooting: What To Do If It Doesn’t Work
Even with clear steps, things can go wrong. Here’s how to fix common problems:
- Remote not responding: Check the batteries. Weak batteries cause most problems.
- Learn button not working: Unplug the opener for 30 seconds, then try again. This resets the system.
- Wrong frequency: Some very old openers use different frequencies. Check your opener’s manual or the table above.
- Interference: LED light bulbs or nearby electronics can block signals. Try programming with the lights off, or change bulbs.
- Door moves only sometimes: The remote may be out of range, or the opener’s antenna could be damaged.
- Multiple remotes fail: The opener’s memory may be full. Erase all codes and start over.
If you still have issues, try searching for your opener’s brand and model online. Many brands have support pages, and you can also find more details at the official Chamberlain site.
Common Mistakes Homeowners Make
Many people make simple mistakes when reprogramming remotes. Here are the most frequent:
- Not clearing old codes: This leaves your garage accessible by lost or old remotes.
- Holding the learn button too long: This erases all codes instead of entering programming mode.
- Programming out of range: Stand too far from the opener, and the signal may not reach.
- Using weak batteries: This often causes failed programming but is often overlooked.
- Not matching the right button: Some remotes let you choose which button controls which door. Remember which button you programmed.
Paying attention to these details can save you hours of frustration.
Programming Clicker Remotes With Dip Switches
If you have a very old opener (usually pre-1993), it may use DIP switches instead of a learn button. Here’s what to do:
- Open the battery compartment on your Clicker remote.
- Find the row of small switches (usually 8-12).
- Locate the matching DIP switches inside your garage door opener (may require a screwdriver).
- Set the remote’s switches to match the opener’s exactly (up/down or on/off).
- Replace the cover and test the remote.
These systems are less secure than rolling code models. If you have this setup, consider upgrading your opener for better security.
When To Call A Professional
Most people can reprogram a Clicker remote in under 10 minutes. But you may need professional help if:
- Your opener is very old or damaged.
- The remote will not sync after multiple attempts.
- The opener’s antenna or wiring is broken.
- You want to upgrade to a smart garage door system.
Professional installers can also help if you’re unsure about safety (e. g. , using ladders or handling electrical components).

Comparing Clicker Remote Models
Not all Clicker remotes are the same. Here’s a look at three popular models:
| Model | Buttons | Max Doors Supported | Compatibility | Special Features |
|---|---|---|---|---|
| KLIK1U | 2 | 2 | Most major brands | Simple design, keychain |
| KLIK3U | 2 | 2 | Wide compatibility | Visor clip, rolling code |
| KLIK5U | 2 | 2 | Most brands, newer tech | Wireless keypad option |
Choose the model that matches your needs. Most differences are in design and extra features, not basic programming.
How Security Is Improved By Reprogramming
Many people do not realize that reprogramming your remote is a key part of home security. Old remotes or codes can be used by anyone who previously lived in your house or found a lost remote. Modern Clicker remotes use rolling code technology, making it almost impossible for thieves to “clone” your signal.
If you ever suspect someone has unauthorized access, erase all codes and reprogram your remotes. This is faster and safer than changing the entire opener.
Security experts recommend reprogramming after:
- Moving into a new home
- Losing a remote
- Having contractors or renters who had remote access
Tips For Safe And Easy Reprogramming
- Work during daylight: Good lighting helps you see buttons and avoid falls.
- Have someone assist you: One person can press buttons while the other watches the indicator lights.
- Keep the manual handy: Manuals often have unique steps for your model.
- Label remotes: Use a marker or sticker to note which remote opens which door, especially in multi-car families.
- Store remotes securely: Avoid leaving them in unlocked cars or outdoors.
- Check for recalls: Rarely, remotes may be recalled for safety reasons. Search your model online to check.
Upgrading To Smart Garage Door Systems
If you find the process difficult or want more control, consider upgrading to a smart garage door opener. These systems let you open or close your garage from your smartphone, check the door’s status remotely, and even get alerts if the door is left open.
Some smart openers work with existing Clicker remotes. Others require new remotes or apps. They offer better security and convenience, but always keep your physical remotes as backups in case your internet or phone is down.
Real-world Example: Homeowner Success Story
Jane, a homeowner in Texas, lost her garage door remote while shopping. She was worried someone might find it and access her garage. Instead of calling a locksmith, she erased all codes from her opener and reprogrammed her new Clicker remote using the learn button.
The process took less than 10 minutes, and she avoided a costly service call. Jane’s story is common—most people can solve remote issues with just a little guidance.
Comparing Diy Vs. Professional Reprogramming
Let’s look at the main differences between doing it yourself and hiring a pro:
| Factor | DIY | Professional |
|---|---|---|
| Cost | Free (except new remote) | $50-$150 per visit |
| Time | 10-20 minutes | Wait for appointment |
| Difficulty | Easy for most people | Handled by expert |
| Security Control | You control all remotes | Some trust required |
For most people, DIY is the best choice unless your system is very old or damaged.
Frequently Asked Questions
How Do I Know If My Clicker Remote Is Compatible With My Garage Door Opener?
Most Clicker remotes are universal and work with all major brands made after 1993. Check your opener’s learn button color and frequency against your remote’s manual. For very old openers with DIP switches, make sure your remote supports that method.
What Should I Do If My Clicker Remote Still Doesn’t Work After Reprogramming?
Try replacing the batteries, moving closer to the opener, or resetting the opener by unplugging it for 30 seconds. If it still fails, check for frequency compatibility or possible interference from electronics. You can also find support at manufacturer websites like Chamberlain.
Is Reprogramming My Remote Enough To Keep My Garage Secure?
Reprogramming removes old remotes from your system, which greatly improves security. For best results, use rolling code remotes, keep remotes out of sight, and consider upgrading to smart security options for extra protection.
Can I Program My Clicker Remote To More Than One Garage Door Opener?
Yes. Most Clicker remotes have two buttons. You can program each button to a different opener, even from different brands. Just repeat the programming process for each opener and button.
Do I Need To Reprogram My Remote After Changing The Opener’s Battery?
Usually, no. The remote stays programmed if you only change its battery. But if you unplug the garage door opener or reset it, you may need to reprogram your remotes.
Learning how to reprogram a Clicker garage door remote is a practical skill every homeowner should have. It’s quick, protects your home, and gives you full control over who can access your garage. By following these steps, you’ll avoid common mistakes and make sure your garage door opens smoothly every time.
If you ever feel unsure, don’t hesitate to ask for help or consult your opener’s manual—peace of mind is always worth it.


