Now Reading: How to Reprogram Garage Door Keypad Chamberlain Easily
- 01
How to Reprogram Garage Door Keypad Chamberlain Easily
If your Chamberlain garage door keypad stops working or you need to reset it—don’t worry. Many people face this problem when they move into a new house, lose their code, or want to improve security. Reprogramming your keypad may sound difficult, but with the right steps, anyone can do it. This guide explains everything you need to know, from understanding your keypad to detailed programming instructions, fixing common errors, and even what to do if things go wrong. You’ll also learn tips that most beginners miss, so you can avoid frustration and keep your home safe.
Understanding Your Chamberlain Garage Door Keypad
Before changing anything, it’s important to know which Chamberlain keypad model you have. The company makes several types, such as the Chamberlain 940EV, 940ESTD, and universal keypads. Most work in a similar way, but small differences can affect the programming process.
Chamberlain keypads use a radio signal to communicate with the garage door opener. When you enter your code, the keypad sends a secure signal to the opener’s receiver, telling it to unlock the door. There’s usually a “Learn” button on the garage door opener unit itself (mounted in your garage), which is key to the programming process.
Key Parts Of The System
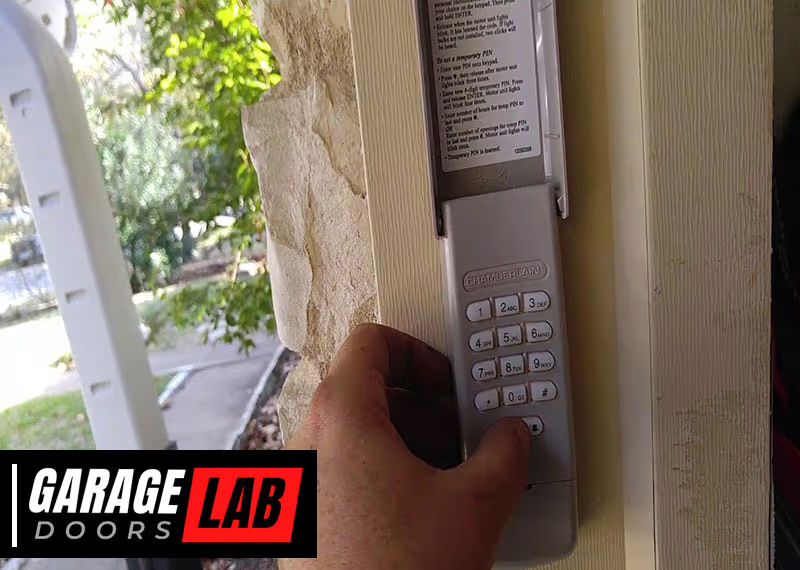
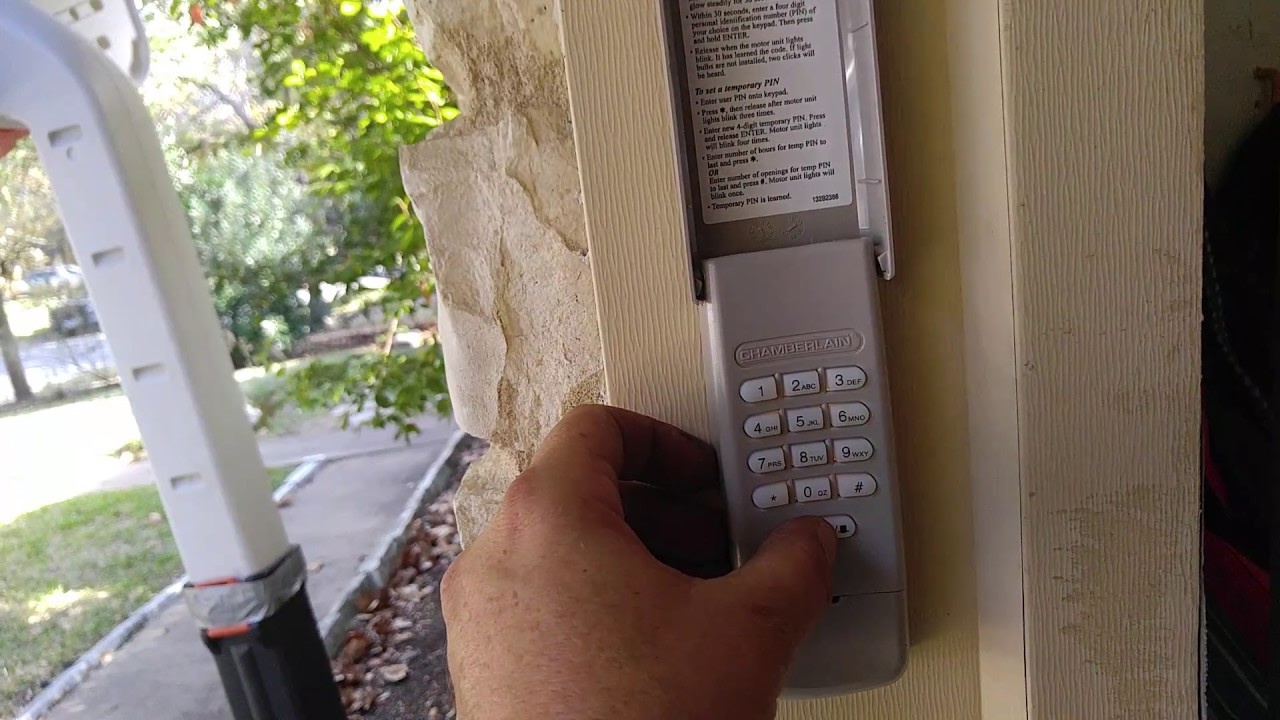
- Keypad: The pad outside your garage where you enter your code.
- Garage Door Opener Unit: The main device inside the garage, often on the ceiling.
- Learn Button: A colored button (usually yellow, red, orange, or purple) on the opener unit.
- Light Indicator: Some keypads or openers have a small LED that flashes during programming.
Knowing these basics makes the process smoother.
Why Reprogram Your Garage Door Keypad?
Many people only think about reprogramming when something stops working. But there are several important reasons to do it:
- Security: If you move into a new home, reprogramming stops old codes from working.
- Lost or Forgotten Code: If you or a family member forgets the code, you need to set a new one.
- Malfunction: Sometimes the keypad just stops responding because of interference or battery issues.
- Upgrading Equipment: When adding a new keypad or opener, reprogramming is required.
- Routine Maintenance: Regularly updating your code keeps your home safer.
What You Need Before You Start
You don’t need many tools or special skills to reprogram your Chamberlain keypad, but having these things ready makes the job faster:
- Ladder: Most garage door openers are mounted high.
- New Battery: If your keypad is old or has stopped lighting up, replace the battery first.
- Your Keypad Manual: If you have it, keep it nearby.
- Pen and Paper: For writing down your new code (just in case).
- Flashlight: Some garages are dim, especially near the opener unit.
How To Reprogram A Chamberlain Garage Door Keypad: Step-by-step
Let’s get right into the main process. These steps work for most Chamberlain keypads, but always check your model’s manual if you have one.
1. Locate The Learn Button
The Learn button is usually found on the back or side of the garage door opener unit (inside your garage, not the keypad itself). You may need to remove a small light cover.
- Colors: Yellow, red, orange, or purple
- Label: Often says “Learn” or “Set”
This button is the “brain” for programming.
2. Clear Old Keypad Codes (optional But Recommended)
If you bought a new house or think someone else may know the old code, clear all codes first:
- Press and hold the Learn button for about 6-10 seconds until the LED light turns off.
- This removes all remote and keypad codes linked to the opener.
Tip: Clearing codes will disconnect all remotes and keypads, so you’ll need to reprogram them.
3. Press The Learn Button
- Press the Learn button briefly (don’t hold it down).
- The indicator light will turn on or blink, showing it’s ready to learn a new code.
- You have about 30 seconds to complete the next step.
4. Enter Your New Code On The Keypad
- Go to the keypad outside your garage.
- Enter your desired 4-digit code (choose something secure but memorable).
- Press the Enter button within 30 seconds of pressing the Learn button.
If successful, the opener’s light bulb will flash, or you’ll hear a click.
5. Test Your Code
Wait a few seconds, then enter your new code and press Enter. The garage door should open or close.
If it doesn’t work:
- Double-check battery and keypad wiring.
- Repeat the process, making sure you press the Learn button only briefly.
6. Set A Temporary Pin (optional)
Some Chamberlain keypads let you program a temporary code for visitors or deliveries:
- Enter your main code, then press and hold the “” (star)* button until the light blinks.
- Enter a temporary 4-digit code and press Enter.
- This code usually works for a limited time or a set number of uses.
Programming A Keypad For Multi-door Garages
If you have two or more garage doors, some Chamberlain keypads can control all of them. Here’s how to set up multiple doors:
For Two-door Systems
- Press the Learn button on the first opener.
- Enter your main 4-digit code, then press Enter (the door will link).
- Press the Learn button on the second opener.
- Enter your main 4-digit code, then press the “0” button.
- Press Enter.
You can now open either door. Your keypad manual gives details for three or more doors.
Model Differences
Not every Chamberlain keypad supports multi-door programming. For complex systems, check your manual or the Chamberlain website.
How To Change An Existing Garage Door Keypad Code
Want to keep your keypad but change just the code? It’s easy and doesn’t require clearing all remotes.
- Press the Learn button on the opener briefly.
- Within 30 seconds, enter the new 4-digit code on the keypad.
- Press Enter.
The door opener light blinks to confirm. Test your new code to make sure it works.
Insight: Many people forget that changing the code does not erase remote controls. Each remote must be cleared separately for full security.
Resetting The Keypad To Factory Settings
Sometimes, the keypad seems frozen or acts strangely. In this case, a factory reset may help.
- Remove the keypad’s back cover (usually with a small Phillips screwdriver).
- Remove the battery for 10 seconds.
- Replace the battery.
- Hold down the “”* and “#” buttons together until the keypad stops blinking.
Now, reprogram the keypad as described earlier.
Non-obvious tip: Some keypads require you to press and hold a button on the inside while replacing the battery for a true reset.
Troubleshooting Common Problems
Even if you follow instructions carefully, sometimes things go wrong. Here’s how to fix the most common issues:
Keypad Not Lighting Up
- Solution: Replace the battery (usually a 9V).
- Check for corrosion on battery contacts.
Keypad Blinks But Door Doesn’t Move
- Make sure you pressed the Learn button briefly, not held it down.
- Re-enter code within 30 seconds of pressing Learn.
- Check for interference from LED bulbs or nearby electronics.
Code Works Intermittently
- Weak battery or poor keypad placement (exposed to rain/sun).
- Reprogram with a new code.
- Move the keypad if possible.
Door Opens Without Code
- Old code is still active (clear all codes and reprogram).
- Possible malfunction—factory reset the keypad.
Keypad Is Unresponsive
- Perform a factory reset.
- Check wiring if it’s a wired model.
Unusual Insight: Some keypads become unreliable if the garage temperature swings a lot. If possible, shield the keypad from direct weather.
Battery Replacement: Don’t Overlook This Step
Most Chamberlain keypads use a 9-volt battery. A weak battery is the most common cause of keypad failure.
- Slide the keypad up (or open the battery door).
- Replace with a fresh 9V battery.
- Reprogram if needed.
Pro tip: Change the battery once a year, even if it’s working, to avoid being locked out.
Chamberlain Keypad Models: Feature Comparison
Understanding model differences can help you solve problems faster. Here’s a handy comparison:
| Model | Door Compatibility | Temporary PIN | Battery Type | Learn Button Color Supported |
|---|---|---|---|---|
| 940EV | Single/Multi | Yes | 9V | Yellow, Purple, Red/Orange |
| 940ESTD | Single | No | 9V | Yellow, Purple, Red/Orange |
| Universal | Single/Multi | Yes | 9V | Most colors |
Always check your opener’s Learn button color and keypad model for the best results.

Programming With Smart Garage Door Openers
Modern Chamberlain openers (like MyQ) may use smartphone apps instead of keypads or as a backup. If your keypad is not working, you can often program codes through the app:
- Open the MyQ app.
- Go to “Device Settings.”
- Select “Add Keypad” or “Change PIN.”
- Follow the app instructions.
Note: Not all openers support app-based keypad programming.
Safety And Security Tips
Many people overlook these small but important tips for keeping your home safe:
- Change codes regularly (every 6-12 months).
- Never use obvious codes like “1234” or your address.
- Don’t write the code near the keypad.
- If the keypad is lost or stolen, clear all codes immediately.
- Choose a code that’s easy for you to remember but hard for others to guess.
Advanced: Adding A New Keypad Or Remote
If you want to add a new Chamberlain keypad or remote, the process is similar:
- Press the Learn button on the opener.
- Within 30 seconds, enter the new code on the keypad or press the new remote’s button.
- Wait for the opener light to flash.
You can program up to 12 remotes and keypads for most Chamberlain openers.
Expert tip: If your opener “forgets” remotes after adding a new keypad, you may be at the maximum memory limit. Clear old codes and re-add only the devices you use.
When To Call A Professional
Sometimes, even after following all steps, the keypad still won’t work. Call a pro if:
- The keypad gets wet inside and stops working.
- The garage door opener is very old or has no Learn button.
- You see electrical sparks or burning smells.
- You’ve tried reprogramming several times with no luck.
A technician can test wiring, replace the keypad, or upgrade your system.
Cost And Time Estimates
Reprogramming a Chamberlain keypad is one of the fastest DIY jobs:
- Time: Usually 10-15 minutes (including battery change)
- Cost: Free if you already have the keypad and opener. A new keypad costs $30–$50.
Calling a technician may cost $75–$150 per visit.
Mistakes Beginners Often Make
Let’s look at some common errors and how to avoid them:
- Holding the Learn Button Too Long: This erases all codes, not just the keypad.
- Not Replacing Batteries First: Weak batteries cause random failures.
- Programming in Bright Sunlight: Hard to see keypad blinks and can cause accidental mistakes.
- Not Testing the Code: Always check if the new code works before closing the garage.
- Using an Obvious Code: Easy for burglars to guess.
Non-obvious insight: Some openers will “time out” and refuse new codes if you try too many times in a row. Wait 5 minutes before trying again.
Real-world Example: Fixing A Stubborn Keypad
Consider this story: Maria moved into a new house with a Chamberlain 940EV keypad. The old code didn’t work, and the keypad was slow to light up. After replacing the battery, she tried reprogramming but got stuck because she held the Learn button too long, erasing all remotes. After clearing all codes, she reprogrammed each remote and the keypad step by step. Now, everything works, and Maria uses a new, secure code.
Lesson: Always replace the battery first and press the Learn button briefly.
Side-by-side: Chamberlain Vs. Competitors
To see how Chamberlain compares to other brands, here’s a quick look:
| Brand | Programming Steps | Temporary PIN Option | App Integration |
|---|---|---|---|
| Chamberlain | 3-4 | Yes | Yes (MyQ) |
| Genie | 4-5 | Some Models | Yes |
| LiftMaster | 3-4 | Yes | Yes (MyQ) |
| Craftsman | 3-5 | No | No |
Chamberlain keypads are among the easiest to program and have good security features.
What To Do If You Lose Your Keypad Code
If you can’t remember your code and don’t have the manual:
- Clear all codes by holding the Learn button for 6-10 seconds.
- Reprogram the keypad with a new code.
Important: All remotes will also be erased, so reprogram them too.
For lost manuals, Chamberlain offers online PDF manuals and video guides on their official site.
Maintaining Your Keypad For Years Of Use
To prevent problems:
- Clean the keypad with a dry cloth every few months.
- Replace batteries yearly.
- Keep the area around the keypad dry.
- Change your code if you notice any strange behavior.
Pro insight: If you live in a very cold climate, keep a spare battery inside your house.
The Importance Of Learn Button Colors
Many Chamberlain openers use different colored Learn buttons. The color tells you the system’s age and compatibility.
- Yellow: Newest systems, Security+ 2.0, most secure.
- Purple/Red/Orange: Older Security+ systems.
- Green/White: Very old, may need special keypads.
Check your opener’s Learn button color before buying a new keypad.
Why You Should Avoid Universal Keypads (sometimes)
Universal keypads work with many brands, but they sometimes lack features like temporary PINs or may not support the latest security. For best results, use a genuine Chamberlain keypad with Chamberlain openers.
Example: A universal keypad may not work with a yellow Learn button opener without a special programming trick.
Keypad Not Responding? Advanced Fixes
If you’ve tried everything and the keypad still won’t program:
- Unplug the opener for 60 seconds, then plug back in (resets the receiver).
- Check for spider webs or dust inside the opener—clean carefully.
- Try programming with a different code (sometimes specific numbers fail due to worn buttons).
- Replace the keypad if it’s over 10 years old.
Smart Home Integration
Many Chamberlain openers now work with smart home systems like Google Home or Alexa. You can use your phone as a keypad, get alerts when the door opens, or even create schedules.
- Install the MyQ app for extra features.
- Set unique PINs for each family member.
For more info, see the official Chamberlain MyQ page.
Frequently Asked Questions
How Do I Find The Learn Button On My Chamberlain Opener?
The Learn button is usually on the back or side of the garage door opener unit, often under a light cover. It’s about the size of a pencil eraser and may be yellow, red, orange, or purple.
What Should I Do If My Keypad Stops Working After Replacing The Battery?
After changing the battery, reprogram the keypad using the steps above. Sometimes the keypad loses its memory when the battery is replaced.
Can I Set A Different Code For Each Family Member?
Most Chamberlain keypads only allow one main code, but you can set a temporary PIN on newer models. This PIN can be given to guests and deleted later.
How Long Does It Take To Reprogram A Chamberlain Garage Door Keypad?
The whole process, including battery replacement, usually takes 10 to 15 minutes.
Is There A Way To Program My Chamberlain Keypad With My Smartphone?
Yes, if you have a MyQ-compatible Chamberlain opener, you can use the MyQ app to add or change keypad codes. Not all models support this, so check your opener’s compatibility.
Reprogramming your Chamberlain garage door keypad is a simple but important step for home security. With these clear steps, troubleshooting tips, and expert insights, you can handle most problems yourself—and keep your garage safe and easy to access for years to come.


