
Programming a garage door remote can seem confusing at first, especially if you have never done it before. Many homeowners find themselves searching for the right way to reprogram their Liftmaster garage door opener remote after moving into a new home, replacing a lost remote, or upgrading their system. The good news is that with a bit of guidance, you can handle this task on your own—no need to call a technician for something that takes just a few minutes. By following the correct steps, you’ll save both time and money, and gain the satisfaction of fixing your own home devices.
In this article, you’ll discover everything you need to know to reprogram your Liftmaster garage door opener remote. We’ll go step by step, covering different models, what to do if your opener is older, and common mistakes people make. You’ll also learn how security features work, what to do if something isn’t working, and get answers to the most common questions. Whether you’re a first-timer or need a refresher, you’ll find clear explanations and practical tips that make the process easy to follow.
Understanding Your Liftmaster Garage Door Opener
Before you start programming, it’s important to know what kind of Liftmaster opener you have. Liftmaster is a leading brand, but they make a range of models. Each model may have a slightly different process for reprogramming remotes.
Older models use a series of DIP switches to set the code, while newer ones use a Learn button and rolling code technology. Rolling code means the code changes every time you use the remote, making it harder for anyone to copy your signal. This is a key part of why you want to reprogram your remote when you move into a new home or lose an old remote.
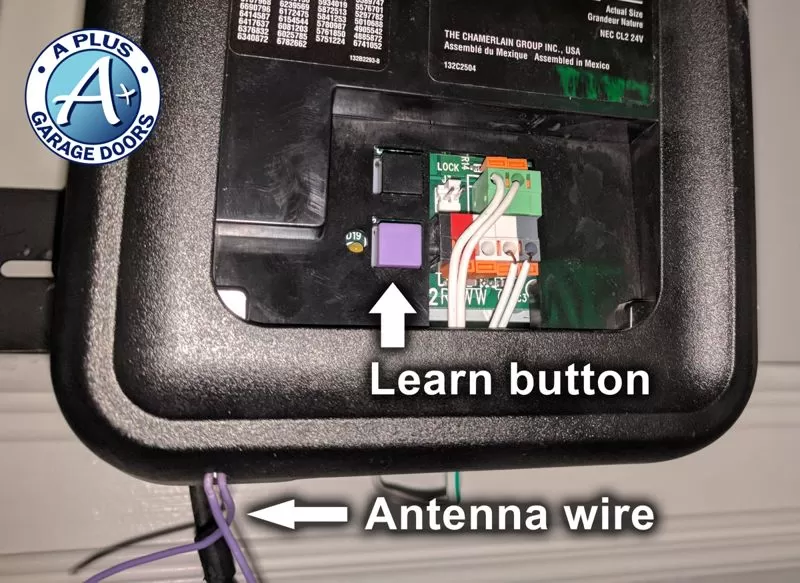
You’ll usually find the Learn button on the back or side of the main garage door opener unit (the one on the ceiling). It might be colored yellow, purple, red, orange, or green, depending on the model and year. The color can help you figure out which instructions you need to follow.
Tools And Preparation
You don’t need many tools to reprogram your remote, but a few things will make the process smoother:
- A ladder to safely reach the opener unit on your garage ceiling
- Your Liftmaster remote (new or existing)
- The owner’s manual for reference (optional, but helpful)
- A flashlight if your garage is dim
Before starting, make sure your remote has fresh batteries. Weak batteries can make programming fail, leading to confusion.
How To Identify Your Liftmaster Opener Model
Knowing your opener’s model helps you follow the right programming steps. Here’s how to find this information:
- Check the motor unit: Look for a sticker or metal plate on the opener, usually on the side or bottom.
- Look for the Learn button: Its location and color are important.
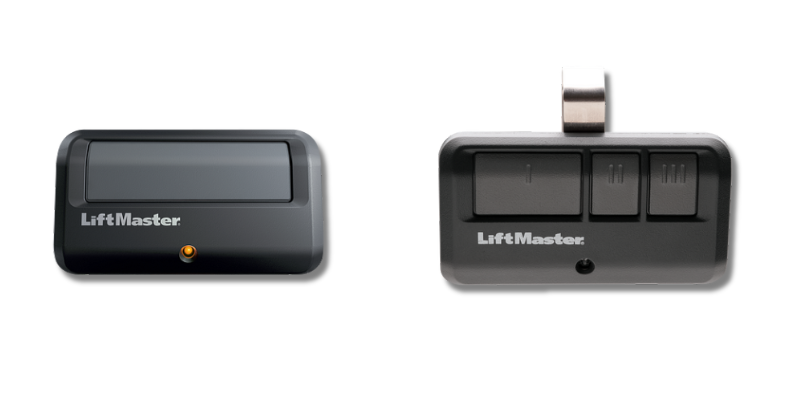
- Note the remote type: Is it a single-button or multi-button remote? This affects the programming steps.
If you can’t find the model number, the color of the Learn button is the best clue.
Common Learn Button Colors
- Yellow: Most openers made after 2011
- Purple: Models from 2005–2011
- Red/Orange: Models from 1997–2005
- Green: Some models from 1993–1997
If your opener has a row of small switches instead of a Learn button, it’s an older DIP switch model.
Step-by-step: How To Reprogram Liftmaster Garage Door Opener Remote
Now let’s get practical. The process is slightly different depending on your opener. Below are the steps for the most common types.
For Openers With A Learn Button (most Models After 1993)
- Climb your ladder and locate the Learn button on your opener unit.
- Press and release the Learn button. The LED light beside it will turn on or blink. You have 30 seconds to finish the next step.
- Press and hold the button on your remote that you want to program. Hold it until you see the opener’s lights blink or you hear two clicks.
- Release the button. Test the remote by pressing it again—the door should move.
If you have a multi-button remote and want to program more than one door, repeat the steps for each button.
For Older Dip Switch Models (pre-1993)
- Open the remote’s battery cover to see the DIP switches inside.
- Match the position of the switches inside your remote with those inside the opener unit (also found under a small panel).
- Close the cover and test the remote.
These older models do not have a Learn button or rolling code security.
For Keypad Remotes
- Press the Learn button on the opener.
- Within 30 seconds, enter your chosen 4-digit code on the keypad, then press the Enter button.
- The opener’s light will blink, signaling success.
If you have a wireless keypad, check your manual for specific instructions, as some require an extra step.
What To Do If You Lose Your Remote
If you lose a remote, or want to stop someone else from using an old remote, you should erase all codes from your opener and reprogram your devices.
- Hold the Learn button for about 6–10 seconds, until the light goes out. This erases all programmed remotes and keypads.
- Program your new remote using the normal steps.
Many people forget this step and wonder why old remotes still work. Erasing all codes is the only way to make sure only your remotes can open the door.
Programming Multiple Remotes
You can program several remotes to the same opener, which is useful for families. Each remote must be programmed separately.
- Follow the same Learn button procedure for each remote.
- If you erase all codes, you’ll need to reprogram every remote and keypad.
Some advanced Liftmaster models allow up to 8 or more remotes. Check your manual if you have a large number to program.
Troubleshooting: When Programming Doesn’t Work
Sometimes, things don’t go as planned. Here are common problems and how to fix them:
1. Remote Doesn’t Program
- Check the battery: Weak batteries are the top cause of failure.
- Be quick: You have only 30 seconds after pressing the Learn button.
- Distance: Make sure you’re close to the opener when programming.
- Interference: LED bulbs or nearby electronics can interfere with the signal.
2. Remote Works Intermittently
- Battery contacts: Clean the battery contacts inside the remote.
- Obstructions: Metal objects or thick walls can block the signal.
- Receiver issues: The opener’s receiver board could be faulty. This is rare, but possible in older units.
3. Door Opens By Itself
- Erase all codes and reprogram. Someone nearby may have a remote with the same code (mostly with old DIP switch models).
4. Keypad Not Working
- Check the battery and enter the code carefully.
- Reprogram the keypad from scratch.
If you’ve tried all troubleshooting and nothing works, contact Liftmaster customer support or a professional installer.
Security Features And Why Reprogramming Matters
Modern Liftmaster openers use Security+ rolling code technology. This creates a new code every time you press the remote, making it very hard for thieves to “capture” and reuse your code.
When you move into a new home, or if a remote is lost or stolen, reprogramming is essential. Otherwise, someone with an old remote could open your garage.
Older openers with DIP switches are less secure. If you have one, consider upgrading to a newer model for better safety.
How To Program Liftmaster Remotes For Multiple Doors
If you have more than one garage door, you might have a multi-button remote. Each button can control a different door, opener, or even a gate.
Steps For Multi-button Remotes
- Press the Learn button on the first opener.
- Within 30 seconds, press the button on the remote you want to use for that door.
- Repeat the process for the second opener and another button.
Label your remotes if you have several doors to avoid confusion later.
How To Program A Liftmaster Remote From Another Remote
Some newer Liftmaster remotes support a “clone” or “learning” feature, letting you copy the code directly from one remote to another. This only works on certain models.
- Hold both remotes close together
- Press and hold the button on the working remote
- At the same time, press the button on the new remote until the light blinks
After that, use the normal Learn button procedure to sync the new remote to the opener.
Comparing Liftmaster Remotes And Compatibility
Not all Liftmaster remotes work with all openers. The main factors are the frequency and the Learn button color.
Here’s a quick comparison:
| Learn Button Color | Frequency | Compatible Remote Series | Year Range |
|---|---|---|---|
| Yellow | Security+ 2.0 (315/390 MHz) | 892LM, 893LM | 2011–Present |
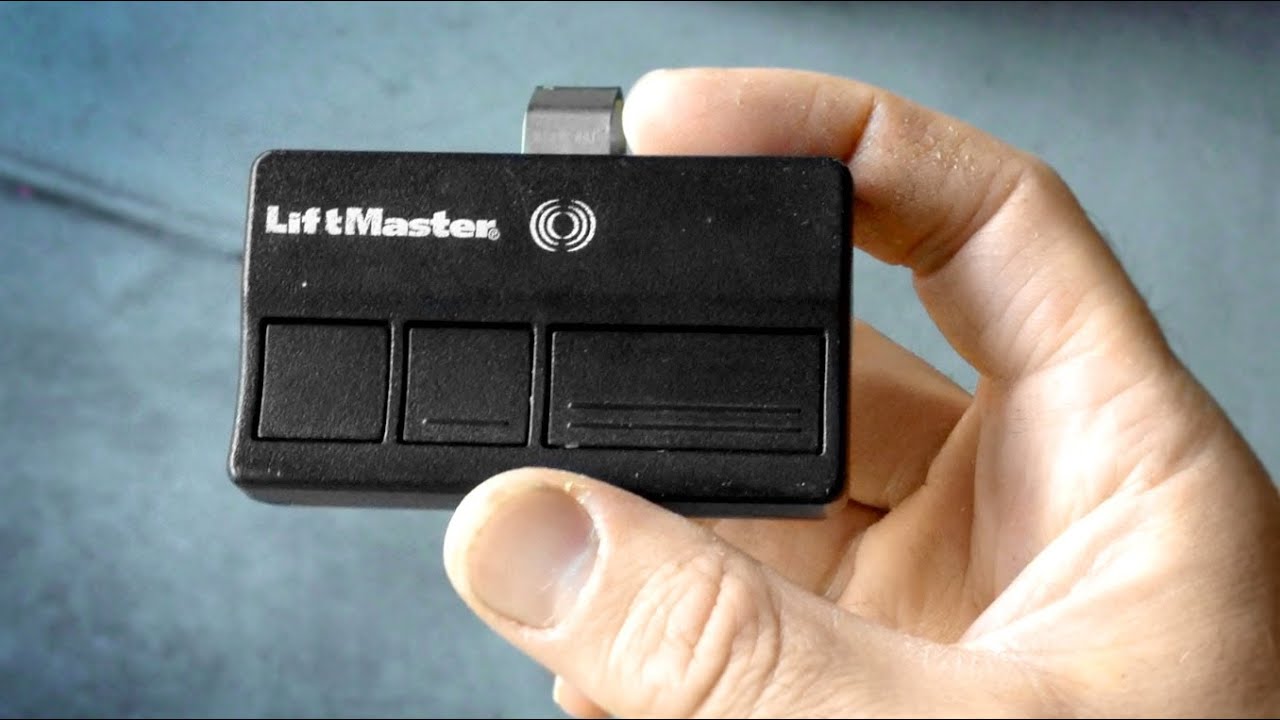
| Purple | 315 MHz | 371LM, 373LM | 2005–2011 |
| Red/Orange | 390 MHz | 971LM, 973LM | 1997–2005 |
| Green | 390 MHz | 81LM, 83LM | 1993–1997 |
Tip: Always match your remote to the opener’s Learn button color for best results.
How To Reset Your Liftmaster Garage Door Opener
Resetting the opener means erasing all codes and starting over. This is the best way to clear out old or lost remotes.
- Press and hold the Learn button for 6–10 seconds, until the LED goes out.
- All remotes and keypads are now erased.
- Program each remote again as needed.
Some models have a “lock” feature that can disable remote signals. If your remotes stop working, check if the lock button on your wall control is on.
Common Mistakes When Programming Liftmaster Remotes
Many people run into problems because of simple mistakes. Here are some to avoid:
- Not pressing the Learn button firmly enough: Make sure you press until the indicator light comes on.
- Waiting too long: You have only 30 seconds after pressing Learn.
- Programming from too far away: Stand close to the opener.
- Trying to program old DIP switch remotes to new openers: These are not compatible.
- Not erasing old codes: Always erase codes if you lose a remote or move homes.
Non-obvious insight: If you are in a neighborhood with many garage doors, always reprogram after moving in, as some remotes might accidentally match your opener’s frequency by chance.
How To Replace A Remote And Program It
If your remote is broken, you’ll need a replacement. Here’s what to do:
- Buy a compatible remote: Match the Learn button color or check your opener’s model number.
- Install fresh batteries in the new remote.
- Follow the programming steps for your opener type.
If you’re unsure, take a photo of your opener and show it to a hardware store staff member. They can help you select the right remote.
Credit: utahgaragedoors.net
Advanced Features: Smart Garage Openers
Many new Liftmaster openers work with MyQ smart technology. This lets you control your door from your phone, set schedules, or get alerts.
- Download the MyQ app
- Create an account
- Connect the opener to Wi-Fi
- Follow the app instructions to add your door
If you have a smart opener, you can program remotes the same way, but you also get extra controls from your phone.
Safety Tips For Garage Door Remotes
Garage door openers are powerful devices. Use these safety tips:
- Keep remotes out of reach of children
- Don’t leave remotes in cars parked outside
- Regularly reprogram if you lose a remote
- Test the door’s safety reverse every month
A small effort now can prevent bigger security problems later.
Upgrading Your Liftmaster Opener
If you have an older opener (pre-1993), consider upgrading. New models have:
- Better security with rolling codes
- Battery backup for power outages
- Smartphone control via MyQ
Upgrading improves safety and makes programming easier.
Programming A Universal Remote To Liftmaster Opener
Some universal remotes can work with Liftmaster openers. Here’s how:
- Set the remote to the correct brand code (see the remote’s instructions)
- Use the Learn button on the opener to sync the remote
- Test the remote
Universal remotes are handy if you have different brands of openers or lost the original remote.
Pro tip: Not all universal remotes support newer Security+ 2.0 models. Always check compatibility.
Credit: www.doorvana.com
Programming Liftmaster Remote For Rental Properties
If you manage rental properties, reprogramming remotes between tenants is critical for security.
- Erase all codes after each tenant moves out
- Program new remotes for new tenants
- Keep a master remote for emergencies
This prevents old tenants from accessing the garage.
Liftmaster Remotes And Vehicle Integration
Some cars have HomeLink or Car2U built into the visor. These can be programmed to work as a garage remote.
- Press the Learn button on the opener
- Hold the in-car button until the opener’s light blinks
- Test the system
Some vehicles need a special “training” step. Check your car’s manual for details. Not all car systems are compatible with every opener.
Environmental Factors Affecting Remote Performance
Garage door remotes use radio frequency (RF) signals. These can be affected by:
- LED or fluorescent bulbs near the opener (can cause interference)
- Nearby radio towers or strong Wi-Fi signals
- Metal garage doors or heavy insulation
If your range is poor, try changing the bulb in your opener to a standard incandescent bulb, or move electronics away from the opener.
The Role Of Batteries In Remote Programming
Low batteries can cause many strange issues:
- Programming fails
- Remote works only up close
- Door opens slowly or not at all
Always use fresh, high-quality batteries. If your remote uses a coin cell, like a CR2032, change it every 1–2 years.
Comparing Programming Steps Across Brands
Liftmaster, Chamberlain, and Craftsman openers share similar programming steps because they are made by the same company.
Here’s a simple comparison:
| Brand | Learn Button Location | Typical Programming Steps |
|---|---|---|
| Liftmaster | Back or side of opener | Press Learn, press remote button |
| Chamberlain | Back of opener | Press Learn, press remote button |
| Craftsman | Side of opener | Press Learn, press remote button |
This means that most tips in this article also work for Chamberlain and Craftsman branded openers.
Real-world Example: Reprogramming After A Move
Imagine you just bought a house. The previous owner left two remotes, but you don’t know if anyone else has a copy. Here’s what you should do:
- Erase all codes from the opener.
- Program each remote for your family.
- Program your car’s in-visor system if you want.
- Test each device to confirm only your remotes work.
This simple process gives you peace of mind and takes less than 10 minutes.
Credit: www.youtube.com
How Often Should You Reprogram Your Remote?
You don’t need to reprogram your remote often. Do it when:
- You move into a new home
- A remote is lost or stolen
- The opener acts strangely
- You add or remove remotes
For most people, reprogramming every few years is enough unless you have security concerns.
Useful Resources
For more detailed instructions and model-specific guides, visit the official Liftmaster Support site. They provide videos, manuals, and troubleshooting guides.
Frequently Asked Questions
How Do I Know If My Liftmaster Remote Is Compatible With My Opener?
Check the Learn button color on your opener and match it to the remote’s series. Most remotes list compatible openers on the packaging. Older DIP switch remotes are not compatible with modern rolling code openers.
What Should I Do If My Remote Still Won’t Program?
Try replacing the battery first. Make sure you’re within a few feet of the opener when programming. If it still fails, erase all codes and try again. If nothing works, your remote or receiver may be faulty.
Can I Program My Car’s Built-in Homelink System To My Liftmaster Opener?
Yes, most HomeLink systems can be programmed to Liftmaster openers. You’ll need to use the Learn button on the opener and follow your car’s instructions. Some older cars may need a HomeLink bridge for compatibility.
Is It Possible To Erase Just One Remote From The Opener’s Memory?
No, you can only erase all programmed remotes at once. After erasing, you must reprogram the remotes you want to keep.
How Many Remotes Can I Program To One Liftmaster Opener?
Most Liftmaster openers support up to 8 remote controls and one keypad. Some advanced or commercial models allow more. Check your opener’s manual for the exact limit.
Reprogramming your Liftmaster garage door opener remote is a valuable skill. It keeps your home safe, lets you add or remove remotes when needed, and gives you control over who can access your garage. With these clear steps and tips, you can handle any remote issue confidently and quickly.