Now Reading: How to Sync Liftmaster Garage Door Opener in Minutes
- 01
How to Sync Liftmaster Garage Door Opener in Minutes

Syncing your Liftmaster garage door opener can feel confusing if you’ve never done it before. Maybe you just bought a new remote, or you want to connect your opener to your smart home system. Or perhaps you replaced the wall control panel and need everything working smoothly. Good news: you don’t need to be a professional to sync your Liftmaster. With the right steps and a little guidance, you can do it yourself—and avoid calling a technician.
This guide will walk you through syncing your Liftmaster opener with remotes, wall panels, keypads, and smart devices. You’ll learn why syncing is important, what to do before you start, and how to solve common problems. Even if you’ve never worked with garage door systems, you’ll find clear instructions, practical tips, and answers to questions most people forget to ask.
Why Syncing Your Liftmaster Garage Door Opener Matters
People often think syncing is only for new devices. But that’s just part of the story. Syncing ensures your garage system works safely, reliably, and efficiently. When devices are synced, you can control your door from anywhere, share access with family, and prevent security risks. If you skip syncing—or do it incorrectly—your opener may ignore commands, or worse, stop responding altogether.
Two big reasons make proper syncing essential:
- Security: Each remote or keypad uses a unique code. If syncing isn’t done right, old codes might still work, which can be a security risk.
- Convenience: Syncing lets you control your garage door from your car, phone, or wall panel. No more jumping out of your car in the rain to open the door manually.
Smart homes also rely on proper syncing to connect your opener to apps like MyQ, Google Home, or Amazon Alexa.
Getting Ready: What To Do Before Syncing
Preparation is key. Many people rush to press buttons without checking important details. This can lead to frustration or repeated errors. Here’s what to do before you start:
- Check the Model Number: Find the model number on your opener motor, usually on a sticker. Different models have different syncing steps.
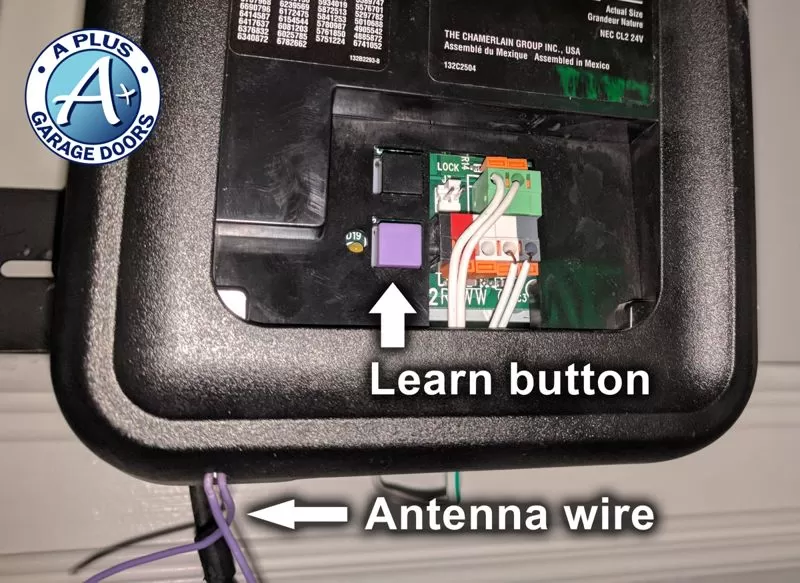
- Find the Learn Button: This button is usually on the back or side of the opener motor. It may be yellow, red/orange, green, or purple. The color tells you the technology type and syncing method.
- Gather All Devices: Have your remote, keypad, wall panel, or smart device nearby. Make sure they have fresh batteries.
- Review Safety Precautions: Keep the area clear of kids and pets. Make sure the door path is free of obstacles.
- Read the Manual: If you have the original manual, keep it handy. If not, most manuals are available online at the official Liftmaster Support site.
A common mistake is not knowing the correct Learn button color. Pressing the wrong sequence may erase all programmed devices.
Understanding The Learn Button: The Heart Of Syncing
The Learn button is crucial for syncing your Liftmaster. Its color shows what kind of remote or keypad will work. Here’s a quick comparison:
| Learn Button Color | Compatible Remotes | Year Produced |
|---|---|---|
| Yellow | Security+ 2.0 (Envisalink, MyQ) | 2011–present |
| Red/Orange | Security+ | 1997–2005 |
| Green | Billion Code | 1993–1996 |
| Purple | Security+ (315 MHz) | 2006–2014 |
Pro tip: If your opener is very old (pre-1993), it may not have a Learn button. These openers are not compatible with modern remotes or smart systems.
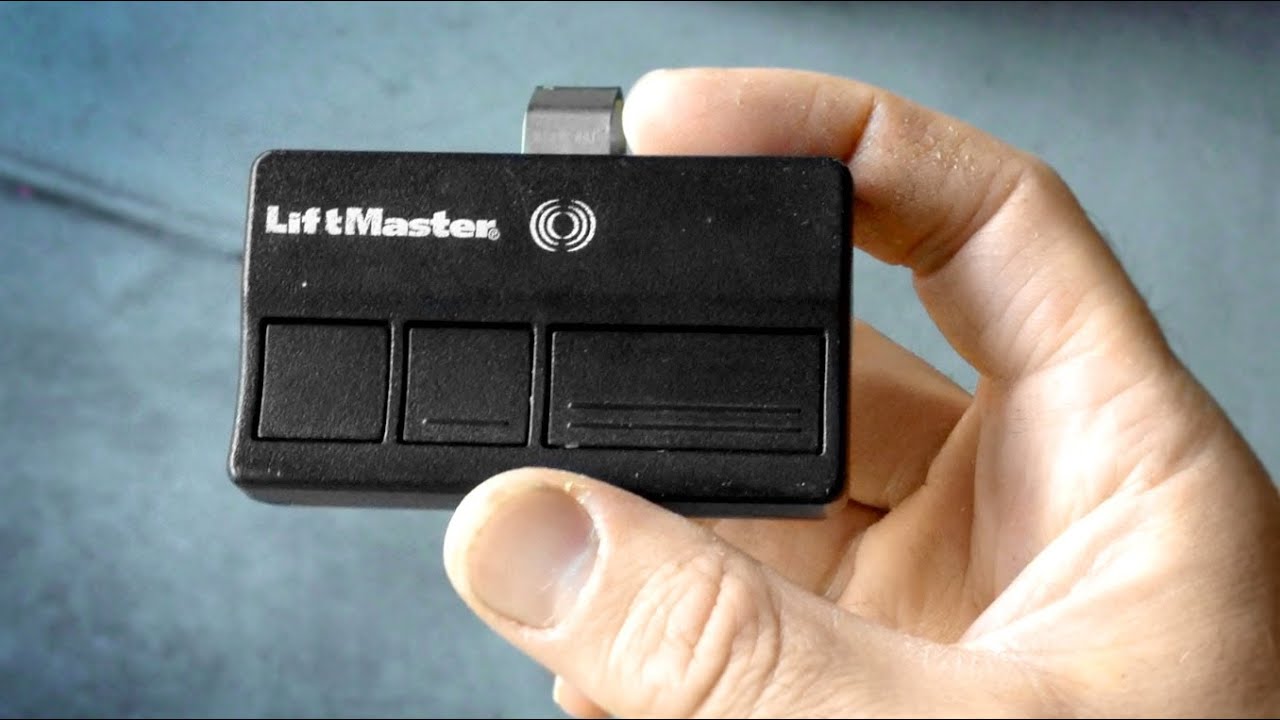
Syncing A Liftmaster Remote Control
Let’s start with the most common task: syncing a new or replacement remote control. Follow these steps carefully:
Step 1: Climb Safely
Use a stable ladder to reach the opener motor. Always make sure the ladder is secure before climbing.
Step 2: Locate The Learn Button
Find the Learn button on the opener motor. Remove the light cover if needed.
Step 3: Press The Learn Button
Press and release the Learn button. Don’t hold it down—holding for too long may erase all existing remotes. The LED light next to the button will turn on (usually stays on for 30 seconds).
Step 4: Press Remote Button
Within 30 seconds, press the button on your remote you want to use. The opener lights may blink or you’ll hear a click—this means syncing is successful.
Step 5: Test The Remote
Step down and test the remote. The garage door should open or close with a single press.
Common mistake: Pressing the Learn button for too long. This can erase all synced devices, forcing you to resync everything.
Advanced tip: Most openers allow up to 8–12 remotes. If you need more, you may need to clear older ones.
Syncing A Liftmaster Wireless Keypad
A wireless keypad is great for family or guests. Here’s how to sync it:
Step 1: Reset The Keypad (if Needed)
If it’s a new keypad, skip this step. For used keypads, press and hold the * and # keys until the lights stop flashing.
Step 2: Enter Program Mode
Press the Learn button on the opener motor. The LED will light up.
Step 3: Enter Pin
Within 30 seconds, enter your desired 4-digit PIN on the keypad. Then press and hold the Enter button until the lights on the opener blink.
Step 4: Test The Keypad
Type your PIN and press Enter. The garage door should move.
Non-obvious insight: Different models may require you to press the Enter button twice or follow a different sequence. Always check for a light blink or a motor click.
Syncing A Liftmaster Wall Control Panel
The wall control panel allows you to open and close your garage from inside. Most panels auto-sync, but some need pairing.
Step 1: Power Off The Opener
Unplug the opener before connecting a new wall panel for safety.
Step 2: Connect Wires
Match the red and white wires to the corresponding screws on the wall control panel. Tighten securely.
Step 3: Power On
Plug the opener back in. Most panels will sync automatically.
Step 4: Test
Press the wall panel button. The door should operate.
Hidden issue: Loose connections or frayed wires can prevent syncing. Always check the wiring if the panel does not work.
Syncing Your Liftmaster With Myq Smart Home System
MyQ lets you control your garage door from your smartphone or smart home system. This is a popular feature, but setup can be tricky the first time.
Step 1: Download The Myq App
Install the official MyQ app from the App Store (iOS) or Google Play (Android).
Step 2: Create Or Log In To Your Account
Use a valid email and create a strong password. Confirm your email if required.
Step 3: Connect The Myq Hub
Plug in the MyQ hub near your garage door opener. Follow the app’s instructions to connect the hub to your Wi-Fi network.
Step 4: Pair With Garage Door Opener
In the MyQ app, select “Add Device. ” Press the Learn button on your Liftmaster opener. The app will search and connect. When successful, the app will confirm pairing.
Step 5: Test And Name Your Device
Open or close the garage door using the app. Name the device for easy identification.
Non-obvious insight: Some Wi-Fi routers may block the hub if parental controls or firewalls are active. Disable these settings if syncing fails.
Syncing Multiple Remotes Or Keypads
Liftmaster openers allow syncing several remotes and keypads. Here’s how to manage them:
Adding Additional Remotes
Repeat the syncing process for each new remote. Press the Learn button, then the remote button. Each remote is assigned a unique code.
Removing Old Remotes
Press and hold the Learn button for about 6–8 seconds until the LED turns off. This erases all remotes and keypads. You’ll need to reprogram the ones you want to keep.
Syncing Multiple Keypads
Most openers only support one wireless keypad. For second keypads, use a compatible universal model.
Practical tip: Label your remotes for each family member. This helps if you ever need to remove access for a lost or stolen remote.
What To Do If Syncing Fails
Sometimes, syncing doesn’t work the first time. Here are proven troubleshooting steps:
- Check Battery Life: Weak remote or keypad batteries are a common cause.
- Distance Issues: Syncing works best when you’re close to the opener.
- Radio Interference: LED light bulbs, Wi-Fi routers, or metal objects can block the signal.
- Wrong Learn Button Sequence: Follow the steps exactly. Each model has a slightly different timing.
- Factory Reset: If all else fails, reset the opener by holding the Learn button until the LED goes out, then reprogram all devices.
If syncing still fails, check the opener manual or contact Liftmaster support.
Liftmaster Syncing Tips Most People Miss
Many guides skip these advanced but useful tips:
- Backup Your Codes: Write down your programmed PINs and remote codes in a safe place.
- Change PINs Regularly: For security, update your wireless keypad PIN every few months.
- Upgrade Old Openers: If your opener is older than 20 years, consider upgrading. Modern models are more secure and compatible with smart devices.
- Test Safety Sensors: After syncing, always check the safety reversal system by placing an object in the door’s path.

Common Problems And How To Fix Them
Here are common issues and solutions:
Remote Works, Keypad Does Not
- Check for battery corrosion in the keypad.
- Re-sync the keypad using the Learn button.
- Make sure only one keypad is in use.
Opener Beeps Or Flashes
- This means the safety sensors are blocked or misaligned. Clean and realign them.
App Won’t Connect (myq)
- Check Wi-Fi signal in the garage.
- Reset the MyQ hub and try again.
- Update the MyQ app.
Door Opens But Won’t Close
- Safety sensors may be dirty or misaligned.
- Check for objects in the door’s path.
Syncing Older Liftmaster Models
Older openers (pre-1993) use dip switches instead of Learn buttons. Here’s how to sync:
Step 1: Set The Dip Switches
Open the remote and the opener’s back panel. Set the switches to match exactly.
Step 2: Test
Press the remote button. The door should move.
Note: These models are less secure and not compatible with MyQ or modern remotes.
Comparing Liftmaster Syncing With Other Brands
How does Liftmaster syncing compare with brands like Genie or Chamberlain? Here’s a quick look:
| Brand | Sync Method | Max Remotes | Smart Integration |
|---|---|---|---|
| Liftmaster | Learn button | Up to 12 | MyQ, Alexa, Google |
| Genie | Learn code + Intellicode | Up to 7 | Aladdin Connect |
| Chamberlain | Learn button | Up to 8 | MyQ |
Insight: Liftmaster and Chamberlain share similar syncing methods, since they are owned by the same parent company. Genie uses different technology and is less compatible with third-party remotes.
Garage Door Opener Syncing: Security And Safety
Syncing is not just about convenience. It’s also about security and safety.
Security Features
- Rolling Codes: Modern Liftmaster remotes use rolling codes, which change each time you use them. This prevents code grabbing by thieves.
- PIN Protection: Wireless keypads require a PIN, adding another layer of security.
Safety Features
- Auto-Reverse: If something blocks the door, it will reverse direction.
- Lockout Feature: Some wall panels allow you to lock out remotes for extra security at night or when on vacation.
Non-obvious insight: Always erase all remotes and keypads if you move into a new home or lose a remote.
Step-by-step Example: Syncing A Liftmaster 8500w
Let’s walk through a real-world example. The Liftmaster 8500W is a popular wall-mount opener.
Step 1: Prepare
Have your remote and wall control ready. Make sure the Learn button is yellow.
Step 2: Press Learn Button
Press and release the yellow Learn button. The LED will light.
Step 3: Sync Remote
Within 30 seconds, press the desired button on your remote. The light will blink.
Step 4: Sync Keypad (if Needed)
Press the Learn button again. On the keypad, enter your PIN and press Enter.
Step 5: Test
Use the remote and keypad to operate the door.
This process is similar for most modern openers.
Advanced: Syncing With Home Automation Systems
Many people want to sync their Liftmaster with Amazon Alexa, Google Home, or Apple HomeKit. Here’s what you need to know:
Alexa And Google Home
- Both work through the MyQ app. Enable the MyQ skill and link your account.
- You can check door status or open/close the door with voice commands.
Apple Homekit
- Requires a MyQ Home Bridge accessory.
- Set up through the Apple Home app.
Integration Table
Here’s how different smart home platforms compare:
| Platform | Works with Liftmaster? | Extra Devices Needed |
|---|---|---|
| Amazon Alexa | Yes | MyQ app/skill |
| Google Home | Yes | MyQ app/integration |
| Apple HomeKit | Yes | MyQ Home Bridge |
Pro tip: Some third-party smart home platforms require a paid subscription for advanced features.
Keeping Your System Synced Over Time
Syncing isn’t a one-time job. Batteries die, devices get lost, and technology updates. Here’s how to keep things running smoothly:
- Test all remotes and keypads monthly.
- Change batteries at least once a year.
- Update the MyQ app and opener firmware as needed.
- Remove access for lost or stolen remotes immediately.
Non-obvious insight: If you notice delays or missed commands, re-syncing can fix software glitches without needing repairs.
When To Call A Professional
Most syncing can be done yourself. But call a professional if:
- The opener doesn’t respond after multiple attempts.
- Wires are damaged or you see sparks.
- The door moves unevenly or stops halfway.
- You feel unsure about any electrical connections.
A certified technician can check the system, replace bad parts, and ensure safety.
Frequently Asked Questions
How Many Remotes Can I Sync With My Liftmaster Garage Door Opener?
Most Liftmaster models can sync up to 8–12 remotes. If you reach the limit, you’ll need to erase old remotes before adding new ones.
Can I Use A Universal Remote With My Liftmaster Opener?
Yes, many universal remotes are compatible, but always check for your opener’s Learn button color. Some older models may not support universal remotes.
What Should I Do If I Lose A Remote Or Keypad?
Immediately erase all devices by holding the Learn button until the LED goes out. Then, reprogram the remotes and keypads you still have.
Why Won’t My Remote Work After Syncing?
Check for dead batteries, radio interference, or being too far from the opener. Also, make sure you pressed the correct Learn button sequence.
Is Syncing Required After A Power Outage?
Usually, syncing is not required after a power outage. But if your opener forgets remotes or settings, simply re-sync as shown above.
Syncing your Liftmaster garage door opener helps keep your home safe, convenient, and up to date. Whether you’re pairing a new remote, adding smart controls, or troubleshooting, the right steps make all the difference. Remember: careful syncing improves both security and peace of mind. With these detailed instructions, you can handle syncing tasks confidently and avoid common problems that frustrate many homeowners. If you need more help, the official Liftmaster support site offers manuals and videos to guide you further.


