Now Reading: How to Wire a Garage Door Opener: Step-by-Step Guide
- 01
How to Wire a Garage Door Opener: Step-by-Step Guide
Wiring a garage door opener might look intimidating, but with careful steps, the right tools, and some basic electrical knowledge, it’s entirely possible for a determined homeowner. A properly wired garage door opener gives you convenience, security, and peace of mind.
But making a mistake can lead to frustration, malfunctions, or even safety risks. In this guide, you’ll learn how to wire a garage door opener from start to finish—covering every detail, from safety checks to troubleshooting, so you can complete this project confidently.
Understanding Garage Door Opener Wiring
Before you start handling wires and tools, it’s important to understand what you’ll be working with. A typical garage door opener system includes the motor unit, safety sensors, wall control button, and sometimes additional features like keypads or smart home integration.
The wiring process involves:
- Supplying power to the opener (usually 120V AC)
- Connecting the wall button
- Installing and wiring safety sensors
- Integrating accessories (if present)
Knowing the function of each wire and terminal helps prevent mistakes and makes troubleshooting much easier later on.
Common Types Of Garage Door Opener Systems
There are several types of garage door openers, but the wiring for most standard chain-drive, belt-drive, and screw-drive models is similar. Modern systems may add smart features, but the basic wiring principles stay the same.
| Opener Type | Main Power Source | Wall Button | Safety Sensors |
|---|---|---|---|
| Chain Drive | Hardwired or Plug-in | Low-voltage wire | Low-voltage wire |
| Belt Drive | Hardwired or Plug-in | Low-voltage wire | Low-voltage wire |
| Screw Drive | Hardwired or Plug-in | Low-voltage wire | Low-voltage wire |
Safety First: Essential Precautions
Electricity can be dangerous. Before touching anything, always put safety first.
- Turn off power at the breaker panel before starting any work.
- Read the opener’s manual to understand model-specific instructions.
- Wear insulated gloves and use insulated tools.
- Test wires with a voltage tester to confirm there is no power.
- Keep the area dry and free of clutter.
Don’t ignore safety warnings. If you feel unsure at any point, ask for help from a qualified electrician.
Tools And Materials You’ll Need
Having the right tools saves time and prevents frustration. Here’s what you’ll typically need:
- Drill (corded or cordless)
- Screwdrivers (flat and Phillips)
- Wire strippers
- Tape measure
- Level
- Fish tape or coat hanger (for pulling wires)
- Voltage tester
- Ladder
- Electrical tape
- Staples or wire clips
- Garage door opener wiring kit (often included with opener)
- Low-voltage wire (usually 18-22 gauge, solid core)
- Wire nuts or connectors
Check your opener’s manual—some systems require specific wire types.
Step-by-step Guide: Wiring A Garage Door Opener
1. Plan Your Wiring Route
Every garage layout is different. Before you start, map out the best path for wires from the opener to the wall button and safety sensors. Avoid sharp corners, keep wires away from moving parts, and use wire clips to keep everything neat.
- The wall button is usually near the door leading into the house.
- Safety sensors are mounted on each side of the garage door, about 6 inches above the floor.
2. Install The Power Source
Most openers plug into a ceiling outlet. If your garage doesn’t have one, you may need to install a new outlet—this should be done by a licensed electrician. Never use extension cords as a permanent solution.
- Confirm your power is 120V AC and properly grounded.
- The outlet should be within 3 feet of the opener.
3. Mount The Opener
Follow the manufacturer’s instructions for securely mounting the opener to your garage ceiling and connecting the rail to the door.
- Make sure the unit is level.
- Use lag bolts into ceiling joists for stability.
4. Wiring The Wall Control Button
The wall button controls the opener from inside the garage. It requires low-voltage wiring, which is safe for homeowners to handle.
Steps To Wire The Wall Button:
- Run the wire from the opener (terminals marked “Wall Control” or similar) to the wall button location.
- Attach the wire to the wall using staples or clips, keeping it out of the way.
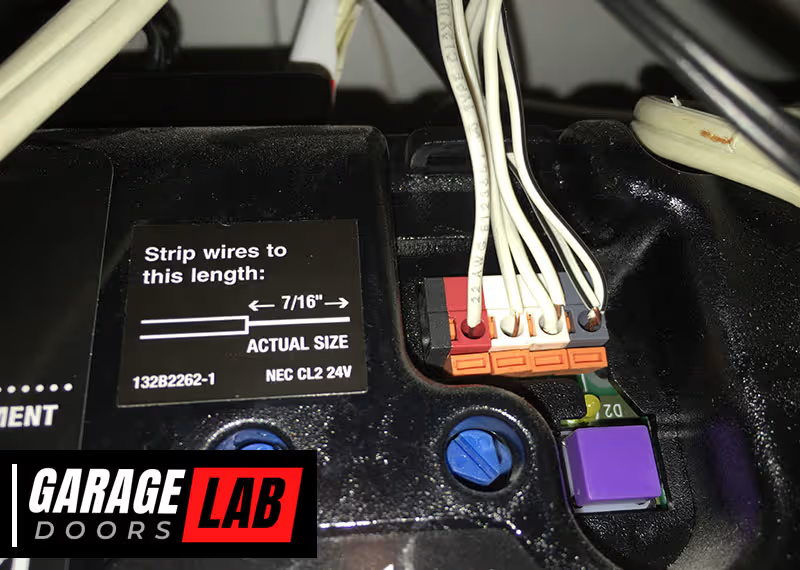
- Strip about ½ inch of insulation from each wire end.
- Connect the wires to the terminals on the wall button—polarity usually doesn’t matter for basic buttons, but check the manual for multi-function controls.
- Connect the other end to the opener’s wall button terminals, usually marked “WALL” or “PB” (push button).
5. Wiring The Safety Sensors
Safety sensors stop the door from closing if something is in the way. They are required by law on all new openers.
Steps To Wire The Safety Sensors:
- Mount each sensor on either side of the garage door, about 6 inches off the ground.
- Run the wire from each sensor to the opener, following the wall or ceiling.
- Secure the wires with clips or staples.
- Strip the wire ends and connect to the opener terminals marked “SENSOR” or similar. Be careful: Sensors are polarity sensitive, so match white to white and black to black, or as shown in your manual.
- Align the sensors so their indicator lights turn on. Misalignment is a common cause of problems.
6. Connecting Accessories (optional)
If your opener supports extra features like a keypad, motion sensors, or smart home modules, connect these after the main wiring is done.
- Follow the accessory instructions.
- Most accessories use the same low-voltage wire and connect to labeled terminals on the opener.
7. Final Power Connection
Once all wiring is complete:
- Double-check all connections.
- Make sure there are no exposed wires.
- Plug in the opener or restore power at the breaker.
If your opener doesn’t power on, use your voltage tester to check the outlet.
8. Test The Opener
Now test every feature:
- Press the wall button to open and close the door.
- Test the remote control.
- Block the sensor beam—the door should stop or reverse.
- Try the keypad or other accessories.
If something doesn’t work, check the wiring for loose connections or swapped wires.
Common Problems And Troubleshooting
Even careful installers sometimes face challenges. Here are some issues and solutions:
Wall Button Not Working
- Check for loose or crossed wires at both the button and opener.
- Test with a short jumper wire directly at the opener terminals. If it works, the problem is in the wire run.
Safety Sensors Not Aligned
- Indicator lights on sensors should be solid (not blinking).
- Realign the sensors until the lights stay on.
- Remove any obstructions.
Opener Doesn’t Power On
- Check the outlet with another device.
- Inspect the opener’s power cord for damage.
- Confirm the breaker is not tripped.
Remote Won’t Operate Opener
- Make sure the opener works from the wall button first.
- Reprogram the remote according to the manual.
- Check for interference from nearby electronics.
Door Reverses Before Closing
- Clean sensor lenses.
- Check for sunlight interference (rare, but possible).
- Adjust the down-force setting on the opener.
Advanced Tips For A Cleaner, Safer Install
Most guides stop at the basics, but a few extra steps make your wiring more reliable and professional.
- Label all wires at both ends, especially if your opener supports multiple accessories.
- Use a conduit or wire channel for added protection if wires run along walls.
- Allow extra length at connection points for future repairs.
- Take photos of wiring before closing covers. This helps later troubleshooting.
One insight many beginners miss: Low-voltage wiring can be extended or spliced if needed, but always use connectors and never twist wires together without securing them. Another tip: Avoid running opener wires parallel to high-voltage (120V) lines for long distances, as this can cause interference or noise.
Comparison: Hardwired Vs Plug-in Power
Some garages have a junction box, others only a standard outlet. Which is better?
| Power Source | Pros | Cons |
|---|---|---|
| Plug-in Outlet | Easy to install Simple to replace opener No electrician needed if outlet exists | Outlet must be nearby Extension cords not safe Outlet could be accidentally switched off |
| Hardwired Junction Box | Cleaner look Less likely to be unplugged Can share circuit with lights | Requires electrician Harder to swap openers More permanent |
For most homeowners, a plug-in outlet is simpler and safer, but a hardwired connection may look neater if installed by a pro.
Wiring Codes And Regulations
US electrical codes require garage door openers to have:
- Dedicated GFCI-protected outlet (for plug-in)
- Safety sensors on all new installs
- Low-voltage wiring secured and neat
- No extension cords as permanent wiring
Always check your local codes. Some areas require a permit for new wiring or outlets.
Integrating Smart Garage Door Openers
Modern openers often include Wi-Fi or Bluetooth controls. Wiring is usually the same, but setup involves connecting the opener to your home network using an app.
Extra wires may be needed for:
- Wired internet modules
- Backup battery integration
- Security cameras
If you’re upgrading from a manual opener, this is a good time to add smart features. Just be sure to follow both wiring and network setup instructions carefully.
When To Call A Professional
While most people can handle the wiring, there are times to call a pro:
- No nearby outlet, or need to add one
- Unsure about electrical codes
- Damaged or confusing garage wiring
- Multiple doors or complex accessories
A licensed electrician knows local codes and can ensure everything is safe and legal. Never guess about high-voltage connections.
Maintenance Tips To Keep Your Opener Reliable
Good wiring lasts years with minimal care, but a few regular checks help prevent issues:
- Inspect wires for damage or wear every 6 months.
- Make sure all screws and terminals are tight.
- Clean sensor lenses and check for proper alignment.
- Test the opener’s auto-reverse function monthly.
If you see signs of trouble—like frayed wires or flickering sensors—fix them promptly.
Real-life Example: A Typical Garage Door Opener Wiring
Imagine a homeowner named Mike. His opener stopped working, so he decided to replace it with a new model. Here’s how he handled the wiring:
- Mike mapped out the wire runs before mounting the opener.
- He used an existing outlet for power, confirming it was GFCI-protected.
- For the wall button, he attached new low-voltage wire, labeling both ends.
- He carefully aligned the safety sensors, watching the indicator lights.
- After double-checking all connections, he restored power and tested the door.
At first, the door didn’t close. Mike found a loose wire at the sensor terminal—something many beginners overlook. Tightening the screw fixed the problem.
This example shows the importance of checking every connection and not rushing the process.

Upgrades And Custom Wiring Options
As technology advances, so do garage door openers. Some homeowners add:
- Keypad entry systems (wired or wireless)
- Battery backup units
- Motion-activated lights
- Home automation modules
Each upgrade may require extra wiring. Always use the correct wire gauge and follow accessory instructions. Don’t overload the opener’s terminals with too many wires—use a junction block if needed.
Cost And Time Estimate
Wiring a garage door opener usually takes 2–4 hours for an average DIYer. Here’s a rough breakdown:
| Task | Estimated Time | Cost (if DIY) |
|---|---|---|
| Mounting Opener | 1–2 hours | $0 (if included with opener) |
| Running Wires | 30–60 minutes | $10–$30 (wire and clips) |
| Connecting Wall Button & Sensors | 30–45 minutes | $0 (parts included) |
| Testing & Adjusting | 15–30 minutes | $0 |
If you need to add an outlet or hire an electrician, costs can rise to $100–$300.
Environmental Considerations
Old wires, openers, or accessories should be disposed of properly. Many cities offer recycling for electronics and wire. Don’t throw wires in the regular trash—copper and plastic can be recycled.
Also, newer openers are more energy-efficient and quieter, so upgrading can reduce your home’s energy use and noise.
Summary Of Key Steps
- Plan wiring routes before starting
- Use the correct wire type and size
- Secure and protect all wires
- Connect wall button and sensors to correct terminals
- Test every feature before finishing
- Follow all codes and safety rules
A well-wired garage door opener gives you years of trouble-free use and peace of mind.
Frequently Asked Questions
How Do I Know Which Wire Goes Where On My Garage Door Opener?
Most openers have clearly labeled terminals, usually for power, wall button, and safety sensors. Use the manual for your model. If wires are not color-coded, use labels or take a photo before disconnecting the old opener.
Can I Use Any Wire For Connecting The Wall Button And Sensors?
No, use 18–22 gauge solid-core low-voltage wire. This is safe and designed for control circuits. Don’t use high-voltage or stranded wire, as it may cause unreliable operation.
What If My Garage Has No Nearby Power Outlet?
You’ll need to have an outlet installed by a licensed electrician. Never use an extension cord as a permanent solution—it’s unsafe and against code.
Why Do My Safety Sensors’ Lights Keep Blinking?
Blinking lights usually mean misalignment or a wiring issue. Make sure sensors face each other, the lenses are clean, and wires are securely connected. Check for obstructions blocking the beam.
Where Can I Find More Information About Wiring Codes?
The National Electrical Code (NEC) provides guidelines for garage wiring. For more details, check this NFPA NEC resource.
Whether you’re installing a new opener or upgrading an old one, wiring it yourself is a rewarding project. With careful planning, attention to detail, and safety as your top priority, you’ll enjoy a reliable garage door for years to come.


