Now Reading: How to Seal Garage Door Gaps for a Warmer, Pest-Free Home
- 01
How to Seal Garage Door Gaps for a Warmer, Pest-Free Home
Sealing your garage door gaps can make a surprising difference in your home’s comfort and energy use. Many homeowners ignore the small spaces around and under their garage doors, but these gaps can bring in cold drafts, water, pests, and even raise your energy bills.
If you feel a breeze, spot daylight, or see puddles after rain, your garage door is not sealed tight. Fixing this problem is not as hard as you might think. With some basic tools and clear guidance, you can stop air, dust, water, and critters from sneaking into your garage.
This guide will walk you through every step to seal garage door gaps, from identifying problem areas to choosing the right materials and doing the job safely. You’ll also learn some tips that most beginners miss, helping you avoid common mistakes.
Let’s get started on making your garage more secure, energy-efficient, and clean.
Why Garage Door Gaps Are A Problem
Garage door gaps are more than just a minor annoyance. These small spaces can lead to several issues:
- Energy loss: Gaps let cold air in during winter and hot air in during summer, making it harder to keep your home comfortable.
- Water intrusion: Rainwater can seep in, damaging floors, walls, and stored items.
- Pest entry: Rodents, insects, and even snakes can use these gaps to enter your garage.
- Dirt and debris: Leaves, dust, and litter blow in, creating more cleaning work.
- Security risks: Larger gaps can make it easier for burglars to pry open the door.
Many people overlook garage door gaps, but fixing them protects your property and helps lower energy costs. According to the U. S. Department of Energy, air leaks in garages and basements can account for up to 30% of a home’s heat loss in winter.
Common Types Of Garage Door Gaps
Not all gaps are the same. Knowing where to look helps you seal every problem area.
- Bottom gap: The space between the garage door and the floor. It’s usually caused by worn or missing bottom seals, uneven floors, or door misalignment.
- Side gaps: These appear along the edges where the door meets the frame. They can result from old or damaged weatherstripping or a warped door.
- Top gap: This forms where the door meets the header at the top. Often, it’s due to poor installation or a sagging door.
- Panel gaps: Some doors, especially older wooden ones, develop cracks or gaps between panels.
- Threshold gap: Sometimes, the floor under the door is not level, creating a wider space that the regular seal cannot cover.
Each of these gaps needs a slightly different solution. We’ll cover how to seal every type.
Tools And Materials You Need
Before you start, gather these supplies. Having the right tools saves time and ensures a good seal.
- Tape measure
- Utility knife
- Hammer and nails or drill and screws
- Flathead and Phillips screwdrivers
- Caulking gun
- Silicone or latex caulk
- Weatherstripping (vinyl, rubber, or foam)
- Garage door bottom seal
- Threshold seal (for uneven floors)
- Cleaning brush or vacuum
- Adhesive (for some types of seals)
- Level (optional, but helpful for checking door alignment)
Some garage doors need specialized seals, so check your model before buying.
Material Comparison
Here’s a quick look at common seal types and where they work best:
| Seal Type | Best For | Durability | Installation Difficulty |
|---|---|---|---|
| Rubber Bottom Seal | Bottom gaps | High | Moderate |
| Vinyl Weatherstripping | Sides and top | Medium | Easy |
| Foam Weatherstripping | Small gaps | Low | Very easy |
| Threshold Seal | Uneven floors | High | Moderate |
Step 1: Inspect Your Garage Door
Before buying anything, do a thorough inspection. This step is often rushed, but it’s critical for success.
- Close the garage door. Stand inside with the lights off during the day. Look for daylight around the edges and under the door.
- Check for drafts. Move your hand slowly around the frame. Feel for cold air, especially at the bottom and sides.
- Look for water stains or dirt. These mark where water and debris are getting in.
- Examine the seals. Are they cracked, hard, or missing? Old seals often lose flexibility and can’t block gaps.
- Check door alignment. A crooked door creates uneven gaps. Use a level if you have one.
Many beginners miss small gaps above the floor or at the corners. Shine a flashlight from outside at night to spot these.

Step 2: Measure The Gaps
Measuring is simple, but accuracy matters. You need the right size seal for each gap.
- Width: Measure the length of the bottom, each side, and the top of the door.
- Gap size: Use a ruler to check how wide the gaps are. Most standard bottom seals cover gaps up to 1/2 inch. For larger gaps, consider a threshold seal or layered weatherstripping.
- Note uneven spots: If the floor is higher on one side, write down the difference.
Double-check your measurements before buying materials. A common mistake is buying seals that are too short or too thick, causing the door to not close properly.
Step 3: Clean The Area
Seals stick best to clean surfaces. This step is often skipped, but it’s key for a long-lasting result.
- Sweep away dirt and dust with a broom or vacuum.
- Scrub old glue or sealant with a stiff brush and mild soap.
- Dry all surfaces before installing new seals.
- Remove old weatherstripping completely. Use a utility knife to cut away stubborn pieces.
If you install a seal over dust or old adhesive, it won’t bond well and will come off quickly.
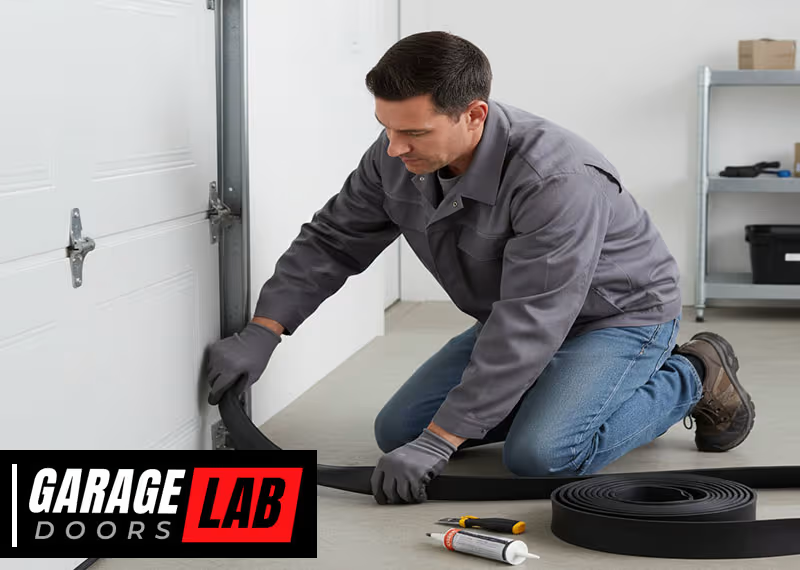
Step 4: Sealing The Bottom Gap
The bottom gap is the largest source of air and water leaks. Here’s how to fix it:
Replacing The Bottom Seal
Most garage doors have a slot or track at the bottom for a rubber or vinyl seal.
- Remove the old seal. Open the door slightly and slide out the old seal. If it’s stuck, use pliers.
- Clean the track. Remove dirt and old bits of rubber.
- Cut the new seal to the correct length.
- Insert the new seal into the track. Some seals slide in, others snap in. Follow the instructions for your door.
- Test the door. Open and close it a few times to check for smooth movement.
When To Use A Threshold Seal
If the floor is uneven, a regular seal may not close the gap. Use a garage door threshold seal (a thick strip that sticks to the floor).
- Dry-fit the threshold under the door. Mark where it will sit.
- Apply adhesive (usually provided) to the floor.
- Press the threshold into place. Hold for a few minutes.
- Close the door and let the adhesive cure for a few hours.
Threshold seals are especially good for stopping water and rodents.
Bottom Seal Comparison
Here’s how bottom seals and threshold seals compare:
| Feature | Bottom Seal | Threshold Seal |
|---|---|---|
| Blocks Air | Yes | Yes |
| Blocks Water | Somewhat | Very well |
| Easy to Install | Yes | Moderate |
| Good for Uneven Floors | No | Yes |
Step 5: Sealing Side Gaps
Side gaps let in the most wind and insects. Sealing them is easy but often overlooked.
Installing Side Weatherstripping
- Buy vinyl or rubber weatherstripping designed for garage doors. It comes in rolls or pre-cut strips.
- Measure and cut the strips to fit each side.
- Position the strip so it presses against the door when closed.
- Nail or screw the weatherstripping to the wooden frame. Place fasteners every 12–16 inches.
- Check for tightness. The strip should touch the door but not stop it from moving.
If you have a metal door frame, use adhesive-backed weatherstripping. For large gaps, layer two strips or use thicker material.
Common Mistakes
- Installing too tight: This can make the door hard to open.
- Leaving gaps at the corners: Overlap the weatherstripping at the top and bottom for a better seal.
Step 6: Sealing The Top Gap
The top of the door is often missed. This gap can let in hot air, especially in summer.
How To Seal The Top
- Use the same weatherstripping as for the sides.
- Cut a strip to the width of the door.
- Nail or screw it to the top frame, pressing it against the door.
- Check for daylight. If you see light, adjust the strip.
Some doors have a metal or plastic header. For these, use adhesive-backed weatherstripping.
Step 7: Sealing Panel Gaps
Older doors with panels can develop cracks. These are small but can let in cold air and moisture.
Fixing Panel Gaps
- Use exterior caulk (silicone or latex).
- Apply a thin bead to the crack.
- Smooth with a wet finger or a caulking tool.
- Let dry before painting or staining (if needed).
For large gaps, consider adding foam backer rod before caulking. This saves caulk and makes a better seal.
Step 8: Sealing Around The Frame
Sometimes, gaps appear between the garage door frame and the wall.
- Check for cracks or loose boards.
- Fill cracks with caulk.
- Replace rotten wood if needed.
- Add foam insulation for wide gaps, then seal over it with caulk.
This step is important for garages attached to the house, as it helps keep out fumes and heat.
Step 9: Test Your Work
Once all the seals are in place, it’s time to check your results.
- Close the garage door.
- Turn off the lights. Look for daylight at all edges.
- Feel for drafts with your hand.
- Spray water with a hose outside (optional). Check for leaks inside.
- Open and close the door. Make sure it moves smoothly and doesn’t stick.
If you find small leaks, adjust or add more weatherstripping. If the door is hard to open, the seals may be too thick.

Step 10: Maintain Your Seals
Sealing your garage door is not a one-time job. Weatherstripping and seals wear out over time.
- Inspect seals twice a year.
- Clean dirt and debris from seals with mild soap and water.
- Replace cracked or hard seals as soon as you notice them.
- Lubricate metal parts of the door to keep it moving smoothly.
Good maintenance means you won’t have to redo the whole job often.
Advanced Tips And Non-obvious Insights
Most guides stop at the basics, but a few extra steps can make a big difference.
- Seal the door threshold from outside: If your driveway slopes toward your garage, install a threshold seal outside to block water before it reaches the door.
- Add insulation panels: For metal garage doors, add foam insulation inside the panels. This helps keep temperatures stable and reduces noise.
- Use rodent-proof seals: Some bottom seals have a metal mesh inside to stop rodents from chewing through. These are worth it if you have a mouse problem.
- Paint or treat wooden frames: Moisture can rot wood over time. Sealing and painting the frame adds years to your weatherstripping’s life.
- Check for door alignment issues: If your door is never level, you may need a pro to adjust the springs or tracks.
Many beginners forget that garage doors move. Flexible seals are needed so they don’t tear or come loose quickly.
Costs And Savings
Is sealing garage door gaps worth the money? Let’s look at the numbers.
- Typical material cost: $25–$100, depending on the size of your door and the type of seals.
- Professional installation: $150–$350.
- DIY time required: 2–4 hours for a standard door.
Energy savings: According to the U.S. Department of Energy, sealing air leaks can save 10–20% on energy bills each year. If your garage is attached, you’ll notice your house feels less drafty and your heating or cooling system works less hard.
Water and pest damage savings: Fixing water damage or pest problems costs much more than sealing the door—sometimes thousands of dollars.
When To Call A Professional
Most garage door sealing can be done by a handy homeowner. But call a pro if:
- The door is misaligned or very heavy.
- Seals do not stay in place after installation.
- The floor is extremely uneven.
- You see rust, rot, or termite damage in the frame.
- The opener or springs need adjustment.
Professional installers have special tools and can finish the job fast, but most people can seal common gaps themselves.
Safety Tips
Working with garage doors involves some risks. Stay safe with these tips:
- Disconnect automatic openers before working on the door.
- Do not adjust springs or cables yourself; they are under high tension.
- Wear gloves when removing old rubber or metal seals.
- Use eye protection when drilling or hammering near the frame.
- Keep children and pets away from the work area.
Environmental Benefits
Sealing your garage door gaps helps the environment, too.
- Reduces energy use, lowering your carbon footprint.
- Prevents chemical fumes (from cars or paints) from entering living spaces.
- Keeps out pests without needing poisons or traps.
- Reduces water leaks, preventing mold and rot.
Small actions add up to big savings for your family and the planet.
Diy Vs Professional: Which Is Better?
Here’s a quick comparison to help you decide:
| Aspect | DIY | Professional |
|---|---|---|
| Cost | Low | High |
| Time | 2–4 hours | 1–2 hours |
| Skill Needed | Basic handyman skills | None |
| Best For | Standard doors, small gaps | Complex problems, heavy doors |
Real-world Example
Anna, a homeowner in Michigan, had a cold draft every winter in her garage. She found a 3/4-inch gap under the door and smaller gaps at the sides. After following the steps above—measuring, cleaning, installing a rubber bottom seal and vinyl side weatherstripping—she noticed less dust and no more drafts. Her heating bill dropped about 8% in the first winter. The project took three hours and cost $60. Anna’s tip: “Don’t skip cleaning the track and buy a little extra weatherstripping in case you make a mistake.”
Frequently Asked Questions
How Often Should I Replace Garage Door Seals?
Most garage door seals last 3–5 years, but heavy use, sun, and weather can shorten their lifespan. Check your seals twice a year and replace them if they are cracked, hard, or letting in air or water.
Can I Seal Garage Door Gaps If My Floor Is Uneven?
Yes, use a threshold seal designed for uneven floors. It sticks to the floor and creates a tight seal even if the surface is not level. For very large gaps, you may need to level the floor or consult a professional.
Will Sealing Garage Door Gaps Really Lower My Energy Bills?
Yes, especially if your garage is attached to your house. Sealing gaps can cut energy loss by up to 20%, making your home easier to heat or cool. For more on energy savings, see this U.S. Department of Energy guide.
What Is The Best Material For Garage Door Weatherstripping?
Rubber seals last longest at the bottom of the door. For the sides and top, vinyl or rubber weatherstripping works well. For small cracks, use foam or caulk.
Can I Seal A Metal Garage Door The Same Way As A Wooden One?
Yes, but use adhesive-backed weatherstripping for metal frames and doors. For wooden frames, you can nail or screw the strips in place. Always clean the surface well before installing.
Sealing garage door gaps is a practical way to protect your home, save money, and keep your garage cleaner and safer. With a bit of time and the right materials, you can solve this common problem and enjoy a more comfortable home year-round.


