Now Reading: How to Wire a Garage Door Opener Without Sensors Safely
- 01
How to Wire a Garage Door Opener Without Sensors Safely
Wiring a garage door opener without sensors is a topic that brings both curiosity and caution. Many homeowners want a simple, direct way to automate their garage doors without the extra steps of installing safety sensors. Whether your sensors are broken, missing, or you just want a cleaner look, you might consider skipping them.
However, this choice comes with important safety and legal concerns. In this guide, you’ll learn how to wire a garage door opener without sensors, what risks are involved, and the best practices to stay safe and compliant. Let’s break down every detail, step by step.
Understanding Garage Door Opener Sensors
Before you start, it’s important to know why garage door sensors exist. These small devices, often installed near the floor on both sides of your garage door, detect objects or people in the door’s path. If something breaks the sensor beam, the opener won’t close the door. This is a basic but crucial safety feature, especially for homes with children or pets.
Sensors use infrared light to create an invisible line between each side of the door. If anything interrupts this line—like a child, pet, or bike—the opener receives a signal to stop or reverse the door. This prevents accidents that can cause serious injuries or expensive damage to items left in the doorway.
Since 1993, the US government has required all new garage door openers to include these safety sensors. Disabling or bypassing them may put you at risk of injury or property damage, and in some places, it can break local building codes.
But sensors are not just for homes with children. Even in garages with only adults, it’s easy to forget something behind the door—like a toolbox or a shopping bag. The sensors offer a last line of defense against crushing accidents.
Why Would You Wire Without Sensors?
There are times when you might want to wire a garage door opener without sensors:
- Your sensors are broken and you need a quick fix.
- The sensors are missing, and replacements are hard to find.
- You’re working in a garage without children, pets, or foot traffic.
- You want a minimalist look or have trouble with false alarms from sunlight or dust.
Some people also bypass sensors during construction or renovations, when the door will not be used often, or when sensors are repeatedly tripped by harmless things like blowing leaves or the sun’s glare. In rare cases, old garages may not have wiring routes for modern sensors, making installation tricky.
But remember, skipping sensors means you lose an important safety layer. Even if the garage seems safe now, your situation could change in the future.
Legal And Safety Risks
Removing or bypassing safety sensors means you take full responsibility for what happens. If your garage door closes on a person, pet, or object, you could face serious injury, property damage, or legal trouble. In some states, not having sensors is a building code violation, which might affect your home insurance or when you sell your house.
Home inspectors often check garage doors during sales. If they find sensors bypassed or missing, they can require you to fix the issue before closing. Insurance companies might deny claims if they find out you disabled a required safety feature—even for unrelated accidents.
Manufacturers also warn that modifying openers can void your warranty. Always check your local laws and building codes before making any changes.
An important detail: some modern openers automatically log error codes or events. If an accident happens, this can be used as evidence that safety sensors were intentionally disabled.
Tools And Materials Needed
Getting the right tools and supplies makes the job smoother. Here’s what you’ll likely need:
- Flathead and Phillips screwdrivers
- Wire strippers and cutters
- Electrical tape or wire nuts
- Extra wire (18-22 gauge, 2-conductor, for extensions)
- Garage door opener manual (for wiring diagrams)
- Ladder or sturdy step stool
- Safety glasses
- Voltage tester (optional, for safety)
- Small pliers
Keep your tools organized and within reach. Never work on live wires—always disconnect power first.
It’s smart to lay out all tools before starting. Keep a flashlight handy if your garage is dimly lit, and consider using a small container or magnetic tray for screws so nothing gets lost.
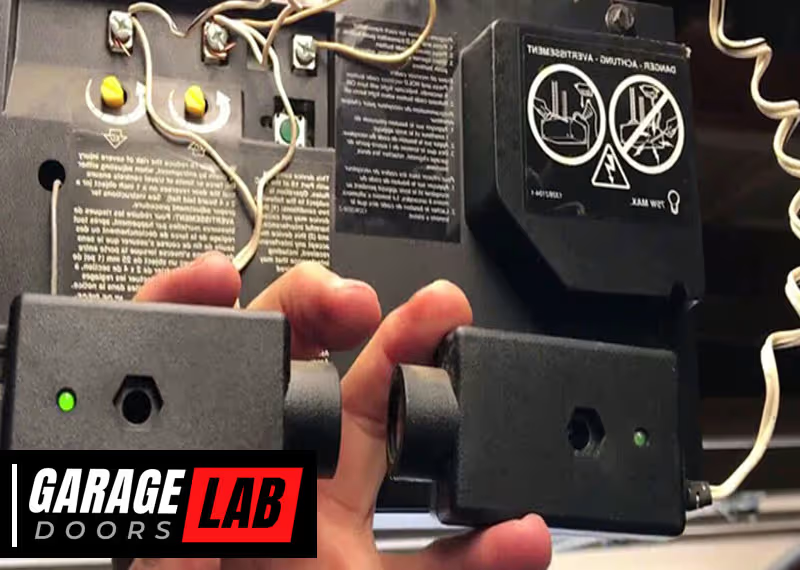
How Garage Door Opener Sensors Work
Understanding how sensors work helps you bypass them safely. Most openers use a photoelectric system: one sensor sends an infrared beam, and the other receives it. If the beam is broken, the opener won’t close.
Some openers use additional checks, like verifying the sensors are powered or communicating correctly. This means that simply connecting the wires may not fool all openers—especially newer ones with digital logic boards.
When you bypass the sensors, you’re telling the opener’s logic board to act as if the beam is always clear. This can be done by connecting the two sensor wires together, fooling the system.
A key detail: some brands use a pulsed or modulated signal. In these cases, the opener may look for a specific “signature” from the sensor, not just a closed circuit. If you try to bypass these with just a wire, you may get a warning light or no movement at all.
Step-by-step Guide: Wiring Without Sensors
Let’s move through the process. This guide is for openers made after 1993, such as Chamberlain, LiftMaster, or Genie. Always refer to your specific model’s manual for wire color codes and terminal labels.
1. Disconnect Power
Unplug the opener. If hardwired, turn off the breaker. Never work on live circuits.
Check that the opener’s light is off and press the wall button to make sure no power remains. This reduces shock risk and prevents accidental movement while you work.
2. Identify Sensor Terminals
Open the cover on your opener’s housing. Most units have a terminal strip or labeled ports. Look for labels like “SENSOR,” “SAFE-T BEAM,” or “PHOTO EYE. ” There are usually two wires from each sensor, often white and black.
If you’re unsure, trace the wires from the door frame to the opener. Sometimes, extra wires are bundled together, so check carefully to avoid disconnecting the wrong ones.
3. Remove Sensor Wires
Use a screwdriver to loosen the sensor terminal screws. Pull out the wires coming from the wall sensors. Save these wires in case you need to reinstall sensors later.
If the wires are twisted together or connected with wire nuts, gently untwist them to avoid breaking the copper strands. Label each wire with tape if you think you’ll reinstall them in the future.
4. Create A Bypass Loop
Strip about 1/2 inch of insulation from the ends of the two wires still connected to the opener’s sensor terminals. Twist these two wires together (white to white, black to black) to complete a circuit. You can use a short piece of spare wire to make a U-shaped jumper if needed.
Secure the twisted wires with a wire nut or electrical tape. This tells the opener’s board the sensors are always “clear. ”
If your opener uses three terminals (power, ground, signal), check the manual—often, you’ll connect the ground and signal terminals, but never connect all three together.
5. Secure The Wiring
Double-check your connections. Make sure no bare wires are exposed. Tidy up extra wire with a zip tie or tape so nothing hangs loose inside the opener housing.
Loose wires can short out against the opener’s metal case, causing damage or dangerous sparks. Neat wiring also makes future troubleshooting easier.
6. Reconnect Power And Test
Plug the opener back in or turn on the breaker. Try closing the door with the wall button and remote. The door should now close without sensors stopping it.
If the opener blinks or beeps, or the door won’t move, check your connections and the manual. Some newer models have extra safety checks and may not allow bypassing.
A non-obvious tip: If the wall button works but the remote does not, it may be a sign that the opener is in a “service” or “safe” mode due to missing sensors.
7. Restore Cover And Clean Up
Replace the opener’s cover. Pick up all tools and leftover wire. Test the opener several times to make sure it works smoothly.
If you hear any odd noises or see sparks, disconnect power and recheck your work immediately.

Important Tips And Common Mistakes
Wiring a garage door opener without sensors seems simple, but small mistakes can cause big problems.
- Never twist wires together without using a connector. Loose wires can spark or fall out.
- Don’t short the sensor terminals directly with metal tools. This can damage the control board.
- Label removed wires if you plan to reinstall sensors later.
- Don’t bypass sensors if you have children or pets. The risk isn’t worth it.
- Never use wire that’s too thin. Use at least 18- or 20-gauge wire for safety.
A common beginner mistake is not reading the opener’s manual. Each brand may have a unique sensor system or error codes.
Another mistake: assuming all openers are wired the same. Some units use digital signals rather than simple circuits. If you skip the manual, you might damage the opener or create a fire hazard.
Comparing Major Opener Brands: Sensor Bypass Difficulty
It’s useful to know how different brands handle sensor bypassing. Here’s a quick comparison:
| Brand | Sensor Bypass Difficulty | Notes |
|---|---|---|
| Chamberlain/LiftMaster | Medium | Simple jumper works, but newer models may block bypass |
| Genie | Medium | Bypass possible, but some units have self-checks |
| Craftsman | Medium | Follows Chamberlain design; jumper usually works |
| Overhead Door | Hard | Some models cannot be bypassed without error codes |
| Sommer | Hard | European design, rarely allows bypass |
Not all openers are created equal. Some “smart” openers include microchips that detect sensor resistance or signal patterns. With these, bypassing requires more than just a wire loop—sometimes, you need to add a resistor or even build a small circuit.
This is advanced and should not be attempted unless you are confident in electronics.
What If My Opener Won’t Work Without Sensors?
Some openers, especially those made in the last 5-10 years, are designed to detect missing or bypassed sensors. They might flash error codes, blink the lights, or refuse to close the door at all.
If this happens:
- Double-check your bypass wiring.
- Consult the manual for error code meanings.
- Look for online forums specific to your opener model.
- Some advanced users have used resistors to mimic sensor signals, but this requires electronics knowledge.
In rare cases, you may need to reinstall working sensors, even if you hide them out of sight (not recommended for safety).
If your opener refuses to work without sensors, don’t force it. Forcing the system can lead to permanent damage or even lock you out of the opener’s programming. Some brands update their firmware to block common bypass methods as a safety measure.
Permanent Vs. Temporary Bypass
There’s a big difference between a permanent bypass (removing sensors forever) and a temporary bypass (for repairs or troubleshooting).
- Permanent bypass: You remove sensors and jumper the opener forever. This is not recommended for homes with regular foot traffic.
- Temporary bypass: You jumper the sensors for a short time while waiting for replacements or repairs.
Whenever possible, restore sensors as soon as you can. This keeps your garage safe for everyone.
If you’re selling your house, be aware that temporary fixes may not pass inspection. Always return the opener to its original, compliant state.
Can You Hide Sensors Instead Of Removing Them?
Some homeowners “hide” working sensors by pointing them at each other inside the opener housing, above the door, or in a corner. This keeps the safety circuit closed but removes the detection at the door.
While this may pass a visual inspection, it does not meet safety standards. If someone is hurt, you could still be liable. Always weigh the risks before choosing this shortcut.
Additionally, hidden sensors can be knocked out of alignment easily, leading to door malfunctions that are hard to diagnose.
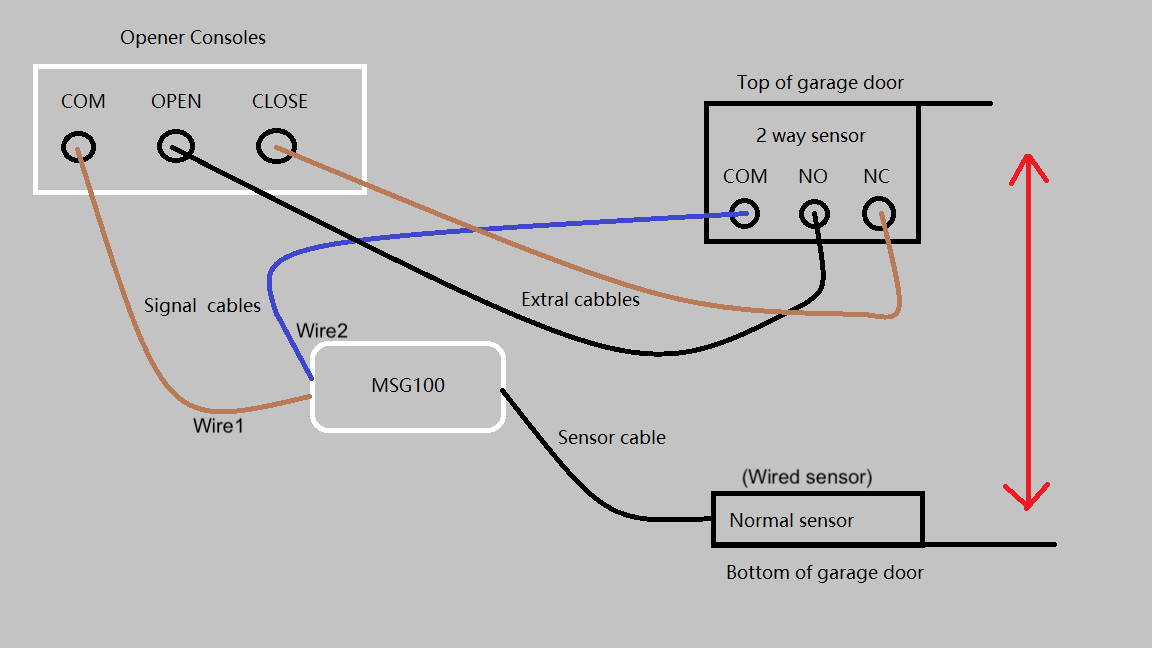
Wiring Diagrams And Examples
Every opener is different, but here’s a simple wiring diagram for a typical two-wire sensor bypass:
Original wiring:
- Opener terminal 1: White wire to sensor 1
- Opener terminal 2: Black wire to sensor 2
Bypassed wiring:
- Remove sensor wires from terminals
- Insert a short jumper wire from terminal 1 to terminal 2
Some openers have three terminals (power, signal, ground). In that case, you may need to connect the signal and ground terminals together with a jumper.
If your opener uses a plug-in connector instead of screw terminals, use a short piece of insulated wire cut to fit the connector. Do not force thick wire into a tight space—it can damage the terminals.
Table: Common Sensor Wire Color Codes
Knowing your wire colors helps avoid mistakes.
| Brand | Sensor Wire 1 | Sensor Wire 2 |
|---|---|---|
| Chamberlain/LiftMaster | White | Black/White |
| Genie | White | Gray |
| Craftsman | White | Black/White |
| Overhead Door | White | Red |
Always match wire colors when making bypass loops.
Some openers use solid wires; others use stranded. Stranded wire is more flexible and less likely to break, but it’s important to twist the strands tightly before securing with a wire nut or tape.
Safety Practices When Working Without Sensors
Bypassing sensors increases the risk of accidents. If you must operate without them, follow these safety practices:
- Always watch the door close. Never walk away until it’s fully down.
- Keep the opener’s remote and wall control out of reach of children.
- Post a warning sign near the opener button.
- Test the door’s auto-reverse function by placing a solid object (like a 2×4) in the path. If the door does not reverse, do not use it.
- Consider installing a garage door edge sensor or other aftermarket safety device if you must operate without photo eyes.
A less obvious safety tip: If you’re working alone, let someone know you’re modifying the opener, and keep a phone nearby in case of emergency. Garage doors are heavy and can cause serious injuries if they fall unexpectedly.
Real-world Example: When Bypassing Sensors Caused Problems
Imagine a homeowner who bypasses their opener’s sensors because they’re tired of false alarms from sunlight. A week later, their child’s bike is left in the garage door’s path. The opener, no longer “seeing” the bike, closes the door and damages it.
Insurance refuses to pay because the safety system was disabled.
In another true story, a pet cat was injured when it darted under a closing door that had its sensors bypassed. The owner had believed the garage was safe, but pets are unpredictable. The accident led to a costly vet bill and regret that sensors were not used.
Stories like this are not rare. Think carefully before bypassing safety features, and always keep your family’s safety first.
Alternatives To Bypassing Sensors
If your sensors are faulty but you don’t want to bypass them:
- Clean the lenses; dirt or spider webs can block the beam.
- Check for proper alignment; both sensors must face each other directly.
- Shade the sensors if sunlight causes false triggers.
- Replace broken sensors with new ones (available online or at hardware stores).
- Upgrade your opener to a newer model with better error handling.
A little-known trick: If your sensors are often misaligned, try mounting them on a small block of wood to create a more solid base. This makes them less likely to move if the garage shifts or the wall vibrates.
For more on opener safety, see the Wikipedia article on garage door openers.
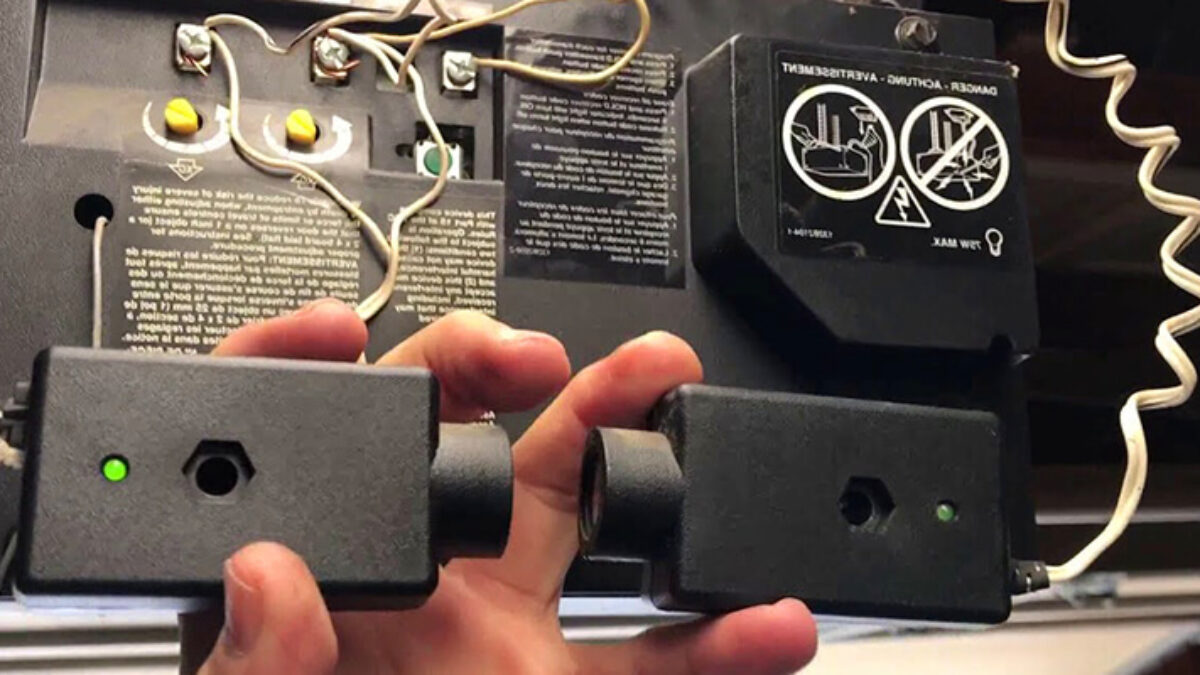
Table: Comparison—bypassing Vs. Replacing Sensors
It helps to see the pros and cons side by side.
| Option | Pros | Cons | Cost |
|---|---|---|---|
| Bypass Sensors | Quick, no extra parts | Unsafe, may violate code, voids warranty | Free (if you have wire) |
| Replace Sensors | Safe, code-compliant, keeps warranty | Requires purchase, some wiring skills | $15–$40 for a pair |
While bypassing may seem easier, the long-term risks and costs can be much higher than simply replacing the sensors.
Frequently Asked Questions
Can I Wire My Garage Door Opener Without Sensors And Still Be Safe?
You can wire the opener to work without sensors, but it is not safe. The sensors are there to prevent injury or damage. Without them, the door won’t stop if something is in its path. Always watch the door close and keep children and pets away.
Even if you have no kids or pets today, a neighbor’s child or a visiting animal could enter your garage unexpectedly.
Will Bypassing The Sensors Void My Garage Door Opener’s Warranty?
In most cases, yes. Manufacturers state that removing or bypassing safety features voids the warranty. If your opener breaks, you may not be able to get free repairs.
Is It Legal To Operate A Garage Door Opener Without Sensors?
In many places, it is not legal. US federal law requires sensors on all new openers since 1993, and some states have local codes. You may also fail a home safety inspection if you sell your house.
Are There Any Openers That Work Without Sensors From The Factory?
No modern openers (since 1993) are built to work without sensors. All must include a safety system. Some very old or specialty openers may not have sensors, but these are rare and do not meet today’s safety codes.
What’s The Best Alternative If My Sensors Keep Giving Me Trouble?
Try cleaning and realigning your sensors first. If the problem continues, replace them with a new set. Avoid bypassing unless you have no other option and understand the risks.
In summary, while wiring a garage door opener without sensors is technically possible, it is never the safest or most responsible choice. Always put safety first, and restore your sensors as soon as you can. With the right tools, a clear plan, and an understanding of the risks, you can keep your garage both functional and safe for everyone in your home.


