Now Reading: How to Code Garage Door Remote: Easy Steps for Quick Setup
- 01
How to Code Garage Door Remote: Easy Steps for Quick Setup
Coding a garage door remote can look complicated if you’ve never done it before. But the truth is, most modern garage door openers are designed for easy programming. Whether you lost your old remote, bought a new one, or need to reset security, you don’t always need to call a technician.
If you follow the right steps and understand how your system works, you can code your garage door remote yourself in less than an hour. In this guide, I’ll explain every detail you need to know, from understanding your opener to advanced troubleshooting, so you’ll finish with a working remote and more confidence in your home’s security.
Understanding Garage Door Remotes And Openers
Before you start coding, it helps to know what you’re working with. Garage door remotes send a radio signal to a receiver inside your garage door opener. When you press the remote button, the opener receives the signal and opens or closes the door. But not all remotes and openers work the same way.
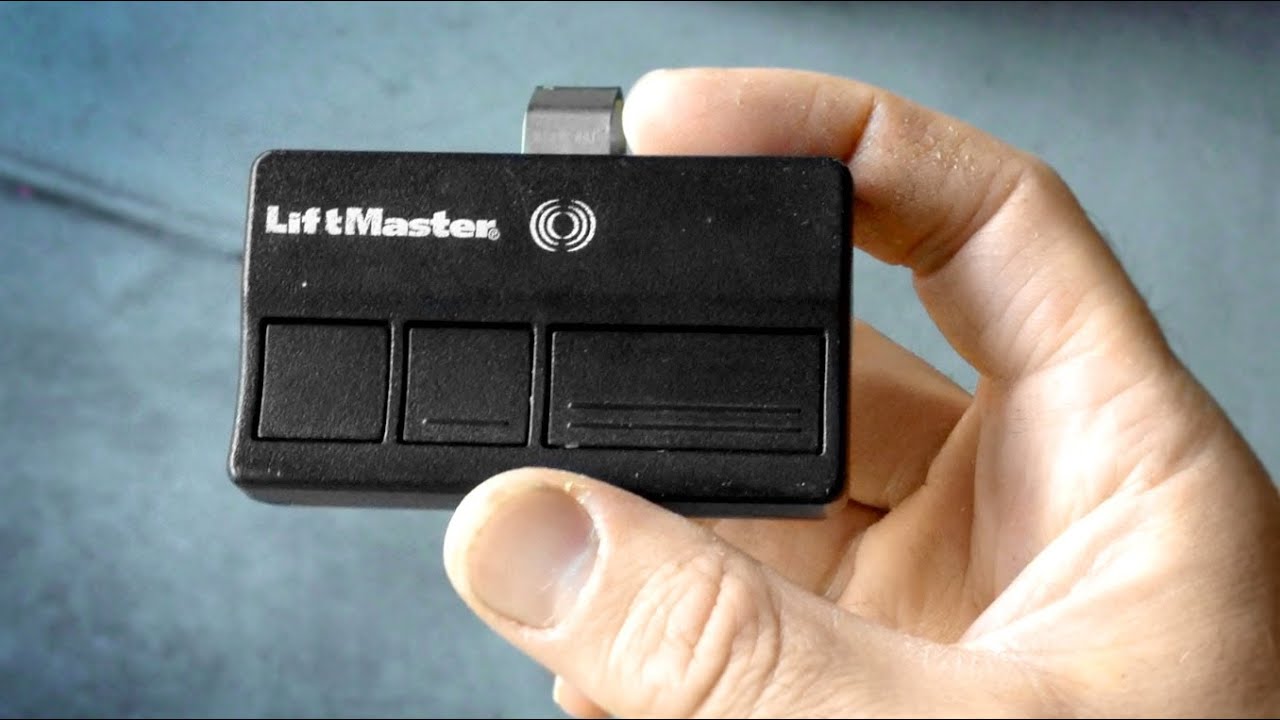
Some older systems use fixed codes, while most newer models use rolling code technology. Rolling codes mean the code changes every time you use the remote, making it harder for thieves to copy the signal. Brands like LiftMaster, Chamberlain, and Genie are popular in the US, but there are many others.
Common Types Of Garage Door Remotes
- Single-button remotes: Only open or close one door.
- Multi-button remotes: Can control two or three doors, or lights.
- Universal remotes: Can be programmed to work with many brands.
Understanding the type you have will help you pick the right steps later.
How Garage Door Remote Coding Works
When people say “coding” a remote, they mean programming the remote to match the opener’s receiver. This involves syncing a small radio code between the remote and the opener. For rolling code systems, the process is secure and unique.
Fixed Code Vs. Rolling Code
- Fixed code: You set a code with switches inside the remote and opener. Rare today.
- Rolling code: The remote and opener sync automatically. Each press uses a new code.
Almost all remotes sold after 1995 use rolling codes. If your opener is older, you may have to use DIP switches and set codes manually.
Tools And Items You’ll Need
You don’t need many tools, but make sure you have these items before you begin:
- The new remote you want to code (and old one, if you’re copying)
- A ladder (to reach the garage door opener’s “Learn” button)
- The garage door opener manual (if available)
- A small flathead screwdriver (sometimes needed to open the remote)
- Pen and paper (to note model numbers or steps)
- Good lighting in your garage
Having these ready will make the process smoother and safer.
Safety First: Precautions Before You Start
Working with any electrical device requires caution. Garage door openers have moving parts and high tension springs, but you won’t need to touch these for remote coding. Still, keep these safety tips in mind:
- Make sure the area around the door is clear.
- Use a sturdy ladder and don’t overreach.
- Keep children and pets away while you work.
- Avoid touching the opener’s wiring.
- If you’re unsure, consult a professional.
Coding a remote is usually safe, but accidents can happen when people rush or ignore safety basics.
Step-by-step Guide: How To Code A Garage Door Remote
Now, let’s get into the main steps. The process may be slightly different depending on your opener’s brand, but most systems use a similar method.
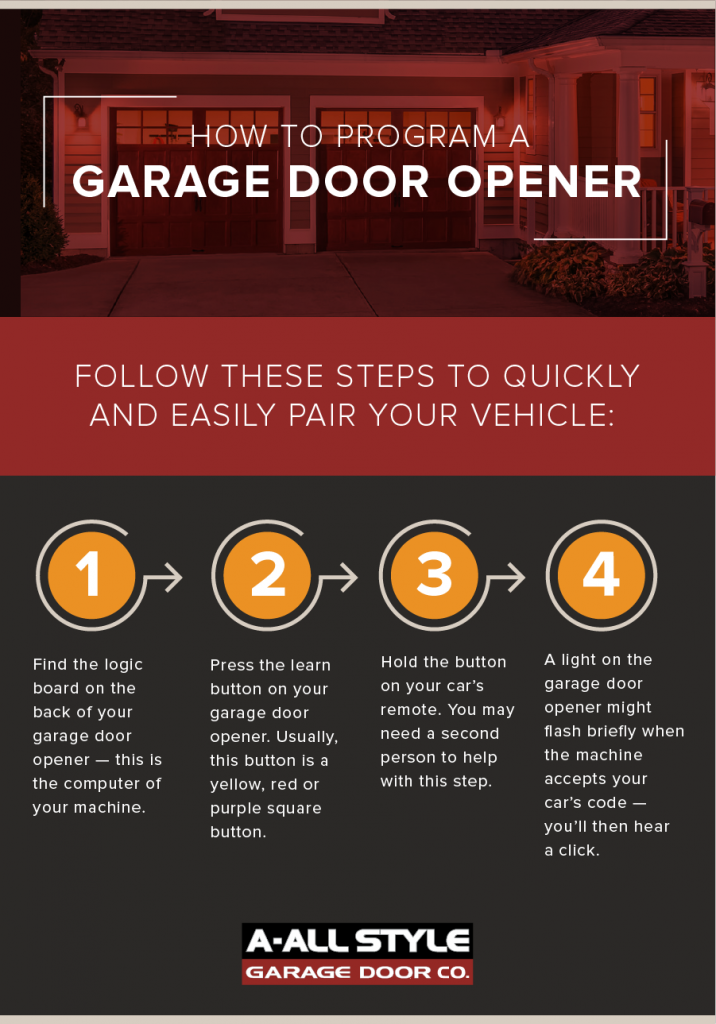
Step 1: Find The “learn” Button On Your Opener
Most garage door openers have a Learn button. This button is usually on the back or side of the motor unit (the box hanging from your garage ceiling). You may need to remove a light cover to see it.
Common Learn button colors and what they mean:
- Yellow: Security+ 2.0 (most new LiftMaster/Chamberlain)
- Purple: Security+ 315 MHz (some older models)
- Red/Orange: Security+ 390 MHz (older)
- Green: 390 MHz (very old models)
Write down the color and any model number you see.
Step 2: Prepare Your Remote
Take your new remote and make sure it has fresh batteries. If you have an old remote that still works, keep it handy—you may need to clear old codes or test the system.
Step 3: Enter Programming Mode
Climb your ladder and press the “Learn” button on the opener. Don’t hold it—just press and release. A small LED next to the button will light up or blink, meaning the opener is ready to learn a new remote.
Tip: If you hold the Learn button too long (usually 6+ seconds), you may erase all remotes from memory. This can be useful if you want to start fresh, but if you only want to add a remote, just press and release quickly.
Step 4: Press The Remote Button
Within 30 seconds of pressing the Learn button, press and hold the button on your remote that you want to use. Hold it for 2-3 seconds, then release. The opener’s light may blink or you may hear a click. This means the remote is now coded.
If nothing happens, try the step again. Make sure you’re within 30 seconds of pressing the Learn button.
Step 5: Test The Remote
Stand a few feet from the opener and press the newly programmed button. The garage door should open or close. If it doesn’t, repeat steps 3 and 4, making sure you’re pressing the correct buttons.
Step 6: Program Additional Remotes (if Needed)
Repeat steps 3–5 for each extra remote you want to code. Each remote must be programmed individually.
Step 7: Secure Your System
If you lost a remote or want to make sure only your remotes work, you can erase all remotes from the opener’s memory. To do this, press and hold the Learn button for 6–10 seconds until the LED turns off.
Then reprogram only the remotes you want to keep.
Special Cases: Universal Remotes And Keypads
Some people use universal garage door remotes or wireless keypads. These work for many brands but require different steps.
Programming A Universal Remote
- Make sure the universal remote is compatible with your opener (check the manual or manufacturer website).
- Put the remote into “program” mode (usually by holding a button until a light flashes).
- Choose the right brand or frequency (sometimes there’s a switch or you press a certain button sequence).
- Press the Learn button on your opener.
- Within 30 seconds, press the remote button you want to use.
- Test the remote.
Coding A Wireless Keypad
Wireless keypads mount outside your garage. To program one:
- Press the Learn button on your opener.
- Within 30 seconds, enter your chosen PIN on the keypad and press Enter.
- The opener should blink or click.
- Test by entering the PIN and pressing Enter again.
Tip: Write down your keypad PIN and keep it in a safe place.

Brand-specific Programming Tips
While most brands follow the same basic steps, some have unique features. Here’s what you should know about the most common brands.
Liftmaster, Chamberlain, And Craftsman
These brands often share parts and use similar remotes. Their Learn buttons are color-coded. Newer models use Security+ 2. 0, which is more secure. Always use compatible remotes (look for color match).
Genie
Genie uses an “Intellicode” system (rolling code). Find the Learn or “Program” button. You may need to press the remote button twice. Some Genie openers use a “smart set” button.
Linear, Overhead Door, And Others
Read the manual—some brands have unique steps. Universal remotes may not always work. For very old openers, you may need to set DIP switches inside both the remote and opener.
Common Problems And How To Fix Them
Even if you follow every step, things can go wrong. Here’s how to solve the most common issues.
The Remote Doesn’t Work After Programming
- Check the battery in the remote.
- Make sure you pressed the Learn button (not just the remote button).
- Try programming again, making sure you’re within 30 seconds.
- Check if the opener’s memory is full (many hold 5–8 remotes).
- Make sure you’re using the correct frequency (see opener’s manual).
- For universal remotes, confirm compatibility.
The Opener Light Doesn’t Blink
Some openers don’t blink a light after successful programming. Test the remote anyway.
The Remote Works Only Up Close
This often means a weak battery or signal interference. Change the battery. Check for LED lights or wireless routers near the opener—these can block signals.
The Remote Stops Working After A Power Outage
Sometimes the opener loses memory after a power cut. Reprogram the remote using the steps above.
You Can’t Find The Learn Button
Check your manual or look for an online version. Some very old models may use DIP switches instead.
When To Use Dip Switches
If your opener and remote are from the 1980s or early 1990s, you may have to set a code using DIP switches. Inside the remote and opener, you’ll see small switches labeled 1–8 or 1–12. Set each switch to match the other (up or down).
Both codes must be identical.
Note: These systems are less secure and easier to hack than rolling codes.
Security Tips For Garage Door Remotes
Garage doors are a common entry point for burglars. Follow these tips to keep your home secure:
- Erase lost or stolen remotes from memory.
- Don’t leave remotes in your car’s visor—bring them inside.
- Use rolling code remotes whenever possible.
- Change your keypad PIN regularly.
- Upgrade old openers (before 1993) for better safety and security.
Non-obvious insight: If your neighbor’s remote opens your door, both systems may use the same code. Always erase codes and reprogram after moving into a new home.
Using Your Car’s Built-in Remote (homelink)
Many modern cars have HomeLink or Car2U systems that can learn your garage opener’s code. Programming these is similar but sometimes tricky.
How To Program Homelink
- Turn your car’s ignition to “on” (do not start engine).
- Hold the desired HomeLink button until the indicator light blinks slowly.
- Hold your garage remote close to HomeLink and press both buttons at the same time. The HomeLink light should blink faster.
- Press the Learn button on your opener.
- Within 30 seconds, press the HomeLink button for 2 seconds, release, and repeat up to 3 times.
If it doesn’t work, check your car and opener manuals for brand-specific tips.
Pro tip: Some HomeLink systems need an extra step for “rolling code” openers. Always check the instructions.
Comparison: Fixed Code Vs. Rolling Code Remotes
It’s useful to see how these two types differ in practice.
| Feature | Fixed Code Remotes | Rolling Code Remotes |
|---|---|---|
| Security | Low (easy to copy) | High (changes each use) |
| Programming Method | DIP switches | Learn button |
| Year Common | Before 1995 | After 1995 |
| Compatibility | Brand-specific | Many universal remotes work |
| Risk if lost | High | Can erase from memory |
Coding Multiple Garage Doors
Many homes have two or three garage doors. You can program one remote to control them all if it has enough buttons.
How To Program One Remote For Multiple Doors
- Press the Learn button on the first opener.
- Press and hold button #1 on your remote.
- Test and repeat for the second opener and button #2, and so on.
Each opener must be programmed separately, and each button will control a different door.
Tip: Label the buttons or write down which door each one controls.
Programming A Garage Door Remote: Troubleshooting Table
Sometimes a quick table helps you fix problems faster.
| Problem | Likely Cause | What to Try |
|---|---|---|
| Remote not working | Dead battery | Replace with a new battery |
| Remote works up close only | Signal interference | Move router/lights away, check opener antenna |
| Can’t find Learn button | Hidden behind cover | Remove light lens, check sides |
| Lost all remotes | Memory erased | Reprogram all remotes from scratch |
| Opener light doesn’t blink | Model difference | Test remote even if no blink |
Upgrading To A Smart Garage Door Opener
If your opener is more than 20 years old, you might consider upgrading to a smart garage door opener. These allow you to control your door from your phone, check status remotely, and get alerts. Some even work with Amazon Alexa or Google Assistant.
Benefits Of Smart Openers
- Remote access: Open/close door from anywhere.
- Notifications: Get alerts if the door is left open.
- Guest access: Grant temporary access to friends or family.
- Better security: Rolling code and app control.
Most smart openers still let you program standard remotes using the same steps above.
What To Do If You Lose All Remotes
If you lose all your garage door remotes, don’t panic. You can still open the door using the wall button or keypad. Buy a compatible remote, and program it using the Learn button. For extra security, erase all old codes before programming the new remote.
Non-obvious insight: Always keep a backup remote in a safe place (not in your car). This can save you from being locked out.
Professional Help: When To Call A Technician
Most people can code a garage door remote on their own. But there are times when you should call a pro:
- If you can’t find the Learn button or access the opener.
- If the remote still won’t program after several tries.
- If the opener is very old or has exposed wiring.
- If you see sparks, hear buzzing, or smell burning.
- If you need a new opener installed.
A technician can help with complex systems, safety upgrades, or troubleshooting electrical problems.
Keeping Your Remote Working Smoothly
Once you’ve coded your remote, these tips will keep it reliable for years:
- Change batteries every 1–2 years.
- Keep remotes out of direct sunlight and moisture.
- Clean the buttons gently if they stick.
- Test remotes monthly to make sure they work.
- Update your opener if you notice delays or odd behavior.
Real-life Example
Maria, a homeowner in Texas, bought a new universal garage door remote. She found the Learn button on her Chamberlain opener, pressed it, then held the remote button. At first, nothing happened. She realized she was pressing the wrong button on the remote.
After checking the manual, she tried again with the correct button and it worked. Maria also programmed her car’s HomeLink system using the same process. Now, she keeps a backup remote in her kitchen drawer for emergencies.
Useful Resources
For more details about specific opener brands or troubleshooting, you can visit the official Wikipedia page on garage door openers.
Frequently Asked Questions
How Do I Reset My Garage Door Remote?
To reset, press and hold the Learn button on your opener for about 6–10 seconds. This erases all remotes from memory. Then reprogram each remote you want to use by following the coding steps above.
Can I Program A Universal Remote To Any Garage Door Opener?
Most universal remotes work with openers made after 1995 that use rolling codes. Always check the remote’s compatibility list. Some very old or rare brands may not work with universal remotes.
Why Does My Garage Door Remote Only Work When I’m Close To The Door?
This usually means a weak remote battery or interference from other wireless devices. Try replacing the battery and check for Wi-Fi routers or LED lights near the opener that might block the signal.
Is It Safe To Program My Garage Door Remote Myself?
Yes, coding a remote is safe if you follow the instructions and basic safety tips. Avoid touching electrical wiring, and keep children and pets away while you work.
What Should I Do If My Neighbor’s Remote Opens My Garage Door?
Erase all codes by holding the Learn button for 6–10 seconds. Then, reprogram only your remotes. This ensures only your devices can open your garage.
Coding a garage door remote is easier than it seems. With the right information, you can finish the task quickly and keep your home safe. If you ever get stuck, don’t hesitate to look up your model’s manual or call a professional.
Your peace of mind—and your security—are worth it.


