Now Reading: How to Pair Liftmaster Garage Door Opener: Step-by-Step Guide
- 01
How to Pair Liftmaster Garage Door Opener: Step-by-Step Guide
How to Pair Liftmaster Garage Door Opener: Step-by-Step Guide
Pairing your LiftMaster garage door opener might sound difficult, but with the right guidance, it can be a smooth, stress-free experience. Many homeowners upgrade to LiftMaster for its reliability and advanced features, but connecting remotes, keypads, and smart devices is a step that often causes confusion. Whether you just installed a new opener, replaced a lost remote, or want your phone to control the door, understanding the pairing process is essential.
This guide will walk you through every detail of pairing a LiftMaster garage door opener. You’ll learn not just the basics, but also tips that save time, prevent mistakes, and help you get the most out of your device. By the end, you’ll confidently pair remotes, wall controls, keypads, and smart home systems, even if you’ve never done it before.
Understanding Liftmaster Garage Door Openers
Before starting, it’s helpful to know what makes LiftMaster openers unique. LiftMaster is a leading name in garage door technology, known for security, smart features, and quiet operation. Most models use rolling code technology, which changes the code each time you use the remote, making them more secure than older openers.
Modern LiftMaster openers often include MyQ technology, allowing smartphone and internet control. Some models are belt-driven for quiet operation, while others use chains for extra durability. Knowing your model helps you follow the right pairing steps.
Tools And Preparation
Pairing most devices with a LiftMaster opener doesn’t require complex tools, but being prepared prevents frustration.
What you’ll need:
- A sturdy ladder (to safely reach the opener)
- The remote, keypad, or device you want to pair
- Your garage door opener manual (if available)
- A smartphone or tablet (for smart features)
- A pen and paper (optional, for writing codes)
Before you begin:
- Check the opener’s power supply. Make sure your garage door opener is plugged in and the light on the motor unit is on.
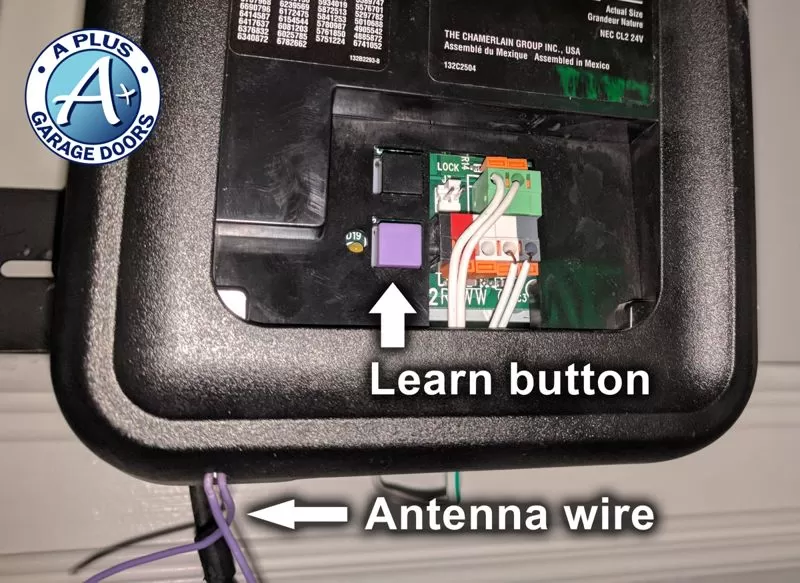
- Identify the Learn button. Most LiftMaster openers have a colored Learn button on the back or side (often yellow, red/orange, or purple). This button is key for pairing devices.
- Test the garage door. Open and close it to confirm it works smoothly without any obstructions.
- Clear the area. Move any vehicles or objects away from the door path for safety.
How To Pair A Liftmaster Remote
Pairing a remote control is often the first thing new owners need. Here’s how to do it safely and correctly.
1. Locate The Learn Button
Find the Learn button on the garage door opener unit. It’s usually near the antenna wire and LED light. The color of the button can indicate the opener’s age and compatibility.
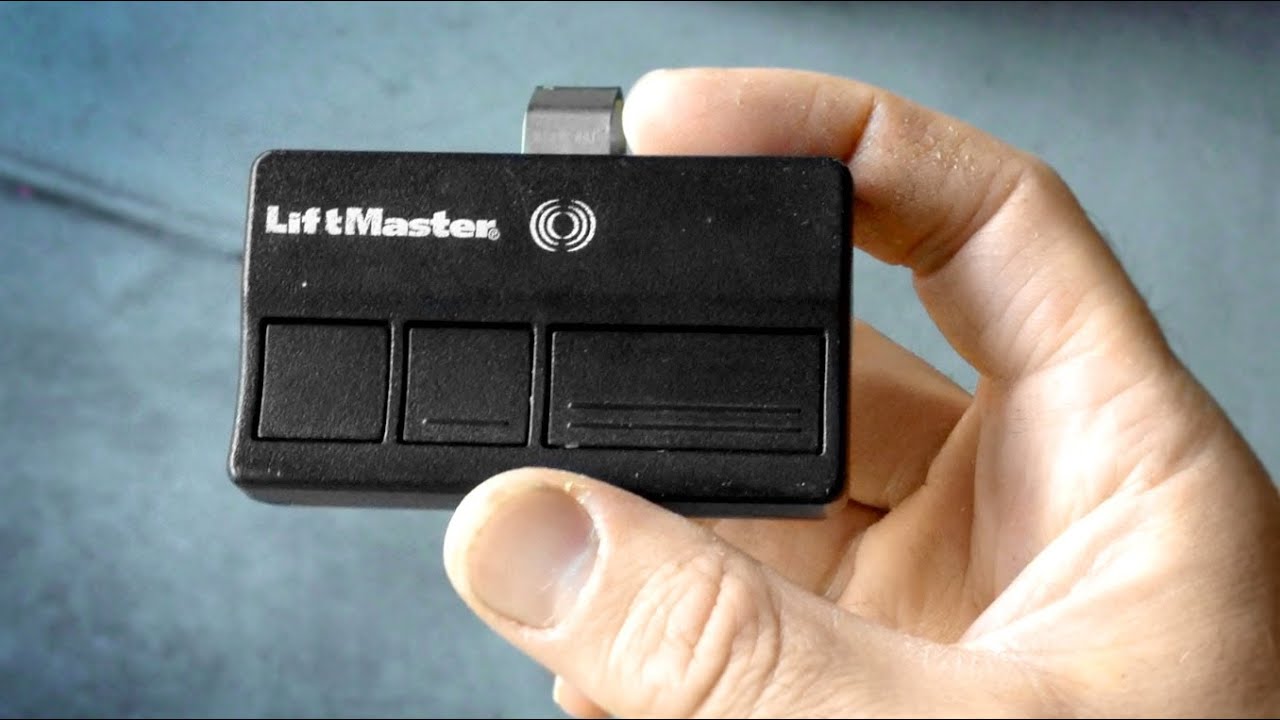
2. Prepare The Remote
Make sure the remote has a fresh battery. Weak batteries can cause pairing to fail.
3. Press The Learn Button
Climb your ladder and press the Learn button once. Do not hold it down unless you want to erase all paired devices. The indicator light will come on for about 30 seconds.
4. Press The Remote Button
Within 30 seconds, press and hold the button on the remote you wish to pair. You’ll hear a click or see the opener’s light blink, confirming successful pairing.
5. Test The Remote
Move off the ladder and test the remote. The door should respond immediately.
Pro tip:
If you have an older opener (pre-1993), it may use DIP switches instead of a Learn button. Check your manual for instructions.
How To Pair A Liftmaster Wireless Keypad
A wireless keypad is convenient for opening the garage without a remote. Pairing one is straightforward, but entering the code correctly is crucial.
1. Locate The Learn Button
As before, find the Learn button on the opener.
2. Set A Personal Pin
Decide on a 4-digit PIN that’s easy for you to remember, but hard for others to guess.
3. Initiate Pairing On The Keypad
On most keypads:
- Press the “” and “#” keys together until the keypad stops blinking.
- Enter your chosen PIN.
- Press the Learn Button
Quickly press and release the Learn button on the opener.
5. Enter The Pin
Within 30 seconds, enter your 4-digit PIN on the keypad and press the Enter button. The garage door should move, confirming success.
Two key insights:
- Don’t wait too long between pressing the Learn button and entering your PIN.
- If the keypad flashes or the door doesn’t move, recheck your PIN and repeat the steps.

Pairing Multiple Remotes Or Devices
You can pair several remotes, keypads, or even cars with HomeLink to one LiftMaster opener. Each pairing is done separately.
- Repeat the Learn button and remote pairing steps for each new device.
- Most openers can remember up to 8 or more devices. If you reach the limit, you may need to erase some devices before adding new ones.
Common mistake:
Holding the Learn button too long will erase all paired devices. If this happens, simply re-pair each device.
How To Pair A Liftmaster Wall Control Panel
Some openers come with a wall control panel or a multifunction wall station. These are usually wired, but some are wireless.
For Wired Wall Controls
- Connect the wires to the terminals on the opener as shown in your manual.
- Power on the opener. The wall control should work immediately.
For Wireless Wall Controls
- Press the Learn button on the opener.
- Press the button on the wireless wall control you want to pair.
- The opener light will blink, confirming pairing.
Non-obvious insight:
If your wall control has a lock feature, make sure it’s not activated during pairing. A locked wall control will prevent the remote from working.
How To Pair With Homelink (in-car Remote System)
Most modern cars have a built-in HomeLink system, allowing you to control your garage door from your car.
1. Clear Homelink Memory
Hold the two outer HomeLink buttons until the indicator light flashes rapidly (about 20 seconds).
- Train HomeLink
- Hold your LiftMaster remote close to the HomeLink buttons.
- Press and hold the button you want to program and the remote button at the same time.
- Hold until the HomeLink light changes from slow to fast blinking.
- Pair With the Opener
- Press the Learn button on the opener.
- Within 30 seconds, press the programmed HomeLink button in your car.
- The opener will click or the light will blink.
Note:
Some cars require the ignition to be on for programming. Also, some older cars may need a “bridge” device for compatibility.
How To Pair With Myq Smart Home System
MyQ is LiftMaster’s smart home system, letting you control your garage from your phone or integrate with Alexa, Google, and other platforms.
Requirements
- Wi-Fi enabled LiftMaster opener (or MyQ Smart Garage Hub for older models)
- MyQ app installed on your smartphone
- Stable Wi-Fi in your garage
Pairing Steps
1. Download The Myq App
Get the MyQ app from the App Store or Google Play.
2. Create An Account
Sign up and log in.
- Add a Device
- Tap “Add Device” in the app.
- Select your garage door opener type.
- Connect the Opener
- The app will guide you to press the Learn button on the opener.
- The opener’s light will blink when detected.
- Name your door in the app for easy reference.
- Test the System
Open and close your door using the app.
Extra tip:
If your Wi-Fi signal is weak in the garage, use a Wi-Fi extender before pairing. Poor signal causes slow response or failed connection.
Troubleshooting Pairing Problems
Even with clear steps, pairing sometimes fails. Here’s how to fix common issues:
- Remote or Keypad Not Working
- Check battery levels.
- Make sure you’re within range.
- Repeat the pairing process, ensuring you press the right buttons in the right order.
- Learn Button Not Responding
- Unplug the opener for 30 seconds and plug it back in.
- Try again.
- If still not working, the opener’s logic board may be faulty.
- MyQ Won’t Connect
- Check Wi-Fi signal strength.
- Make sure your opener is MyQ compatible.
- Update your app.
- HomeLink Won’t Pair
- Some vehicles need an additional compatibility bridge.
- Check your car’s user manual.
Advanced troubleshooting:
If you’ve tried everything and devices still won’t pair, reset the opener by holding the Learn button for 6-10 seconds (removes all paired devices), then start fresh.
Erasing All Paired Devices
Sometimes, you need to clear all paired remotes and keypads, for example, after moving into a new home.
- Hold the Learn button on the opener for 6-10 seconds until the indicator light turns off.
- All paired devices are now erased.
- You must re-pair every remote, keypad, and smart device you want to use.
Caution:
This action cannot be undone.
Safety And Security Tips
Pairing isn’t just about convenience—it’s about security. Follow these best practices:
- Choose a unique 4-digit PIN for your keypad.
- Never share your PIN with neighbors or service people.
- Re-pair devices if you lose a remote or move to a new house.
- Keep the Learn button cover closed to prevent tampering.
Data shows: Most garage break-ins happen when remotes are left in unlocked cars. Always keep your remotes secure.
Compatibility Guide: Liftmaster Models And Devices
Not all LiftMaster openers use the same technology. The Learn button color reveals a lot:
| Learn Button Color | Frequency (MHz) | Compatible Devices |
|---|---|---|
| Yellow | Security+ 2.0 (310, 315, 390) | Remotes, MyQ, Keypads |
| Purple | 315 | Remotes, Keypads |
| Red/Orange | 390 | Older remotes, Keypads |
| Green | 390 | Basic remotes, Keypads |
Pro tip:
Always match the remote’s frequency and technology to your Learn button color for reliable pairing.
Comparing Pairing Methods
Different devices use slightly different pairing processes. Here’s how the main options stack up:
| Device | Pairing Complexity | Common Issues | Typical Time Needed |
|---|---|---|---|
| Remote Control | Simple | Battery issues | 2-3 minutes |
| Wireless Keypad | Moderate | PIN entry errors | 3-5 minutes |
| HomeLink (Car) | Moderate | Compatibility, timing | 5-10 minutes |
| MyQ Smart App | Advanced | Wi-Fi connection, app setup | 10-15 minutes |
When To Call A Professional
Most pairing tasks are DIY-friendly, but sometimes it makes sense to call a pro:
- If the opener or remote is physically damaged
- If the Learn button is broken
- If the garage door won’t open or close even after pairing
- If you are unsure about wiring wall controls
A certified installer can test circuits, replace logic boards, and ensure your system is safe.
Common Mistakes To Avoid
Even experienced users make errors when pairing. Here are some to watch out for:
1. Not Pressing The Learn Button Properly:
Press and release, don’t hold (unless erasing).
2. Waiting Too Long:
Most pairing windows last 30 seconds or less.
3. Using Weak Batteries:
Always replace batteries in remotes and keypads before pairing.
4. Standing Too Far Away:
Pair devices close to the opener for best results.
5. Ignoring Compatibility:
Not all remotes work with all models. Check both the Learn button color and remote specs.
6. Forgetting To Test:
Always test each device immediately after pairing.
Maximizing Security With Advanced Features
Newer LiftMaster openers come with features to boost security and convenience:
- Timer-to-Close: Automatically closes the door after a set time.
- Motion sensors: Turn on lights when you enter the garage.
- Alert-2-Close: Warns before the door closes remotely.
- MyQ notifications: Get alerts on your phone for every door event.
Non-obvious insight:
You can customize notifications in the MyQ app so you’ll know if your door was left open or used at an odd hour.
Maintenance Tips For Reliable Pairing
Pairing is only reliable if your system is well maintained:
- Check opener wiring every 6 months.
- Replace remote and keypad batteries yearly.
- Clean opener sensors and photo eyes.
- Update MyQ app regularly for new features and security patches.
Unexpected issue:
Cobwebs or dust on photo eyes can block the signal and cause pairing or operation issues.
Real-world Example: Pairing A Liftmaster 8500w With All Devices
Let’s walk through a common scenario:
Situation:
You just installed a LiftMaster 8500W. You want to pair two remotes, a wireless keypad, and set up MyQ.
Step-by-step:
- Pair first remote: Press Learn, then remote. Test.
- Pair second remote: Repeat. Test.
- Pair keypad: Enter PIN, press Learn, then Enter on keypad. Test.
- Set up MyQ: Connect opener to Wi-Fi, use app to add device, test with phone.
Result:
All devices work independently. Family members can use remotes, guests can use the keypad, and you control everything from your phone—even get alerts if the door is left open.
Keeping Your System Up To Date
Technology advances quickly. To keep your LiftMaster system current:
- Register your product on the LiftMaster website for updates.
- Check for firmware updates in the MyQ app.
- Upgrade remotes or add smart modules if your opener is older.
For more on new features and compatibility, visit the official LiftMaster website.
Frequently Asked Questions
What Does The Learn Button Do On A Liftmaster Opener?
The Learn button puts your garage door opener into pairing mode. This allows you to connect new remotes, keypads, or smart devices. The button’s color also tells you what technology your opener uses.
Why Won’t My Liftmaster Remote Pair?
Common reasons include a weak battery, being out of range, pressing the wrong button sequence, or trying to pair an incompatible remote. Always check the battery and ensure the remote matches your opener’s technology.
How Many Devices Can I Pair With My Liftmaster Opener?
Most modern LiftMaster openers can store up to 8-12 devices (remotes, keypads, HomeLink, etc.). If you reach the limit, you’ll need to erase one before adding another.
Is Myq Compatible With All Liftmaster Openers?
MyQ works with most openers made after 1993 with a yellow, purple, or red/orange Learn button. Older models may need the MyQ Smart Garage Hub for compatibility.
What Should I Do If I Move Into A New House With A Liftmaster Opener?
You should erase all previously paired remotes and keypads by holding the Learn button for 6-10 seconds. Then, pair your own remotes, keypad, and smart devices for maximum security.
Pairing your LiftMaster garage door opener doesn’t need to be intimidating. With clear steps, a little patience, and attention to detail, you can set up remotes, keypads, and smart controls with ease. Taking the time to understand each device and method ensures your garage is both secure and convenient. If you run into trouble, remember that most issues have simple solutions—and help is always available online or from a professional. Enjoy the peace of mind that comes from a well-paired, reliable LiftMaster system.