Now Reading: Both Garage Door Sensors Not Lighting Up? Troubleshoot Fast
- 01
Both Garage Door Sensors Not Lighting Up? Troubleshoot Fast
If your garage door won’t open or close and both sensors are not lighting up, it can be frustrating and confusing. Many homeowners rely on their garage doors every day, so when something goes wrong, it disrupts routines and even security. The small lights on your garage door sensors are more important than you might think—they help the system “see” if there’s anything in the way, making sure the door doesn’t close on a car, pet, or person. But what does it mean when both garage door sensors not lighting up? This problem is not only common, but it can also have several causes, some simple and some more complicated.
In this guide, you’ll learn how these sensors work, what causes them to stop lighting up, and most importantly, step-by-step solutions to fix the issue. Whether you’re a DIY beginner or have some experience, you’ll find practical advice, clear explanations, and tips to help you get your garage door working safely again.
Understanding Garage Door Sensors
Garage door sensors are a safety feature required by law in the US since 1993. They are installed near the bottom of the garage door tracks, usually about 6 inches above the ground. Their main job is to detect obstacles in the path of the door.
If they sense something, they stop the door from closing.
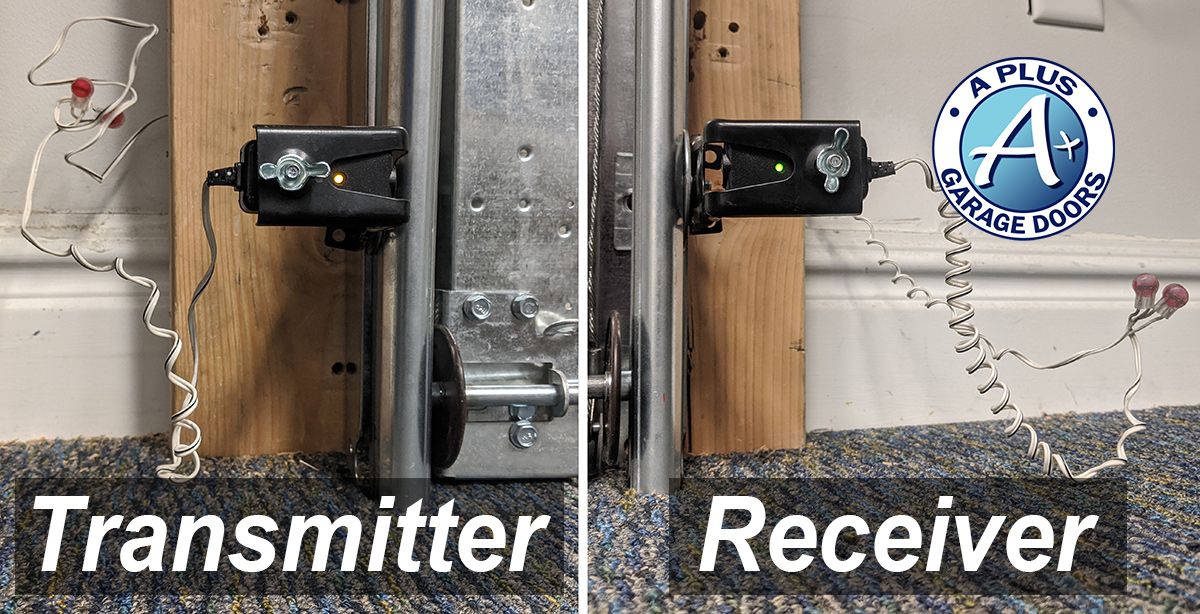
Each sensor pair has two units:
- The sender (emitter), which sends an invisible infrared beam across the door opening.
- The receiver, which detects the beam.
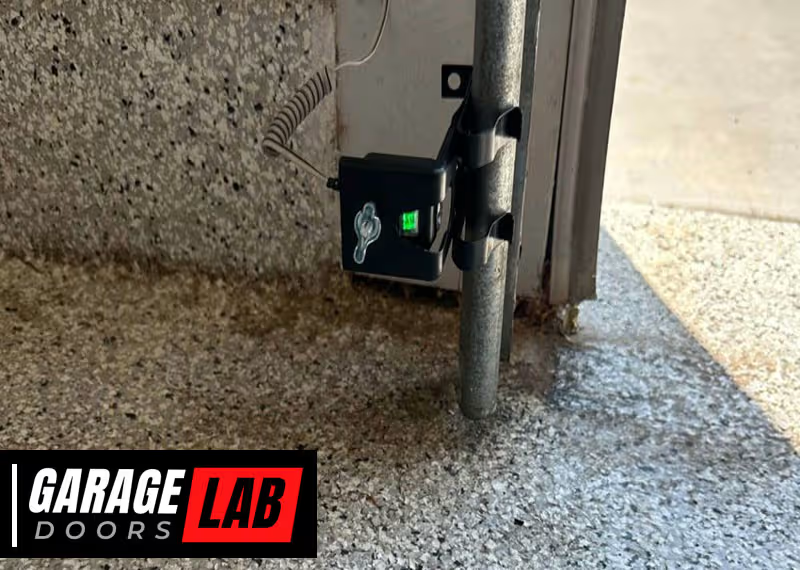
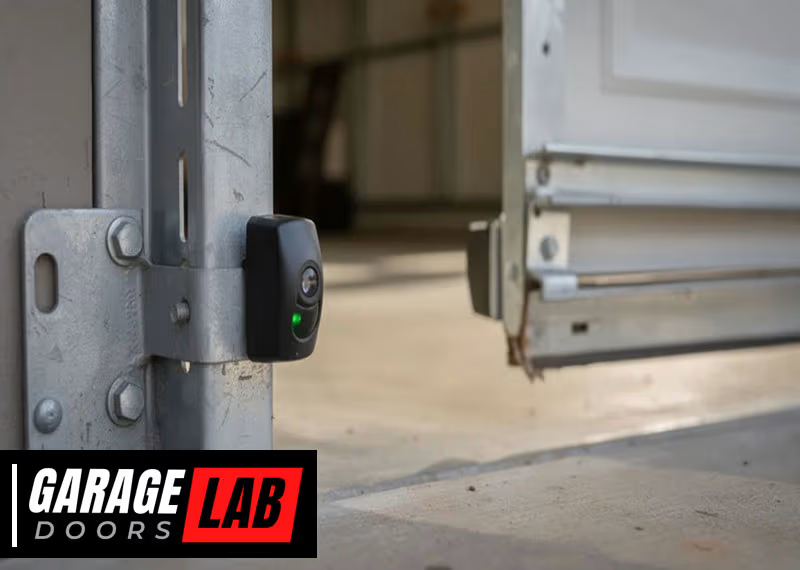
When the beam is broken, or the sensors cannot “see” each other, the door will not close. Each sensor usually has a small LED light that shows if it is working:
- A solid light means the sensor is powered and aligned.
- A blinking or no light means there’s a problem.
Both garage door sensors not lighting up means neither sensor shows a light. This is different from when just one sensor goes out. If both are off, the issue is likely with power, wiring, or the garage door opener itself.
Common Causes When Both Sensors Are Not Lighting Up
Let’s look at the main reasons why both sensor lights might be off:
- No Power to Opener or Sensors
- If the garage door opener is not getting power, neither will the sensors.
- Faulty or Loose Wiring
- Damaged wires or loose connections can cut off power to both sensors.
- Blown Fuse or Tripped Breaker
- Sometimes, a power surge or overload can trip a breaker or blow a fuse in your opener’s circuit.
- Faulty Power Supply Board
- The circuit board inside the opener can fail, stopping power to the sensors.
- Sensor Cable Damage
- The cables that run from the opener to the sensors may be cut, chewed by rodents, or frayed.
- Incorrect Sensor Installation
- New installations or replacements sometimes result in wiring mistakes.
- Water Damage or Corrosion
- Moisture can cause corrosion at the sensor terminals, breaking the connection.
- Opener Logic Board Failure
- The main control board in the opener can fail, affecting multiple functions.
Understanding these causes helps you check the most likely problems first and avoid wasting time on less common issues.
How To Troubleshoot: Step-by-step Guide
Step 1: Check Power To The Garage Door Opener
Start by making sure the garage door opener is getting electricity.
- Plug another device, like a lamp, into the same outlet. If it works, the outlet has power.
- If not, check your circuit breaker panel for tripped breakers or blown fuses.
- Reset any tripped breakers. If the opener still doesn’t work, test another device in the outlet.
Pro tip: Sometimes outlets in garages are on a GFCI circuit. Check for any “reset” buttons on nearby outlets and press them if they’re tripped.
Step 2: Inspect The Sensor Lights
- Look closely at both sensors. If both are off, it’s likely a power or wiring issue. If only one is off, it’s usually an alignment or single sensor problem.
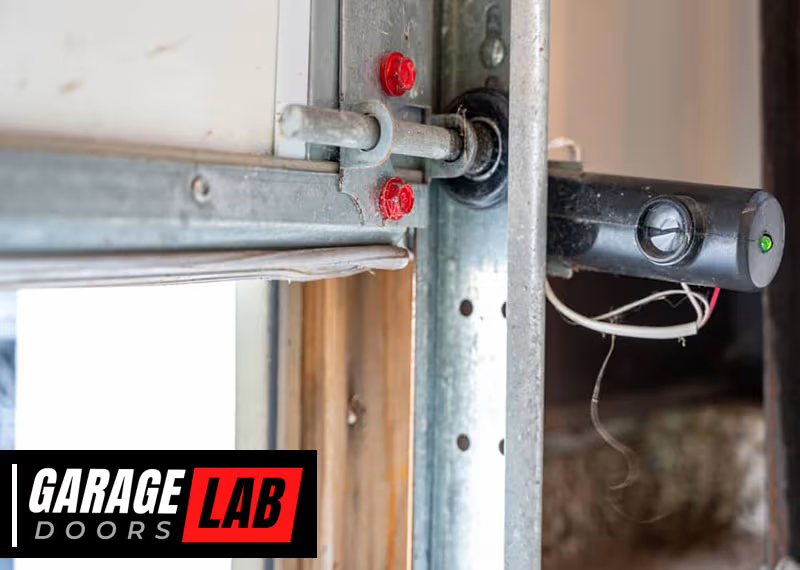
Step 3: Examine The Wiring
- Trace the wires from the opener to the sensors.
- Look for disconnected, loose, or cut wires.
- Gently wiggle the wires at the sensor terminals and the opener—sometimes a loose wire will cause the lights to flicker or turn on.
- Check for visible damage, like rodent bites or pinched cables.
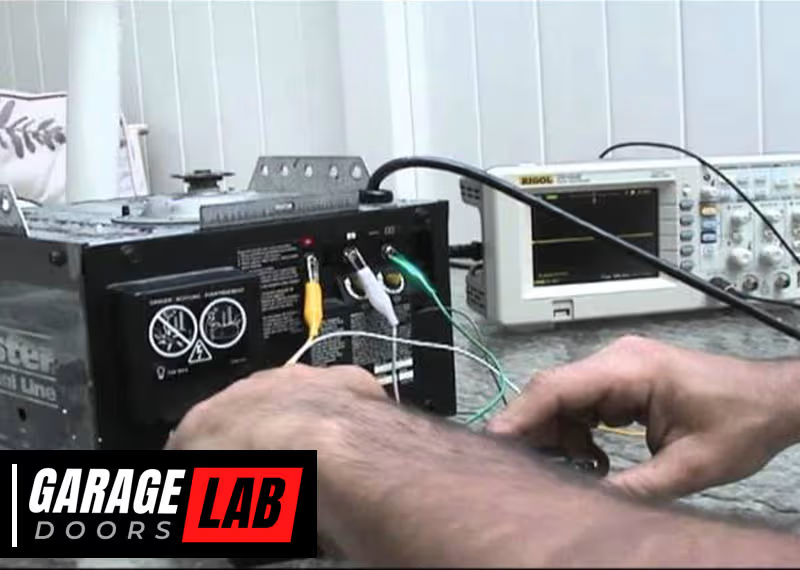
Step 4: Test The Sensors With A Multimeter
If you have a multimeter:
- Set it to measure DC voltage.
- Disconnect the sensors from their terminals.
- Test the voltage at the sensor wires from the opener. Most sensors need 5-6 volts DC.
- If you don’t get any voltage, the problem is likely inside the opener.
Step 5: Inspect The Sensor Terminals
- Unscrew the terminal screws at the opener and the sensors.
- Check for corrosion, rust, or dirt.
- Clean any dirty or corroded terminals gently, then reconnect.
Step 6: Check For Water Damage
- Look for water stains or corrosion on the sensors or wiring.
- If you find moisture, allow the area to dry completely before reconnecting.
Step 7: Reset The Garage Door Opener
- Unplug the opener for 30 seconds, then plug it back in. Sometimes a simple reset will restore power to the sensors.
Step 8: Look At The Logic Board
- If all else fails and there’s still no power to the sensors, the opener’s logic board may be faulty. This usually requires professional repair or replacement.
Practical Fixes For When Both Sensors Are Off
Many homeowners can fix these problems with basic tools. Here’s a list of what you’ll likely need:
- Phillips and flathead screwdrivers
- Needle-nose pliers
- Wire cutters/strippers
- Electrical tape
- Multimeter (optional but helpful)
- Replacement wire (if needed)
Follow these steps to address the most common causes.
Fix 1: Restore Power
If the outlet or circuit breaker was off, restoring power should bring the sensor lights back. If not, move to the next step.
Fix 2: Secure Or Replace Wiring
- If you find a loose wire, strip the end, twist it tightly, and reconnect it under the terminal screw.
- For damaged wires, cut out the bad section and splice in a new piece, using electrical tape to insulate.
Fix 3: Clean Terminals
- Use a small brush or sandpaper to remove corrosion.
- Reattach wires securely.
Fix 4: Replace Sensors
- If the sensors are old or water-damaged, they might be beyond repair.
- Buy a matching pair (brand and model), and follow the instructions to swap them out.
Fix 5: Replace The Logic Board
- If all wiring and connections are good, but there’s no voltage at the sensor terminals, the logic board is likely bad.
- Replacement boards are available for most brands, but installation can be tricky. Consider a professional if you’re not comfortable with this repair.
Comparison: Common Garage Door Sensor Problems
Below is a comparison showing how different sensor problems affect the sensor lights and what you should check:
| Problem | Sensor Light Status | Main Thing to Check |
|---|---|---|
| No power to opener | Both off | Outlet, breaker, power to opener |
| Broken wire | Both off | Wiring from opener to sensors |
| Sensor misalignment | One off/blinking | Sensor position and aim |
| Dirty lens | One off/blinking | Clean sensor lens |
| Defective sensor | One off | Replace sensor |
How To Tell If Sensors Or Opener Logic Board Are Bad
Sometimes, it’s hard to know whether the sensors or the logic board is causing the problem. Here’s how to decide:
- If no power at the sensors but the opener works for other functions (like the light or remote), it’s usually a wiring or sensor problem.
- If the opener does nothing (no lights, no sound), it’s probably a power supply or board issue.
- If you have a multimeter, checking for voltage at the sensor wires can confirm if the logic board is sending power.
Quick Reference Table
| Symptom | Likely Problem | Next Step |
|---|---|---|
| Both sensor lights off, opener works | Wiring/sensors | Check wiring, replace sensors |
| Both sensor lights off, opener dead | Power/logic board | Check outlet, breaker, replace board if needed |
| One sensor light off, one on | Misalignment or bad sensor | Realign or replace sensor |
How To Prevent Future Sensor Problems
Prevention saves time and money. Here are some good habits:
- Inspect Sensors Monthly: Dust, spider webs, and dirt can block the lens.
- Check Wiring: Make sure wires are not hanging where they can be pulled or chewed.
- Avoid Water Exposure: Keep sensors and wiring away from areas that get wet.
- Protect from Impact: Sometimes, bikes or tools bump the sensors out of place or damage them.
- Test the Door: Press the garage door button and wave an object in front of the sensors. The door should reverse or stop.
When To Call A Professional
You can fix many sensor problems yourself, but sometimes you need help:
- If you’re not comfortable with electricity or wiring
- If the opener’s logic board needs replacement
- If you tried all steps and both sensor lights are still off
A professional has the tools and experience to fix the problem safely and quickly.
Real-world Examples
Homeowners often share stories about what worked for them:
- “My kids pulled on the sensor wires while playing. Both lights went out. I found a wire pulled loose at the opener. Tightened the screw, and both lights came back on.”
- “We had a power outage. After power returned, both sensor lights were dead. Turned out the GFCI outlet in the laundry room had tripped. Pressed reset and the sensors worked again.”
- “Mice chewed through the wires. Replaced the section with new wire from the hardware store, and the sensors lit up.”
These examples show that simple solutions often fix the problem, but you need to look carefully.
Why You Should Never Bypass Or Ignore Sensor Problems
Garage door sensors are a safety device. Some people try to bypass them to “fix” the door quickly. This is dangerous and illegal in many places. Without sensors, the door can close on people, pets, or objects, causing injury or damage.
Always fix the problem correctly.
Upgrading Your Garage Door System
If your sensors are old or you keep having problems, it might be time to upgrade:
- Modern sensors have better dust and water resistance.
- Newer systems offer smartphone control and better safety features.
- Some brands make sensors that are easier to align and less likely to be knocked out of place.
When upgrading, make sure the new sensors are compatible with your opener model.
Cost Of Repairing Garage Door Sensors
Repair costs can vary:
- Simple DIY fixes (tightening wires, cleaning) are usually free.
- New sensors cost $20–$50 for a pair.
- Hiring a professional can cost $75–$150 for diagnosis and repair.
- Replacing a logic board can cost $100–$200, depending on the brand.
Compare the cost of repair with the cost of upgrading to a new system, especially if your opener is more than 15 years old.

Comparing Top Garage Door Sensor Brands
Here’s a quick look at some popular brands and what they offer:
| Brand | Compatibility | Price Range (Pair) | Main Features |
|---|---|---|---|
| Chamberlain/LiftMaster | Most Chamberlain, LiftMaster, Craftsman openers | $25–$45 | Easy alignment, good water resistance |
| Genie | Most Genie openers | $20–$40 | Snap-in mounting, dust-proof lens |
| Linear | Linear openers | $30–$50 | Strong mounting brackets |
Always check your opener’s model number and buy compatible sensors.
Non-obvious Insights For Troubleshooting
Many beginners overlook these important points:
- GFCI Outlets in Other Rooms: Sometimes, the garage outlet is wired to a GFCI in another room (like a bathroom or laundry). If that outlet trips, power is cut to your opener.
- Wire Polarity Matters: If you replace sensor wires, connect them the same way (white to white, black to black). Reversing wires can cause sensors not to work.
- Temperature Effects: In cold climates, wires can contract and pull loose from terminals.
Checking these details can save hours of frustration.
Safety Reminders
- Always unplug the opener before working on wiring.
- Use a step ladder safely when reaching sensors or opener.
- If you’re unsure, it’s safer to call a professional.
Where To Find More Information
For more details on garage door safety, sensor standards, and home electrical codes, see the U.S. Consumer Product Safety Commission’s guide. This guide explains why sensors are required and how to keep your system safe.
Frequently Asked Questions
What Causes Both Garage Door Sensors To Stop Lighting Up?
Usually, it’s a power supply problem—like a tripped breaker, loose wire, or unplugged opener. Sometimes it’s a bad logic board or damaged wiring between the opener and sensors.
Can I Use My Garage Door Opener If Both Sensor Lights Are Off?
Most openers won’t let you close the door with the wall button or remote if both sensors are off. This is a safety feature. You can open the door, but closing it usually requires holding the wall button down continuously.
How Do I Know If I Need New Sensors Or A New Opener?
If only the sensors are dead but the opener works, try new sensors first. If the opener has other problems (doesn’t open, lights don’t work), you might need a new opener or logic board.
Is It Safe To Bypass Garage Door Sensors?
No. Bypassing sensors is dangerous and can cause injury or property damage. Always repair or replace broken sensors.
How Often Should I Check My Garage Door Sensors?
It’s smart to test your sensors monthly. Wipe the lens, check for solid lights, and make sure the door reverses when the beam is blocked.
A garage door that won’t close because both sensors are not lighting up can be fixed with patience and careful checking. By understanding how the system works and following the steps above, you can often solve the problem yourself. Remember, sensors keep you and your family safe, so don’t ignore or bypass them.
If you’re ever unsure, ask a professional for help and enjoy a garage door system that works smoothly and safely every time.