
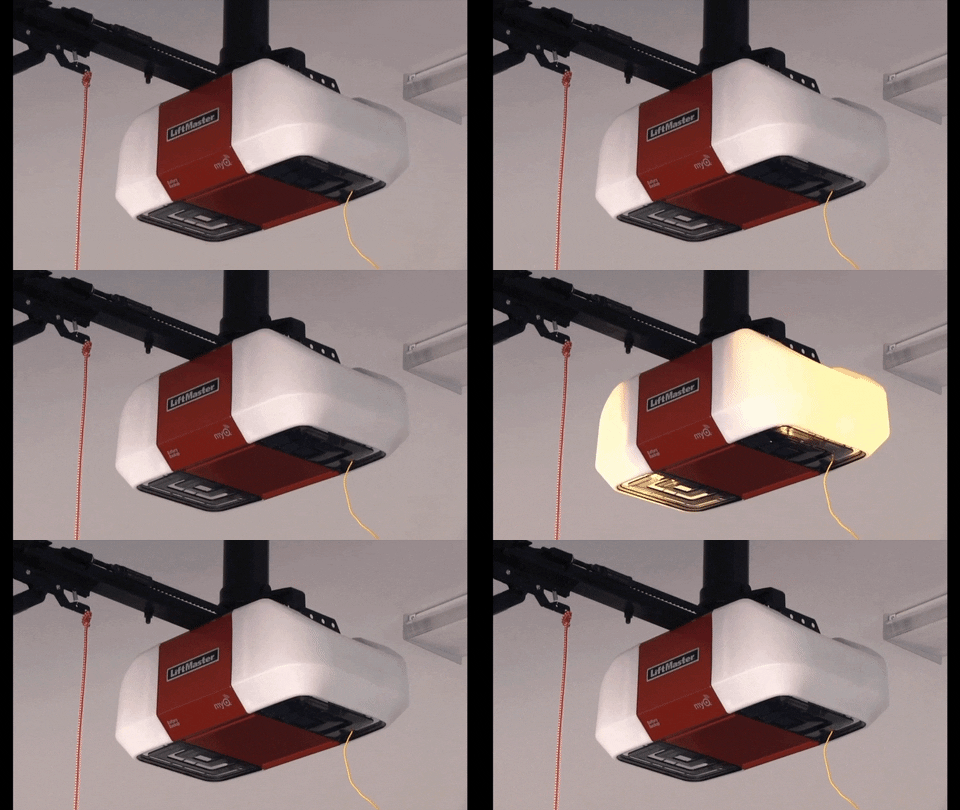
A Liftmaster garage door opener that flashes its light 10 times is a clear signal that something is amiss. This blinking pattern is not random; it’s a diagnostic code designed to help you pinpoint the source of the problem. While it can be frustrating when your garage door opener malfunctions, understanding these codes is the first step toward a swift resolution. This specific 10-flash sequence on a Liftmaster opener often points to an issue with the safety sensors or the travel limits, two critical components that ensure your garage door operates smoothly and, more importantly, safely.
Ignoring such error codes can lead to more significant problems down the line, potentially causing damage to your opener, your door, or even posing a safety hazard. Fortunately, many of the issues indicated by a 10-flash error are DIY-friendly, allowing you to address them without needing to call a professional immediately. This guide will break down the common causes of this Liftmaster code, provide step-by-step troubleshooting instructions, and offer insights into preventative maintenance to keep your garage door opener in optimal working condition.
Key Takeaways
- A Liftmaster garage door opener flashing its light 10 times typically indicates an issue with the safety sensors or travel limits.
- Safety sensors are crucial for preventing the door from closing on obstructions. Misalignment or obstruction is a common cause of the 10-flash error.
- Travel limits dictate how far the garage door opens and closes. Incorrectly set limits can trigger this error.
- Obstructions, dirt, or damage to the sensors or their wiring can cause them to malfunction.
- The opener’s logic board might also be the culprit if other components are ruled out.
- Regular maintenance can prevent many of the issues that lead to error codes.
- Always disconnect power before performing any troubleshooting or adjustments.
Credit: gdmedics.com
Understanding The Liftmaster 10-flash Error Code
The blinking lights on your Liftmaster garage door opener are more than just indicators; they are a sophisticated diagnostic system. When the opener encounters a problem it cannot resolve on its own, it initiates a series of flashes to communicate the nature of the fault. The 10-flash error code is one of the more common sequences and is specifically tied to the safety and operational parameters of the garage door.
Liftmaster, like many garage door opener manufacturers, uses a standardized system of blinking lights to denote specific issues. This allows homeowners and technicians to quickly identify the problem without extensive guesswork. The 10-flash pattern generally points to a fault within the motor unit that relates to either the safety reversal system (most commonly the photo-eye sensors) or the travel limit settings.
The Role Of Safety Sensors (photo-eyes)
Garage door openers are equipped with safety sensors, often called photo-eyes, located near the bottom of the garage door tracks. These sensors work by emitting an invisible infrared beam. When the door is closing, if this beam is broken by an object (like a car, a pet, or a person), the opener is designed to immediately stop and reverse the door’s direction, preventing a collision. This is a critical safety feature mandated by federal regulations to prevent injuries and property damage.
When the Liftmaster opener flashes 10 times, it frequently means that the motor unit is not receiving a consistent signal from these safety sensors. This can happen for several reasons:
- Obstruction: Something might be blocking the infrared beam.
- Misalignment: The sensors might be out of sync with each other, so the beam isn’t properly connecting.
- Dirt or Debris: Dust, cobwebs, or grime on the sensor lenses can interfere with the beam.
- Damage: The sensors themselves or their wiring might be damaged, perhaps from impact or wear and tear.
- Power Issues: A loose wire or a faulty connection to the sensors can disrupt the signal.
Understanding Travel Limits
Another common cause for the 10-flash error code relates to the travel limits of the garage door opener. These settings tell the opener when the door has reached its fully open or fully closed position. The opener uses these limits to know when to stop the motor. If the travel limits are set incorrectly, the opener might “think” the door is in a position it’s not, or it might not be able to reach the correct position, triggering an error code.
Incorrect travel limits can be a result of:
- Improper Adjustment: The limits may have been accidentally bumped or adjusted incorrectly during maintenance.
- Mechanical Issues: Sometimes, a problem with the garage door’s track or counterbalance system can prevent it from reaching the full open or closed position, which the opener interprets as a limit issue.
- Logic Board Glitches: In rarer cases, the opener’s logic board might misinterpret the signals related to travel limits.
Troubleshooting The 10-flash Error: A Step-by-step Guide
When your Liftmaster opener displays the 10-flash code, it’s time to systematically investigate the potential causes. Start with the simplest and most common issues and work your way toward more complex ones.
Step 1: Check For Obstructions And Clean The Safety Sensors
This is the most frequent reason for the 10-flash error. The safety sensors are typically located about 6 inches off the ground on either side of the garage door track.
- Visually Inspect: Look at both sensors. Is there anything physically blocking the path between them? This could be a broom, a storage bin, or even thick grass if your garage is outdoors.
- Clean the Lenses: Even if nothing is visibly blocking the beam, the lenses on the sensors can accumulate dust, dirt, or cobwebs. Use a soft, dry cloth to gently clean the lenses of both sensors. For stubborn grime, you can use a mild glass cleaner on the cloth, but avoid spraying directly onto the sensor.
- Check for Damage: Inspect the sensors and their wiring for any visible signs of damage, such as cuts, kinks, or loose connections.
Step 2: Realign The Safety Sensors
If cleaning doesn’t resolve the issue, the sensors may simply be misaligned. They need to be perfectly aimed at each other for the infrared beam to connect reliably.
- Locate the Sensors: Identify the two sensors, usually mounted on brackets on opposite sides of the garage door track.
- Observe Indicator Lights: Most Liftmaster sensors have small LED indicator lights. One sensor (often the “master” or transmitting sensor) might have a steady light, while the other (the “slave” or receiving sensor) should have a steady light when the beam is properly aligned. If the light on the receiving sensor is blinking or off, they are misaligned.
- Adjust Gently: Loosen the mounting bracket of one sensor slightly. Gently pivot it until the indicator light on the other sensor becomes steady. You may need to make very small adjustments. Once aligned, tighten the bracket.
- Test: Try operating the garage door. If the 10-flash code persists, try adjusting the other sensor.
Step 3: Inspect Wiring And Connections
Damaged or loose wiring can disrupt the signal between the safety sensors and the motor unit.
- Trace the Wires: Follow the wires from each sensor back to the motor unit. Look for any signs of damage, such as fraying, cuts, or connections that have come loose.
- Secure Connections: At the motor unit, the wires for the safety sensors usually connect to terminals. Ensure these connections are secure. If you’re comfortable with basic electrical work, you can disconnect and re-secure these wires. Always disconnect power to the opener at the breaker first.
- Check for Pinching: Ensure the wires aren’t being pinched by the garage door tracks or other moving parts as the door operates.
Step 4: Check And Adjust Travel Limits
If the safety sensors appear to be functioning correctly, the next step is to examine the travel limits. The process for adjusting these varies slightly depending on your specific Liftmaster model, but the general principle is the same. You’ll typically need a screwdriver and possibly a specific tool that comes with your opener.
- Consult Your Manual: Refer to your Liftmaster owner’s manual for the exact procedure for your model. You can usually find these online on the Liftmaster website if you don’t have the physical copy.
- Locate Adjustment Screws/Buttons: On the motor unit, you’ll find adjustment screws or buttons for the “up” and “down” travel limits.
- Manual Operation: You may need to operate the door manually or use the opener’s buttons to move the door to the fully open and fully closed positions for adjustment.
- Adjusting Down Limit: To adjust the down limit, you typically turn a screw (often labeled “DOWN” or with a downward arrow). Turning it one way will make the door stop higher; turning it the other will allow it to close further. Your goal is to have the door close completely without straining the opener or door mechanism.
- Adjusting Up Limit: Similarly, adjust the “UP” limit screw to set the fully open position. The door should stop at a height that allows vehicles to pass underneath comfortably, without leaving too much of a gap.
- Test: After adjusting, test the opener’s full cycle. If the 10-flash error disappears, the travel limits were likely the issue.
*Pro Tip:* When adjusting travel limits, make small, incremental changes and test the opener after each adjustment. Over-adjusting can cause new problems.
Step 5: Reset The Garage Door Opener
Sometimes, a glitch in the opener’s memory can cause it to display error codes. Resetting the opener can clear these temporary faults.
- Disconnect Power: Unplug the garage door opener from the electrical outlet.
- Wait: Leave it unplugged for at least 60 seconds. This allows any residual power to dissipate and the internal memory to reset.
- Restore Power: Plug the opener back in.
- Test: Try operating the garage door. If the 10-flash error is gone, it was likely a minor electronic hiccup.
- Reprogram Remotes/Keypads: After a reset, you may need to reprogram your remote controls and keypads. You can find specific instructions on how to reset Liftmaster garage door opener remote easily in our guide.
Step 6: Check The Logic Board
If all the above steps fail to resolve the 10-flash error, the issue might lie with the logic board itself. This is the “brain” of the garage door opener.
- Inspect for Damage: Visually inspect the logic board for any signs of burns, corrosion, or damaged components.
- Loose Connections: Ensure all wire connections to the logic board are secure.
- Replacement: If the logic board is faulty, it will likely need to be replaced. This is a more complex repair and may require professional assistance. The cost of a new logic board can vary significantly, but it’s often a substantial portion of the opener’s original price. Consider the age and overall condition of your opener before deciding on a repair versus replacement.

Credit: www.reddit.com
Common Liftmaster Models And Their 10-flash Error
While the general troubleshooting steps apply to most Liftmaster models, understanding how the 10-flash error might manifest on specific units can be helpful. Liftmaster has produced a wide range of openers over the years, from older chain-drive models to newer Wi-Fi-enabled units.
Liftmaster Legacy Series (e.g., 2500, 3500, 3800)
These models often use a diagnostic LED on the motor unit that flashes. The 10-flash sequence typically points to the safety sensors. Issues with misalignment, obstruction, or wiring faults are the primary culprits. The logic board may also be the cause if the sensors and their connections are confirmed to be in good working order.
Liftmaster Premium Series (e.g., 8500, 8550w, 8557w)
These higher-end models, often featuring battery backup and Wi-Fi connectivity, also utilize the 10-flash code for similar reasons. Because these models have more advanced features, it’s crucial to ensure that the Wi-Fi signal or other electronic components aren’t interfering with the safety sensor communication, though this is less common than physical sensor issues. Resetting the opener and checking the sensors remain the priority.
Liftmaster Contractor Series (e.g., 1345, 1355)
These are more basic, reliable openers. The 10-flash error on these units almost always relates directly to the safety sensors or their wiring. Given their simpler design, the troubleshooting steps are usually straightforward: clean, align, check wiring, and then consider travel limits or a reset.
Liftmaster Wall Mount Openers (e.g., 98022)
Even wall-mount operators, like the Liftmaster 98022, use diagnostic codes. The 10-flash error on these units will also indicate a problem with the safety sensors or potentially the travel limit settings that are configured through the wall unit or motor.
Regardless of the specific Liftmaster model, the underlying principles of the 10-flash error remain consistent: it’s a signal that the safety reversal system or the travel limit system is not functioning as expected.

Credit: www.youtube.com
When To Call A Professional
While many of the issues causing the 10-flash error are fixable by a homeowner, there are times when it’s best to call a qualified garage door technician.
- Persistent Issues: If you’ve gone through all the troubleshooting steps and the 10-flash code continues to appear, there might be a more complex internal problem.
- Damaged Components: If you discover damaged wiring, a cracked sensor housing, or a visibly damaged logic board, it’s safer to let a professional handle the replacement.
- Unfamiliarity with Electrical Work: If you’re not comfortable working with electrical components or making adjustments to mechanical systems, it’s wise to seek expert help.
- Multiple Issues: If you suspect problems with the garage door springs, cables, or tracks in addition to the opener issue, a professional can address all aspects of the system.
A professional technician has the specialized tools and expertise to diagnose and repair even the most stubborn problems quickly and safely. The average cost for a garage door opener repair can range from $100 to $300, depending on the complexity of the issue and the parts needed. For instance, replacing a logic board might be more expensive than simply realigning sensors. You can get a better idea of overall garage door expenses by looking at guides on how much for a garage door.
Preventative Maintenance For Your Liftmaster Opener
Regular maintenance is key to preventing the 10-flash error code and extending the life of your Liftmaster garage door opener. Here are some essential maintenance tasks:
- Clean Sensors Monthly: As outlined above, a quick wipe-down of the safety sensors monthly can prevent many alignment and obstruction issues.
- Lubricate Moving Parts: Periodically lubricate the garage door rollers, hinges, and tracks with a silicone-based lubricant. This ensures smooth operation and reduces strain on the opener motor. For detailed instructions, refer to our guide on how to lubricate garage door rollers.
- Check and Tighten Hardware: Inspect the mounting hardware for the opener and the garage door tracks. Tighten any loose bolts or screws.
- Inspect Rollers and Tracks: Ensure the rollers are turning freely and the tracks are free of debris or damage. If the tracks are bent or misaligned, it can affect the door’s movement and trigger opener errors.
- Test Safety Features: Monthly, test the safety reversal system by placing a piece of wood (like a 2×4) on the floor in the door’s path. When the door hits it while closing, it should automatically reverse. Also, test the manual release function to ensure you can open the door by hand if needed.
- Check Chain Tension (if applicable): For chain-drive openers, periodically check the chain tension. A chain that is too loose can skip gears, while one that is too tight can put undue stress on the motor. Our guide on how to adjust chain on garage door opener provides detailed steps.
- Inspect Wiring: Keep an eye on the wiring for the safety sensors and the opener itself. Ensure it’s not frayed, pinched, or damaged.
By incorporating these simple maintenance routines, you can significantly reduce the likelihood of encountering error codes like the 10-flash and ensure your garage door opener operates reliably for years to come.
Frequently Asked Questions
What Does It Mean If My Liftmaster Opener Light Flashes 10 Times?
A Liftmaster garage door opener flashing its light 10 times is a diagnostic code indicating a problem with the safety sensors or the travel limits. It means the opener is detecting an issue that prevents it from safely completing its cycle.
Are Liftmaster Safety Sensors Difficult To Align?
Aligning Liftmaster safety sensors is generally a straightforward process that most homeowners can do themselves. It involves gently adjusting the sensor’s position until the indicator light on the receiving sensor is steady, confirming a proper beam connection. Tools are usually minimal, often just a screwdriver.
How Do I Reset My Liftmaster Garage Door Opener After Fixing A 10-flash Error?
To reset your Liftmaster opener, unplug it from the power outlet for at least 60 seconds. Then, plug it back in. This process clears temporary electronic glitches. You may need to reprogram your remotes and keypads afterward. You can find detailed guides on how to reset your garage door opener.
Can A Dirty Lens On A Safety Sensor Cause The 10-flash Error?
Yes, a dirty lens is one of the most common causes of the 10-flash error. Dust, dirt, cobwebs, or smudges on the sensor lenses can obstruct or weaken the infrared beam, leading the opener to believe the path is blocked or the sensors are misaligned. Cleaning the lenses with a soft cloth is often the first troubleshooting step.
Should I Replace My Liftmaster Opener If It’s Consistently Showing The 10-flash Error?
Not necessarily. The 10-flash error often points to issues with the safety sensors or travel limits, which are typically repairable or adjustable. Before considering replacement, thoroughly troubleshoot the sensors, wiring, and limits. If these are all confirmed to be in good working order and the error persists, then a faulty logic board might necessitate a repair or replacement of the opener. Replacement openers can cost anywhere from $200 to $600 or more, so addressing the specific fault first is usually more economical.
When your Liftmaster garage door opener displays a 10-flash error, it’s a clear indication that a diagnostic check is needed. By systematically working through the potential causes, from simple obstructions and sensor misalignments to wiring issues and travel limit adjustments, you can often resolve the problem yourself.
Remember to always prioritize safety by disconnecting power before making any adjustments and to consult your owner’s manual for model-specific instructions. Regular maintenance, including cleaning sensors and lubricating moving parts, is the best defense against future error codes and ensures your garage door system operates reliably and safely.