
A sudden power outage can leave you stranded, especially when your Craftsman garage door opener refuses to budge afterward. This common issue can stem from various factors, ranging from simple tripped breakers to more complex electronic resets. Understanding the potential causes and the systematic troubleshooting steps is crucial to getting your garage door back in working order without unnecessary professional intervention. Don’t let a power interruption become a major inconvenience; with the right approach, you can often resolve the problem yourself.
This guide will walk you through the most common reasons why your Craftsman garage door opener might not be working after a power outage and provide clear, actionable solutions. We’ll cover everything from checking power sources and safety features to resetting the opener and diagnosing potential mechanical issues.
Our aim is to empower you with the knowledge to tackle this problem confidently.
Key Takeaways
- Check Power Supply: Ensure the opener is plugged in, the circuit breaker isn’t tripped, and the GFCI outlet (if applicable) hasn’t been triggered.
- Verify Remote and Wall Button: Test both the remote and the hardwired wall button to isolate whether the issue is with the remote or the opener unit itself.
- Inspect Safety Sensors: Misaligned or obstructed safety sensors are a frequent cause of non-functioning openers.
- Disengage and Re-engage Manual Release: The emergency release cord is often pulled during a power outage; re-engaging it is a key step.
- Reset the Opener: A full system reset can resolve electronic glitches caused by power surges or fluctuations.
- Check Door Balance and Track: If the opener seems to work but the door doesn’t move smoothly, the door itself might have mechanical issues.
- Consult the Manual: Always refer to your specific Craftsman model’s manual for detailed troubleshooting specific to your unit.

Credit: www.reddit.com
Troubleshooting Power And Basic Connections
The first and most critical step when your Craftsman garage door opener isn’t working after a power outage is to verify that the unit is receiving power. Power fluctuations or surges during an outage can sometimes cause the opener to lose its connection to the power source or trigger internal safety mechanisms.
Checking The Power Outlet
Begin by ensuring the garage door opener unit is securely plugged into the electrical outlet. It might seem obvious, but sometimes plugs can become dislodged during power interruptions or due to vibrations. If it’s plugged in, try unplugging it for about 30 seconds and then plugging it back in.
This simple power cycle can sometimes reset minor electronic glitches.
Next, test the outlet itself. Plug in a small appliance, like a lamp or a phone charger, to confirm that the outlet is providing power. If the outlet is dead, the problem lies with your home’s electrical system, not the garage door opener.
Inspecting The Circuit Breaker
Most garage door openers are connected to a dedicated circuit breaker in your home’s electrical panel. Power outages can sometimes cause breakers to trip, even after power is restored. Locate your main electrical panel and look for a tripped breaker.
A tripped breaker will usually be in a position between “ON” and “OFF,” or it might be visibly out of alignment with the other breakers.
To reset a tripped breaker, push it firmly to the “OFF” position and then back to the “ON” position. If the breaker trips again immediately after you try to power the opener, it indicates a potential short circuit or an overload issue, and you should consult a qualified electrician.
Gfci Outlet Considerations
Many modern homes, especially those with garages, utilize Ground Fault Circuit Interrupter (GFCI) outlets for safety. These outlets have a “Test” and “Reset” button on them. If your garage door opener is plugged into a GFCI outlet and it has stopped working, the GFCI may have tripped due to the power surge or fluctuation.
Look for the GFCI outlet (often near the opener or in the garage utility area) and press the “Reset” button firmly. If the opener still doesn’t work, try plugging a known working appliance into the GFCI outlet to confirm its functionality.
If the GFCI outlet repeatedly trips, there may be an issue with the outlet itself or the wiring.
Credit: wichitagaragedoorexperts.com
Verifying Remote And Wall Button Functionality
Once you’ve confirmed the opener unit has power, the next step is to determine if the issue lies with the remote control, the hardwired wall button, or the opener’s receiver.
Testing The Remote Control
If your Craftsman garage door opener isn’t responding to the remote, try a few things. First, ensure the remote has fresh batteries. Low batteries are a common reason for remotes to stop working. If you’ve recently replaced them, double-check that they are installed correctly.
Next, try operating the garage door using a different remote if you have one. If another remote works, the original remote is likely faulty or needs reprogramming. If you only have one remote, try standing closer to the opener unit to rule out range issues.
Testing The Wall-mounted Button
The wired wall button is a direct connection to the opener’s logic board. If the remote isn’t working but the wall button does, the problem is likely with the remote or its programming. Conversely, if neither the remote nor the wall button is working, the issue is more likely with the opener unit itself, its power supply, or its internal components.
When testing the wall button, press it firmly. If it feels loose or unresponsive, the button itself might be damaged or the wiring to it could be compromised.
Checking The Remote Control Programming
Sometimes, a power surge or outage can cause the opener to lose its connection with the remote control. This means the remote needs to be reprogrammed. The process for reprogramming varies slightly by Craftsman model, but generally involves pressing a “Learn” or “Program” button on the motor unit.
For many Craftsman models, you’ll find this button on the back panel of the motor unit, often near the antenna wire. You typically press and release the button, then immediately press and hold a button on your remote until the opener’s indicator light flashes or the opener makes a sound.
Pro Tip: Always refer to your specific Craftsman garage door opener manual for the exact programming sequence for your model. You can often find these manuals online by searching for your opener’s model number. If you’re having trouble with a Craftsman remote specifically, this guide on how to reset Craftsman garage door remote can be very helpful.
Inspecting Safety Sensors
Modern garage door openers are equipped with safety sensors located near the bottom of the garage door tracks. These sensors prevent the door from closing if they detect an obstruction in its path, and they are a very common culprit when an opener malfunctions, especially after power interruptions.
Locating And Aligning The Sensors
You’ll typically find two small sensors, one on each side of the garage door track, about 6-12 inches off the ground. They usually have a small indicator light on each. One sensor emits an infrared beam, and the other receives it.
If this beam is broken or misaligned, the opener will prevent the door from closing and may exhibit unusual behavior, such as blinking lights or refusing to move at all.
After a power outage, these sensors can sometimes become misaligned due to vibrations or minor shifts in the garage structure. Visually inspect both sensors. Ensure they are clean and free of debris, cobwebs, or obstructions like tools or storage items.
Checking Sensor Indicator Lights
Most Craftsman sensors have indicator lights that help diagnose their status. Typically, one sensor will have a solid light, indicating it’s receiving power. The other sensor, which emits the beam, may also have a light that is solid or flashing.
- Solid Light on Both: This usually indicates proper alignment and functioning.
- One Light Off or Flashing: This suggests a problem with that specific sensor or the beam connection.
If a light is off or flashing, try gently nudging the sensor to see if it snaps into better alignment. You might need to loosen a mounting screw slightly to adjust the sensor’s position. Adjust it slowly until the indicator lights show a proper connection.
Cleaning The Sensors
Dust, dirt, or even spiderwebs can easily obstruct the infrared beam. Use a soft, dry cloth to gently wipe the lenses of both sensors. For stubborn dirt, you can use a slightly damp cloth, but ensure the sensors are completely dry before testing.
A case study from a homeowner in Ohio highlighted this issue. After a thunderstorm and subsequent power outage, their Craftsman opener would only move the door a few inches before stopping. Upon inspection, they found that a thick layer of dust and a small spiderweb had accumulated on one of the safety sensors, completely blocking the beam.
A quick cleaning and realignment resolved the problem instantly.

Credit: frontrangeraynor.com
Disengaging And Re-engaging The Manual Release
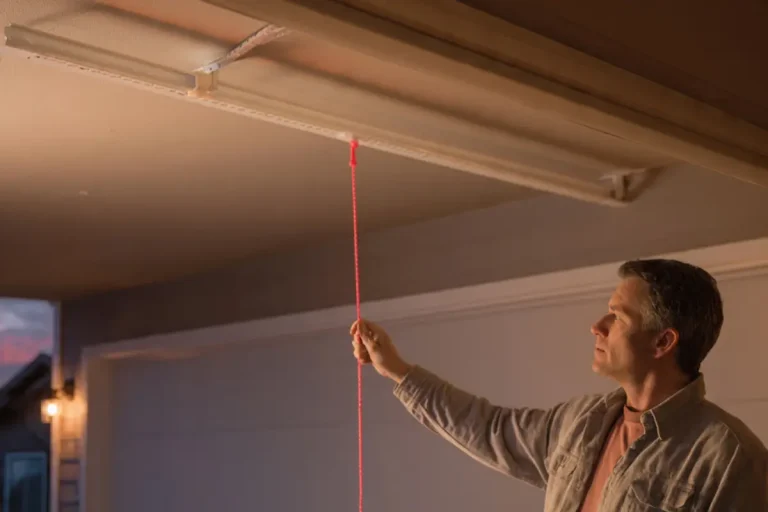
Every garage door opener has an emergency release cord, usually a red rope hanging from the trolley mechanism on the opener’s rail. This cord allows you to manually disconnect the door from the opener, enabling you to open or close it by hand.
Understanding The Emergency Release
During a power outage, you might have manually pulled this cord to open the garage door. Or, the power surge itself could have inadvertently triggered the release mechanism. If the opener motor runs but the door doesn’t move, or if the opener chain/belt seems to be moving freely without engaging the door, the emergency release is likely disengaged.
How To Re-engage The Release
To re-engage the release, you’ll need to reconnect the door to the opener’s drive mechanism.
- Ensure the garage door is fully closed. If it’s partially open, you may need to open it manually first.
- Locate the red emergency release cord.
- Pull the cord forward (away from the motor unit). This action typically re-engages the trolley.
- Check the connection. The trolley should now be connected to the drive mechanism.
- Test the opener. Try operating the opener using the remote or wall button. The door should now move.
If the cord is pulled and the trolley doesn’t seem to reconnect, there might be an issue with the release mechanism itself, or the trolley might be stuck. In some cases, you might need to manually move the door to the fully closed position for the trolley to re-engage properly. This process is detailed in guides like how to manually open a garage door, which also covers the disengagement and re-engagement.
Resetting The Garage Door Opener
When basic troubleshooting doesn’t resolve the issue, a full system reset of the Craftsman garage door opener can often clear internal electronic faults or memory issues caused by the power interruption. This process varies by model, but the general principle is to clear the opener’s memory and restore it to its factory default settings.
Performing A Factory Reset
- Locate the “Learn” or “Program” button. As mentioned earlier, this is usually on the back or side of the motor unit.
- Press and hold the “Learn” button. You typically need to hold it for about 10-30 seconds. Consult your manual for the exact duration.
- Observe the indicator lights. The LED indicator light on the motor unit will usually flash or turn off to confirm the memory has been cleared.
- Reprogram remotes and keypads. After the reset, all previously programmed remotes and keypads will no longer work. You will need to reprogram them according to your opener’s manual. This usually involves pressing the “Learn” button and then pressing the desired button on your remote or keypad.
This step is crucial because power surges can corrupt the opener’s memory, leading to erratic behavior or complete failure. Resetting wipes this corrupted data and allows you to start fresh. For a general guide on resetting various openers, this resource on how to reset garage door opener can be useful.
Re-establishing Travel Limits And Force Settings
After a reset, you will almost certainly need to re-establish the opener’s travel limits (how far the door opens and closes) and force settings (how much force it uses to open and close). These settings are critical for the safe and proper operation of the garage door.
- Enter programming mode. This often involves pressing and holding specific buttons on the motor unit or using the wall control.
- Set the UP travel limit. You’ll typically manually move the door to the fully open position using the wall button, then press a button on the motor unit to set this position.
- Set the DOWN travel limit. Similarly, you’ll manually move the door to the fully closed position and set that limit.
- Set the force settings. The opener will usually perform a test run, and you’ll adjust the force up or down until the door operates smoothly without excessive strain.
These settings ensure the door stops at the correct points and reverses if it encounters resistance, preventing damage to the door or potential injury. Incorrectly set limits can cause the door to not open or close fully, or to reverse prematurely.
Checking The Garage Door Itself
Sometimes, the problem isn’t with the opener unit itself but with the garage door it’s attached to. If the opener seems to be trying to work (you hear the motor humming, the chain moves) but the door doesn’t move, or moves with great difficulty, the issue could be with the door’s balance, springs, or tracks.
Testing Door Balance And Springs
A properly balanced garage door should stay open on its own when you manually lift it about halfway. If it slams shut or springs upward, the torsion springs (above the door) or extension springs (along the tracks) are likely failing or broken. These springs do the heavy lifting, counterbalancing the weight of the door. If they are not functioning correctly, the opener will struggle or be unable to lift the door.
Warning: Garage door springs are under extreme tension and can be very dangerous to handle. If you suspect a spring issue, it’s best to contact a professional garage door technician.
Inspecting Tracks And Rollers
Examine the vertical and horizontal tracks that the garage door rollers travel within. Ensure they are clean, free of debris, and not bent or damaged. Also, check the rollers themselves; they should spin freely. If they are stuck, cracked, or worn, they can impede the door’s movement.
Lubricating the rollers and hinges periodically can help ensure smooth operation. For more information on this, you can refer to a guide on how to lubricate garage door rollers.
Chain Or Belt Tension
If you have a chain-drive or belt-drive opener, the chain or belt could have become loose or jumped a tooth on the sprocket, especially after a power surge or during a manual operation.
- Chain Drive: Check the tension of the chain. It should be taut but not overly tight. If it’s loose, it might need adjustment. This is covered in detail in our guide on how to adjust chain on garage door opener.
- Belt Drive: Similar to a chain, a belt can become loose. Check for any signs of wear or damage.
Common Craftsman Opener Error Codes And Indicator Lights
Many Craftsman garage door openers use blinking LED lights to signal specific error codes, which can be invaluable for diagnosing problems. After a power outage, these codes can help pinpoint the exact issue.
Understanding Diagnostic Lights
Consult your owner’s manual to understand the specific blinking patterns for your Craftsman model. Common patterns might indicate:
- Safety sensor issues: Rapid blinking of the main light or a specific indicator.
- Travel limit errors: A specific number of blinks might point to an issue with the up or down limit settings.
- Force limit errors: Indicates the opener is encountering too much resistance.
- Internal logic board faults: More complex error codes may suggest a problem with the opener’s electronics.
Example: A Craftsman opener model 139.53970 SRT might flash its green LED light 5 times to indicate a problem with the safety sensors. If you see this pattern, you know to focus your troubleshooting on the sensors.
Troubleshooting Based On Error Codes
Once you identify the blinking pattern, cross-reference it with your manual. For instance, if the code indicates a safety sensor problem, re-examine the sensors, their alignment, and the wiring connecting them to the motor unit. If it points to a travel limit issue, you’ll need to re-program the limits as described earlier.
When To Call A Professional
While many issues with a Craftsman garage door opener after a power outage can be resolved with DIY troubleshooting, there are times when it’s best to call a professional.
Signs You Need Professional Help
- Broken springs: As mentioned, these are dangerous and require expert handling.
- Damaged tracks or opener rail: Significant bending or damage can compromise the entire system.
- Persistent error codes: If you’ve followed all troubleshooting steps and the opener continues to display error codes, there might be an internal component failure.
- Electrical issues beyond tripped breakers: If you suspect wiring problems or issues with the motor unit’s electronics, an electrician or garage door technician is necessary.
- Uncertainty or lack of confidence: If you’re uncomfortable performing any of the troubleshooting steps, it’s always safer to call a professional. The cost of a professional can often be less than the cost of repairing accidental damage you might cause.
Cost Considerations
The cost of a garage door repair can vary widely depending on the issue. Simple fixes like reprogramming remotes or cleaning sensors are usually free if you do them yourself. Professional service calls typically range from $100 to $300 for basic diagnostics and minor repairs, while more complex issues like spring replacement or motor unit repair can cost $200 to $600 or more. Understanding these potential costs can help you decide when DIY is worthwhile. For a general idea of garage door costs, see how much for a garage door.
Frequently Asked Questions
My Craftsman Opener Lights Are Blinking, But Nothing Happens. What Does This Mean?
Blinking lights on a Craftsman opener are usually diagnostic codes. The specific number of blinks and the color of the lights often correspond to particular issues, such as problems with the safety sensors, travel limits, or force settings. Consult your owner’s manual to decipher the code for your specific model.
Often, issues like misaligned safety sensors or incorrect travel limit settings are the cause, which can be resolved by following the steps outlined in this guide.
Can A Power Surge Damage My Craftsman Garage Door Opener?
Yes, a power surge or fluctuation during a power outage can definitely damage a garage door opener. Surges can fry sensitive electronic components on the logic board, corrupt memory, or trigger safety mechanisms that prevent operation. In some cases, the opener might simply need a reset, while in others, internal components may be permanently damaged, requiring repair or replacement. Using a surge protector designed for large appliances can help mitigate this risk for future outages.
My Remote Works, But The Wall Button Doesn’t After The Power Outage. What Should I Do?
This suggests the issue is likely with the wiring between the wall button and the opener unit, or with the wall button itself. First, check if the wire connections at both the wall button and the motor unit are secure and intact.
Look for any signs of damage or corrosion. If the wiring appears fine, the wall button itself might have failed. You can test this by carefully disconnecting the wires from the wall button and then momentarily touching them together; if the opener operates, the button is faulty and needs replacement.
How Do I Manually Open My Craftsman Garage Door If The Opener Isn’t Working?
To manually open your Craftsman garage door, you’ll need to disengage the opener’s trolley from the drive mechanism. Locate the red emergency release cord hanging from the trolley on the opener’s rail. Pull this cord down and towards the opener unit. This will disconnect the trolley. You can then lift the garage door manually. Remember to re-engage the trolley once you’ve resolved the opener issue or if you need to use the opener again. For detailed steps, refer to guides on how to manually open a garage door.
My Craftsman Opener Is Working, But The Garage Door Is Very Slow Or Noisy. What’s Wrong?
If the opener motor is running but the door is slow or noisy, the problem is likely with the garage door’s mechanics rather than the opener’s electronics. Check the rollers to ensure they are clean and spinning freely. Inspect the tracks for any bends or obstructions. The springs might be losing tension, or the door might need lubrication on its hinges and rollers. A garage door that is difficult to move manually will also be difficult for the opener to move. Addressing these mechanical issues, such as by lubricating parts as detailed in