
The convenience of a garage door opener is undeniable, transforming a daily chore into a seamless entry. However, the prospect of installing one can seem daunting, leading many homeowners to wonder: how long does it take to install a garage door opener? This question is central to planning the project, whether you’re a DIY enthusiast or considering professional help. The actual time can vary significantly based on several factors, from the type of opener chosen to your own mechanical aptitude and the existing garage setup. Understanding these variables is key to setting realistic expectations and ensuring a smooth installation process.
Key Takeaways
- DIY Installation Time: Expect a DIY installation to take anywhere from 3 to 8 hours, depending on experience, complexity, and tools.
- Professional Installation Time: A professional garage door opener installation typically takes 1 to 3 hours.
- Opener Type Matters: Chain drive openers may take slightly longer due to heavier components, while belt drive and direct drive systems can be quicker.
- Existing Conditions: Older homes, non-standard garage door setups, or the need for electrical work can extend installation time.
- Preparation is Crucial: Gathering tools, reading instructions, and preparing the workspace can significantly reduce on-the-day installation duration.
- Troubleshooting: Unforeseen issues can add hours, so budgeting extra time for potential problems is wise.
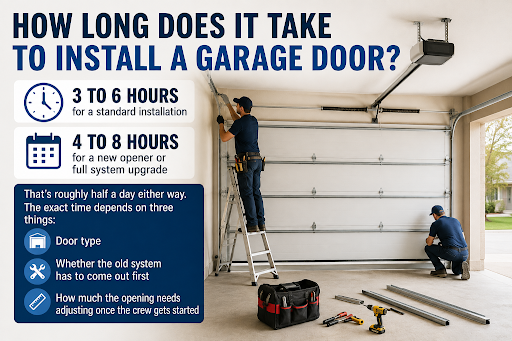
Credit: northcountryoverheaddoor.com
Understanding The Variables: Factors Influencing Installation Time
The time it takes to install a garage door opener isn’t a one-size-fits-all answer. Numerous elements contribute to the overall duration, and understanding them can help you accurately estimate the time commitment. These factors range from the technical specifications of the opener itself to the unique characteristics of your garage.
Type Of Garage Door Opener
The mechanism of the garage door opener plays a significant role in installation complexity and time.
- Chain Drive Openers: These are one of the most common types, known for their durability and affordability. However, they can be heavier and require careful alignment of the chain. Installation might involve more steps to ensure the chain is properly tensioned and secured.
- Belt Drive Openers: Similar in operation to chain drives but using a rubber belt instead of a chain, these are quieter. The installation process is often very similar to chain drives, though some find handling the belt slightly easier than a chain.
- Direct Drive Openers: In these systems, the motor is directly integrated into the opener rail, simplifying the mechanical aspects. Installation can sometimes be quicker as there’s no separate chain or belt to manage.
- Screw Drive Openers: These use a threaded rod to move the trolley. While robust, the installation can be intricate, requiring precise alignment of the rod.
In my experience, while the core steps are similar, the physical handling of heavier components like the motor unit and the rail assembly can add a bit of time to chain drive installations, especially if working alone.
Your Diy Skill Level And Experience
This is perhaps the most significant variable.
- Beginner DIYer: If you have limited experience with tools and mechanical installations, expect the process to take longer. You’ll likely spend more time deciphering instructions, double-checking steps, and potentially troubleshooting minor issues. For a first-time installer, budgeting 6 to 8 hours is a reasonable estimate.
- Intermediate DIYer: If you’re comfortable with basic tools, understand mechanical principles, and have tackled similar home improvement projects, you might complete the installation in 4 to 6 hours. You’ll be more efficient in identifying parts and performing tasks.
- Experienced DIYer/Handyperson: For those with a strong background in DIY projects, installing a garage door opener might take as little as 3 to 4 hours. Your familiarity with tools and a systematic approach will streamline the process considerably.
It’s always prudent for beginners to err on the side of caution and allocate more time than they think they’ll need. Rushing can lead to mistakes, which ultimately take longer to correct.
Existing Garage Door System And Structure
The condition and type of your current garage door system can significantly impact installation time.
- Standard Overhead Doors: Most modern garage doors are designed for easy opener integration. Installation on these is generally straightforward.
- Older or Non-Standard Doors: If you have an older, heavier, or unusually balanced garage door, it might require additional adjustments or reinforcement. The opener needs to work in sync with the door’s balance, and significant imbalances can add complexity.
- Structural Considerations: The mounting point for the opener and its rail needs to be secure. If your garage ceiling joists or wall studs are not ideally positioned, you might need to install additional bracing or mounting hardware, which adds time.
- Existing Wiring: If your garage lacks a convenient power outlet near the opener’s mounting location, you’ll need to run an electrical extension cord or, for a more permanent solution, have an electrician install a new outlet. This can add a substantial amount of time and cost.
Need For Additional Parts Or Modifications
Sometimes, the opener kit doesn’t include everything needed for a specific installation.
- Mounting Brackets: You might need specialized brackets for certain ceiling types or wall constructions.
- Reinforcement: As mentioned, older or heavier doors might require a reinforcement angle iron or strut to adequately support the opener’s arm.
- Electrical Work: If no power source is readily available, hiring an electrician will add time and cost to the overall project.
- Safety Sensors: While usually included, ensuring they are correctly aligned and securely mounted is part of the process. If the original mounting points are damaged or missing, you might need to improvise or purchase new ones.

Credit: www.home.crs
The Installation Process: A Step-by-step Breakdown
Understanding the typical stages involved in installing a garage door opener can help demystify the process and provide a clearer picture of where time is spent. While specific steps vary by manufacturer and opener model, the general workflow remains consistent.
Pre-installation Preparations
This phase is crucial for a smooth and efficient installation and often takes longer than anticipated if not done thoroughly.
- Unpacking and Inventory: Carefully unpack all components and compare them against the parts list in the manual. Ensure nothing is missing or damaged. This can take 15-30 minutes.
- Reading the Manual: Thoroughly read the manufacturer’s installation manual. Pay close attention to safety warnings, specific measurements, and wiring diagrams. This is a critical step that can prevent errors later and might take 30-60 minutes.
- Gathering Tools: Assemble all necessary tools. Common tools include a ladder, drill with various bits, wrenches, screwdrivers, measuring tape, level, pliers, wire strippers, safety glasses, and potentially a stud finder. Having everything ready prevents interruptions. This can take 15-30 minutes.
- Preparing the Workspace: Clear the area around the garage door and the opener’s mounting location. Ensure there’s ample space to work safely. This might involve moving vehicles, bikes, or storage items. This can take 15-45 minutes.
- Disengaging the Existing Door: If an old opener is being replaced, disconnect it and remove it. Ensure the garage door is properly balanced before proceeding. If the door is not balanced, it needs to be addressed first. This can take 15-30 minutes.
Mounting The Opener And Rail
This is the core mechanical part of the installation.
- Attaching the Rail to the Motor Unit: Connect the opener’s rail assembly to the motor unit. This usually involves sliding the rail into the motor housing and securing it with bolts. (Approx. 10-20 minutes)
- Mounting the Rail to the Ceiling: Position the rail assembly, ensuring it’s centered with the garage door. Securely attach the rail to the ceiling joists using the provided brackets and hardware. This step requires precision to ensure the door operates smoothly. (Approx. 30-60 minutes)
- Attaching the Door Bracket: Securely fasten the door bracket to the garage door itself, typically to the top section. Ensure it’s positioned correctly according to the manual to allow for full opening. (Approx. 15-25 minutes)
- Connecting the Trolley and Opener Arm: Connect the trolley (which moves along the rail) to the door bracket with the opener’s arm. This arm connects the door to the moving trolley. Adjustments are often needed here. (Approx. 15-30 minutes)
Wiring And Electrical Connections
This involves connecting the opener to power and installing safety features.
- Mounting the Motor Unit: Securely mount the motor unit to the ceiling or wall bracket. Ensure it’s level and firmly attached. (Approx. 10-20 minutes)
- Connecting Power: Plug the opener into a grounded electrical outlet. If an outlet isn’t available, this is where electrical work would be needed, significantly increasing time. (Approx. 5-10 minutes for plugging in)
- Installing Safety Sensors: Mount the safety sensors near the bottom of the garage door tracks on either side. These are crucial for preventing the door from closing on obstructions. (Approx. 15-30 minutes)
- Wiring the Wall Control and Sensors: Run wires from the motor unit to the wall-mounted control button and the safety sensors. Secure the wires neatly along the ceiling and walls. (Approx. 30-60 minutes)
Adjustments And Testing
The final stage involves fine-tuning the system and ensuring it operates safely and correctly.
- Setting Travel Limits: Adjust the opener’s settings so it knows how far to open and close the door. This is usually done via buttons on the motor unit or a remote. (Approx. 15-30 minutes)
- Setting Force Limits: Adjust the force settings to ensure the door opens and closes smoothly without excessive strain. The opener should reverse if it encounters significant resistance. (Approx. 10-20 minutes)
- Testing Operation: Manually operate the door to check its balance and smooth movement. Then, test the opener using the remote and the wall button. Check that the safety sensors work by interrupting the beam. (Approx. 15-30 minutes)
- Programming Remotes and Keypads: Program any remotes or keypads to the opener system. This often involves pressing buttons on the opener and the remote/keypad. For example, reprogramming a Genie keypad is a common task. (Approx. 10-20 minutes)
Professional Vs. Diy Installation Time Comparison
When deciding whether to tackle a garage door opener installation yourself or hire a professional, the time factor is often a major consideration. While DIY offers potential cost savings, professional installation provides speed and expertise.
Professional Installation
- Average Time: Most garage door opener installations performed by a qualified technician take between 1 to 3 hours.
- Why it’s Faster: Professionals have extensive experience with various opener models and garage door types. They are equipped with the right tools, understand the nuances of installation, and can anticipate potential problems. They often work in teams, further speeding up the process.
- What’s Included: Professional services typically include the installation, testing, and basic programming of the opener, remotes, and safety features. Some companies may also offer haul-away of the old opener.
Diy Installation
- Average Time: As discussed, a DIY installation can range from 3 to 8 hours, with most falling in the 4-6 hour range for someone with moderate experience.
- Factors Affecting Time: The variables mentioned earlier, opener type, skill level, existing conditions, and the need for extra parts, significantly influence the DIY timeline.
- Potential for Delays: DIYers may encounter unexpected challenges, such as difficult-to-reach mounting points, needing to purchase additional hardware, or struggling with specific instructions. Troubleshooting can easily add hours to the project.
Here’s a table summarizing the typical time differences:
| Installation Type | Estimated Time Range | Key Considerations |
|---|---|---|
| Professional Installation | 1 – 3 hours | Requires scheduling, but efficient and reliable. Expertise reduces risk of errors. |
| DIY Installation (Experienced) | 3 – 4 hours | Requires tools and mechanical aptitude. Potential for minor delays. |
| DIY Installation (Average Experience) | 4 – 6 hours | Most common DIY timeframe. Thorough reading of instructions is vital. |
| DIY Installation (Beginner) | 6 – 8+ hours | Significant time needed for learning and careful execution. Budget extra time for unforeseen issues. |
Case Study: The Weekend Warrior Vs. The Professional
Scenario 1: The Weekend Warrior
Mark, a homeowner with some DIY experience, decided to install a new chain drive opener himself. He purchased a kit on sale and set aside his Saturday morning. He spent the first hour unpacking, reading the manual, and gathering tools. The actual mounting and wiring took about 3.5 hours, but he ran into trouble aligning the chain, which added another hour of troubleshooting. Programming the remotes took an extra 30 minutes due to unclear instructions. In total, Mark spent 6 hours installing his opener, plus the time spent on initial research and tool gathering.
Scenario 2: The Busy Professional
Sarah, a working mother with limited free time, opted for professional installation. She contacted a local garage door company and scheduled an appointment for Tuesday afternoon. Two technicians arrived, and within 1.5 hours, the new belt drive opener was fully installed, tested, and programmed. Sarah spent her time on other tasks, and the project was completed with minimal disruption.

Credit: www.daytondoorsales.com
Factors That Can Extend Installation Time
While a standard installation might fit within the estimated times, several factors can unexpectedly lengthen the process, turning a few hours into a full day’s work. Being aware of these potential pitfalls can help you prepare and manage your expectations.
Complex Garage Door Systems
- Torsion Spring Systems: While most modern doors use torsion springs, their proper calibration is essential for opener function. If the springs are old or not correctly tensioned, it can affect how the opener performs and may require adjustment before opener installation.
- Multiple Garage Doors: If you’re installing openers on more than one garage door, the time will multiply. While you gain efficiency with the second door, each requires individual mounting, wiring, and programming.
- Unusual Door Materials or Weights: Doors made from heavy materials like solid wood or those with intricate designs might require more robust mounting hardware or additional reinforcement, adding to the installation time.
Electrical Issues
- Lack of Nearby Outlet: This is a common issue, especially in older garages. Running new wiring or installing a new outlet requires electrical knowledge and adherence to safety codes. If you’re not comfortable with this, you’ll need to hire an electrician, which can add days to the project depending on their availability.
- Faulty Existing Wiring: In rare cases, the existing electrical setup might be outdated or problematic, requiring repairs before the opener can be safely connected.
Obstructions And Accessibility
- Low Ceilings: Very low garage ceilings can make maneuvering the rail and motor unit difficult, requiring more careful handling and potentially specialized mounting techniques.
- Obstacles in the Way: Plumbing pipes, ductwork, or storage shelves that obstruct the optimal mounting path for the opener rail can necessitate creative solutions or rerouting, which takes extra time.
- Difficult Access to Mounting Points: If the ideal mounting points are hard to reach or require working in cramped spaces, it will naturally slow down the process.
First-time Opener Installation
- No Prior Structure: If a garage has never had an opener before, there might be no pre-existing mounting points or wiring infrastructure. This means creating these from scratch, which involves more planning and labor. For example, ensuring the ceiling joists are strong enough for the opener’s bracket is critical.
Troubleshooting And Unexpected Problems
- Component Malfunctions: Occasionally, a new opener might have a faulty part, requiring a trip back to the store or a call to the manufacturer.
- Compatibility Issues: Though less common with modern universal openers, ensuring compatibility between the opener and your specific garage door mechanism is vital.
- Door Balance Issues: If the garage door is not properly balanced, the opener will struggle, and the door may not operate smoothly or safely. Addressing door balance issues, such as adjusting torsion springs, is a separate task that might be needed before or during opener installation. A poorly balanced door can also cause premature wear on the opener. You can check this by disconnecting the opener and trying to lift the door manually; it should stay open at any height. If it slams down or shoots up, it needs adjustment.
- Safety Sensor Alignment: Getting the safety sensors perfectly aligned can sometimes be finicky, especially if the mounting brackets are not perfectly straight or if there are minor obstructions in the beam’s path.
Tips For A Smoother And Quicker Installation
Whether you’re going the DIY route or overseeing a professional, a few strategies can help ensure the installation process is as efficient and stress-free as possible.
Thorough Preparation Is Key
- Read the Manual Before Buying: ** Understand the specific requirements of the opener model you’re considering. Does it need specific mounting hardware? Does it have particular electrical needs?
- Inventory Everything: As soon as the opener arrives, check all parts against the list. Missing parts are a common cause of delays.
- Gather All Tools: Lay out every tool you’ll need before you start. Check batteries in drills and levels.
- Pre-Wire if Necessary: If you know you’ll need an outlet added, schedule an electrician well in advance of your planned installation day.
During The Installation
- Work with a Helper: Having a second person, especially for lifting the motor unit and holding the rail in place, can significantly speed up the process and improve safety.
- Follow Instructions Precisely: Resist the urge to skip steps or improvise unless you’re absolutely certain of the outcome.
- Test as You Go: Perform basic tests after key stages (e.g., after mounting the rail, after connecting the trolley) to catch issues early.
- Keep the Area Tidy: A clean workspace reduces the risk of tripping hazards and makes it easier to find tools and parts.
Post-installation Best Practices
- Lubrication: Regularly lubricating moving parts like rollers and hinges can ensure the door operates smoothly, reducing strain on the opener. Consider how to lube garage door rollers for optimal performance.
- Maintenance: Follow the manufacturer’s recommended maintenance schedule. This includes checking the balance, tightening hardware, and lubricating the chain or belt. For chain drive openers, learning how to adjust the chain can prevent future issues.
- Know Your Reset Procedures: Familiarize yourself with how to reset your opener and remotes, should the need arise. For instance, knowing how to reset your garage door opener is a valuable skill.
Common Garage Door Opener Brands And Installation Nuances
While the general installation process is similar across brands, each manufacturer might have slight variations in their designs, components, and recommended procedures. Understanding these nuances can be helpful, especially if you’re comparing models or troubleshooting.
Chamberlain
Chamberlain is a widely recognized brand, offering a range of openers, including their popular MyQ technology.
- Installation Notes: Chamberlain openers often feature a relatively straightforward rail assembly. Their wall buttons and safety sensors are typically easy to wire. The MyQ connectivity setup is an additional step that requires connecting to your home Wi-Fi network. Programming remotes is usually done via a “Learn” button on the motor unit. For example, if you need to reset a Craftsman remote (often Chamberlain-powered), the process is similar across Chamberlain models.
Liftmaster
LiftMaster is another major player, known for its durable and feature-rich openers, often favored by professionals.
- Installation Notes: LiftMaster installations are generally robust. They often use a slightly different rail connection system than some competitors. The programming of their Security+ remotes is typically done using the colored learn button on the motor unit. If you ever need to reset a LiftMaster remote, it involves specific button presses on the unit.
Genie
Genie offers a variety of opener types, including their popular “QuietLift