
The familiar rumble of a garage door opener has been a staple of modern convenience for decades. Yet, as our homes become increasingly connected, that trusty, albeit older, garage door opener might feel like a relic from a bygone era. The good news is that you don’t necessarily need to replace your entire system to enjoy the benefits of a smart garage. With a few clever upgrades, you can bring your existing garage door opener into the 21st century, offering enhanced security, convenience, and peace of mind.
The desire for a smart home extends beyond smart lights and thermostats; it’s about creating a more integrated and responsive living environment. For many, the garage is a crucial entry point to their home, and its security and accessibility are paramount.
Fortunately, the market offers a growing array of solutions designed to retrofit older garage door openers, transforming them into intelligent systems that can be controlled and monitored remotely. This guide will explore the various methods and devices available to make your old garage door opener smart, detailing the benefits, the process, and what to consider before you begin.
Key Takeaways
- Retrofitting is feasible: Most older garage door openers can be made smart without a full replacement.
- Smart controllers are common: Devices like smart garage door openers (e.g., MyQ, Nexx, Tailwind) can be installed alongside existing openers.
- Key benefits include: Remote monitoring and control, enhanced security alerts, integration with smart home ecosystems, and potential energy savings.
- Installation varies: Some solutions are DIY-friendly, while others might require professional installation.
- Compatibility is crucial: Always check that the smart device is compatible with your specific garage door opener model.
- Security considerations: Ensure chosen devices use strong encryption and secure network protocols.

Credit: jamesachambers.com
Understanding Your Existing Garage Door Opener
Before embarking on the journey to make your garage door opener smart, it’s essential to understand the technology you’re working with. Older garage door openers, while functional, lack the network connectivity and advanced features of their modern counterparts. They typically rely on a simple radio frequency (RF) signal transmitted from a remote control to activate the motor unit.
The receiver in the motor unit interprets this signal and initiates the opening or closing sequence.
Most garage door openers manufactured since the early 1990s utilize rolling code technology, which enhances security by changing the access code with each use. However, even these systems are “dumb” in the sense that they cannot communicate their status (open or closed) or be controlled remotely via the internet.
Identifying your opener’s brand and model number is the first step, as this information will be crucial when selecting a compatible smart upgrade. You can usually find this on the motor unit itself, often on a sticker or plate. Understanding the basic operation, the motor, the drive mechanism (chain, belt, or screw), and the safety sensors, will also provide context for how a smart controller will interact with it.
Common Garage Door Opener Types And Brands
The garage door opener market has been dominated by a few key players for years. Recognizing these brands can help you determine compatibility with smart devices.
- Chamberlain: A very common brand, often featuring yellow or purple learn buttons. They also own LiftMaster and Craftsman.
- LiftMaster: Widely used, often found in professional installations. They share much of their technology with Chamberlain.
- Craftsman: Another popular brand, frequently found in DIY installations.
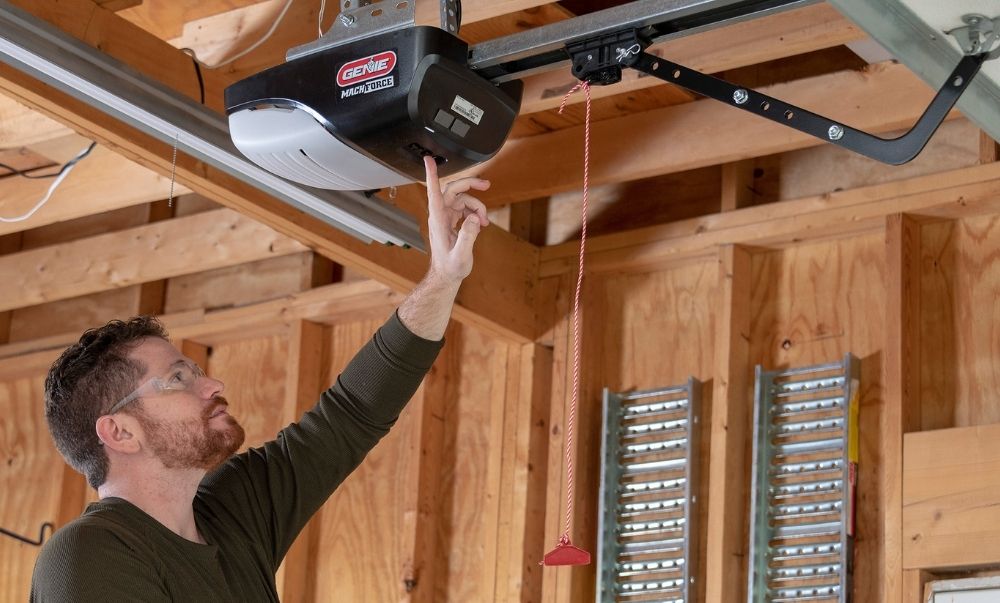
- Genie: Known for their distinct red learn buttons and often using a different frequency than Chamberlain/LiftMaster/Craftsman.
- Linear: Less common in residential settings but still present.
Understanding your specific model might involve consulting its manual or searching online with the brand and model number. This foundational knowledge is critical for ensuring a successful smart upgrade.
Identifying Your Opener’s Compatibility Features
Not all garage door openers are created equal when it comes to smart upgrades. While many systems can be retrofitted, some features or age can present challenges.
- Learn Button: Most modern openers (post-1993) have a “learn button” on the motor unit. This button is used to pair remotes and is often the point of connection for smart controllers. The color of this button (e.g., purple, yellow, green, red, orange) can indicate the frequency and type of rolling code technology used, which is vital for compatibility.
- Safety Sensors: These are the small sensors typically mounted near the bottom of the garage door tracks. They are crucial for preventing the door from closing on an obstruction. Smart controllers rely on the opener’s existing logic, which includes these sensors, for safe operation.
- Wired Remote Terminals: Some older openers have terminals on the motor unit that allow for a wired external remote button. These can sometimes be used as an alternative connection point for certain smart controllers.
If your opener is very old (pre-rolling code technology, often called “dip switch” models), it might still be possible to make it smart, but the security implications are significantly higher, and you’d want to ensure your chosen smart device adds a layer of encryption.
Methods To Make Your Garage Door Opener Smart
There are several primary approaches to introducing smart functionality to an older garage door opener. These range from simple add-on devices to more integrated solutions. The most common and generally recommended method involves using a smart garage door opener controller. These are external devices that connect to your existing opener and communicate with your home Wi-Fi network.
Smart Controller Devices (add-ons)
These are the most popular and accessible solutions. They typically consist of a small hub that plugs into an outlet near your opener and a sensor or two that attach to your garage door. The hub connects to your Wi-Fi and allows you to control the door via a smartphone app.
How they work:
- Mounting: The main unit is often mounted on the ceiling near the garage door opener.
- Wiring: A small wire typically connects from the smart controller to the terminals on your garage door opener’s motor unit. This wire mimics the signal sent by a traditional remote, effectively telling the opener to activate.
- Sensor: A separate sensor is attached to the garage door itself. This sensor tells the smart controller whether the door is open or closed, providing crucial status updates to your app.
- App Control: The device connects to your home Wi-Fi, and you use a smartphone app to monitor the door’s status, open/close it remotely, and receive notifications.
Popular Brands and Features:
- Chamberlain MyQ Smart Garage Hub: One of the most widely recognized brands, MyQ offers a simple hub that can control up to two garage doors. It integrates with the Chamberlain, LiftMaster, and Craftsman openers that have a yellow, purple, or orange “learn” button. It also offers integration with Amazon Key for in-garage delivery.
- Nexx Garage: Nexx offers a compact device that’s compatible with a wide range of garage door openers. It’s known for its straightforward installation and robust app features, including scheduling and activity logs.
- Tailwind iQ Smart Garage: This system is designed for enhanced compatibility and often allows for automatic opening as you approach your home using geofencing technology. It also offers features like multiple user access and detailed activity tracking.
- Garadget: Garadget uses a unique approach with a Wi-Fi enabled device and a laser sensor. The laser reflects off a specific point on the garage door, and the device detects the reflection to determine if the door is open or closed.
Installation Considerations:
Most of these devices are designed for DIY installation, often taking less than an hour. Key steps usually involve:
- Mounting the hub.
- Connecting the wires to the opener’s terminals.
- Attaching the door sensor.
- Connecting the hub to your Wi-Fi network via the app.
Smart Garage Door Openers (complete Replacement)
If your existing opener is very old, unreliable, or you simply want the latest features integrated directly, replacing the entire unit is an option. Modern garage door openers often come with built-in Wi-Fi connectivity and smartphone app control.
Advantages:
- Integrated System: All features are built into one unit, potentially leading to a cleaner installation.
- Latest Technology: You get the newest motor technology, security features, and potential for battery backup.
- Simplified Compatibility: No need to worry about add-on device compatibility with an older opener.
Disadvantages:
- Higher Cost: Replacing the entire opener is significantly more expensive than adding a smart controller.
- More Complex Installation: This typically requires professional installation unless you have experience with electrical and mechanical systems.
Using Smart Plugs And Relays (advanced/diy)
For the technically inclined, it’s possible to use smart plugs or smart relays to control older garage door openers. This method is more DIY-intensive and requires a good understanding of electronics and the opener’s circuitry.
How it works:
A smart plug can be used to control the power to the entire opener unit. However, this only allows you to cut power or restore it; it doesn’t allow for opening or closing.
A more functional approach involves using a smart relay. This device is wired in parallel with the opener’s existing wall button. When the relay is triggered (via a smart home app or automation), it sends a brief electrical pulse to the opener’s terminals, just like pressing the physical button would.
Considerations for this method:
- Safety: This requires careful wiring to avoid electrical shock or damaging the opener. You must ensure the relay is rated for the correct voltage and current.
- Status Monitoring: This method typically doesn’t provide status monitoring (open/closed) unless combined with a separate door sensor.
- Compatibility: You need to identify the correct terminals on your opener that correspond to the wall button.
- Security: Ensure the smart relay device uses secure protocols.
While this offers a high degree of customization, it’s generally recommended for experienced DIYers or those who consult with an electrician. For most users, a dedicated smart controller is a safer and more straightforward option.

Credit: www.consumerreports.org
Benefits Of A Smart Garage Door Opener
Upgrading your old garage door opener to a smart system brings a wealth of advantages that enhance convenience, security, and overall home management. These benefits extend beyond simple remote control, offering a more integrated and intelligent approach to your home’s primary entry point.
Enhanced Security And Peace Of Mind
One of the most significant advantages is improved security. With a smart opener, you can:
- Remote Monitoring: Check the status of your garage door from anywhere using your smartphone. This eliminates the nagging worry of whether you remembered to close it.
- Real-Time Alerts: Receive instant notifications on your phone if the garage door opens or closes unexpectedly, or if it’s left open for an extended period. This can alert you to potential unauthorized access or simply remind you if you forgot to close it.
- Activity Log: Many smart systems keep a log of all door activity, showing who opened or closed the door and when. This provides an audit trail for added security.
- Secure Access: Some systems offer temporary virtual keys or scheduled access for guests or service providers, eliminating the need for a physical key or code that could be compromised.
Unparalleled Convenience
The convenience factor is undeniable. Imagine these scenarios:
- Remote Operation: Open the garage door for a family member who forgot their remote or key, or close it if you’re on your way home and realize you left it open.
- Location-Based Automation: Some systems utilize geofencing. As you approach your home, the garage door can automatically open, and as you leave, it can close, all without you lifting a finger. This is particularly useful when your hands are full.
- Integration with Smart Home Ecosystems: Many smart garage controllers can integrate with popular smart home platforms like Google Assistant, Amazon Alexa, or Apple HomeKit. This allows for voice control (“Alexa, open the garage door”) and inclusion in broader home automation routines (e.g., a “goodbye” routine that closes the garage door).
- Delivery Access: Services like Amazon Key allow trusted delivery drivers to place packages inside your garage, protecting them from theft and the elements.
Potential Energy Savings And Monitoring
While not the primary driver for most users, smart openers can contribute to energy efficiency:
- Preventing Unintended Operation: Alerts for doors left open can prevent the garage from being unnecessarily heated or cooled, especially if it’s an attached garage.
- Monitoring Usage: Some systems may offer insights into how often the garage door is used, which can indirectly inform energy consumption habits.
Improved Accessibility
For individuals with mobility issues, a smart garage door opener can be a significant aid. Voice control or app-based operation eliminates the need to physically reach or manipulate a remote, making access easier and more independent.
Credit: store.geniecompany.com
Choosing The Right Smart Garage Controller
With various options available, selecting the best smart garage controller for your needs requires careful consideration of compatibility, features, and your specific garage setup. It’s not just about buying the cheapest or most feature-rich device; it’s about finding the one that seamlessly integrates with your existing hardware and provides the functionality you desire.
Compatibility Check: The Most Crucial Step
This cannot be stressed enough: always verify compatibility with your existing garage door opener before purchasing any smart controller. Most smart controllers are designed to work with openers manufactured after a certain date and often specify compatibility based on the “learn button” color or brand.
- Brand and Model: Check the smart controller’s specifications for supported brands (Chamberlain, LiftMaster, Genie, Craftsman, etc.) And, if possible, specific model series.
- Learn Button: Many controllers, like Chamberlain’s MyQ, are compatible with openers featuring specific learn button colors (e.g., purple, yellow, green, red). If your opener has a different color, it might not be compatible.
- Security Protocol: Ensure the controller supports your opener’s security protocol (e.g., rolling code technology). Very old “dip switch” openers are generally less secure and may not be compatible with newer smart devices designed for rolling codes.
- Wired Terminals: Some controllers connect via wires to the terminals on the opener motor unit. Confirm your opener has these accessible terminals.
Pro Tip: If you’re unsure about your opener’s compatibility, consult the smart controller manufacturer’s website. They often have online compatibility checkers where you can input your opener’s brand and model.
Key Features To Consider
Beyond basic compatibility, evaluate the features offered by different smart controllers:
- Number of Doors Supported: Some controllers can manage one garage door, while others can handle two.
- App Interface and Usability: A user-friendly app is essential. Look for intuitive navigation, clear status indicators, and easy access to controls and settings.
- Notifications and Alerts: Customizable alerts for door status, open/close activity, and potential security issues are vital.
- Smart Home Integration: If you use Amazon Alexa, Google Assistant, or Apple HomeKit, ensure the controller integrates with your preferred platform for voice control and automation.
- Geofencing: The ability to automatically open or close the door based on your proximity to home can be a significant convenience.
- Activity Logging: A detailed log of who operated the door and when adds a layer of accountability and security.
- User Access Management: The ability to grant temporary or scheduled access to family members or service providers.
- Installation Ease: While most are DIY-friendly, some might be simpler than others. Check reviews or installation guides.
- Reliability and Connectivity: Look for devices with good Wi-Fi connectivity and a reputation for reliability.
Installation And Setup Process
The installation process for most smart garage door controllers is designed to be straightforward for the average homeowner. However, understanding the general steps can help you prepare.
- Download the App: Start by downloading the manufacturer’s app to your smartphone or tablet.
- Power Up the Hub: Plug the smart controller hub into a power outlet near your garage door opener.
- Connect to Wi-Fi: Follow the app’s instructions to connect the hub to your home Wi-Fi network. This usually involves selecting your network and entering the password.
- Wire to the Opener: This is often the most technical step. You’ll typically need to connect small wires from the smart controller to the terminals on your garage door opener’s motor unit. These terminals are usually where your existing wired wall button connects. Consult your opener’s manual and the smart controller’s instructions carefully. Ensure the opener is unplugged before making any wire connections.
- Install the Door Sensor: Attach the sensor to the garage door itself, following the manufacturer’s guidelines. This sensor detects whether the door is open or closed.
- Test the System: Once everything is connected, power on the opener (if unplugged) and test the system through the app. Open and close the door, verify the status updates, and check that notifications are working.
Example Installation Scenario:
Consider installing a Chamberlain MyQ Smart Garage Hub. After downloading the MyQ app and connecting the hub to Wi-Fi, you would unplug your garage door opener. You’d then connect two thin wires from the MyQ hub to the “terminal” or “door control” screws on the back of the opener motor unit.
Finally, you’d attach the door sensor to the top panel of your garage door. Once powered on and synced, the app would allow you to monitor and control the door.
Installation And Setup: A Closer Look
While the general steps for installing a smart garage controller are similar across brands, diving deeper into the process reveals nuances that can make the experience smoother. The ease of installation is a significant factor for many homeowners considering a DIY upgrade.
Diy Installation: What To Expect
Most smart garage controller manufacturers design their products with the DIYer in mind. This means clear instructions, often with video guides, and minimal need for specialized tools. Typically, you’ll need:
- A screwdriver (often Phillips head) for attaching wires and sensors.
- A ladder to reach the opener unit and garage door.
- Your smartphone for app setup and Wi-Fi connection.
- Possibly a drill if mounting the hub requires it, though many can be placed on a shelf or attached with adhesive strips.
Key Steps in Detail:
- Unplug the Opener: Safety first. Always disconnect the power to your garage door opener before connecting any wires. This prevents electrical shock and potential damage to the opener or the smart device.
- Locate Opener Terminals: On the back or side of your garage door opener’s motor unit, you’ll find screw terminals. These are typically labeled for “door control,” “button,” “wall button,” or similar. This is where the wired connection from the smart controller will attach. If you have an existing wired button, you’ll usually connect the smart controller wires in parallel with those wires.
- Connect the Controller Wires: The smart controller will come with wires (often thin gauge). Connect these to the designated terminals on the opener. The order of these wires usually doesn’t matter, as they simply complete a circuit like a button press.
- Mount the Door Sensor: The sensor attaches to the garage door itself. This is usually done with adhesive strips or screws. It needs to be positioned so that the sensor and a corresponding reflector (or the sensor itself, depending on the design) align when the door is closed and separate when it’s open.
- Connect the Hub to Wi-Fi: Power on the main hub and use the manufacturer’s app to guide you through connecting it to your home’s 2.4GHz Wi-Fi network.
- Test and Configure: Once the physical connections and Wi-Fi setup are complete, test the system through the app. Open, close, and check that the status updates correctly. Configure any desired notifications or advanced settings.
Warning: If you are uncomfortable working with electrical wiring or cannot easily identify the correct terminals on your opener, it is best to hire a qualified garage door technician or an electrician for the installation. Incorrect wiring can damage your opener or the smart device, and pose a safety risk.
Professional Installation Options
If DIY isn’t your preference, most smart garage controller brands offer resources for finding professional installers. This is particularly advisable if:
- Your garage door opener is very old or complex.
- You have multiple doors or unusual garage configurations.
- You lack confidence in your ability to handle the wiring.
A professional installation ensures the device is connected correctly and safely, and they can often troubleshoot any compatibility issues on the spot. The cost for professional installation typically ranges from $100 to $250, depending on your location and the complexity of the job.
Troubleshooting Common Issues
Even with careful installation, you might encounter minor issues. Here are a few common ones:
- Connectivity Problems: Ensure your Wi-Fi signal is strong enough in the garage. You might need a Wi-Fi extender if the signal is weak. Restarting your router and the smart hub can also resolve temporary glitches.
- Inaccurate Door Status: If the door status isn’t updating correctly, check that the door sensor is properly aligned and securely mounted. Sometimes, recalibrating the sensor through the app can help.
- Opener Not Responding: Double-check the wiring connections to the opener terminals. Ensure the opener itself is functioning correctly by testing the wired wall button. If the opener has a reset button or requires a reset for the garage door opener remote, that might be a step to consider if the opener is behaving erratically, though this is less likely to be directly related to the smart controller’s wiring unless it caused a fault. Refer to