
When your Chamberlain garage door opener starts acting up, or if you’re selling your home and want to clear previous access, erasing codes is a common and necessary task. Whether it’s a remote, a keypad, or even rolling codes for security, knowing how to reset these can save you time and hassle.
This process ensures that only authorized devices can operate your garage door, maintaining security and peace of mind. Many homeowners find themselves needing to do this after losing a remote or when a new family member needs access.
Understanding the different types of codes and how they are stored on your Chamberlain opener is the first step. Chamberlain, a leading manufacturer in garage door opener technology, offers various models, each with its own specific reset procedure. While the core principles remain similar, minor variations exist between models, particularly concerning the location of the “Learn” or “Program” button.
This guide will walk you through the comprehensive process of erasing codes, covering remotes, keypads, and the underlying logic of your opener’s memory, ensuring you can effectively manage access to your garage.
Key Takeaways
- Locate the Learn Button: The primary step for erasing codes on most Chamberlain openers involves finding the “Learn” or “Program” button on the motor unit.
- Remote Code Erasure: Erasing all remotes typically involves pressing and holding the Learn button until the indicator light goes out, then pressing the remote button.
- Keypad Code Erasure: Keypads often have a dedicated erase function or require a full system reset to clear their codes.
- Security Considerations: Regularly clearing codes enhances security, especially if remotes are lost or stolen, or when selling a property.
- Model Specifics: While general procedures apply, always consult your specific Chamberlain model’s manual for precise instructions, as button locations and sequences can vary.
- Full System Reset: In some cases, a complete factory reset of the opener’s memory may be the most effective way to ensure all codes are cleared.
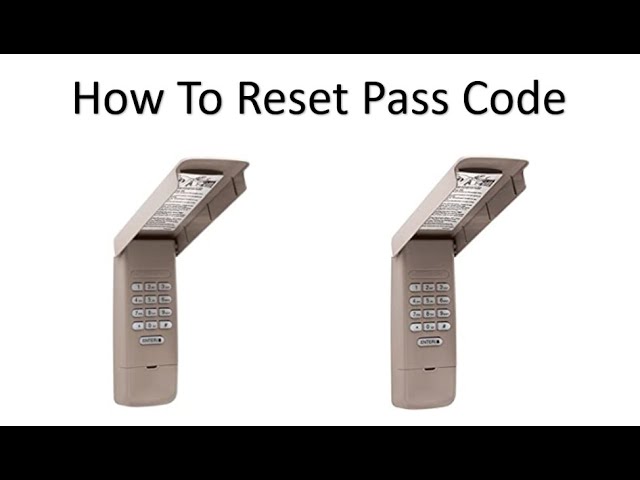
Credit: www.youtube.com
Understanding Chamberlain Garage Door Opener Codes
Chamberlain garage door openers utilize a system of codes to communicate securely with their remotes and keypads. These codes are essentially digital signals that the opener recognizes as valid commands to open or close the garage door. Over time, these codes may need to be erased for various reasons, such as enhanced security, troubleshooting, or preparing a property for sale.
Understanding the types of codes and how they are managed is crucial for performing this task effectively.
Types Of Codes
Chamberlain openers primarily use two types of coding technologies: Fixed Codes and Rolling Codes.
- Fixed Codes: These are older technologies where the remote and opener are programmed with a specific, unchanging code. While simpler, they are less secure as the code can potentially be intercepted. Most modern Chamberlain openers have moved beyond fixed code technology.
- Rolling Codes (Security+): This is Chamberlain’s advanced security technology. Each time you press the remote button, a new code is generated from a complex algorithm. The opener “rolls” through a vast series of codes, and only the opener and the remote know the current sequence. This makes it significantly harder for unauthorized individuals to “capture” and reuse a code.
Memory And Storage
The motor unit of your Chamberlain garage door opener houses the logic board that stores the programmed codes for all remotes and keypads. This memory is finite, though generally large enough for typical household use. When you program a remote or keypad, its unique identifier and/or code sequence is stored in this memory. Erasing codes means either deleting these stored identifiers or, in the case of rolling codes, resetting the opener’s synchronization with the remote.
Why Erase Codes?
There are several compelling reasons to erase codes on your Chamberlain garage door opener:
- Security: If a remote is lost or stolen, erasing its code prevents unauthorized access. Similarly, if you suspect a code has been compromised, a full erasure is the safest bet.
- Selling Property: When selling a home, it’s standard practice to clear all previous access codes to ensure the new owners have a secure system and old codes are no longer active.
- Troubleshooting: Sometimes, a garage door opener might malfunction due to corrupted code data or interference. Erasing and reprogramming can resolve these issues.
- Adding New Devices: In some instances, if the opener’s memory is full, you may need to erase older codes to make space for new remotes or keypads.
- Changing Access: If a family member moves out or you want to restrict access for any reason, erasing their specific remote or keypad code is necessary.

Credit: www.youtube.com
Erasing All Remote Codes
The most common scenario for erasing codes is when you want to remove all previously programmed remotes from your Chamberlain opener. This is a comprehensive security measure that ensures only remotes you reprogram afterward can operate the door. The process typically involves interacting with the “Learn” button on the motor unit.
Locating The Learn Button
The Learn button (sometimes labeled “Program” or “Set”) is your key to managing codes on most Chamberlain garage door openers. Its location varies depending on the model, but it’s almost always found on the motor unit itself, which is typically mounted to the ceiling in your garage.
- On older models: The Learn button is often located near the power terminal screws or under a light cover. You might need to remove a protective panel to access it.
- On newer models: It’s frequently found on the back or side of the motor unit, often accompanied by an LED indicator light.
Pro Tip: If you’re having trouble finding the Learn button, consult your specific Chamberlain model’s owner’s manual. You can usually find these online by searching for “Chamberlain [your model number] manual.”
The Erase Procedure (most Models)
For most Chamberlain openers equipped with Security+ technology, erasing all remote codes follows a standard procedure:
- Locate the Learn button on your garage door opener motor unit.
- Press and hold the Learn button for approximately 10-30 seconds. The duration can vary, so pay attention to the indicator light.
- Observe the LED indicator light next to the Learn button. It will typically blink or change color.
- As you continue to hold the button, the LED light will usually turn off or go solid, indicating that the opener has entered programming mode or is about to erase its memory.
- Release the Learn button once the LED light turns off or changes its behavior significantly.
- Immediately press and release the button on any one of your existing remotes that you wish to erase. This action confirms the erasure. Some systems require you to press the remote button again after a short pause.
- The overhead LED light on the motor unit will likely flash, or the main opener light will blink, confirming that the codes have been erased.
Example: On a Chamberlain LiftMaster Professional, you might press and hold the Learn button until the LED goes out (about 20 seconds). Then, release the button. The opener has now erased all previous remote codes. You would then need to reprogram any remotes you wish to use.
Verifying Erasure
After performing the erasure steps, it’s crucial to verify that the codes have indeed been cleared.
- Attempt to operate the garage door using any of your old remotes. They should no longer work.
- If you have a wireless keypad programmed to the opener, test it as well. It should also be deactivated.
If the old remotes and keypads still function, you may need to repeat the erasure process, paying close attention to the timing and the indicator lights, or consult your manual for model-specific nuances. It’s important to note that this process erases *all* previously programmed remotes and keypads. You will need to reprogram any remotes or keypads you intend to use going forward. For guidance on reprogramming, you can refer to resources on how to reset garage door remotes.
Erasing Specific Remote Codes (if Supported)
While most Chamberlain openers are designed to erase *all* paired remotes simultaneously for security reasons, some advanced models or specific programming sequences might allow for the deletion of individual remotes. This is less common for typical residential openers and more often found in commercial systems or when using specific programming tools.
Understanding The Limitation
The primary security feature of rolling code systems is their complexity. Allowing individual remote deletion would introduce potential vulnerabilities if not implemented with extreme care. Therefore, Chamberlain’s standard approach for residential units is a full memory wipe. This ensures that if a remote is lost, its code is definitively removed from the system, preventing any possibility of unauthorized access.
Alternative Methods For Individual Code Removal
If your model does not explicitly support individual remote deletion via the Learn button, the only way to effectively “remove” a specific remote’s access is to:
- Erase all codes: Perform the full system erasure as described in the previous section.
- Reprogram only the desired remotes: After erasing all codes, you will need to reprogram each remote you wish to continue using. This ensures that only the remotes you actively program back into the system will function.
This method effectively isolates the access to only the remotes you re-authorize, achieving the goal of removing access for a specific lost or unwanted remote.

Credit: www.youtube.com
Erasing Keypad Codes
Chamberlain keypads, both wired and wireless, also store codes that allow access to your garage. Erasing these can be done in a couple of ways, depending on the type of keypad and the opener model.
Wireless Keypads
Wireless keypads communicate with the opener’s motor unit. Erasing their codes typically involves either a specific keypad reset process or, more commonly, erasing all codes from the opener itself.
- Full Opener Reset: The most reliable method is to erase all codes from the garage door opener motor unit as described previously. This will deactivate any programmed wireless keypad. You will then need to reprogram the keypad using the opener’s Learn button. This process is detailed in guides on how to reprogram a Chamberlain garage door keypad.
- Keypad-Specific Reset (Less Common): Some very specific Chamberlain keypad models might have a hidden reset button or a sequence of button presses directly on the keypad itself to clear its memory. This is rare for standard Chamberlain keypads and usually requires consulting the keypad’s individual manual.
Wired Keypads
Wired keypads are directly connected to the opener’s logic board. Erasing codes for these usually requires accessing the opener’s control panel or performing a full system reset.
- Opener Control Panel: On some models, the wired keypad’s programming is managed through the opener’s main control panel, often located on the back of the motor unit. There might be a “Program” or “Set” button here, similar to the Learn button, that can be used to erase or re-enter codes.
- Full Opener Reset: As with wireless keypads, performing a full erasure of all codes from the motor unit will also clear the codes associated with a wired keypad.
Important Note: Always refer to your specific Chamberlain keypad and opener model’s manual for the most accurate instructions on erasing keypad codes. The interface and programming methods can differ significantly.
Performing A Full System Reset
In situations where you want to ensure all codes are cleared, or if you’re experiencing persistent issues, performing a full factory reset of the garage door opener’s memory can be the most effective solution. This process returns the opener to its original state, as if it were brand new, wiping out all programmed remotes, keypads, and any custom settings.
When To Consider A Full Reset
- Selling Your Home: To guarantee complete security for the new owners.
- Lost or Stolen Remotes/Keypads: When you cannot be certain which codes are compromised.
- Persistent Malfunctions: If other troubleshooting steps haven’t resolved issues potentially related to code memory.
- Upgrading to a New System: Preparing the opener for a completely new set of authorized devices.
The Reset Procedure
The exact steps for a full system reset can vary by Chamberlain model, but the general principle involves power cycling the unit while holding specific buttons.
- Disconnect Power: Unplug the garage door opener from the electrical outlet. For safety, always ensure the unit is not powered before proceeding.
- Locate the Learn Button: Find the Learn button on the motor unit.
- Press and Hold the Learn Button: Press and hold down the Learn button.
- Reconnect Power: While still holding the Learn button, plug the garage door opener back into the electrical outlet.
- Continue Holding: Keep holding the Learn button for approximately 15-30 seconds after reconnecting power.
- Observe Indicator Lights: Watch the indicator lights on the motor unit. They may flash, change color, or turn off.
- Release the Button: Release the Learn button once you observe the expected behavior indicating a reset (e.g., all lights turn off, or a specific sequence of flashes occurs).
- Confirmation: The opener’s memory is now cleared. The overhead LED light on the motor unit may flash or turn off to confirm the reset.
Example: For some Chamberlain models, holding the Learn button while plugging the unit back in and continuing to hold it until the LED indicator light turns off is the method for a full factory reset.
After a full system reset, all previously programmed remotes and keypads will be erased. You will need to reprogram any devices you intend to use. This is a more thorough approach than just erasing remotes and is often recommended for maximum security. If you need to adjust other settings after a reset, you may need to learn how to adjust a Chamberlain garage door opener.
Reprogramming After Erasure
Once you have successfully erased all codes, your garage door opener will not respond to any previously programmed remotes or keypads. The next crucial step is to reprogram the devices you wish to use. This process ensures that only your authorized remotes and keypads are linked to your opener.
Reprogramming Remotes
- Locate the Learn Button: Find the Learn button on the garage door opener motor unit.
- Press and Release the Learn Button: Press and release the Learn button once. The LED indicator light next to it should illuminate and stay lit. You typically have about 30 seconds to complete the next step.
- Press the Remote Button: Press and hold the button on the remote control you want to program.
- Observe Confirmation: Hold the remote button down until you see the garage door opener’s lights flash or hear it click. This indicates successful programming.
- Test the Remote: Release the remote button. Press the remote button again to test if it now operates the garage door.
- Repeat for Additional Remotes: Repeat steps 3-5 for any other remotes you want to program.
Reprogramming Keypads
- Locate the Learn Button: Find the Learn button on the garage door opener motor unit.
- Press and Release the Learn Button: Press and release the Learn button. The LED indicator light should illuminate.
- Enter Your Desired Code: On the keypad, enter your chosen 3- to 4-digit PIN code.
- Press the Enter/Program Button: Press and hold the “Enter” or “Program” button on the keypad.
- Observe Confirmation: While holding the Enter/Program button, press the “0” or “1” button on the keypad. The LED indicator light on the motor unit will flash, or you’ll hear a click, indicating successful programming.
- Test the Keypad: Release all buttons. Try entering your PIN code on the keypad and pressing the Enter button to operate the garage door.
- Repeat for Additional Keypads (if applicable): Follow the same steps to program any other keypads.
Note: Some keypads may have a slightly different programming sequence. Always refer to your specific keypad’s manual if you encounter issues. For instance, programming a Genie keypad has its own distinct steps, similar to how Genie keypads are programmed.
Troubleshooting Common Issues
Even with clear instructions, you might encounter problems when trying to erase or reprogram codes on your Chamberlain garage door opener. Here are some common issues and their potential solutions:
Remote Not Working After Erasure
- Issue: The remote still doesn’t operate the door after erasing and attempting to reprogram.
- Possible Causes:
- Incorrect Erasure: The codes weren’t fully erased. Try the erasure process again, paying close attention to the LED indicator light and timing.
- Incorrect Reprogramming: The reprogramming sequence wasn’t followed precisely. Double-check the steps for your specific model.
- Battery: The remote’s battery might be dead or low. Replace the battery.
- Compatibility: The remote might not be compatible with your opener model. Ensure you are using the correct type of remote for your Chamberlain opener.
- Range: You might be too far from the opener during programming. Try programming from closer proximity.
Opener Not Responding To Learn Button
- Issue: Pressing the Learn button on the motor unit doesn’t seem to do anything; no light illuminates.
- Possible Causes:
- Power Issue: Ensure the opener is properly plugged in and receiving power. Check your circuit breaker.
- Faulty Learn Button: The button itself might be damaged or malfunctioning.
- Interference: Other electronic devices nearby could be causing interference.
- Internal Logic Board Failure: In rare cases, the logic board within the opener may have failed.
Keypad Not Working After Reprogramming
- Issue: The keypad doesn’t open the door even after following the reprogramming steps.
- Possible Causes:
- Incorrect PIN: You might be entering the wrong PIN code. Ensure you are using the new code you just programmed.
- Keypad Battery: The keypad might need new batteries.
- Programming Error: The programming sequence was interrupted or incorrect. Repeat the keypad reprogramming process carefully.
- Signal Issue: The keypad might not be communicating effectively with the opener. Ensure there are no major obstructions and that the keypad is within range.
Opener Light Flashes Rapidly
- Issue: The opener’s main light flashes rapidly and continuously.
- Possible Causes:
- Error Code: This often indicates an error or a specific status. Consult your manual; it might signify a need for adjustment or indicate a problem with the door itself (e.g., obstruction).
- Interference: Strong radio frequency interference can sometimes cause unusual light patterns.
- System Reset Confirmation: In some models, rapid flashing can indicate that a system reset has occurred.
Example Case Study: A homeowner was selling their house and wanted to erase all old remote codes. They followed the steps to press and hold the Learn button on their Chamberlain opener until the light went out. However, when they tried to reprogram their existing remotes, only one out of three worked. Upon closer inspection, they realized they had initially tried to reprogram a remote that was not compatible with their opener model. After identifying the correct remote type and repeating the reprogramming process for the remaining two remotes, all worked perfectly. This highlights the importance of using compatible accessories and double-checking model numbers.
If you continue to experience problems, it’s advisable to consult the specific troubleshooting section of your Chamberlain owner’s manual or contact Chamberlain customer support for assistance. Sometimes, issues might also relate to the physical condition of your garage door, such as the need to lube garage door rollers or adjust the chain, which can affect opener performance.
Frequently Asked Questions
Why Should I Erase Codes From My Chamberlain Garage Door Opener?
Erasing codes enhances security, especially if remotes are lost or stolen. It’s also a crucial step when selling a property to ensure the new owners have a secure system, and it can help resolve certain operational glitches by resetting the opener’s memory.
How Often Should I Erase And Reprogram My Garage Door Opener Codes?
There’s no strict schedule, but it’s highly recommended to erase and reprogram codes annually for optimal security. You should definitely do it immediately if a remote is lost or stolen, or when you move out of a property.
Will Erasing Codes Affect My Opener’s Force Settings Or Travel Limits?
No, erasing remote and keypad codes typically only affects the stored access credentials. It does not alter the opener’s force settings, travel limits, or other operational parameters. These are usually adjusted separately.