Now Reading: How To Fix Garage Door Spring Cable
- 01
How To Fix Garage Door Spring Cable

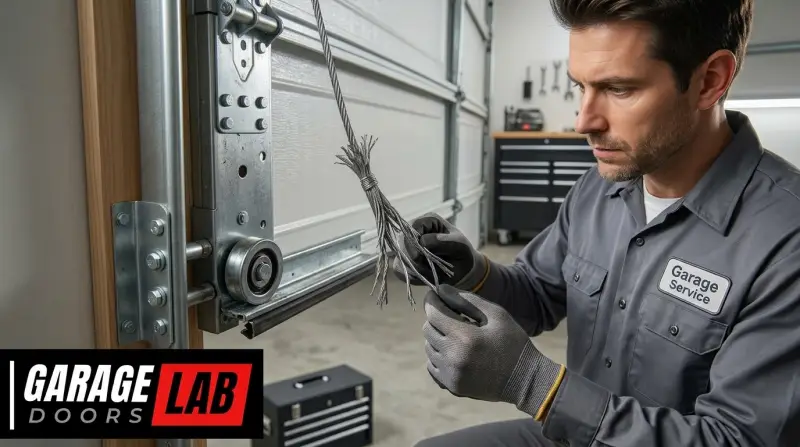
The garage door is a vital component of your home, offering security, convenience, and protection from the elements. When its spring system malfunctions, particularly the cables that work in tandem with the springs, it can render the entire door inoperable and potentially dangerous.
These cables are under immense tension, and their failure can be a startling event, often accompanied by a loud snap. Understanding how to address a broken or frayed garage door spring cable is crucial for homeowners looking to restore functionality and ensure safety.
While some repairs are best left to professionals due to the inherent risks, knowing the signs of trouble and the basic steps involved can empower you to make informed decisions.
This guide will walk you through the complexities of garage door spring cables, from identifying common issues to outlining the repair and replacement process. We’ll cover the different types of cables, the tools you’ll need, and the critical safety precautions that must be observed.
By the end, you’ll have a comprehensive understanding of how to fix garage door spring cables, or at least know when it’s time to call in the experts.
Key Takeaways
- Cable Function: Garage door cables work with torsion or extension springs to lift and lower the heavy door smoothly and safely.
- Common Issues: Frayed, snapped, or detached cables are the primary problems, often caused by wear and tear, rust, or improper tension.
- Safety First: Garage door springs and cables are under extreme tension; attempting repairs without proper knowledge and safety gear can lead to severe injury.
- Diagnosis: Visually inspect cables for damage, listen for unusual noises, and observe the door’s operation for signs of cable problems.
- DIY vs. Professional: Simple reattachment might be possible for some DIYers, but a snapped cable or significant damage usually requires professional replacement due to safety concerns.
- Tools and Materials: Essential tools include winding bars, locking pliers, a ladder, safety glasses, gloves, and potentially new cables and drums.
- Tension is Key: Properly tensioning the springs after cable replacement is critical for the door’s balance and safe operation.
- Preventive Maintenance: Regular lubrication and inspection can extend the life of your garage door cables and springs.

Credit: seenorest.com
Understanding Garage Door Cable Systems
Garage doors are heavy, often weighing between 150 to 350 pounds or more. To lift and lower this weight effortlessly, they rely on a sophisticated spring system. The cables are an integral part of this system, working in conjunction with either torsion springs or extension springs.
Their primary role is to transfer the lifting force generated by the springs to the bottom corners of the garage door, allowing it to move smoothly along its tracks.
Torsion Spring Systems
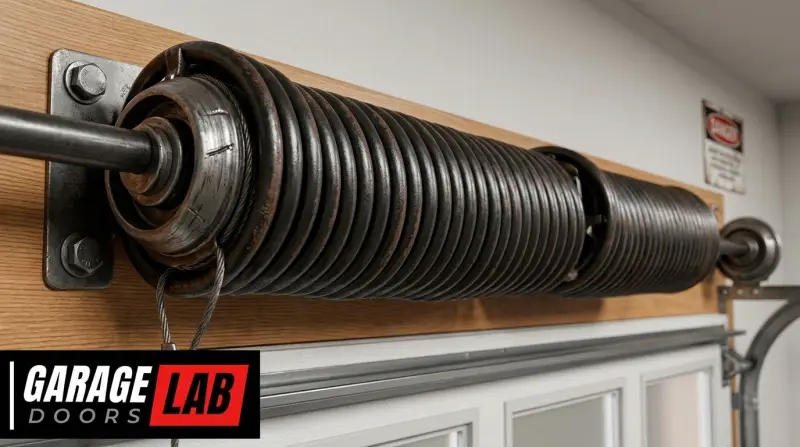
Many modern garage doors utilize a torsion spring system. In this setup, one or two large springs are mounted horizontally on a shaft above the garage door opening. As the door closes, the springs are wound tighter, storing energy. Cables are attached to the bottom corners of the door and then run down to a pulley system connected to the ends of the torsion spring shaft. When the door opens, the unwinding springs release their stored energy, and the cables pull the door upwards. The cables are typically routed through a cable drum located at each end of the torsion spring shaft, which helps to wind and unwind them evenly.
Extension Spring Systems
Older or lighter-duty garage doors might use extension springs. These springs are mounted horizontally along the garage door tracks, running parallel to the door’s travel. When the door is closed, the extension springs are stretched, storing energy. Cables are attached to the bottom corners of the door and run through pulleys located at the ends of the springs. As the door opens, the springs contract, and the cables pull the door upwards. The tension in these systems is often adjusted by moving the anchor points of the springs or by adding safety cables that run through the center of the springs to prevent them from flying across the garage if they break.
How Cables Interact With Springs
Regardless of the spring type, the cables are the critical link transferring power. They are designed to be strong enough to withstand the constant stress of lifting and lowering the door. When a cable becomes frayed, stretched, or snaps, it disrupts this delicate balance.
A snapped cable in a torsion system often results in a loud “crack” and the door becoming extremely difficult, if not impossible, to lift manually. In an extension system, a snapped cable can cause the door to sag unevenly or become completely stuck.
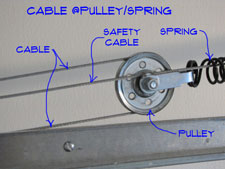
Credit: voetenenkelchirurg.be
Diagnosing Garage Door Cable Problems
Identifying a problem with your garage door cables requires a careful visual inspection and an understanding of how the door should operate. Several signs can indicate that your cables are in distress or have failed.
Signs Of Frayed Or Worn Cables
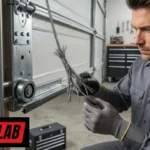
Over time, the constant friction and tension can cause garage door cables to fray. This is particularly common if the cables rub against the tracks, the drum, or other components. Look for:
- Visible Strands: Individual metal strands of the cable appearing loose or broken.
- Rough Texture: The cable surface feeling rough or uneven.
- Kinks or Knots: Any unusual bends or twists in the cable that weren’t there before.
- Rust or Corrosion: Especially if you live in a humid or coastal environment, rust can weaken the cable.
Signs Of A Snapped Cable
A snapped cable is usually more dramatic. You might hear a loud bang or snap sound, followed by the door behaving erratically. Signs include:
- Door Sagging Unevenly: One side of the door might be lower than the other when closed, or it might hang at an angle when partially open.
- Inability to Lift: The door becomes extremely heavy or completely immovable.
- Cable Hanging Loose: A portion of the cable is visibly detached and hanging slack.
- Pulley or Drum Issues: The cable may have slipped off its pulley or drum.
Signs Of Detached Cables
Sometimes, a cable doesn’t snap but simply detaches from its anchor point at the bottom of the door or from the cable drum/pulley system. This can happen due to:
- Loose Anchor Bolts: The bolts securing the cable to the door or drum may have loosened.
- Worn Drum Grooves: The grooves in the cable drum can wear down, causing the cable to slip out.
- Improper Installation: If the cable was not correctly seated or tensioned during a previous repair.
Pro Tip: Always disconnect your garage door opener from the power source before inspecting or attempting any repairs. This prevents accidental activation of the opener while you are working on the door. You can do this by unplugging the unit or flipping the circuit breaker.
Safety Precautions Before You Begin
Working with garage door springs and cables is inherently dangerous. These components are under extreme tension, and a failure during repair can result in severe injury or even death. It is imperative to prioritize safety above all else.
Understanding The Risks
- Stored Energy: Even when the door is in the closed position, the springs (torsion or extension) store a significant amount of energy. Releasing this energy unexpectedly can cause components to fly with considerable force.
- Cable Tension: Cables are also under high tension. If they snap or detach during an attempted repair, they can whip around violently.
- Heavy Components: The garage door itself is heavy. If it becomes unbalanced due to a cable issue, it can fall rapidly.
Essential Safety Gear
Before you even consider touching a garage door cable, ensure you have the following safety equipment:
- Safety Glasses: To protect your eyes from flying debris or snapping metal.
- Heavy-Duty Gloves: To protect your hands from sharp edges, rust, and potential cable snaps.
- Sturdy Footwear: Closed-toe shoes are essential for protecting your feet.
Securing The Garage Door
If a cable has snapped or is severely damaged, the door is likely unbalanced and could be unstable.
- Manual Operation: If the door can still be moved slightly, try to open it to a point where it is stable, or close it completely. Never leave a door in a precarious, partially open position.
- Locking Pliers: Use a pair of locking pliers (like Vise-Grips) to clamp onto the track above the bottom roller on both sides of the door. This will help prevent the door from moving unexpectedly while you assess the situation or prepare for repair.
- C-Clamps: For added security, especially on older doors, you can use C-clamps on the tracks.
Disconnecting The Opener
As mentioned earlier, always disconnect the garage door opener. This is crucial to prevent it from trying to operate a door that is not properly balanced or is mechanically compromised. Unplug the opener from the electrical outlet or turn off the corresponding circuit breaker.
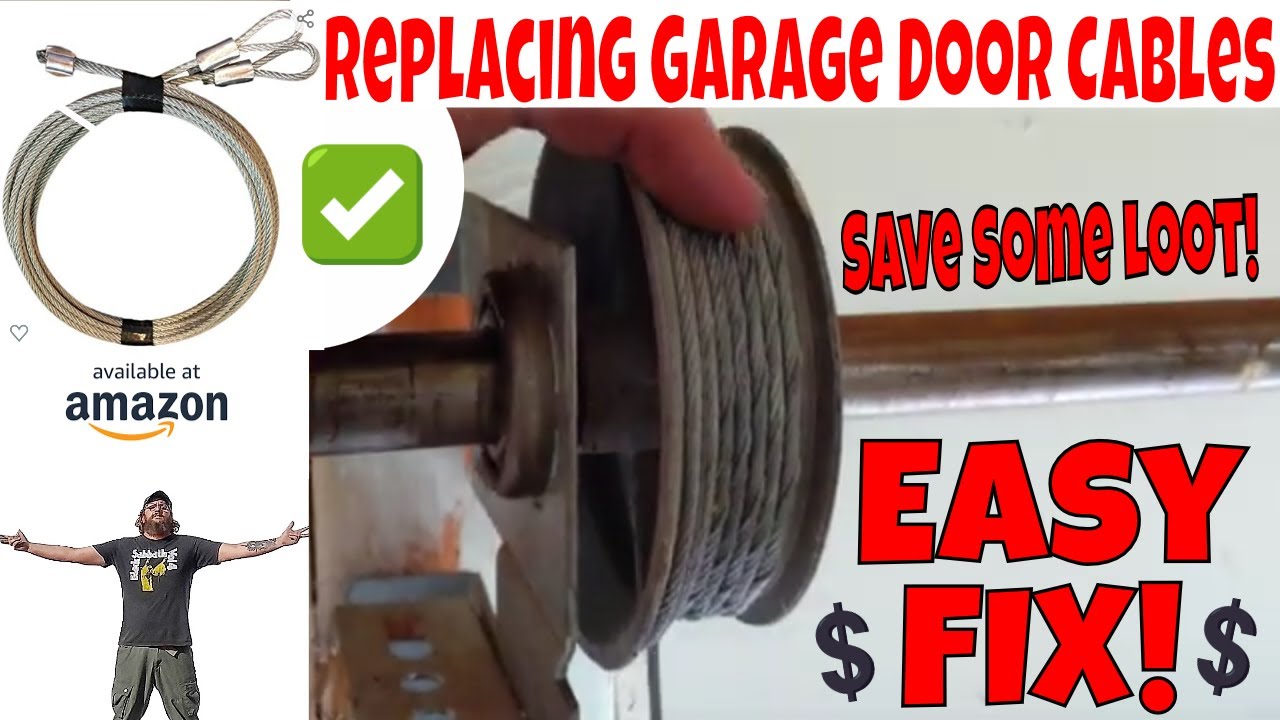
Credit: www.youtube.com
Replacing A Broken Garage Door Spring Cable (torsion System)
Replacing a broken cable in a torsion spring system is a complex and potentially hazardous task. It involves working directly with the tensioned springs and requires specific tools and knowledge. For this reason, professional assistance is strongly recommended. However, understanding the process can help you communicate effectively with a technician or decide if you have the necessary expertise and risk tolerance.
Tools And Materials Needed
- New Cable Set: Ensure they are the correct length and diameter for your door.
- Cable Drums: You may need new drums if the old ones are damaged or worn.
- Winding Bars: Crucial for safely winding and unwinding torsion springs. Never use pipes or other makeshift tools, as they can bend or break, leading to injury.
- Locking Pliers (Vise-Grips): To secure the door and shaft.
- Adjustable Wrench: For loosening and tightening bolts.
- Ladder: A stable ladder to reach the torsion spring assembly.
- Safety Glasses and Gloves: Non-negotiable.
- Cable Tensioning Tool (Optional but Recommended): For more precise tensioning.
Step-by-step Replacement Process (professional Guidance Recommended)
- Prepare the Door: Ensure the door is fully closed. Disconnect the opener. Clamp the door to the tracks to prevent movement.
- Release Spring Tension: This is the most dangerous step.
- Secure the torsion spring shaft with locking pliers so it cannot rotate.
- Loosen the set screws on the cable drums at both ends of the shaft.
- Carefully use winding bars to slowly release the tension on the springs. This must be done gradually, typically by moving the bar one-quarter turn at a time, ensuring the shaft does not slip.
- Once all tension is released, the springs should be loose on the shaft.
- Remove Old Cables:
- Unscrew the bottom brackets holding the cables to the door.
- Carefully detach the cables from the drums. You may need to unwind them completely from the drum grooves.
- Install New Cables:
- Thread the new cables into the grooves of the cable drums, ensuring they are seated correctly.
- Attach the free end of each cable to the bottom bracket on the corresponding side of the door. Ensure the cable is taut and the bottom bracket is positioned correctly to maintain door balance.
- Secure the drums by tightening their set screws onto the shaft.
- Re-tension the Springs:
- This step requires extreme caution. Using winding bars, carefully wind the torsion springs. The number of turns required depends on the door’s weight and spring size. An improperly wound spring can lead to door imbalance or spring failure.
- As you wind, use locking pliers to secure the shaft at intervals to prevent it from unwinding unexpectedly.
- Once the correct tension is applied, securely tighten the set screws on the drums.
- Test the Door:
- Remove the locking pliers from the tracks.
- Reconnect the opener.
- Manually lift and lower the door to check for smooth operation and proper balance. The door should stay open at any position when the opener is disengaged.
- Run the opener through a few cycles to ensure it functions correctly.
Example: A common mistake is using the wrong number of turns when re-tensioning the torsion springs. This can lead to the door being too heavy to lift manually or too light, causing the opener to struggle or the door to slam shut. A professional technician will know the precise winding requirements based on the door’s specifications.
Replacing A Broken Garage Door Spring Cable (extension System)
Extension spring systems are generally considered less dangerous to work on than torsion systems, but they still require careful attention, especially regarding the springs’ tension.
Tools And Materials Needed
- New Cable Set: Matched to your door’s size and weight.
- Pulleys: If the existing ones are damaged.
- Safety Cables (Recommended): These run through the center of the extension springs to contain them if they break.
- Locking Pliers or C-Clamps: To secure the door.
- Ladder: For access.
- Safety Glasses and Gloves: Essential.
- Wrench Set: For bolts and fasteners.
Step-by-step Replacement Process
- Prepare the Door: Ensure the door is fully closed. Disconnect the opener. Clamp the door to the tracks to prevent movement.
- Secure the Springs: If the cables have snapped, the extension springs may have sprung loose. Use locking pliers or clamps to secure the springs and prevent them from moving.
- Remove Old Cables:
- Unscrew the bottom bracket holding the cable to the door.
- Detach the cable from the pulley system at the end of the spring.
- If safety cables are present, you’ll need to detach them as well.
- Install New Cables:
- Thread the new cable through the pulley at the end of the extension spring.
- Attach the cable to the bottom bracket on the door. Ensure the cable is properly seated in the roller groove.
- If using safety cables, thread them through the extension springs and secure them according to the manufacturer’s instructions.
- Adjust Spring Tension:
- Extension springs are tensioned by adjusting their attachment points or by using S-hooks or winding cones to change the gap between coils.
- The goal is to achieve a balanced door. When the door is closed, the springs should have a moderate amount of tension. When the door is open, the springs should be nearly fully extended but not over-stretched.
- This often involves trial and error. Adjust the tension incrementally until the door can be lifted and lowered smoothly and stays put when disengaged from the opener.
- Test the Door:
- Remove all clamps and locking pliers.
- Reconnect the opener.
- Manually operate the door to check for smooth movement and balance. The door should hold its position when you let go.
- Test the opener’s function.
Pro Tip: If your extension springs do not have safety cables, it’s highly recommended to install them. They significantly reduce the risk of injury if a spring breaks.
Cable Maintenance And Prevention
Preventing cable failure is often easier and safer than repairing it. Regular maintenance can significantly extend the life of your garage door cables and ensure smooth operation.
Regular Inspection
Make it a habit to visually inspect your garage door cables at least twice a year, or more often if you live in an area with extreme weather conditions.
- Check for Fraying: Look closely for any signs of broken strands, wear, or unraveling.
- Inspect for Rust: Pay attention to any signs of corrosion, especially at connection points or areas where the cable might collect moisture.
- Examine Anchor Points: Ensure the cables are securely attached to both the bottom brackets on the door and the drums or pulleys. Check for any loose bolts or signs of wear around these points.
- Observe Cable Path: Make sure the cables are running smoothly through their designated path without rubbing against any obstructions.
Lubrication
While cables themselves don’t typically require lubrication (they are usually made of galvanized steel), the rollers and tracks do. Keeping these components well-lubricated reduces friction, which in turn reduces stress on the entire system, including the cables.
- Lubricate Rollers: Use a silicone-based spray lubricant on the rollers. You can follow our detailed guide on how to lubricate garage door rollers for best results.
- Clean and Lubricate Tracks: Ensure the vertical and horizontal tracks are free of debris and are lightly lubricated.
Tension Checks
- Torsion Springs: Periodically check that the set screws on the cable drums are tight. Loose drums can lead to cables slipping off.
- Extension Springs: Ensure the springs are not over-stretched or sagging excessively. If they appear worn or have lost their tension, they may need replacement.
Avoiding Misuse
- Don’t Force the Door: If the door feels unusually heavy or is sticking, don’t try to force it open or closed. This can put undue stress on the cables and springs. Investigate the problem first.
- Keep Clear: Ensure children and pets do not play near the garage door when it is in operation, as this can lead to accidents involving moving parts.
When To Call A Professional
While some minor adjustments might be within the reach of a confident DIYer, attempting significant repairs on garage door cables, especially those involving spring tension, carries substantial risks.
Situations Demanding Professional Help
- Snapped Cables: If a cable has snapped, the spring system is compromised, and safely re-tensioning it requires specialized knowledge and tools.
- Damaged Springs: If you suspect the springs themselves are damaged, rusted, or have lost tension, they must be replaced by a professional.
- Uncertainty About Tension: If you are unsure about the correct number of turns needed to wind a torsion spring or how to properly tension extension springs, do not guess. Incorrect tension is a major safety hazard.
- Lack of Proper Tools: If you don’t have the specialized tools like winding bars, attempting the repair can be extremely dangerous.
- Any Hesitation: If you feel uncomfortable, unsure, or apprehensive at any point, it is always best to err on the side of caution and call a qualified garage door technician. The cost of a professional repair is far less than the potential cost of a serious injury.
Finding A Reliable Technician
When seeking professional help, look for:
- Reputable Companies: Check online reviews, ask for recommendations from neighbors, or consult local directories.
- Licensed and Insured: Ensure the technician and company are licensed and insured to protect yourself.
- Experience: Choose technicians with specific experience in garage door spring and cable replacement.
- Clear Estimates: Get a written estimate before work begins, detailing the parts and labor involved.
The average cost for professional garage door cable repair or replacement can range from $100 to $300, depending on the complexity of the job and your location. This is a small price to pay for safety and peace of mind. For a broader understanding of garage door costs, you can explore resources on how much a garage door costs.
Frequently Asked Questions
How Long Do Garage Door Cables Typically Last?
Garage door cables are designed for durability, but their lifespan varies greatly depending on usage, environmental factors, and maintenance. On average, they can last anywhere from 5 to 15 years. Factors like frequent use, exposure to moisture (leading to rust), and lack of lubrication on rollers and tracks can shorten their lifespan.
Regular inspections are key to identifying wear before failure.
Can I Just Reattach A Detached Cable Without Replacing The Spring?
In some very specific and rare cases, if a cable has simply slipped off its drum or anchor point and the spring itself is in good condition, a DIYer with the right tools and caution might be able to reattach it.
However, this process often involves dealing with spring tension, which is extremely dangerous. If the cable has frayed or snapped, it indicates wear that likely affects the spring system, and professional assessment is crucial. It’s generally safer to assume a problem with a detached cable requires a technician’s expertise.
What Is The Difference Between Torsion Springs And Extension Springs, And How Does It Affect Cable Repair?
Torsion springs are mounted horizontally above the garage door, and cables run from the bottom corners of the door up to pulleys attached to the spring shaft. Extension springs are mounted horizontally along the tracks, and cables run from the bottom corners through pulleys near the springs.
Repairing cables on a torsion system is generally more dangerous due to the higher tension and the need for specialized winding bars to safely release and reapply tension. Extension spring cable repair is often considered less hazardous, but still requires careful handling of spring tension.
What Are The Symptoms Of A Garage Door Cable That Is About To Break?
Before a cable snaps entirely, there are usually warning signs. The most common symptom is visible fraying or unraveling of the metal strands. You might also notice the cable developing kinks or looking unusually loose. If one side of your garage door appears lower than the other when closed, or if the door operates unevenly or with a grinding noise, it could indicate a cable is wearing out or has started to detach from its anchor point.