
When your garage door opener remote suddenly stops responding, or you’ve purchased a new remote, the immediate thought might be a complex repair. However, for Craftsman garage door openers, programming a new remote is often a straightforward process. Many Craftsman openers utilize a rolling code technology for enhanced security, meaning the code changes with each use. This guide will walk you through the essential steps to program your Clicker garage door opener to a Craftsman opener, ensuring you regain seamless access to your garage.
The ability to program a remote to your garage door opener is a common homeowner task that can save time and money. Instead of calling a technician for what is often a simple fix, understanding the programming steps empowers you to handle it yourself. This process typically involves interacting with the learn button on your garage door opener motor unit, a small, often colored button that initiates the pairing sequence.
Key Takeaways
- Identify Your Opener Type: Craftsman openers use different technologies, primarily Security+ and Security+ 2.0, which dictate the remote compatibility and programming method.
- Locate the Learn Button: This is crucial for initiating the programming process and is usually found on the back or side of the garage door opener motor unit.
- Understand Remote Compatibility: Not all Clicker remotes are compatible with all Craftsman openers. Check the remote’s specifications and the opener’s manual.
- Follow a Step-by-Step Process: Programming typically involves pressing the learn button, then pressing the desired button on the new remote within a specific timeframe.
- Test Thoroughly: After programming, test the remote multiple times to ensure it operates the garage door reliably.
- Troubleshooting is Key: If the initial programming fails, re-checking compatibility, battery strength, and following the steps precisely are vital.
Understanding Craftsman Garage Door Opener Technology
Craftsman garage door openers have evolved over the years, with different models employing various technologies to enhance security and functionality. Understanding which technology your Craftsman opener uses is the first critical step before attempting to program any remote, including a Clicker universal remote. Most modern Craftsman openers utilize either Security+ or Security+ 2.0 technology. Older models might use simpler fixed code systems, though these are less common for security reasons.
Security+ technology, introduced by LiftMaster (the manufacturer behind Craftsman openers for many years), employs a rolling code system. This means that each time you press the remote button, a new code is transmitted to the opener. The opener and remote are synchronized, so the opener recognizes the valid, next code in the sequence. This significantly enhances security compared to fixed code systems, where a thief could potentially record and replay the signal.
Security+ 2.0 is an advancement of the Security+ system, offering even greater security and range. It uses a different frequency band and a more sophisticated encryption algorithm. This technology is designed to overcome interference and ensure a more reliable connection. When purchasing a Clicker universal remote, it’s essential to ensure it is compatible with the specific Security+ or Security+ 2.0 system your Craftsman opener employs. Many universal remotes are designed to work with a wide range of models, but verifying compatibility can prevent a lot of frustration.
Security+ Vs. Security+ 2.0
The primary difference between Security+ and Security+ 2. 0 lies in their frequency and encryption. Security+ typically operates on a 390 MHz frequency, while Security+ 2. 0 often uses a 315 MHz frequency with enhanced encryption. This difference is crucial because a remote programmed for Security+ will not work with a Security+ 2.
0 opener, and vice versa, unless the remote is specifically designed to handle both.
| Feature | Security+ | Security+ 2.0 |
|---|---|---|
| **Frequency** | Typically 390 MHz | Typically 315 MHz |
| **Code Type** | Rolling Code | Enhanced Rolling Code |
| **Security** | High (prevents code grabbing) | Very High (advanced encryption) |
| **Range** | Standard | Extended and more reliable |
| **Interference** | Susceptible to some interference | Highly resistant to interference |
| **Compatibility** | Older LiftMaster, Chamberlain, Craftsman | Newer LiftMaster, Chamberlain, Craftsman |
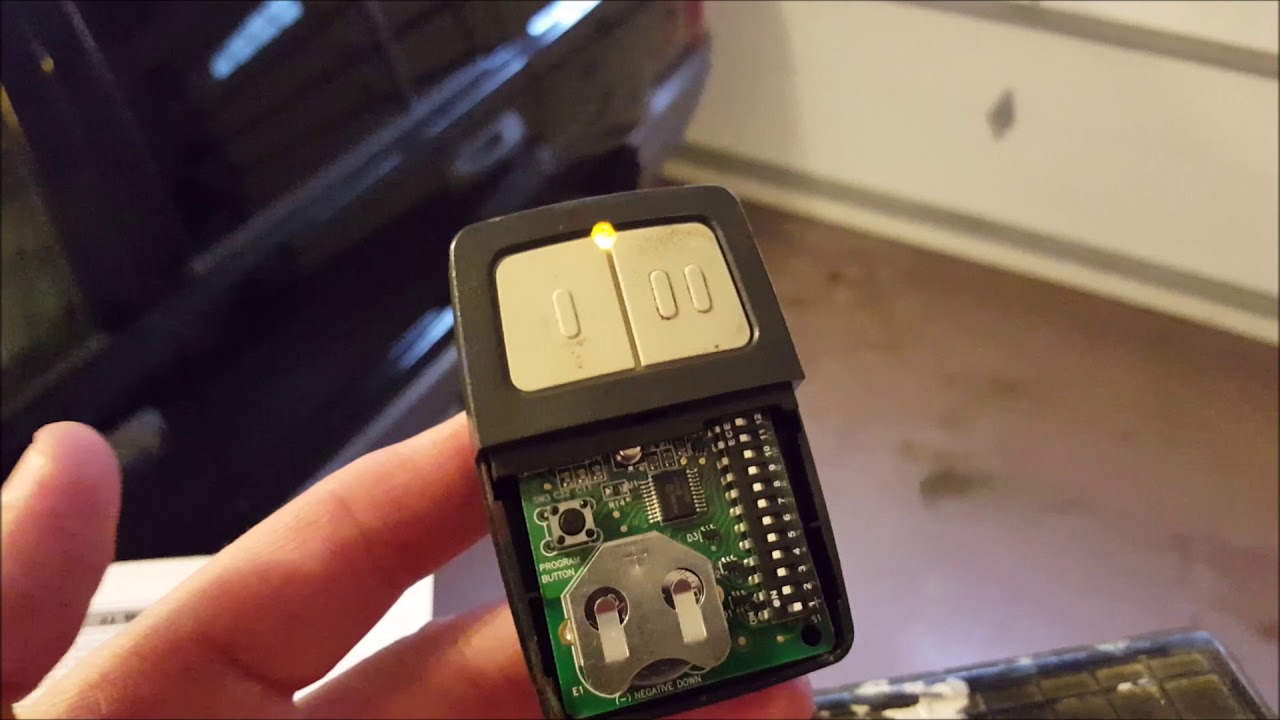
When selecting a Clicker remote, look for models explicitly stating compatibility with Craftsman openers and the relevant Security+ or Security+ 2. 0 versions. Often, the remote packaging or manual will list compatible brands and technologies. If you’re unsure about your opener’s technology, consult your owner’s manual or look for labels on the motor unit itself.
Credit: www.youtube.com
Preparing For The Programming Process
Before you begin the actual programming of your Clicker remote to your Craftsman garage door opener, a few preparatory steps will ensure the process goes smoothly. These steps involve gathering necessary items, ensuring the opener is ready, and understanding the basic mechanics of the programming sequence.
Rushing into programming without these preparations can lead to errors and the need to repeat the process.
Gathering Your Tools And Information
You won’t need a toolbox full of specialized equipment, but having a few items on hand will be beneficial.
- The Clicker Remote: Ensure it’s the correct model for your Craftsman opener and has a fresh battery. A low battery in the remote is one of the most common reasons for programming failure.
- Your Craftsman Garage Door Opener Manual: While this guide provides steps, the original manual for your specific opener model is an invaluable resource. It will contain precise details about the location of the learn button and any model-specific nuances.
- A Ladder or Stool: The learn button is typically located on the motor unit, which is mounted on the ceiling of your garage. You’ll need a stable way to reach it safely.
- A Pen and Paper (Optional): You might want to note down the sequence of button presses or any error codes if your opener displays them.
Locating The Learn Button On Your Craftsman Opener
The learn button is the gateway to programming your remote. Its location can vary slightly depending on the model year and design of your Craftsman opener. However, it’s almost always found on the main motor unit that hangs from your garage ceiling.
Common locations include:
- On the back panel of the motor unit.
- Underneath a light cover. You may need to gently pry off the plastic cover that houses the light bulb.
- On the side panel of the motor unit.
The learn button is usually a small, square or round button, often colored. Common colors for Craftsman openers include red, orange, purple, green, or yellow. The color can sometimes indicate the frequency or technology type of your opener, which is helpful information. Look for a label that says “Learn,” “Program,” or “Set.”
Resetting Your Garage Door Opener (if Necessary)
In some cases, particularly if you’re experiencing persistent issues or have tried programming unsuccessfully multiple times, you might need to reset your garage door opener. Resetting the opener clears any previously programmed remotes and keypads, allowing you to start fresh. This is a more drastic step and should be considered if simpler programming methods fail.
To reset most Craftsman garage door openers:
- Locate the learn button on the motor unit.
- Press and hold down the learn button for approximately 10-30 seconds. The indicator light next to the learn button will typically flash or go out to confirm the reset.
- Release the button.
After a reset, you will need to reprogram all your remotes and keypads, as they will no longer be recognized by the opener. This is a good opportunity to ensure you have all your remotes and are ready to reprogram them. For more detailed instructions on resetting your specific model, refer to your owner’s manual or consult resources like this comprehensive guide on resetting garage door openers.
Credit: www.youtube.com
Programming Your Clicker Remote: Step-by-step
Once you’ve identified your opener’s technology, located the learn button, and ensured you have a fresh battery in your Clicker remote, you’re ready to begin the programming process. This is a sequential task, and following the steps precisely within the given timeframes is crucial for success.
Step 1: Activate The Learn Mode On The Opener
This is the first active step in the programming sequence.
- Safely ascend your ladder or stool to reach the garage door opener motor unit.
- Locate the learn button.
- Press and release the learn button. Do not hold it down for an extended period at this stage, as that often initiates a reset.
- You will typically see an LED indicator light next to the learn button illuminate or begin to flash. This indicates that the opener is now in learn mode and is ready to receive a signal from a new remote. You usually have about 30 seconds to complete the next step before the opener exits learn mode.
Step 2: Program The Clicker Remote
This step involves teaching the opener which button on your Clicker remote should operate the door.
- Take your Clicker remote.
- Press and hold down the button on the remote that you want to use to open and close your garage door.
- Continue to hold down the remote button.
- While holding the remote button, press and release the learn button on the garage door opener motor unit. (Note: Some manuals may instruct you to press and release the learn button first, then press the remote button; always defer to your opener’s manual if there’s a discrepancy).
- The LED indicator light on the opener may blink or turn off, signaling that it has received the signal.
- Release the button on the remote.
Step 3: Test The Remote
After programming, it’s essential to test if the remote has been successfully paired with the opener.
- Descend from your ladder.
- Stand a reasonable distance away from the garage door (not so close that you can easily reach it manually, but not so far that signal strength might be an issue).
- Press the button on your Clicker remote that you just programmed.
- Your garage door should begin to open or close.
If the door operates as expected, congratulations! You have successfully programmed your Clicker remote. If it does not work, do not despair. There are troubleshooting steps you can take.
Step 4: Reprogramming If Necessary
If the remote doesn’t work after the first attempt, it’s often due to a slight timing issue, incorrect button press, or a compatibility problem.
- Repeat the entire process from Step 1. Pay close attention to the timing, you generally have about 30 seconds from pressing the opener’s learn button to pressing the remote button.
- Ensure you are pressing the correct buttons on both the opener and the remote.
- Check the remote battery again. Even if it seemed fresh, a faulty battery can cause issues.
- If you have multiple remotes programmed to the opener, you might need to reprogram all of them after resetting the opener, as some systems only allow a limited number of programmed devices. For instance, if you’re having trouble with a Craftsman opener, you might find this guide on how to reset a Craftsman garage door remote helpful before re-attempting programming.

Credit: www.youtube.com
Troubleshooting Common Programming Issues
Even with clear instructions, programming a remote can sometimes present challenges. Understanding common issues and their solutions can save you considerable time and frustration. Most problems fall into a few categories: compatibility, signal interference, or procedural errors.
Compatibility Problems
This is perhaps the most frequent hurdle. As mentioned, Craftsman openers use different technologies (Security+, Security+ 2. 0), and not all universal remotes are designed to work with all of them.
- Verify Remote Compatibility: Double-check the packaging or manual of your Clicker remote. It should explicitly state compatibility with Craftsman openers and the specific Security+ or Security+ 2.0 system. If it’s an older remote, it might not be compatible with newer opener models.
- Check Opener Model: If possible, identify the exact model number of your Craftsman garage door opener. You can usually find this on a label on the motor unit. Then, search online for remote compatibility information for that specific model.
- Consider a Branded Remote: If you’re consistently struggling with a universal remote, purchasing a Craftsman-branded remote designed for your opener model is often the most straightforward solution.
Signal Interference And Range Issues
Sometimes, the remote might seem programmed, but it only works when you’re standing directly under the opener, or it works intermittently.
- Battery Strength: Always start by replacing the battery in the Clicker remote with a brand-new, high-quality battery. This is a simple fix that resolves many “weak signal” issues.
- Obstructions: Ensure there are no large metal objects or other potential sources of radio interference between the remote and the opener. While Security+ 2.0 is designed to combat interference, extreme cases can still impact performance.
- Antenna: Check the antenna wire hanging from the opener motor unit. Ensure it’s fully extended and not damaged or obstructed. Sometimes, gently repositioning the antenna can improve reception.
Procedural Errors
Missing a step, pressing the wrong button, or exceeding the time limit are common mistakes.
- Timing is Crucial: The learn mode on the opener is active for a limited time (usually 30 seconds). Ensure you press the remote button within this window after activating the learn mode.
- Button Presses: Be precise. Press and *release* the learn button on the opener, then press and *hold* the desired button on the remote. The sequence can sometimes vary slightly by model, so consulting the manual is key.
- Reset and Retry: If you suspect you made a mistake, the easiest way to start over is often to perform a full reset of the garage door opener and then attempt the programming sequence again from the beginning. This clears any partial or incorrect programming. For guidance on resetting, you can refer to general remote resetting procedures which often share similar principles.
Advanced Programming And Additional Remotes
Once you’ve successfully programmed your primary Clicker remote, you might want to program additional remotes for other family members or a spare. The process is generally the same for each new remote, but there are a few considerations.
Programming Multiple Clicker Remotes
To program a second or third Clicker remote, you will repeat the exact same process you used for the first one.
- Activate the learn mode on the opener by pressing and releasing the learn button.
- Within the 30-second window, press and hold the desired button on the new Clicker remote.
- The opener should indicate that it has learned the signal (e.g., LED flashes, light turns off).
- Release the button on the remote.
- Test the new remote.
It’s important to note that most garage door openers have a limit on the number of remotes they can store. For most Craftsman openers, this limit is typically around three to four remotes. If you try to program more remotes than the opener can handle, it will likely overwrite the oldest programmed remote. Always check your owner’s manual for the specific limit for your model.
Using A Keypad With Your Craftsman Opener
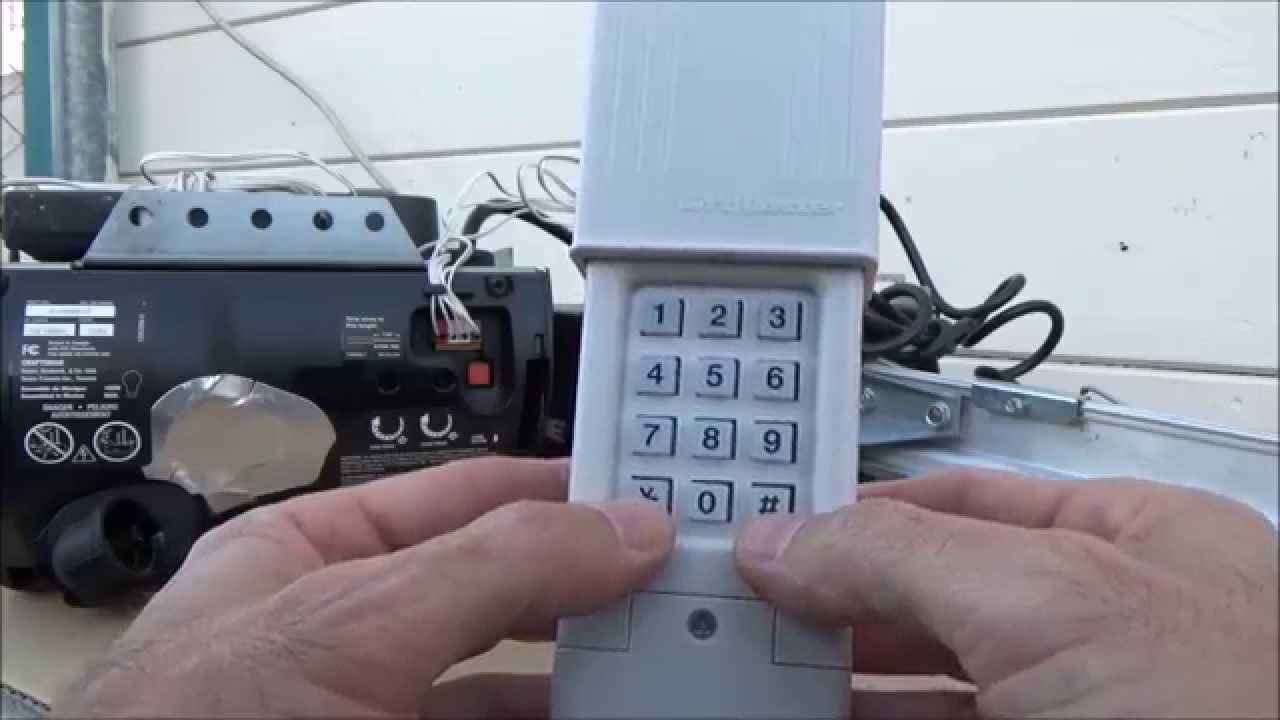
In addition to remotes, many Craftsman openers can also be programmed with a wireless keypad. This allows entry into your garage without a physical remote, using a PIN code. The programming process for a keypad is similar to that of a remote, often involving the learn button on the motor unit and a specific sequence on the keypad itself.
For example, programming a Craftsman keypad might involve:
- Pressing and holding the learn button on the opener.
- Entering a chosen PIN code on the keypad.
- Pressing and holding the Enter or Program button on the keypad.
- The opener’s light may flash to confirm programming.
If you have a Craftsman keypad, refer to its specific manual for programming instructions. If you’re looking to program a universal keypad, ensure it’s compatible with your Craftsman opener’s technology. Resources for programming various keypads, such as reprogramming a Genie keypad, can offer insights into the general principles involved.
When To Consider Professional Help
While programming a Clicker remote to a Craftsman opener is designed to be a DIY task, there are instances where professional assistance is recommended.
- Persistent Unsuccessful Attempts: If you’ve followed all the steps meticulously, tried multiple times, and even reset the opener, but the remote still won’t work, there might be a deeper issue with the opener’s logic board or the remote itself.
- Damaged Opener Unit: If the motor unit appears damaged, is making unusual noises, or the learn button is unresponsive, it’s best to consult a professional.
- Uncertainty About Compatibility: If you’re completely unsure about your opener’s technology or the compatibility of your chosen remote, a technician can quickly diagnose and recommend the correct solution.
- Complex Installations: For older homes, unusual garage setups, or if you suspect wiring issues, professional installation and programming are safer and more reliable.
While the cost of a professional service call might seem high compared to the price of a remote, it can save you time, prevent potential damage to your opener, and ensure a secure and properly functioning system. The average cost for garage door opener repair or programming can range from $100 to $300, depending on the complexity and location. This is a factor to consider against the DIY approach, especially if you value your time or lack confidence in tackling the task yourself. For context on overall garage door costs, you can explore factors influencing garage door expenses.
Frequently Asked Questions
How Do I Know If My Clicker Remote Is Compatible With My Craftsman Opener?
### Compatibility is key. Check the packaging or manual of your Clicker remote to see if it explicitly lists compatibility with Craftsman openers, and specifically with the Security+ or Security+ 2.0 systems. If your Craftsman opener is older, it might use a different system, so verifying your opener’s technology is also important.
What Does The Color Of The Learn Button On My Craftsman Opener Signify?
### The color of the learn button (e.g., red, orange, purple, green, yellow) often indicates the radio frequency and technology used by your Craftsman garage door opener. For example, purple buttons typically signify Security+ 2.0 technology, while red/orange might indicate an earlier Security+ system. This information can help you select the correct compatible remote.
My Clicker Remote Programmed, But The Range Is Very Short. What Should I Do?
### Short range is often due to a weak remote battery. Replace it with a fresh, high-quality battery. Also, ensure the antenna on your garage door opener motor unit is fully extended and not obstructed. Check for potential sources of radio interference in your garage, such as large metal objects, and try repositioning the opener’s antenna if possible.
Can I Program A Clicker Remote If I Don’t Have Access To The Garage Opener Motor Unit?
### Generally, no. The programming process for most Craftsman garage door openers requires physical access to the learn button located on the motor unit itself, which is typically mounted on the garage ceiling. If you cannot access the motor unit, you will need assistance from someone who can.
How Many Remotes Can I Program To A Craftsman Garage Door Opener?
### Most Craftsman garage door openers can store a limited number of remotes, typically between three and four. If you attempt to program more remotes than the opener can hold, it will usually overwrite the oldest programmed remote in its memory. Always refer to your specific opener’s manual for the exact limit.
When you’ve successfully programmed your Clicker remote to your Craftsman garage door opener, you’ve accomplished a common yet valuable DIY task. This process not only restores functionality but also enhances the convenience and security of your home. Remember to always prioritize safety when working near the garage door opener, especially when using ladders.
Keeping your owner’s manual handy and understanding your opener’s specific technology are the best ways to ensure a smooth programming experience.