Now Reading: How to Set Up Garage Door Remote Control in 5 Easy Steps
- 01
How to Set Up Garage Door Remote Control in 5 Easy Steps
A garage door remote control makes life much easier. With just a button press, you can open or close your garage door without leaving your car. But setting up the remote can sometimes feel confusing, especially if you have never done it before or lost the manual.
The good news is that almost anyone can do it, and you do not need special tools or technical knowledge.
This guide gives you everything you need to know about how to set up a garage door remote control. You will learn how remote controls work, how to prepare for setup, step-by-step programming for different types of remotes, and what to do if things do not work. Even if you are a complete beginner, you will find clear instructions, useful tips, and solutions for common problems.
You will also find practical advice, real examples, and some helpful tables to compare features and solve problems. By the end, you will feel confident to set up your garage door remote and keep it working smoothly.
How Garage Door Remote Controls Work
Before you start, it helps to understand the basics. A garage door remote control sends a wireless signal to your garage door opener. The opener receives this signal and activates the motor to open or close the door.
Most modern garage doors use rolling code technology. This means the code changes every time you press the button, making your garage more secure. Older systems may use fixed codes with dip switches. Knowing which type you have is important because the setup steps can be different.
Main Types Of Garage Door Remotes
There are several kinds of garage door remotes. Here’s a quick comparison:
| Type | Main Features | Typical Use |
|---|---|---|
| Single-Button Remote | One button controls one door | Homes with one garage door |
| Multi-Button Remote | Two or more buttons, can control multiple doors | Homes with two or more garage doors |
| Universal Remote | Works with different brands and models | Replacement for lost/broken remotes |
| Keychain Remote | Small, portable, attaches to keyring | Easy to carry, extra convenience |
Non-obvious insight: Some remotes can also control home lighting or gates, not just garage doors. Check your manual if you want to use these extra features.
Preparing For Setup
Setting up your garage door remote control is much easier if you take a few minutes to prepare.
1. Find Out Your Garage Door Opener Brand And Model
Most remotes only work with certain brands or models. Look on the opener unit in your garage (the box attached to the ceiling). You’ll usually find the brand name (like Chamberlain, LiftMaster, Genie, Craftsman, or others) and a model number on a sticker.
If you already have a remote, check the back or inside the battery cover for this information.
2. Choose The Right Remote
If you are buying a new remote, make sure it matches your opener’s brand and model. Universal remotes work with many openers, but not all. Check the package or the manufacturer’s website for compatibility lists.
Tip: If you are unsure, bring a photo of your opener’s sticker to the hardware store, or check online support.
3. Gather What You Need
- The new remote control
- Fresh batteries (many remotes use a small coin cell or AAA battery)
- A ladder (to reach the opener unit)
- A flashlight (if your garage is dark)
- The garage door opener manual (optional but useful)
4. Safety First
Make sure nothing is blocking the garage door. Keep children and pets away while you work. Stand on a stable ladder and never reach over moving parts.
Non-obvious insight: Some garage door openers have a “lock” or “vacation” setting that stops remotes from working. If your remote will not program, check if this feature is turned on.
Step-by-step: Programming A Garage Door Remote Control
The main part of setting up your garage door remote is programming it to “talk” to the opener. The process is a little different for each brand, but there are some common steps.
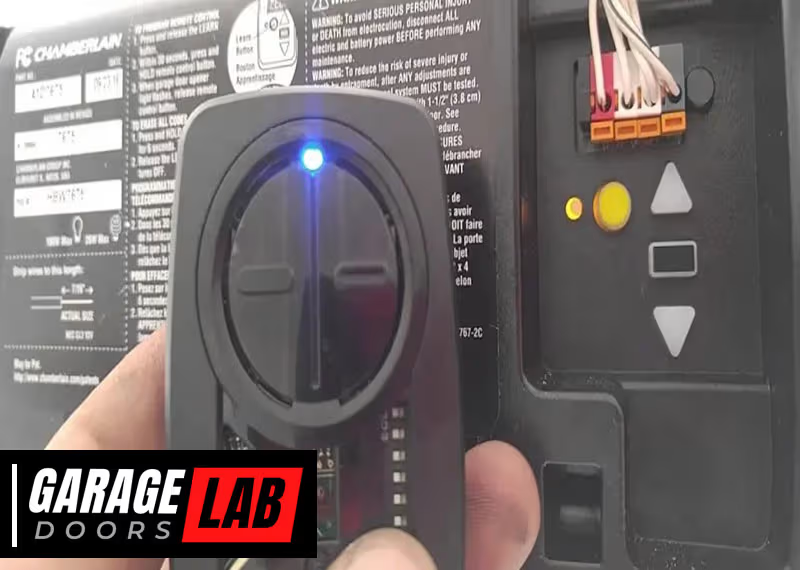
1. Locate The “learn” Or “program” Button On The Opener
On most openers, you need to press a button called Learn, Program, or Set. This button is on the opener unit itself, not on the wall switch. It is often behind the light cover or near the antenna wire.
The button is usually colored (yellow, red, purple, green, or black). The color can help you identify what technology your opener uses.
Example: On Chamberlain and LiftMaster, a yellow “Learn” button means Security+ 2.0, while purple means Security+.
2. Put The Remote Into Programming Mode
- For most remotes, press and hold the button you want to use.
- Some remotes have a program or set button (check the manual if you are not sure).
- Hold the button until the remote’s LED light turns on or blinks.
3. Press The “learn” Button On The Opener
- Climb the ladder and press the Learn button. You may need to hold it for 1-2 seconds (not too long, or you might erase all codes).
- The opener’s LED light will turn on or start blinking. This means it is ready to learn a new remote.
- You usually have 30 seconds to finish the next step.
4. Press The Button On The Remote
- While the opener’s LED is on, press the button on the remote you want to program (sometimes you need to press twice).
- The opener’s light will flash, or you may hear a click. This means the remote has been accepted.
5. Test The Remote
Step down from the ladder and try pressing the remote button. The garage door should move. If not, repeat the steps carefully.
Practical tip: If you have more than one remote, repeat these steps for each one.
Special Cases: Setting Up Different Types Of Remotes
Not all remotes work the same way. Here are some extra instructions for specific situations.
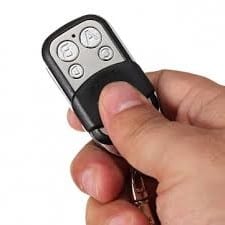
Universal Garage Door Remotes
Universal remotes are useful when you have multiple brands or cannot find your original remote. They have extra switches or buttons to match your opener’s brand.
- Read the remote’s instructions carefully. You may need to set a “brand” switch or enter a code.
- Follow the same steps with the Learn button, but make sure the remote is set to match your opener first.
- Not all universal remotes support every security technology. If your opener is very new or very old, check compatibility.
Remotes With Dip Switches (older Models)
Some openers from before the 1990s use dip switches instead of a Learn button. Inside the remote and on the opener, you will see small switches labeled 1-9 or 1-12.
- Open your remote and the opener unit.
- Set the switches in the remote to match the pattern in the opener.
- Close everything, insert batteries, and test.
- No programming button is needed—just matching the switch positions.
Smart Garage Door Remotes And Apps
Newer systems allow you to control your garage door with a smartphone app. Setup usually involves connecting to Wi-Fi and registering the opener with the app.
- Download the opener manufacturer’s app (like myQ for Chamberlain/LiftMaster).
- Follow the in-app setup instructions.
- You may need to scan a QR code on the opener or enter a serial number.
- Test the app to make sure it works from your phone.
Common mistake: Many people forget to enable Bluetooth or Wi-Fi on their phone, causing connection issues.
Programming Multiple Doors
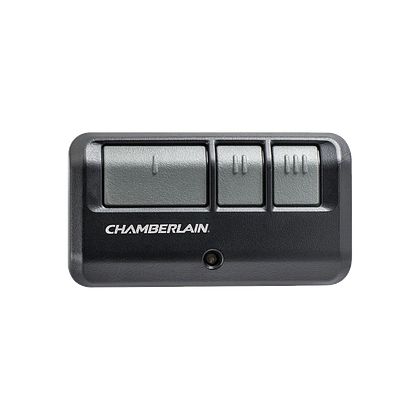
If you have more than one garage door, use a remote with multiple buttons. Each button can be programmed to a different opener.
- For each door, repeat the Learn button process with a new button on the remote.
- Label or remember which button matches each door.
Common Problems And Solutions
Sometimes things do not work on the first try. Here are the most frequent problems and how to fix them.
The Remote Does Not Work After Programming
- Check the batteries: Weak or old batteries are a top cause. Replace and try again.
- Try again: You may have missed the 30-second window after pressing the Learn button.
- Distance: Stand closer to the opener when programming.
- Reset the opener: Unplug the opener for 10 seconds and plug it back in.
- Interference: Some LED bulbs or wireless devices can block signals. Try turning off nearby electronics.
The Remote Used To Work But Stopped
- Batteries: Change them first.
- Erase codes: Sometimes, all remotes stop if the opener’s memory is cleared by mistake.
- Reprogram: Follow the programming steps again.
- Check for “lock” mode: Some wall consoles have a lock button that disables remotes.
The Remote Opens The Door Randomly
- Code conflict: If your neighbor has the same brand and an old fixed-code opener, your remotes might match. Upgrade to a newer rolling code system for better security.
- Stuck button: A remote button stuck down can cause accidental openings.
The Remote Works Only Up Close
- Weak battery: Replace with a new battery.
- Antenna: Make sure the opener’s antenna is hanging down and not broken.
- Interference: Move wireless routers or other devices away from the opener.
Programming Is Not Working
- Wrong remote type: Double-check compatibility.
- Wrong button: Some openers have multiple buttons—make sure you are pressing the correct Learn button.
- Opener memory full: Most openers store only 5-8 remotes. If full, erase all and start over.
Here’s a quick troubleshooting table for reference:
| Problem | Likely Cause | Solution |
|---|---|---|
| Remote not working | Dead batteries | Replace batteries |
| Remote only works near opener | Weak signal | Check antenna, change battery |
| Remote won’t program | Wrong opener type | Check compatibility |
| Remotes stop working | Opener reset | Reprogram all remotes |
| Door opens on its own | Code conflict or stuck button | Upgrade system, check remotes |
Advanced Options: Adding Keypads And Car Remotes
Many people want to use a keypad or their car’s built-in system to open the garage.
Wireless Keypads
A wireless keypad mounts outside your garage. You enter a PIN code to open the door. Setup is almost the same as programming a remote.
- Enter the manufacturer’s programming code (see manual).
- Press the Learn button on the opener.
- Within 30 seconds, enter your PIN and press the open/close button.
- The opener should click or flash to confirm.
Tip: Most keypads let you set temporary codes for guests.
Car Integrated Remotes (homelink)
Many cars (Toyota, Honda, Ford, GM, and others) have a HomeLink button system.
- Turn your car’s ignition on.
- Hold the desired HomeLink button and your old remote together, pressing both until the indicator light changes.
- Press the Learn button on your garage opener.
- Within 30 seconds, press the programmed HomeLink button in your car.
- The opener light will flash or click to confirm.
Non-obvious insight: Some newer garage openers need a “training” step with a rolling code system. Check your car manual if you have trouble.
Keeping Your Garage Door Remote Secure
Garage remotes are convenient, but also a target for thieves. Here are some ways to keep your garage door remote and home safe:
- Do not leave your remote in your car, especially if parked outside.
- Use a keychain remote to keep it with you.
- Upgrade to a rolling code opener if you have an old fixed-code system.
- Change your keypad PIN regularly.
- If you lose a remote, erase all codes on the opener and reprogram the remotes you still have.
Example: Most openers have a way to clear all remotes. Hold the Learn button for 6-10 seconds until the light turns off. All remotes will be deleted.
Comparing Garage Door Remote Features
When buying a new garage door remote, it helps to compare key features. Here’s a summary:
| Feature | Why It Matters | Best For |
|---|---|---|
| Number of Buttons | Controls one or more doors | Single or multi-door homes |
| Universal Compatibility | Works with different brands | Replacement or backup use |
| Keychain Size | Easy to carry | People on the go |
| Rolling Code | Better security | All users, especially in busy areas |
| Smartphone App | Remote operation from anywhere | Tech-savvy users |
| LED Light | Shows programming status | Beginner-friendly |
Practical advice: If you are buying a universal remote, always check online reviews for your garage opener brand. Some models are easier to program than others.
When To Call A Professional
Most people can set up a garage door remote without help. But in some cases, it is better (and safer) to call an expert:
- Your opener is very old and does not have a Learn button.
- The remote will not program after several tries.
- The garage door moves by itself or stops halfway.
- You notice frayed wires, burning smells, or sparks.
A professional can quickly identify the problem and make sure your garage door is safe and secure.
Example: If you have a Genie opener from the 1990s, the manual programming steps can be tricky. A pro can help update your system or install a compatible receiver.
Maintenance Tips For Long-lasting Remotes
A little care can make your garage door remote control last for years.
- Replace batteries every 1-2 years, even if the remote still works.
- Keep remotes dry and avoid dropping them.
- Clean the contacts with a soft cloth if buttons stick.
- Store backup remotes in a safe place, not in the car.
Non-obvious insight: Some remotes have a small reset hole. If the buttons stop working, use a paperclip to gently reset the remote.

Frequently Asked Questions
How Do I Reset My Garage Door Remote?
To reset a remote, you usually erase all codes from the opener. Press and hold the Learn button on the opener for about 6-10 seconds until the light goes out. This clears all remote controls. Then, follow the programming steps to add remotes back.
Can I Program A New Remote Without The Old One?
Yes. You do not need the old remote to add a new one. All you need is access to the garage door opener’s Learn button and a compatible new remote. Just follow the setup process as described above.
Why Won’t My Garage Door Remote Work From Far Away?
Weak signal is often caused by old batteries, damaged antenna, or interference from other wireless devices. Try replacing the battery and make sure the opener’s antenna hangs down freely. Move wireless routers or LED bulbs away from the opener if you suspect interference.
How Do I Erase A Lost Or Stolen Remote From My System?
To erase a lost or stolen remote, press and hold the Learn button on the opener for 6-10 seconds until the light goes out. This deletes all remotes. Then, reprogram the ones you still have. For more security, change your keypad PIN as well.
Can I Use My Smartphone As A Garage Door Remote?
Yes. Many modern openers support smartphone control with a Wi-Fi module and an app (like myQ). You will need to connect the opener to your home’s Wi-Fi and follow the app’s setup instructions. Check your opener’s compatibility and see the manufacturer’s website for details. For more information, you can visit Wikipedia’s garage door opener page.
Setting up a garage door remote control does not have to be stressful or confusing. With the steps and tips in this guide, you can have your system working in minutes. If you ever get stuck, do not hesitate to ask a professional for help.
Now, enjoy the comfort and security of your freshly programmed garage door remote.


