Now Reading: How to Reset Garage Door Code Liftmaster: Quick Step-by-Step Guide
- 01
How to Reset Garage Door Code Liftmaster: Quick Step-by-Step Guide
How to Reset Garage Door Code Liftmaster: Quick Step-by-Step Guide
Resetting the code on your Liftmaster garage door opener is an important way to keep your home secure and make sure only you and your family can enter. Maybe you just moved into a new home, lost a remote, or want to block access from someone who had your code.
Whatever your reason, the process can seem confusing if you have never done it before. But with a little guidance and patience, you can handle it yourself without calling a professional.
This complete guide will walk you through every step, explain why each one matters, and offer tips that even experienced homeowners often miss. Whether your Liftmaster system is a newer smart model or an older classic, you will find practical advice and solutions here.
You will also learn what to do if things don’t go as planned, how to avoid common mistakes, and how to keep your garage as safe as possible in the future.
Why Resetting Your Garage Door Code Matters
Many people underestimate the importance of a secure garage door code. Your garage is not just a place for your car; it’s often a way into your home. If someone else knows your code, they could enter without your permission. Here are the most common reasons people reset their Liftmaster garage door codes:
- You moved into a new home and want to make sure only you have access.
- You lost a remote or keypad, and you’re afraid someone could find and use it.
- You shared the code with a neighbor or worker and want to change it later.
- Your opener is acting strange, and you suspect interference.
Resetting the code helps you control who can get in. It’s a simple step that can prevent break-ins and protect your family’s safety.
Understanding Your Liftmaster System
Before you start, it’s important to know which Liftmaster model you have. Most Liftmaster openers use similar systems, but there are differences between older and newer models, especially with smart features and wireless keypads.
Main Types Of Liftmaster Openers
- Older units (pre-1993): These often use DIP switches inside the remote and the opener for codes.
- Rolling code openers (after 1993): These use a “Learn” button to set and reset codes for better security.
- MyQ and Smart models: These connect to Wi-Fi and can be managed through apps.
If you’re unsure which you have, look for the Learn button (usually on the back or side of the motor unit) and note its color. The manual or the Liftmaster website can also help identify your model.
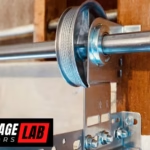
Key Components
- Wall-mounted control panel: Inside your garage, used to open the door and sometimes program codes.
- Remote controls: The small transmitters for your car or keychain.
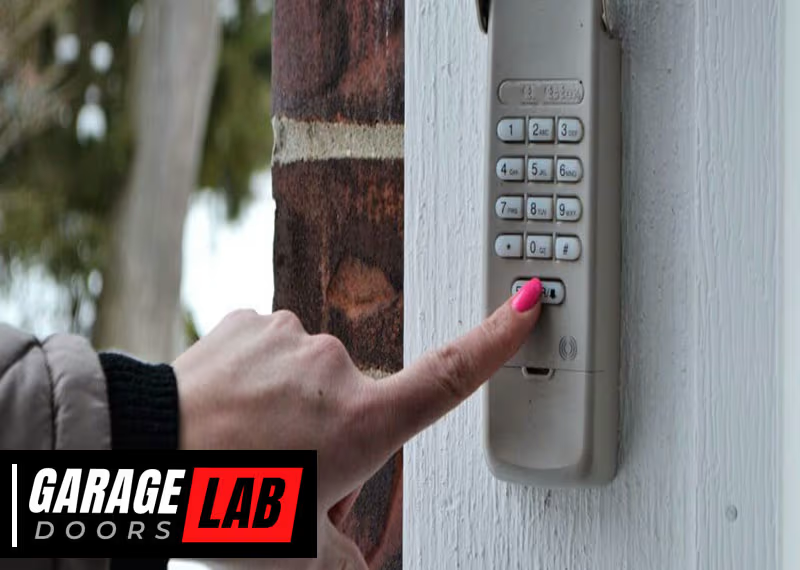
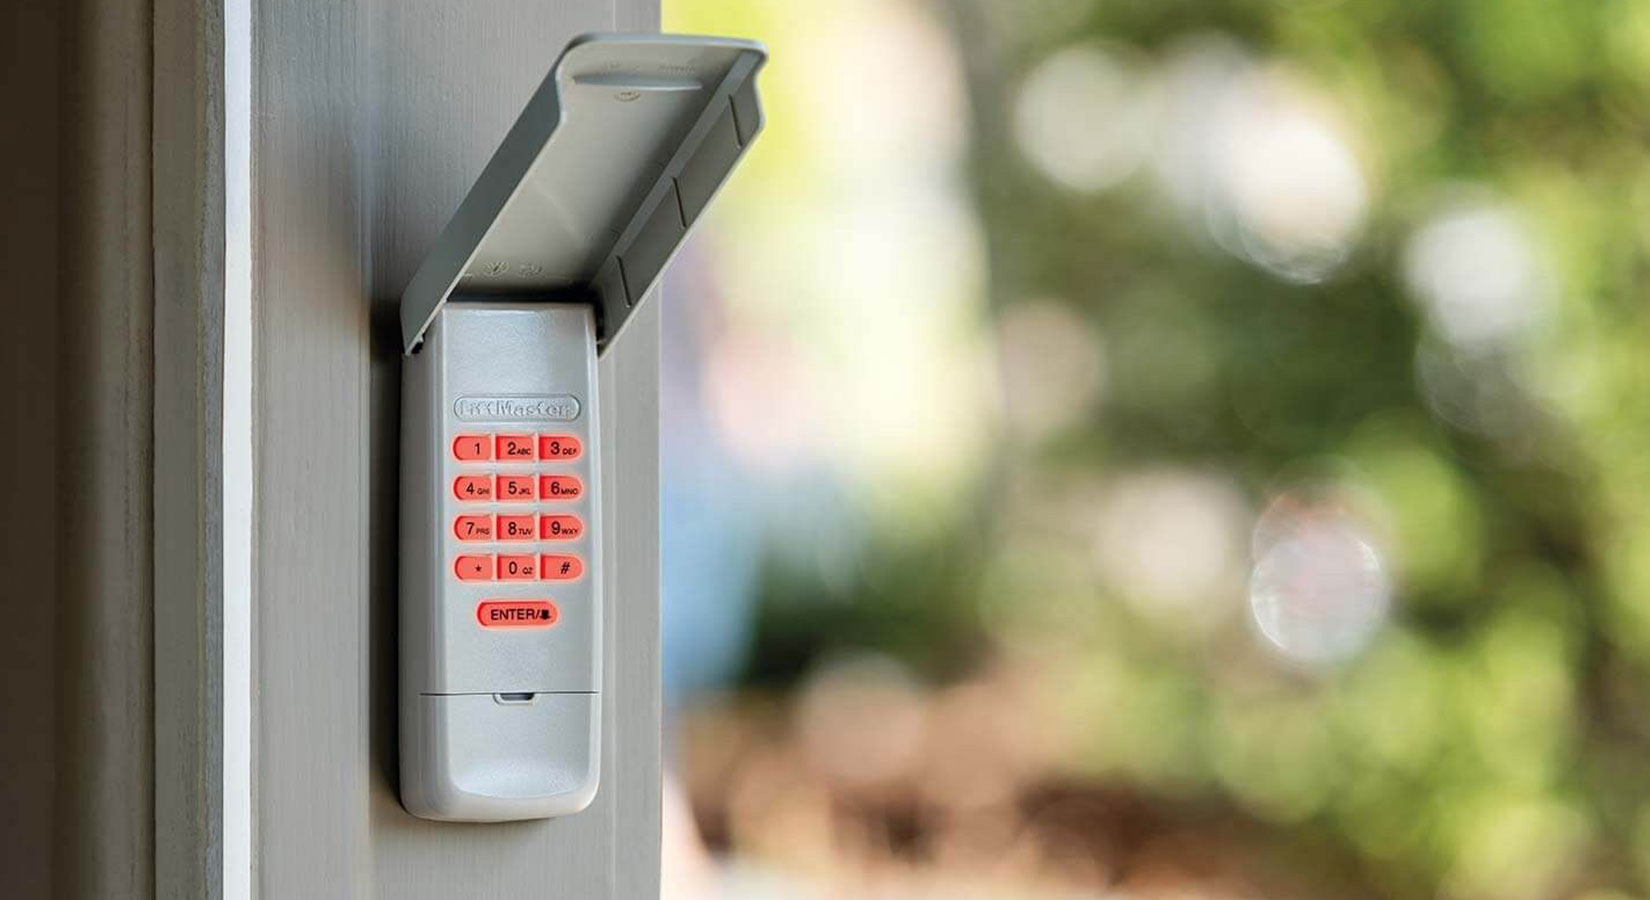
- Wireless keypad: A keypad mounted outside your garage, lets you open the door with a PIN.
Knowing what you have will make the reset process smoother.
Safety Precautions Before Resetting
Working with garage door openers is usually safe, but you should always be careful:
- Unplug the opener if you need to open the cover or work near electrical parts.
- Keep a ladder steady if you need to reach the motor unit.
- Clear the area so nothing blocks your access to the opener.
Do not let children play with remotes or keypads during this process.
Step-by-step Guide: Resetting Your Liftmaster Garage Door Code
The process changes a little based on your opener model and whether you want to reset the remote controls, keypad, or both. Below, you’ll find detailed instructions for each scenario.
1. Clearing Old Codes From The Opener
To start fresh, you must erase all codes from your Liftmaster opener. This blocks all old remotes and keypads.
Steps:
- Locate the Learn button on the opener. It’s often under a light cover or on the back. The button may be yellow, red/orange, purple, or green.
- Press and hold the Learn button until the indicator light turns off (about 6-10 seconds).
- Release the button. All remotes and keypads are now erased from memory.
Tip: Some people forget this step and wonder why old remotes still work. Always clear codes first if you want to block previous users.
2. Programming A New Remote Control
After clearing the codes, you must add your current remotes.
Steps:
- Press and release the Learn button (do not hold it this time).
- Within 30 seconds, press and hold the button on your remote you want to program.
- The garage light will flash, or you’ll hear a click. This means it worked.
- Release the remote button and test it. The door should open or close.
Non-obvious insight: Each remote must be programmed separately. Programming one does not add all remotes at once.
3. Resetting And Programming A Wireless Keypad
If you have an outside keypad, you’ll want to reset it too.
Steps For Most Keypads:
- Enter your current PIN (if you know it), then press and hold the Enter button.
- While holding Enter, press and hold the Learn button on the opener until the light blinks.
- Release both buttons.
- Enter your new PIN on the keypad, then press Enter.
- The garage door opener will blink or click, confirming the new code is set.
If you forgot your PIN: Press and hold the Learn button until codes are erased, then follow the steps to set a new PIN.
Extra tip: Some keypads require you to press the Learn button first, then enter your new PIN within 30 seconds. Check your model’s instructions.
4. Setting A Temporary Pin (if Needed)
Some Liftmaster keypads let you create a temporary PIN for guests or workers.
Steps:
- Enter your regular PIN and press the # button.
- Enter a temporary 4-digit PIN and press Enter.
- The keypad light will blink, confirming the temporary code works.
You can set how many times or how long the temporary code is active by following the keypad’s instructions.
5. Resetting Myq And Smart Liftmaster Openers
If your opener uses the MyQ app or Wi-Fi, resetting the code involves the app as well.
Steps:
- Open the MyQ app on your phone.
- Go to the settings or devices section.
- Remove the device or reset it as described in the app’s menu.
- Re-add your opener following the app’s pairing instructions.
- Program your remotes and keypads as above.
Pro tip: After a factory reset, you may need to reconnect your Wi-Fi and set up schedules or alerts again.
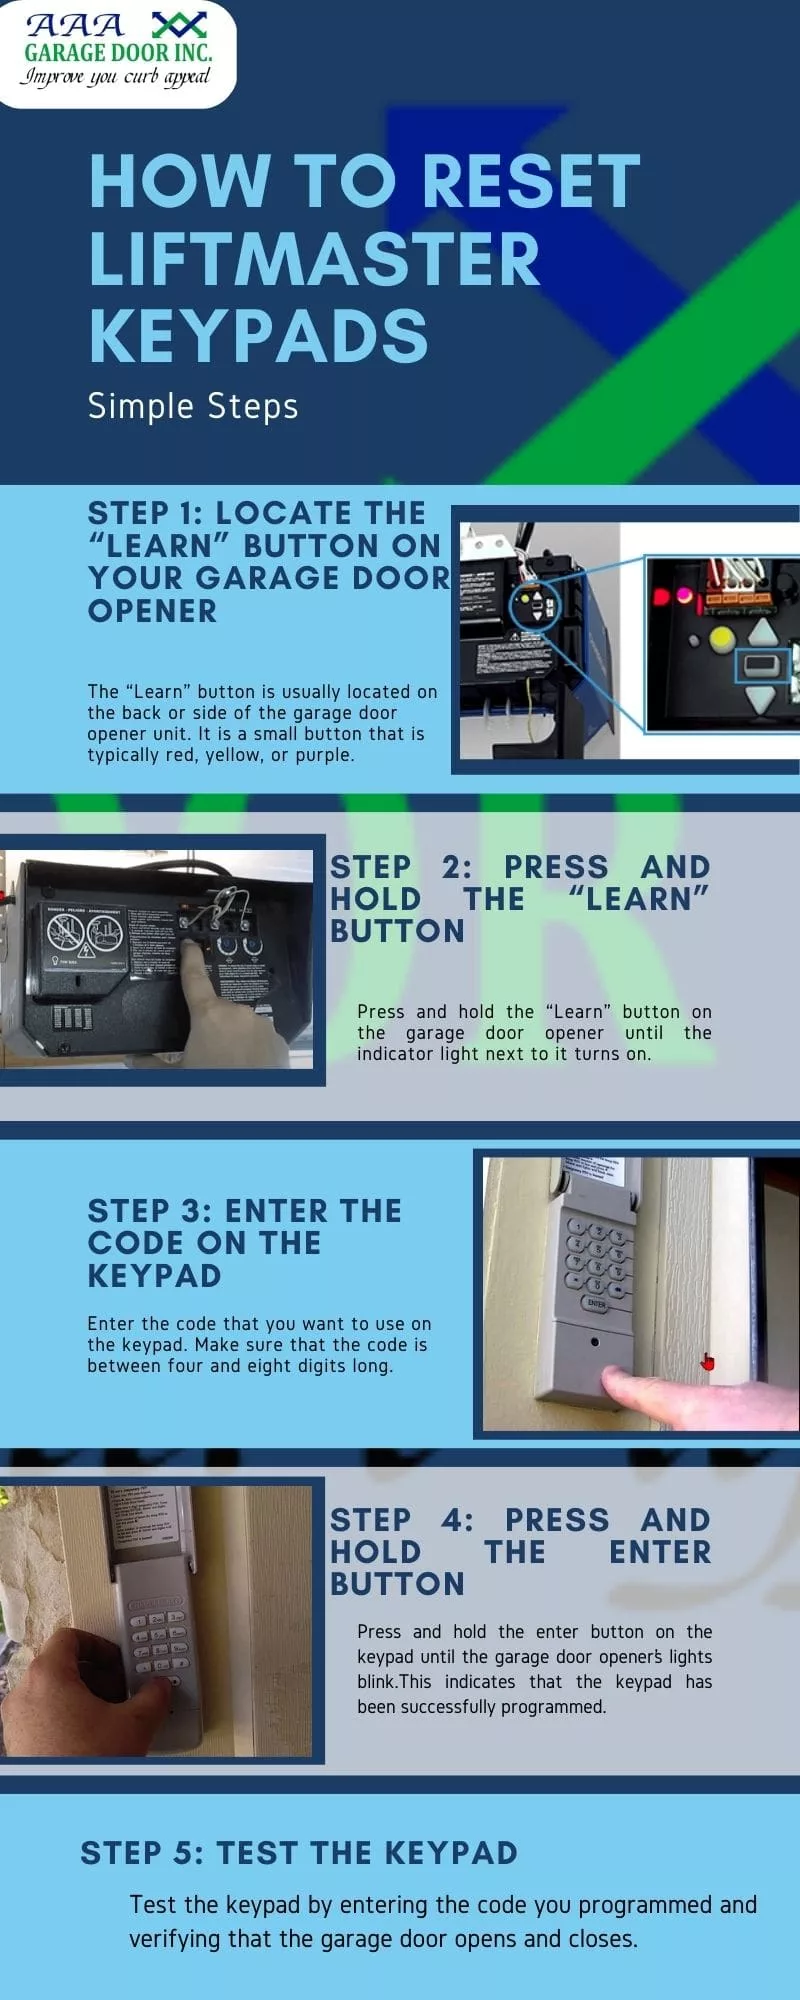
Table: Common Learn Button Colors And Their Meaning
Different Learn button colors mean different programming steps or compatibility. Here’s a quick comparison.
| Learn Button Color | Year Range | Remote Frequency | Notes |
|---|---|---|---|
| Green | 1993-1997 | 390 MHz | Older technology, simple remotes |
| Red/Orange | 1997-2005 | 390 MHz | Rolling code security |
| Purple | 2005-2011 | 315 MHz | Improved encryption |
| Yellow | 2011-present | Security+ 2.0 | Smart technology, MyQ compatible |
Knowing your Learn button color helps you follow the right instructions for your model.
How To Reset Dip Switch Codes (older Models)
If you have a very old Liftmaster opener (pre-1993), it may use DIP switches instead of a Learn button.
Steps:
- Open the remote and the motor unit cover.
- You will see a row of small switches (often 8-12).
- Set the switches in the remote to match the pattern in the opener.
- Close both covers and test the remote.
Warning: DIP switch openers are less secure. Anyone with a similar remote could match your code. If possible, consider upgrading to a rolling code opener.

Troubleshooting: What To Do If Resetting Fails
Sometimes, things don’t go as planned. Here’s how to solve common problems:
The Remote Or Keypad Doesn’t Program
- Make sure you pressed the Learn button correctly (tap vs. hold).
- Check if the opener’s memory is full. Most can store 5-8 remotes/keypads. Erase all codes and start again.
- Old batteries can cause failures. Replace them and retry.
- Interference from wireless devices in your home (like routers) can sometimes block signals.
The Door Opens On Its Own
- Someone nearby may have a similar code (rare, but possible with old DIP switch models).
- Erase all codes and set new ones.
- Inspect the opener for stuck buttons or faulty wiring.
The Keypad Won’t Accept A New Code
- Wait 30 seconds and try again. Sometimes the system needs a reset.
- Check the wiring if it’s a wired keypad.
- If the keypad is old or worn out, consider replacing it.
Table: Common Programming Issues And Solutions
Here’s a quick reference for common problems.
| Problem | Possible Cause | Solution |
|---|---|---|
| Remote not working | Dead battery, memory full, interference | Replace battery, erase & reprogram, check for signal blockers |
| Keypad not working | Wrong PIN, weak signal, old keypad | Reset PIN, move closer, replace keypad if old |
| Opener doesn’t respond | Power loss, wiring issues | Check power source, inspect wires |
| Door opens randomly | Shared code, interference | Erase all codes, set new ones, move opener if needed |
How To Make Your Garage More Secure
Resetting your code is only one part of garage security. Here are some extra steps you can take:
- Change codes regularly: Every 6-12 months, especially if you share the code.
- Limit who knows the code: Only give it to trusted family or friends.
- Remove old remotes: If you lose a remote, erase all codes and reprogram.
- Use MyQ app features: Get alerts when the door opens or closes.
- Upgrade old openers: Newer models have better encryption and features.
- Lock the inner door: If your garage leads to your house, lock the door inside for extra safety.
Non-obvious insight: Don’t leave the remote in your car if you park outside. Thieves can break in and use it.
Comparing Liftmaster Code Reset With Other Brands
Liftmaster is popular, but other brands like Genie, Chamberlain, and Craftsman use similar but slightly different methods.
| Brand | How to Reset Code | Special Features |
|---|---|---|
| Liftmaster | Learn button, erase & reprogram | MyQ smart features |
| Genie | Learn button, sometimes “Intellicode” button | Intellicode encryption |
| Chamberlain | Same as Liftmaster (same company) | MyQ smart features |
| Craftsman | Learn button or DIP switches | Similar to Liftmaster |
If you own more than one brand, check each manual for exact steps.
Common Mistakes People Make When Resetting Codes
It’s easy to make small errors when working with garage openers. Here are mistakes to avoid:
- Not erasing old codes before adding new remotes.
- Programming only one remote, forgetting to add the rest.
- Holding the Learn button too long, which erases everything instead of just adding a new remote.
- Not waiting between steps, causing the programming to fail.
- Ignoring keypad battery life. Weak batteries can block new codes.
- Not checking the Learn button color, which changes the steps.
- Skipping the manual. Even if you’re handy, each model can have small differences.
By avoiding these, you’ll save time and keep your garage safer.
The Importance Of Regular Maintenance
Resetting your code is a great time to do a quick checkup on your garage door system:
- Lubricate moving parts: Smoother movement means less strain on the opener.
- Check for loose screws or bolts: Tighten if needed.
- Inspect safety sensors: Make sure nothing blocks them, and they’re aligned.
- Test the door balance: Disconnect the opener and lift the door by hand. It should move smoothly.
A little maintenance now can prevent bigger problems later.
How Technology Is Changing Garage Security
Liftmaster and other brands are adding new technology to make garages safer and more convenient.
- Smartphone control: Open and close your door from anywhere with the MyQ app.
- Video monitoring: Some models support cameras to check who’s coming in.
- Guest access: Give one-time codes to visitors, then cancel them easily.
- Alerts: Get notifications if the door is left open.
Pro tip: Always keep your app and opener firmware updated for the latest security patches.
When To Call A Professional
Most resets are easy, but sometimes you may need expert help:
- The opener doesn’t respond after several tries.
- You see sparks, smell burning, or hear strange noises.
- The door is very heavy or moves unevenly.
- The wall control or wiring is damaged.
A certified Liftmaster technician can diagnose and fix serious issues safely. If you need to find one, the Liftmaster website has a locator tool.
Additional Resources
For more in-depth guides, wiring diagrams, or troubleshooting help, visit the official Liftmaster Support page. You can find model-specific manuals and videos there.
Frequently Asked Questions
How Often Should I Reset My Liftmaster Garage Door Code?
It’s best to reset your code every 6 to 12 months or anytime you lose a remote, share your code, or move into a new home. Regular resets keep your garage more secure.
Can I Reset My Liftmaster Code Without The Remote?
Yes. You can reset the code using the Learn button on the opener unit itself and reprogram a new remote or keypad as needed. The remote is not required to erase old codes.
What Do I Do If I Forgot My Wireless Keypad Pin?
If you forget your PIN, erase all codes from the opener using the Learn button, then set up a new PIN following the keypad programming steps. Check your keypad’s manual for exact details.
Why Won’t My Garage Door Remote Work After Resetting?
Common reasons include a dead battery, the remote not being programmed back after code erasure, or interference from other electronics. Try reprogramming and replace the battery if needed.
Is It Safe To Let Someone Else Reset My Liftmaster Code?
It’s safest if only trusted family members reset or know your code. If a technician needs to reset it, always set a new code yourself afterward to ensure your security.
Resetting your Liftmaster garage door code is one of the simplest and most effective ways to protect your home. By following these steps, keeping your opener maintained, and staying alert to security risks, you can enjoy peace of mind every time you come home.