Now Reading: Liftmaster Garage Door Troubleshooting: Quick Fixes and Tips
- 01
Liftmaster Garage Door Troubleshooting: Quick Fixes and Tips
If your LiftMaster garage door opener is not working correctly, it can quickly become a frustrating problem. Garage doors are an essential part of your home’s security and convenience. When they stop responding, make strange noises, or move unpredictably, you need reliable troubleshooting steps. This guide will walk you through everything you need to know about fixing common LiftMaster garage door issues, understanding error codes, and knowing when to call for professional help. Even if you are not a technical expert, you will find clear explanations, practical advice, and real examples to get your garage door working again.
Understanding How Liftmaster Garage Door Openers Work
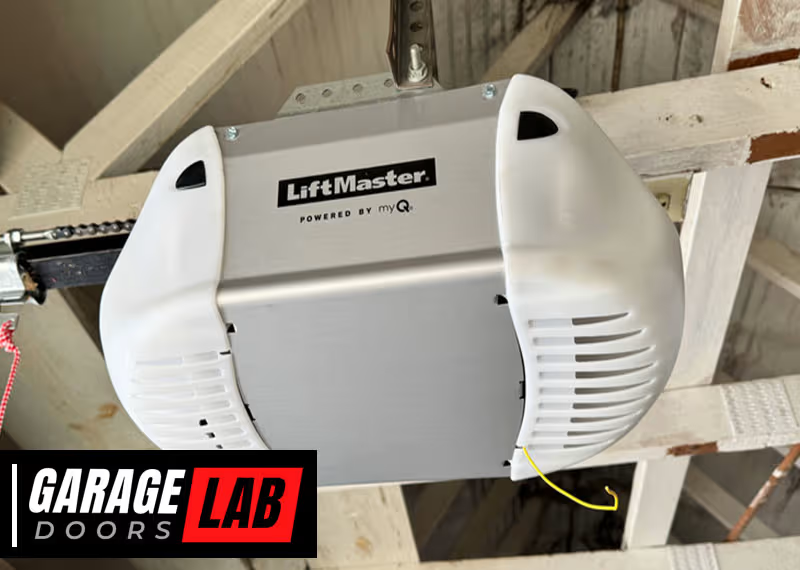
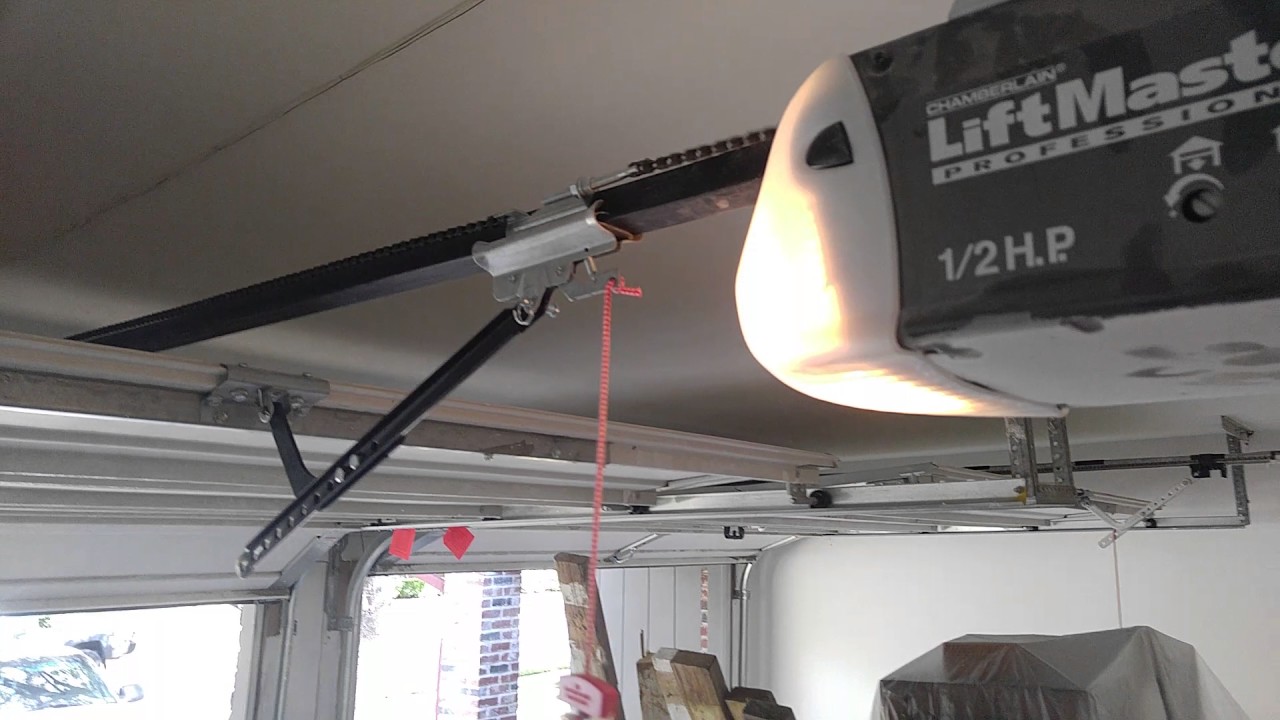
Before diving into troubleshooting, it’s important to understand the basic components of a LiftMaster garage door opener. Most openers include a motor unit (usually mounted on the ceiling), a drive system (chain, belt, or screw), sensors, remote controls, and wall switches. LiftMaster openers often use advanced features like MyQ connectivity, battery backup, and rolling code security.
When you push your remote or wall button, the opener receives a signal and powers the motor. The motor pulls or pushes the garage door along tracks, opening or closing it. Safety sensors at the bottom of the door detect objects to prevent accidents.
If any part of this system fails, the door may not move or could behave unsafely.
Understanding this flow can help you quickly identify where a problem might be coming from—whether it’s the remote, wall button, motor, sensors, or the door itself.
Common Liftmaster Garage Door Problems And Solutions
Some problems with LiftMaster garage doors are very common. Below are the most frequent issues and how you can fix them.
1. Garage Door Won’t Open Or Close
If your door does not move when you press the remote or wall button, start with these checks:
- Power Supply: Make sure the opener is plugged in. Check for blown fuses or tripped breakers.
- Remote Batteries: Replace the batteries in your remote.
- Lock Feature: Some wall units have a “Lock” button that disables remotes. Hold the lock button for 3 seconds to unlock.
- Manual Release: If the door was manually released (with the red cord), reconnect it to the opener trolley.
2. Door Reverses Before Or After Closing
The door might begin to close and then reverse back up. This usually points to a safety feature problem.
- Safety Sensors: Clean the sensors near the ground on both sides. Make sure they are aligned (both lights should be steady, not blinking).
- Obstructions: Check the door path for objects or debris.
- Track Issues: Look for bent or misaligned tracks.
3. Remote Control Not Working
If your wall button works but the remote does not, try these steps:
- Replace Remote Batteries: Weak batteries are common.
- Reprogram Remote: Follow your opener’s manual to sync the remote again.
- Distance: If it only works when close, the antenna on the opener might be damaged or blocked.
- Interference: Wireless devices (LED lights, Wi-Fi routers) can cause interference. Try turning these off briefly to test.
4. Wall Button Not Working
If the remote works but the wall button does not:
- Loose Wires: The wires behind the wall button may be disconnected.
- Replace the Button: Sometimes the wall button itself fails.
- Check for Lock Mode: Some models have a lock feature that disables the opener.
5. Door Stuck Halfway
A door that stops partway could have several causes:
- Travel Limits: Adjust the up and down travel limit screws on the opener.
- Obstructions: Check for objects blocking the tracks or door.
- Broken Springs or Cables: If you hear a loud bang and the door is heavy to lift manually, a spring may be broken. Do not attempt to fix high-tension springs yourself.
6. Opener Makes Noise But Door Doesn’t Move
If you hear the motor running but the door does not move:
- Disconnected Trolley: The trolley may have been disconnected (often by pulling the emergency release).
- Broken Drive Gear: The internal gear in the motor may be stripped. This requires opening the unit.
- Broken Chain/Belt: Inspect for a snapped drive chain or belt.
7. Flashing Lights Or Error Codes
Modern LiftMaster models flash their lights in a pattern to indicate specific errors. Count the number of flashes to diagnose problems.
- 1 Flash: Safety sensor issue (misaligned or blocked).
- 2 Flashes: Wire short on the sensor circuit.
- 5 Flashes: Motor overheated or RPM sensor issue.
Refer to your model’s manual for more codes.
8. Door Opens Or Closes Randomly
If the door operates without you pressing any button:
- Neighbor’s Remote: Rare, but possible with older models. Reprogram your remote.
- Stuck Wall Button: The wall button may be stuck or faulty.
- Interference: Strong radio signals nearby can trigger the opener.
9. Opener Runs, Door Doesn’t Move
If the motor works but the door stays still, check for:
- Broken Coupler: The part connecting the motor to the drive system may have failed.
- Drive System Issues: Chain, belt, or screw could be broken or disconnected.
10. Door Moves Unevenly Or Crooked
A crooked door is usually due to mechanical issues, not the opener.
- Broken Cables or Springs: These parts balance the door’s weight.
- Track Damage: Bent or misaligned tracks can make the door bind.
If unsure, call a professional, as these parts are under high tension.
Step-by-step Troubleshooting Guide
Not sure where to start? Here’s a practical sequence you can follow for almost any LiftMaster garage door problem.
- Check the Power
- Make sure the opener is plugged in.
- Test the outlet with another device.
- Reset any tripped breakers.
- Test All Controls
- Try the remote, wall button, and keypad.
- If only one fails, focus on that device.
- Inspect the Door
- Try opening the door manually (after pulling the emergency release).
- If the door is heavy or sticks, the problem is with the door, not the opener.
- Examine the Sensors
- Wipe the sensor lenses.
- Make sure both sensor lights are steady.
- Watch and Listen
- Operate the opener and observe. Do you hear the motor? Does the chain move?
- Any grinding, banging, or unusual noises?
- Check for Error Codes
- Count the flashes on the opener’s LED or lights.
- Look up the meaning in your manual.
- Inspect for Obstructions
- Remove any objects from the door’s path.
- Check the tracks for debris.
- Test the Limits
- Adjust the travel and force limits following the manual’s instructions.
- Reset the Opener
- Unplug the unit for 30 seconds, then plug it back in.
This process solves most simple problems. If you find broken springs, cables, or complex electrical issues, do not try to repair these yourself.
Understanding Liftmaster Error Codes And Flash Patterns
Modern LiftMaster openers use light flashes to communicate problems. Knowing what these codes mean can save time and money. Below is a reference table for common patterns:
| Number of Flashes | Meaning | Action |
|---|---|---|
| 1 | Safety sensor blocked or misaligned | Clean and align sensors |
| 2 | Sensor wire short or disconnected | Check and reconnect wires |
| 5 | Motor overheated or RPM sensor problem | Wait for cooling, check RPM sensor |
| 6 | Motor circuit error | Call a technician |
Not all models use the same codes, so always check your specific manual for your opener.
Comparing Common Liftmaster Drive Types
Choosing the right opener or understanding your current one helps with troubleshooting. Here’s a quick comparison of the three main LiftMaster drive systems:
| Drive Type | Noise Level | Maintenance | Best For |
|---|---|---|---|
| Chain Drive | Moderate to Loud | Lubricate chain | Heavier doors, budget-friendly |
| Belt Drive | Very Quiet | Minimal | Attached garages, noise-sensitive areas |
| Screw Drive | Moderate | Lubricate screw | Wide doors, moderate use |
If you notice excessive noise or jerky movement, check for worn parts and consider the drive type’s needs.
Diy Fixes For Liftmaster Problems
Some garage door opener issues are simple enough for homeowners to repair themselves. Here are a few examples:
Replacing Remote Batteries
Most LiftMaster remotes use a small coin-cell battery (CR2032 or similar). Pop open the remote’s back cover with a small screwdriver, swap the battery, and snap the cover back.
Realigning Safety Sensors
If the door won’t close, the sensors may be misaligned. Loosen the wing nut on each sensor bracket, gently move the sensor until both LEDs are steady, then retighten.
Lubricating Moving Parts
A squeaky or jerky door often needs lubrication. Use a silicone-based spray on the chain, belt, or screw. Avoid using WD-40, as it dries out parts.
Adjusting The Travel Limits
If your door stops short or opens too far, use a flathead screwdriver to adjust the travel limit screws on the opener unit. Turn clockwise to decrease travel, counterclockwise to increase.
Resetting The Opener
To clear glitches, unplug the opener for at least 30 seconds, then plug it back in. For Wi-Fi models, you may also need to reset the network settings.
When To Call A Professional
While many LiftMaster troubleshooting steps are DIY-friendly, certain problems require expert help:
- Broken Springs or Cables: These are under extreme tension and can cause serious injury.
- Internal Motor or Circuit Issues: If resetting and basic checks do not work, the motor or electronics may be faulty.
- Repeated Error Codes: If the same error comes back, professional diagnostic tools are needed.
- Door Off-Track: A door that has come off its tracks must be realigned safely.
Attempting major repairs yourself can void warranties or cause further damage. If in doubt, call a certified garage door technician.
Preventive Maintenance Tips
Regular maintenance can prevent many common issues with LiftMaster garage door openers:
- Check Sensors Monthly: Wipe lenses and ensure alignment.
- Lubricate Every Six Months: Apply silicone spray to the drive, rollers, and hinges.
- Test Door Balance: With the opener disconnected, lift the door halfway. If it stays in place, it’s balanced. If it falls, call a pro.
- Inspect Wires and Remotes: Look for wear, corrosion, or damage.
- Replace Batteries Yearly: Don’t wait for remotes or keypads to fail.
Simple checks now can save you costly repairs and keep your garage secure.
How Weather Affects Garage Door Openers
Many homeowners don’t realize that weather can impact their LiftMaster opener:
- Cold Temperatures: Metal parts contract, making the door harder to move. Lubricate moving parts before winter.
- Heat and Humidity: Can warp door panels, causing misalignment. Inspect tracks and panels regularly.
- Storms and Power Surges: Can fry circuit boards. Consider using a surge protector.
If your opener suddenly fails after a storm, check your home’s electrical system and the opener’s circuit board.
Liftmaster Smart Features And Connectivity Problems
Modern LiftMaster models often include MyQ technology, allowing smartphone control. These features add convenience but can also introduce new troubleshooting needs.
Common Myq Issues
- App Won’t Connect: Check Wi-Fi signal strength at the opener.
- Network Reset Needed: Hold the Wi-Fi button on the opener until the LED blinks, then set up the connection again.
- Firmware Updates: Outdated software can cause app errors. Update via the MyQ app.
Security Concerns
If you notice unexpected activity, change your MyQ password and check for authorized users in the app. Always use a strong, unique password for your MyQ account.
Garage Door Force And Travel Settings Explained
Two common but often overlooked adjustments on LiftMaster openers are the force and travel settings.
- Travel Limits: Control how far the door opens or closes.
- Force Settings: Control how much power the opener uses to move the door.
If the door hits the floor and reverses, or doesn’t close all the way, fine-tune these settings. Use the dials or screws on the opener unit, following the manual’s instructions.
Dealing With Interference And Range Problems
Sometimes your remote works only when very close, or not at all. This is usually caused by signal interference.
- LED Bulbs: Some cheap LED bulbs emit radio noise. Try swapping bulbs in your opener.
- Nearby Electronics: Wi-Fi routers, baby monitors, or security cameras can interfere. Move these devices or change their channels.
- Antenna Issues: Make sure the opener’s antenna wire is hanging straight down and is not damaged.
For stubborn range issues, a LiftMaster remote extender or a replacement receiver may help.
Comparing Liftmaster With Other Garage Door Opener Brands
Wondering how LiftMaster stacks up against other brands? Here’s a quick overview:
| Feature | LiftMaster | Chamberlain | Genie |
|---|---|---|---|
| Build Quality | Heavy-duty, professional | Good, mostly for DIY | Reliable, lighter use |
| Smart Features | MyQ, advanced | MyQ, standard | Aladdin Connect |
| Warranty | 5-10 years | 5 years | 5-10 years |
| Professional Installation | Required | Optional | Optional |
LiftMaster is often favored for durability and features in both residential and commercial settings.
Non-obvious Insights For Liftmaster Troubleshooting
Many people overlook these important points:
- Surge Protection: Power surges are a leading cause of opener failure. Use a surge protector specifically rated for garage doors.
- Rolling Code Security: If your remote is stolen, always erase all codes from the opener and reprogram new remotes. This prevents unauthorized access.
- Backup Battery: Some models include a battery backup. If your opener works during power outages, replace this battery every 2-3 years. A dying backup battery can cause error codes that seem unrelated.

What To Do If Your Garage Door Is Stuck Closed
If you can’t open the garage door and your car is inside, follow these steps:
- Check for Power: Restore power if possible.
- Use the Emergency Release: Pull the red cord to disconnect the door from the opener. You can now lift the door manually (if the springs are intact).
- Check for Broken Springs: If the door is too heavy, a spring may be broken. Do not force it open—call a technician.
- Inspect for Obstructions: Clear away any visible debris or objects.
Remember to reconnect the opener after resolving the issue, or the door won’t move with the remote.
Tips For Programming And Resetting Remotes
Programming or resetting your LiftMaster remote is a simple process:
- Find the Learn Button: Located on the opener unit, often behind a light cover.
- Press and Release: Press the Learn button, then within 30 seconds press your remote button.
- Success: The opener light will blink or you’ll hear a click.
If you need to erase all remotes (after losing one), hold the Learn button for 6 seconds until the LED turns off.
Liftmaster Garage Door Opener Models And Compatibility
LiftMaster has released many opener models over the years. Most use standard remotes, keypads, and accessories, but some older models are not compatible with new smart features. Always check your model number (usually printed on the motor unit) before buying new remotes or parts.
If you have a very old opener (20+ years), consider upgrading for better safety, security, and convenience. Modern openers offer rolling code remotes, smart controls, and quieter operation.
For a full list of models and compatible accessories, see the official LiftMaster website.
Safety Tips For Garage Door Repairs
Even simple repairs can be risky. Follow these safety tips:
- Disconnect Power: Unplug the opener before working inside the motor unit.
- Don’t Touch Springs: Torsion and extension springs can cause severe injury if handled incorrectly.
- Use Proper Tools: Never substitute tools or use pliers on moving parts.
- Work with a Partner: For heavy doors, always have someone help you.
If you are unsure, it’s better to wait for a professional.

Frequently Asked Questions
How Do I Reset My Liftmaster Garage Door Opener?
To reset your LiftMaster opener, unplug it for 30 seconds and plug it back in. For remote and keypad resets, press and hold the “Learn” button on the opener until the LED turns off (about 6 seconds). Then reprogram your remotes.
Why Does My Liftmaster Opener Beep Or Flash?
A beeping sound often means the backup battery is low or there’s a MyQ system alert. Flashing lights usually indicate a safety sensor issue or an error code. Check the number of flashes to find the specific problem.
What Do I Do If My Garage Door Only Opens A Few Inches And Stops?
This often means a broken spring or a problem with the travel limits. Do not force the door. Check the springs and adjust the travel limits as needed. If the door is very heavy, call a professional.
Can I Replace Liftmaster Remote Batteries Myself?
Yes, most LiftMaster remotes use a coin-cell battery. Open the remote’s back, swap the battery, and reassemble. Be sure to use the correct battery type (usually CR2032).
Why Does My Liftmaster Opener Work With The Wall Button But Not The Remote?
This usually means the remote battery is dead, the remote needs to be reprogrammed, or there is radio interference. Try replacing the battery and reprogramming the remote. If the problem continues, check for interference or a damaged antenna.
A well-maintained LiftMaster garage door opener can last for many years. With the troubleshooting steps, preventive tips, and safety advice in this guide, you can solve most issues yourself and know when it’s time to call for expert help. Keep your opener running smoothly, and enjoy a reliable, secure garage every day.