Now Reading: How Do You Fix a Garage Door Spring: Step-by-Step Guide
- 01
How Do You Fix a Garage Door Spring: Step-by-Step Guide
A garage door that won’t open or close is more than just a small problem—it can disrupt your entire day and even put your home at risk. If your garage door suddenly stops working and you notice a loud bang or see a loose, hanging spring, the most likely cause is a broken garage door spring. For many homeowners, this is a confusing and stressful situation. You might wonder, “Can I fix this myself, or do I need to call an expert?” Fixing a garage door spring is a job that requires careful attention, the right tools, and a solid understanding of how garage doors work. If you’re thinking about tackling this repair yourself, this guide will walk you through everything you need to know, step by step, in clear and simple English.
Understanding Garage Door Springs
Garage doors are heavy—most single doors weigh between 130 to 350 pounds. The springs do the hard work of lifting that weight so you can open and close the door with little effort. There are two main types of garage door springs:
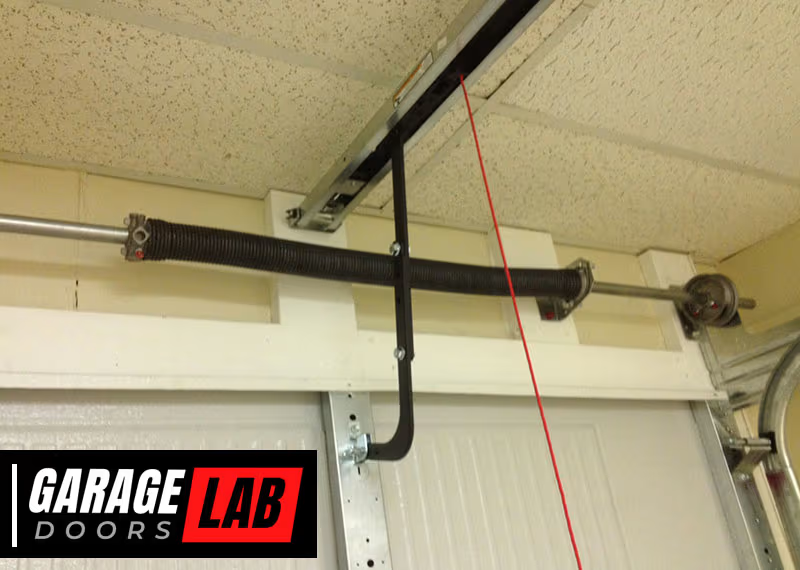
- Torsion Springs: Located above the door opening, these springs twist to store energy.
- Extension Springs: Found along the sides of the door, these springs stretch and contract.
Both types are under high tension. If a spring snaps, it can cause the door to slam shut, or parts to fly off dangerously. This is why safety should be your top priority.
How To Tell If Your Garage Door Spring Is Broken
Some clear signs show when a garage door spring is broken or failing:
- The door is very heavy to lift by hand
- The automatic opener struggles or fails to open the door
- You hear a loud bang from the garage (the sound of a spring breaking)
- The door opens only a few inches, then stops
- You see a visible gap in the spring or the spring hangs down
If any of these symptoms appear, it’s time to act.
Is It Safe To Replace A Garage Door Spring Yourself?
This is a critical question. Garage door springs are under a lot of tension. If they snap or release suddenly, they can cause serious injury or even death. According to the U.S. Consumer Product Safety Commission, over 2,000 people are injured by garage doors each year, many from spring accidents.
If you are not comfortable with tools, or if you have any doubts about your ability, it is best to call a professional. However, if you have basic mechanical skills, the right tools, and you follow safety instructions, it is possible to replace a garage door spring yourself.
Risks To Consider
- Personal injury: Springs can whip or fly off if handled incorrectly.
- Property damage: A misaligned door or broken parts can damage your car or belongings.
- Improper installation: This can lead to more breakdowns or safety hazards.
If you decide to proceed, take your time and never rush.
Tools And Materials You’ll Need
Before you start, gather all the necessary tools and materials. Having everything ready will make the process smoother and safer.
Required Tools:
- Winding bars (for torsion springs)
- Adjustable wrench or socket set
- Vice grips or locking pliers
- Safety goggles and gloves
- Ladder (sturdy and stable)
- Tape measure
- C-clamps
- Marker or chalk
Materials:
- Replacement spring(s) (make sure you buy the correct size and type)
- Lubricant (garage door-specific)
- New cables (if old ones are worn)
Some beginners skip winding bars and try using screwdrivers. Never do this—screwdrivers can slip and cause injuries.
Step-by-step Guide: How To Fix A Garage Door Spring
There are different steps for torsion and extension springs. Below, you’ll find detailed instructions for both types. Read the full process before starting.
Replacing Torsion Springs
Most modern garage doors use torsion springs. These springs sit on a bar above the door and twist to lift the door.
1. Disconnect Power And Secure The Door
- Unplug the garage door opener.
- Pull the emergency release cord to disconnect the door from the opener.
- Use C-clamps or locking pliers to clamp the door to the track, preventing it from moving.
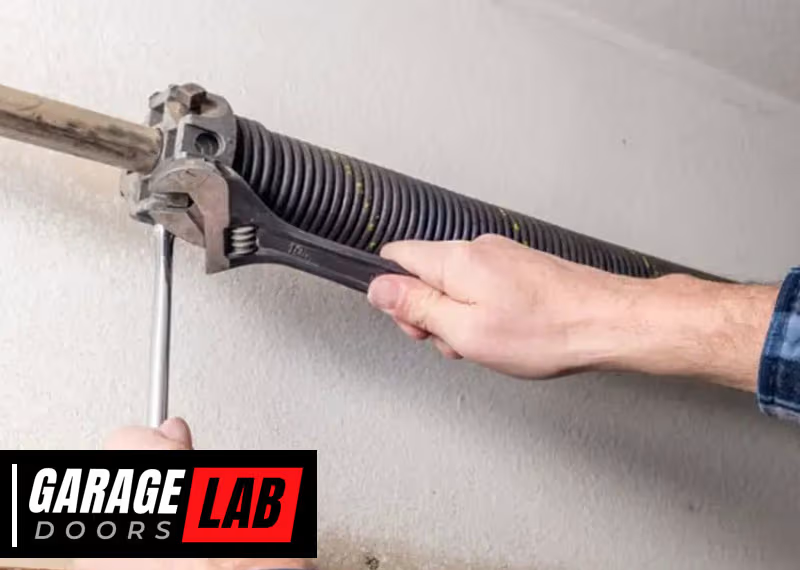
2. Loosen The Broken Spring
- Put on safety goggles and gloves.
- Insert a winding bar into the winding cone of the broken spring.
- Hold the bar firmly and loosen the set screws with a wrench.
- Slowly unwind the spring, one quarter turn at a time, using two winding bars to keep control.
3. Remove The Old Spring
- Slide the spring off the torsion bar.
- Check the cables, bearings, and other hardware—replace any worn parts.
4. Measure And Install The New Spring
- Measure the old spring: Length, inside diameter, and wire size. Most springs have color codes.
- Slide the new spring onto the torsion bar.
- Make sure the stationary cone is secured to the center bracket.
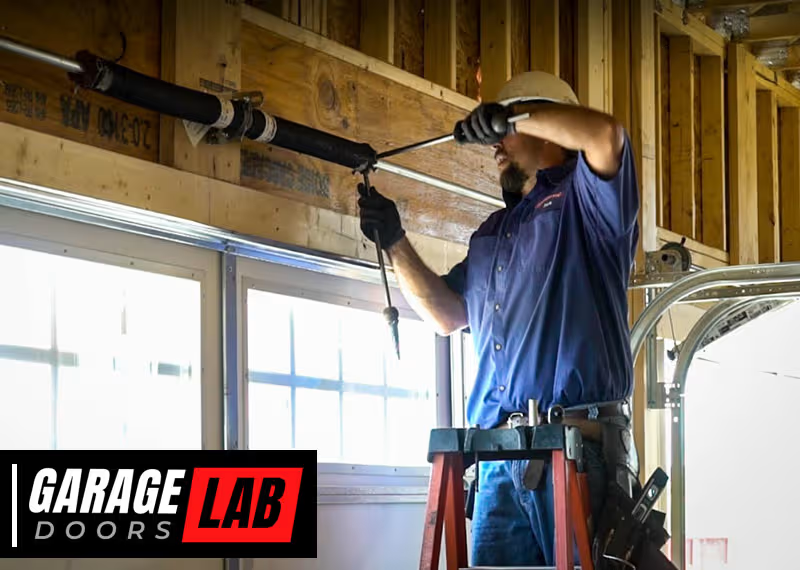
5. Wind The New Spring
- Insert the winding bars into the winding cone.
- Wind the spring by turning it the correct number of times (usually 30-36 quarter turns for standard doors—check manufacturer instructions).
- Tighten the set screws to hold the spring in place.
6. Test And Adjust
- Remove the C-clamps or pliers.
- Reconnect the door opener.
- Test the door by opening and closing it by hand. It should move smoothly and stay open about halfway.
7. Lubricate And Inspect
- Apply garage door lubricant to the spring and moving parts.
- Listen and watch for any strange noises or movements.
Replacing Extension Springs
Some older doors use extension springs, which run along the horizontal tracks.
1. Disconnect The Opener And Secure The Door
- Unplug the opener and pull the emergency release.
- Use C-clamps or locking pliers to secure the door in the open position.
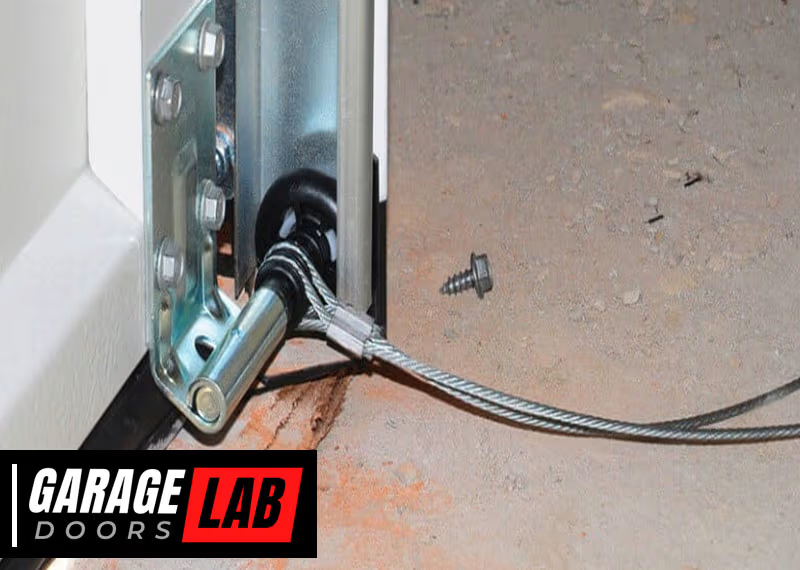
2. Remove The Old Spring
- Use pliers to disconnect the safety cables and the spring from the track support and pulley.
- Carefully remove the spring.
3. Install The New Spring
- Attach the new spring to the track support and pulley.
- Thread the safety cable through the spring (never skip this step—it prevents accidents if the spring breaks).
- Reconnect all hardware.
4. Test And Adjust
- Remove clamps and test the door by hand.
- Adjust tension by moving the S-hook to different holes in the track support if needed.
5. Lubricate And Inspect
- Spray lubricant on the new spring and other moving parts.
- Check for smooth operation.
Torsion Vs. Extension Springs: Key Differences
It’s important to understand the differences between these two spring types when choosing replacements or planning repairs. Here’s a side-by-side comparison:
| Feature | Torsion Springs | Extension Springs |
|---|---|---|
| Location | Above door opening (horizontal bar) | Along the side tracks (parallel to ceiling) |
| Motion | Twists to store energy | Stretches to store energy |
| Safety | Generally safer with correct installation | Higher risk if safety cable is missing |
| Lifespan | 15,000 – 20,000 cycles | 5,000 – 10,000 cycles |
| Cost | More expensive | Less expensive |
Most modern homes use torsion springs because they last longer and are safer with proper installation.
How To Choose The Right Replacement Spring
Getting the right spring is critical. The wrong size or type can make your door unsafe or cause new damage.
What To Check
- Spring length and wire size: Measure the old spring carefully.
- Inside diameter: Usually stamped on the spring cone (common sizes: 1.75”, 2.0”).
- Wind direction: Torsion springs can be right- or left-wound. Look for marks or labels.
- Weight of the door: Check the manufacturer’s label or measure using a scale.
Example Of Measuring A Torsion Spring
- Length: Measure the spring (not including cones) when it is relaxed.
- Wire size: Measure 10 or 20 coils and divide by the number of coils.
- Inside diameter: Look for markings or measure with a caliper.
If you are unsure, take the old spring to a hardware store or consult an expert.
Common Mistakes To Avoid
Many homeowners make simple mistakes that can lead to injuries or more repairs. Here are key pitfalls to watch out for:
- Using the wrong tools: Always use winding bars, never screwdrivers or pliers.
- Buying the wrong spring: Double-check measurements and specifications.
- Skipping safety steps: Never remove a spring without securing the door.
- Not checking other parts: Worn cables, bearings, or pulleys can cause new problems.
- Over- or under-winding the spring: Follow instructions for your door size and weight.
One common beginner mistake: ignoring the safety cable on extension springs. If the spring breaks without this cable, it can become a dangerous projectile.
How Much Does It Cost To Fix A Garage Door Spring?
The total cost depends on several factors:
- Spring type: Torsion springs cost more than extension springs.
- DIY vs. professional: Labor can double or triple the price.
- Location and availability: Prices may vary by region.
Here’s a price comparison:
| Item | DIY Cost (per spring) | Pro Repair (per spring) |
|---|---|---|
| Torsion Spring | $40 – $90 | $180 – $350 |
| Extension Spring | $20 – $50 | $120 – $200 |
| Labor (if pro) | – | $75 – $150/hour |
| Other parts (cables, pulleys) | $10 – $50 | $30 – $80 |
Keep in mind, doing it yourself saves money but increases risk. Weigh your skill level and comfort before deciding.

Signs You Need A Professional
While many people complete this repair themselves, there are situations where hiring a pro is smarter:
- You have two springs and both are broken
- The spring is not easily accessible (tight spaces, high ceilings)
- You have a high-cycle or specialty garage door
- You have limited tools or experience
- You’re unsure about measurements or installation steps
A professional brings the right tools and experience, reducing risks. Sometimes, paying for safety is worth every dollar.
Maintenance Tips To Extend Spring Life
Once your new spring is in place, regular maintenance will help it last longer and keep your door working smoothly.
Simple Maintenance Steps
- Lubricate springs and moving parts: Use a garage-door specific lubricant twice a year.
- Inspect cables and pulleys: Look for fraying or wear and replace as needed.
- Test door balance: Disconnect the opener and lift the door halfway by hand. It should stay in place.
- Tighten loose hardware: Check brackets, hinges, and tracks.
- Keep tracks clean: Remove debris and dust regularly.
Many people skip lubrication, but this small task can add years to the life of your springs.
Proactive Replacement
Garage door springs are rated by cycles (one up-and-down is one cycle). Most standard springs last 10,000 cycles—about 7-10 years with average use. If your spring is old, consider replacing both springs at the same time, even if only one is broken. This keeps the door balanced and avoids future breakdowns.
Real-life Example: Diy Vs. Professional Repair
Let’s look at two homeowners: Sarah and Mike.
- Sarah chose to fix her extension spring herself. She watched videos, bought the right tools, and finished the job in two hours. She saved about $150.
- Mike tried to replace a torsion spring using a screwdriver. The tool slipped, and the spring spun out of control. He was lucky to escape with only a bruised hand and called a pro to finish the job.
The lesson: Use the right tools, follow safety steps, and know your limits.
Professional Help: When And How To Find It
If you decide to hire a pro, look for companies with:
- Good online reviews and ratings
- Proper insurance and licenses
- Transparent pricing (avoid hidden fees)
- Warranties on parts and labor
Ask for references and get more than one quote if possible. Many companies can schedule same-day service for broken springs.
For more tips and safety information, check the U.S. Consumer Product Safety Commission.
Troubleshooting: What If Your Garage Door Still Doesn’t Work?
Sometimes, replacing the spring does not fix all problems. Here are some things to check:
- Cables came off the drum: Rewind and secure them.
- Opener won’t run: Check the power and reset the opener.
- Door is crooked or off track: Realign tracks and tighten all bolts.
- Strange noises: Lubricate moving parts and check for worn rollers.
If you have tried all fixes and the door still has issues, it may be time for professional help.
Key Safety Insights Most Beginners Miss
- Never remove both springs at once (for double-spring systems) unless you fully understand the process. Removing both can make the bar spin dangerously.
- Mark the position of hardware before removing anything. A simple chalk mark can save you from confusion during reassembly.
- Do not attempt to fix a spring while the door is open—it can slam shut unexpectedly and cause injury.
Frequently Asked Questions
How Do I Know If My Garage Door Spring Is Left-wound Or Right-wound?
Look at the end of the spring: if the coil ends point clockwise, it’s right-wound; if they point counterclockwise, it’s left-wound. Most double-door systems have one of each.
Can I Use Universal Springs For Any Garage Door?
No, using a universal spring can cause improper tension, balance problems, and safety risks. Always match the spring to your door’s size and weight.
How Long Do Garage Door Springs Last?
Standard springs last about 10,000 cycles (7–10 years for most families). Heavy use or poor maintenance can shorten their lifespan.
Why Did My New Spring Break So Soon?
This is often due to incorrect installation, poor-quality springs, or lack of lubrication. Always buy quality parts and follow maintenance tips.
What’s The Most Dangerous Part Of Garage Door Spring Repair?
The winding and unwinding process is most dangerous, especially for torsion springs. Always use winding bars and proper safety gear.
A broken garage door spring can feel like a huge problem, but with the right information, you can make smart decisions about repairs. Whether you choose to fix it yourself or hire a pro, always put safety first. Take your time, use the right tools, and double-check every step.
With care and attention, you can have your garage door working safely and smoothly again.