Now Reading: How to Change Garage Door Cable: A Step-by-Step Guide
- 01
How to Change Garage Door Cable: A Step-by-Step Guide
If your garage door feels heavy, jerky, or stops halfway, the problem might be a broken or frayed garage door cable. These cables are small but play a huge role in lifting and lowering your door safely. Ignoring a damaged cable can lead to sudden door drops, injury, or expensive repairs. Changing a garage door cable isn’t impossible for a careful DIYer, but it does require knowledge, planning, and respect for the tension stored in the springs. This guide will walk you through the process step by step, explain the tools and safety gear you need, highlight common mistakes, and provide expert tips. You’ll learn not just how to change a garage door cable, but also how to do it safely and confidently.
Understanding Garage Door Cables
Before you start, it’s important to know what garage door cables do and why they matter. These cables are connected to the bottom corners of your garage door and run up to the torsion or extension springs. When the door opens, the springs pull on the cables, lifting the door. If a cable snaps, your door can crash down or become stuck.
There are two main types of cables:
- Torsion spring cables (for doors with springs above the door)
- Extension spring cables (for doors with springs along the sides)
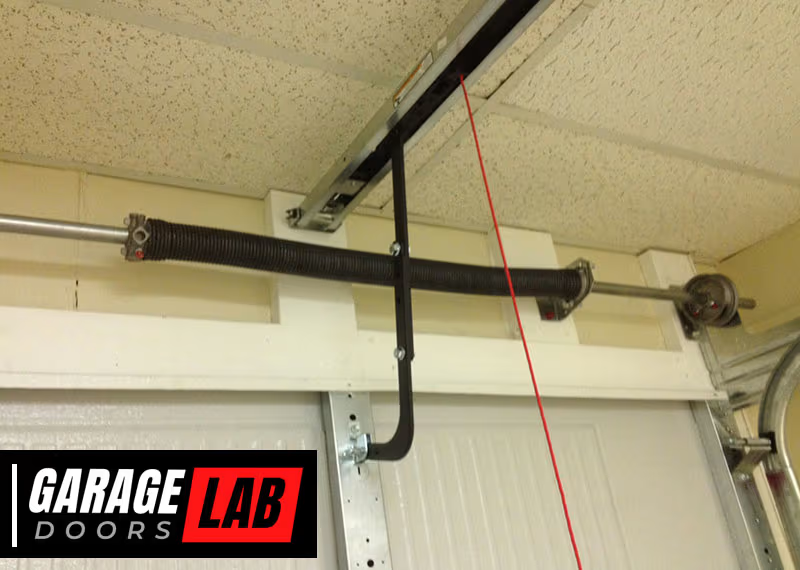
Most residential garage doors use torsion spring systems because they’re safer and more reliable. If you’re unsure which system you have, look above your garage door: a long bar with springs attached is a torsion system; springs running parallel to the tracks are extension springs.
Cables usually fail from:
- Fraying due to age or rust
- Snapping from sudden stress
- Coming off the drum if the door is unbalanced
Replacing a worn cable promptly keeps your door safe and smooth.
Safety Precautions
Changing a garage door cable can be dangerous, especially with torsion springs. These springs store a lot of energy, and a sudden release can cause severe injury. Never rush this job, and don’t attempt it if you’re unsure. Many people miss these safety basics:
- Disconnect the opener: Unplug the automatic garage door opener so no one can accidentally activate it.
- Work with the door down: Always replace cables with the door in the closed position. This reduces spring tension.
- Release tension carefully: For torsion spring systems, you must unwind the springs before touching the cables. This step is critical.
- Wear safety gear: Always use eye protection, gloves, and sturdy shoes.
- Use the right tools: Never substitute tools—improvised items can slip or break.
- Never remove both cables at once: If both sides need replacement, do one at a time to prevent the door from shifting or falling.
If you ever feel unsure, it’s safer to call a professional. According to the Consumer Product Safety Commission, thousands of garage door-related injuries happen every year, often from DIY repairs gone wrong.

Tools And Materials Needed
Having the correct tools makes the job safer and faster. Here’s what you’ll need for most garage door cable replacements:
- New garage door cables (matched to your door height and weight)
- Winding bars (for torsion spring systems)
- Adjustable wrench
- Socket set
- Locking pliers (vise grips)
- Flathead screwdriver
- Stepladder
- Gloves and safety glasses
- Tape measure
- Marker or chalk
- WD-40 or similar lubricant
Don’t skip the winding bars—they’re specially designed to unwind and rewind torsion springs safely. Never use screwdrivers or rebar as substitutes.
Signs Your Garage Door Cable Needs Replacing
People often wait until a cable snaps, but that’s risky. Look for these warning signs:
- Visible fraying or rust
- Slack or loose cables when the door is closed
- The door lifts unevenly or gets stuck
- Cables jump off the drum
- Strange noises like snapping or grinding
If you notice any of these, change the cable before it breaks.
Step-by-step: How To Change Garage Door Cable
Changing a garage door cable is not just about swapping parts—it’s about following a careful process. Here’s how to do it:
1. Prepare Your Workspace
Clear the area around your garage door. Remove cars, bikes, or anything that could get in the way. Gather all your tools and lay them out so you don’t have to hunt for anything mid-job. Make sure there’s good lighting.
2. Disconnect The Opener
Unplug the garage door opener from the ceiling outlet. If your opener has a battery backup, disconnect that too. You don’t want the opener activating while you work.
3. Secure The Door
With the door fully closed, place locking pliers just above one of the rollers on the garage track. This will keep the door from moving if something slips. Never work with the door open.
4. Release Spring Tension (torsion System Only)
This is the most dangerous step. If you have extension springs, skip this and go to the next section.
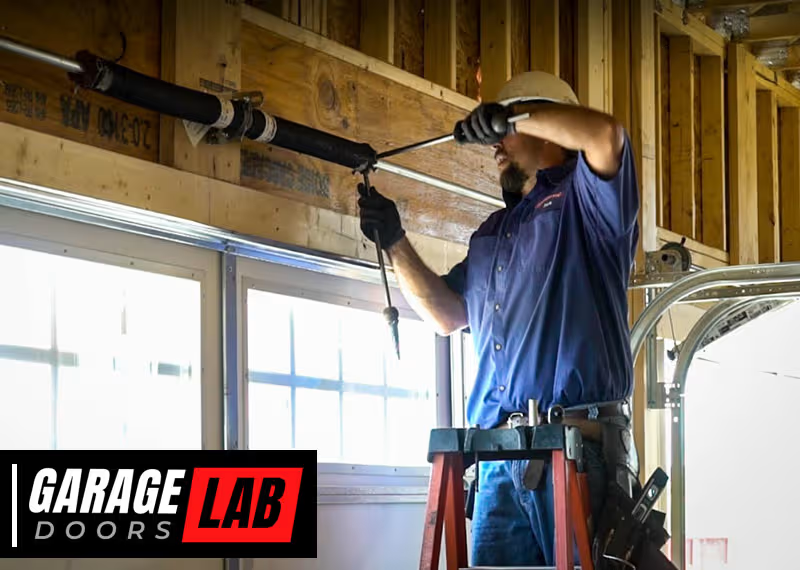
For torsion springs:
- Insert a winding bar into the winding cone at the end of the spring.
- Hold the bar firmly, and loosen the set screws with your wrench. The spring will push against the bar, so keep your grip tight.
- Insert the second winding bar into the next hole before removing the first.
- Slowly unwind the spring, one-quarter turn at a time, alternating bars until all tension is released.
If you’re not comfortable with this, hire a professional. This is where most injuries happen.
5. Remove The Old Cable
Once the spring is unwound:
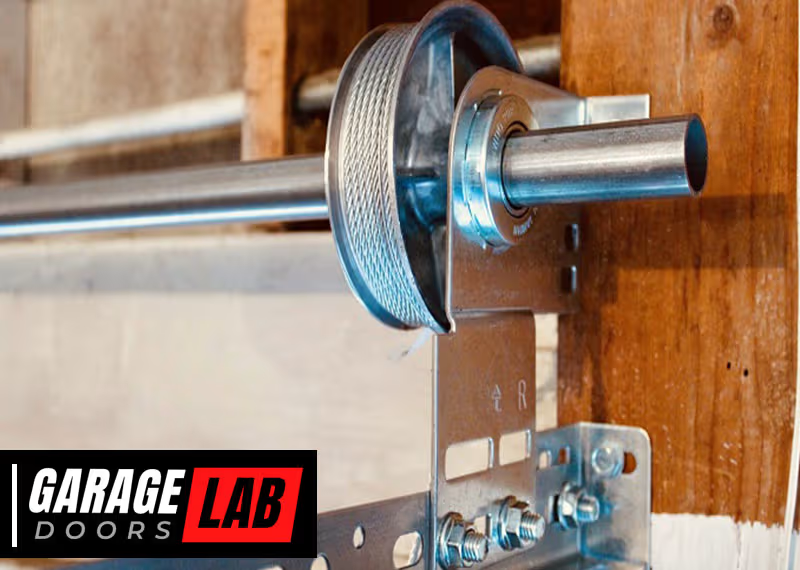
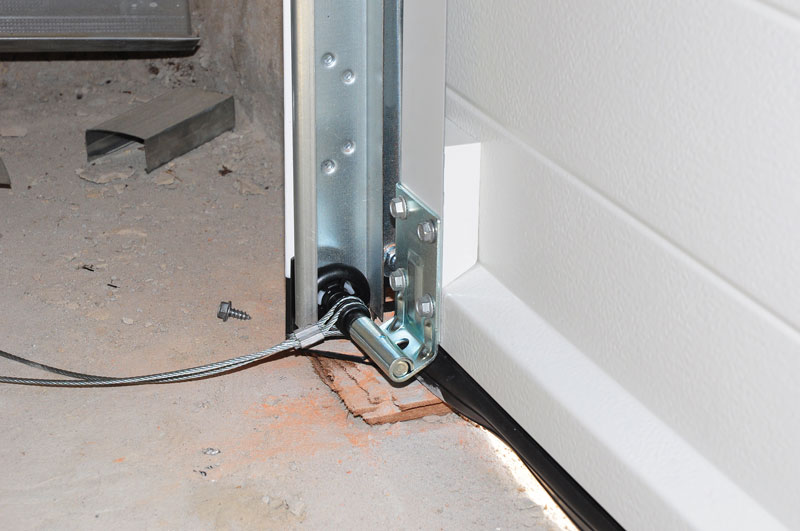
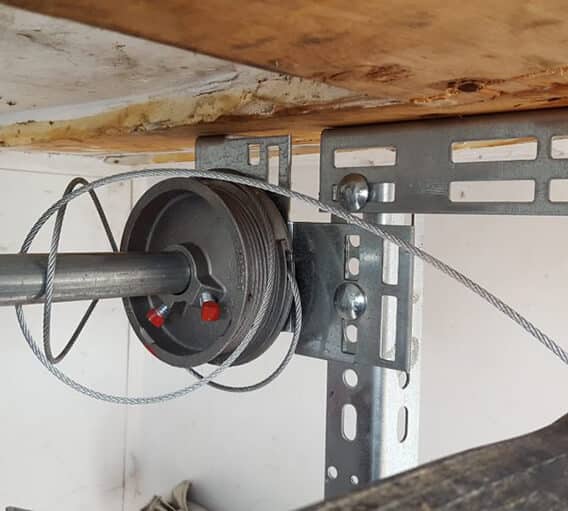
- Locate the cable drum (a grooved wheel at the top corner of the door).
- Loosen the set screw on the drum.
- Pull the old cable out of the drum and detach it from the bottom bracket of the door.
- Inspect the drum for wear—replace if it’s cracked or grooved.
6. Install The New Cable
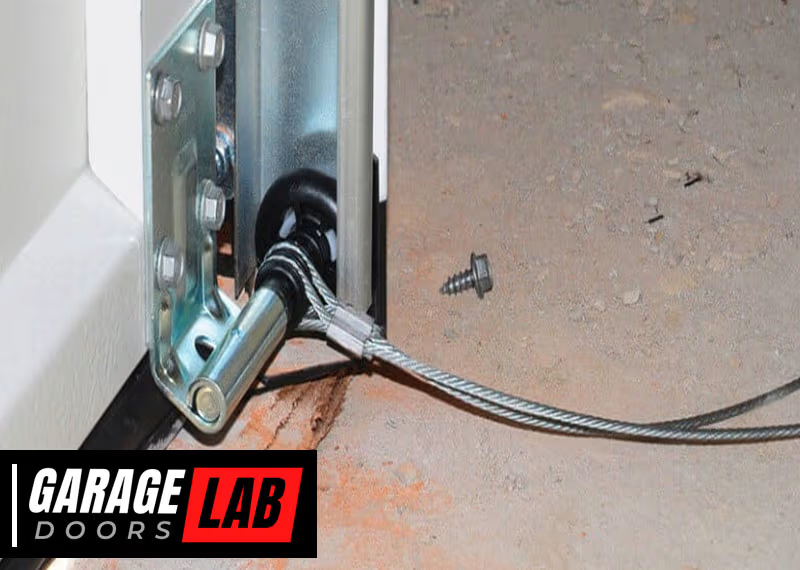
- Attach the loop of the new cable to the bottom bracket of the garage door.
- Guide the cable up along the side of the door, making sure it’s not twisted.
- Thread the end of the cable into the slot on the cable drum.
- Pull the cable tight and wind it neatly around the drum grooves.
- Tighten the set screw to secure the cable.
Pro tip: Some cables are slightly longer on one side. If your door has an offset spring system, match the new cable’s length to the old one.
7. Re-tension The Springs
If you have a torsion spring:
- Insert the winding bars and carefully wind the spring back to its original tension (usually 30 to 36 quarter turns for a standard 7-foot door).
- Tighten the set screws.
- Remove the locking pliers.
8. Test The Door
Plug the opener back in, but first, try the door manually. It should lift smoothly and stay open at waist height. If it slams shut or won’t stay up, the springs may need more or less tension. Adjust as needed.
Run the opener and listen for odd noises. If the door jerks or the cable slips, stop and re-check your work.
9. Repeat On The Other Side (if Needed)
If both cables are frayed, repeat the process on the other side—but only after one side is fully secured.
10. Final Inspection And Lubrication
Check that both cables are seated properly in the drums and run parallel to the door tracks. Spray a light coat of lubricant (not grease) on the cables to prevent rust. Wipe away excess.
Example: Torsion Vs Extension Cable Replacement
Here’s a quick comparison of the steps for the two systems:
| Step | Torsion Spring System | Extension Spring System |
|---|---|---|
| Release Tension | Unwind torsion spring with bars | Detach spring from anchor and allow to hang loose |
| Remove Cable | Loosen drum set screw, remove cable | Unhook cable from pulley and bracket |
| Install New Cable | Attach to bracket, wind onto drum | Hook to pulley and bracket |
| Re-Tension | Wind spring with bars to correct tension | Reconnect and stretch spring |
| Test Door | Manual and powered test | Manual and powered test |
Common Mistakes And How To Avoid Them
Even careful DIYers make mistakes. Watch out for these:
Using The Wrong Cable
Garage doors need cables that match their weight and height. Using a cable that’s too thin or short can cause early failure. Always check your owner’s manual or measure the old cable before buying a replacement.
Not Releasing Spring Tension
Trying to remove a cable with a loaded spring is extremely dangerous. Always unwind torsion springs fully before touching the cable.
Forgetting The Drum Set Screw
If you forget to re-tighten the set screw on the cable drum, the cable will slip and the door can crash. Double-check all set screws before testing the door.
Poor Cable Routing
Cables must run straight, without twists, and sit properly in the drum grooves. Twisted or misrouted cables will jump off the drum and jam the door.
Uneven Tension
If the springs are wound unevenly, the door will lift crooked and put extra stress on the cables. Count the turns carefully.
Not Checking Door Balance
After changing cables, always test the door balance by lifting it halfway. If it won’t stay, adjust the spring tension.
Ignoring Other Worn Parts
If your cables were frayed, check the rollers, drums, and brackets for wear. Replacing only the cables might not fix the root problem.
How To Choose The Right Replacement Cable
Not all garage door cables are the same. Here’s what matters:
- Cable length: Standard residential doors (7–8 feet tall) usually need 8–10 foot cables. Measure the old one if you’re unsure.
- Cable thickness: Most use 1/8-inch or 3/32-inch thick cables, but heavier doors need thicker cables.
- Material: Galvanized steel is common and resists rust. Stainless steel is best for coastal or humid areas.
- Loop or stop end: Some cables have a loop for the bottom bracket, others have a crimped stop. Match your old cable.
- Brand compatibility: Some doors require specific cables—check your manufacturer’s specs.
Here’s a quick comparison of common cable types:
| Type | Best For | Pros | Cons |
|---|---|---|---|
| Galvanized Steel | Most homes | Rust-resistant, affordable | May corrode over time in wet climates |
| Stainless Steel | Coastal/humid areas | Highly rust resistant, long-lasting | More expensive |
| Plastic Coated | Extra corrosion resistance | Added durability, quieter | Can be harder to thread in drums |
Tip: If you’re not sure, bring your old cable to the hardware store and ask for help.
Garage Door Cable Replacement Cost
If you’re hiring a pro, expect to pay $150–$250 for cable replacement. DIY costs are much lower—replacement cables cost $10–$30 per pair, and you’ll need basic tools.
Here’s a sample breakdown:
| Item | DIY Cost | Professional Cost |
|---|---|---|
| Replacement Cables (pair) | $10–$30 | Included in service |
| Tools (if not owned) | $20–$50 | Included in service |
| Labor | Free (your time) | $100–$200 |
| Total | $10–$80 | $150–$250 |
Doing it yourself saves money, but only if you follow safety steps and use the correct parts.
How To Maintain Your Garage Door Cables
Once you’ve installed new cables, a little maintenance will keep them running smoothly for years. Here’s what to do:
- Inspect monthly: Look for fraying, rust, or loose cables.
- Lubricate twice a year: Use a silicone spray or light oil—never heavy grease.
- Keep the tracks clean: Dust and dirt can cause cables to jump out of the drum.
- Check door balance: If the door feels heavy or won’t stay up, check spring tension.
- Listen for noise: Squeaks or grinding mean something needs attention.
Most homeowners forget cable maintenance, but five minutes a month can prevent expensive repairs.
When To Call A Professional
Changing a garage door cable is manageable for many, but certain situations require expert help:
- You’re not comfortable with spring tension
- Your door is extremely heavy or commercial grade
- Cables or drums are damaged beyond simple replacement
- You suspect a broken spring
- The door is stuck open or closed
A professional can usually replace cables in about an hour and will check for other issues. If you want peace of mind, it’s worth the cost. For more on garage door safety and repairs, visit the U.S. Consumer Product Safety Commission.
Frequently Asked Questions
How Long Do Garage Door Cables Last?
Most garage door cables last 5–10 years, depending on climate, usage, and maintenance. Salt air, humidity, or lack of lubrication can shorten their lifespan. Inspect your cables every year for signs of wear.
Can I Change A Garage Door Cable Without Special Tools?
You need winding bars for torsion spring systems—never use screwdrivers or improvised tools. Extension spring systems require fewer special tools, but always use the right size wrenches and pliers.
What Happens If A Garage Door Cable Breaks?
If a cable breaks, the door may become crooked, jam in the tracks, or crash down suddenly. Never try to open or close a door with a broken cable—replace it immediately to avoid injury or damage.
How Do I Know If My Garage Door Is Balanced After Replacing Cables?
Lift the door manually halfway. A balanced door will stay in place. If it rises or falls, adjust the spring tension or check cable routing.
Are All Garage Door Cables The Same?
No. Cables come in different lengths, thicknesses, and materials. Match the replacement to your door’s size, weight, and spring system for safety and performance.
Getting your garage door cable replacement right means more than just swapping a part—it’s about safety, precision, and long-term reliability. With the right tools, careful steps, and a little patience, you can keep your garage door running smoothly for years.
And if you ever feel uncertain, don’t risk it—professional help is always a smart choice.