Now Reading: How to Change Battery in Liftmaster Garage Door Opener Keypad Fast
- 01
How to Change Battery in Liftmaster Garage Door Opener Keypad Fast
How to Change Battery in Liftmaster Garage Door Opener Keypad Fast
If your Liftmaster garage door opener keypad is starting to act up—maybe the buttons aren’t working, or the backlight is dim—it’s likely time to change the battery. Many homeowners worry this is a technical task, but with a little guidance, it’s simple and quick. In fact, changing the keypad battery is one of the easiest ways to keep your garage secure and running smoothly. This guide will walk you through the entire process, share expert tips, and explain what to do if things don’t go as expected.
Why The Keypad Battery Matters
Your keypad lets you open and close your garage door without a remote. It’s a small device, but it plays a big role in daily life. When the battery is low, you might notice:
- Keypad doesn’t light up
- Garage door doesn’t respond
- Intermittent working
A weak battery can lead to lockouts or even security risks if you can’t close your door. Replacing the battery before it dies completely keeps your home safe and your schedule on track.
Understanding Your Liftmaster Garage Door Keypad
Liftmaster makes several types of keypads. Most are wireless and mounted outside the garage. The battery type and replacement steps are similar for most models, but some differences exist. Before starting, check which model you have. Look for a label inside the keypad or check your user manual.
Common models include:
- 377LM
- 877LM
- 878MAX
Most use a 9V battery, but some older or less common units may use different sizes. Always confirm before buying a replacement.
Tools And Materials Needed
Before you start, gather the following items:
- Replacement 9V battery (or the correct size for your model)
- Small Phillips screwdriver (if your keypad has screws)
- Clean, dry cloth (for cleaning contacts)
- Step stool (if your keypad is mounted high)
Having everything ready saves time and avoids mid-task frustration. Don’t skip the cleaning—dust or corrosion can cause problems even after you install a new battery.
Step-by-step: How To Change The Battery
Let’s get hands-on. These steps work for most Liftmaster keypads, but always check your manual for model-specific details.
1. Locate The Keypad And Check The Battery Type
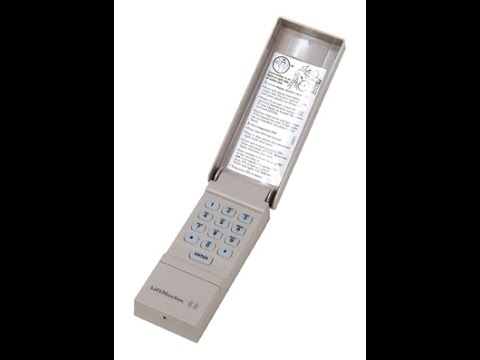
First, find your keypad on the garage wall, typically beside the door. Open the flip-up cover and look for a sticker or engraving with the model number. If you’re unsure, searching the number online or referencing your manual can help.
Most Liftmaster keypads use a 9V alkaline battery. If you don’t see the battery size, open the compartment first to check.
2. Open The Keypad
- If your keypad has a release tab, press it gently to open.
- For models with screws, use your Phillips screwdriver to remove them. Place the screws in a safe spot.
- Carefully lift the keypad cover. Avoid pulling too hard—older plastic can crack.
Some keypads have weatherproof seals. If you see a rubber gasket, be gentle to avoid tearing it.
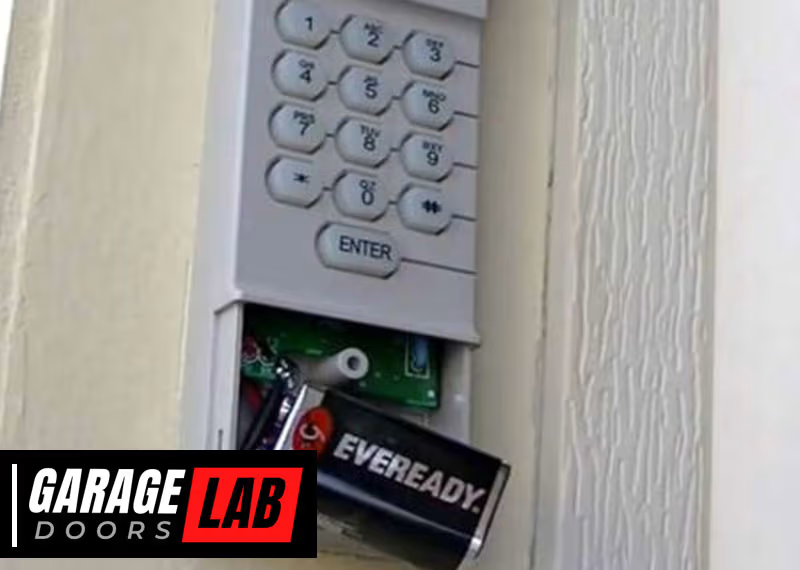
3. Remove The Old Battery
- Gently disconnect the battery by pulling the snap connector off the terminals.
- Avoid using metal tools, which could short the contacts.
- Check for signs of corrosion: White powder or green residue on the terminals. If present, clean with a dry cloth. For stubborn corrosion, a bit of white vinegar on a cotton swab can help—just make sure everything is dry before continuing.
4. Insert The New Battery
- Attach the connector to the new battery, matching the larger and smaller terminals.
- Insert the battery into the compartment, ensuring it sits flat and the wires are not pinched.
- If your keypad is exposed to weather, check the seal before closing.
5. Close The Keypad
- Snap the cover shut or reattach the screws.
- Wipe away any fingerprints or dirt from the outside.
6. Test The Keypad
- Press any button. The keypad should light up.
- Enter your code and open the garage door.
- If nothing happens, double-check the battery orientation and connections.
Pro tip: Some keypads need a reset after battery replacement. If your code doesn’t work, follow the programming instructions in your manual.
Common Problems And Troubleshooting
Not every battery change goes perfectly. Here’s how to handle the most common issues.
The Keypad Still Doesn’t Work
- Confirm the new battery is fresh. Even new batteries can be dead if old stock.
- Double-check that the terminals are clean and making good contact.
- Make sure the battery is installed correctly (positive and negative sides matched).
Keypad Lights Up, But Door Won’t Open
- Try re-entering your code. Some keypads reset after battery replacement.
- If your code doesn’t work, you may need to reprogram the keypad. This usually means pressing the “Learn” button on your opener (located in the garage, not on the keypad) and entering your code again. Refer to your manual for steps.
Keypad Buttons Are Sticky Or Unresponsive
- Dirt and weather can affect buttons. With the battery out, gently clean the keypad surface with a soft, damp cloth. Never soak the unit.
- Avoid using chemical cleaners—they can damage the plastic or electronics.
Old Battery Leaked
If you see white or green powder, wear gloves and clean with care. Corrosion can ruin the keypad if not removed. If contacts are badly damaged, you may need a new keypad.
How Long Does A Keypad Battery Last?
Most Liftmaster keypad batteries last about 1 to 2 years with regular use. Cold weather and frequent operation can shorten battery life. To avoid surprises, change the battery every year, or set a reminder in your phone.
Here’s a quick comparison of battery life in different usage conditions:
| Usage | Expected Battery Life |
|---|---|
| Light (1-2 uses/day) | 18-24 months |
| Moderate (3-5 uses/day) | 12-18 months |
| Heavy (6+ uses/day) | 6-12 months |
| Cold weather (<32°F/0°C) | 6-10 months |
Non-obvious insight: Many people forget that extreme temperatures (both hot and cold) can reduce battery life, even if the keypad is used the same amount.
Choosing The Right Replacement Battery
Not all 9V batteries are equal. For best results, use a high-quality alkaline battery from a reputable brand. Avoid rechargeable batteries, as they often provide lower voltage and shorter life in keypads.
Here’s a comparison of popular 9V battery types for garage door keypads:
| Battery Type | Pros | Cons |
|---|---|---|
| Alkaline (e.g., Duracell, Energizer) | Long life, reliable voltage | Disposable, must recycle properly |
| Lithium (e.g., Energizer Ultimate Lithium) | Longest life, good for cold weather | More expensive |
| Rechargeable NiMH | Eco-friendly, reusable | Lower voltage, shorter run time |
| Generic/No-name | Cheap | Unpredictable quality, may leak |
Expert tip: Lithium 9V batteries cost more but can last twice as long, especially in cold climates. For most homes, a name-brand alkaline battery is the best balance of cost and reliability.
Safety Tips For Battery Replacement
Changing a battery is safe if you follow basic steps, but a few extra precautions can help:
- Always use dry hands to avoid electric shock or damaging the unit.
- Don’t force the battery in—if it doesn’t fit easily, check the orientation.
- Dispose of old batteries at a recycling center. Never toss them in regular trash, as they can leak harmful chemicals.
- If your keypad is exposed to rain or snow, check the gasket and replace it if cracked. This keeps water out and extends the life of your keypad.
Non-obvious insight: Replacing the gasket or adding a small bead of weatherproof silicone around the edge can prevent future water problems—something most people overlook.

What To Do If You Lost Your Manual
Many homeowners lose their manuals over time. Luckily, most Liftmaster keypad manuals are available online. Visit the official Chamberlain Group Support site, type in your model number, and download the instructions. Always check that the manual matches your keypad to avoid confusion.
Preventing Future Keypad Problems
Small changes in care can keep your keypad working longer:
- Change the battery annually, even if it’s not dead.
- Clean the keypad every few months to remove dust and bugs.
- Check the weather seal and replace if needed.
- Teach all family members how to change the battery, so no one is locked out.
Most keypads fail from neglect, not from technical faults. A little regular attention saves money and hassle.
Upgrading Your Keypad: When And Why
If your keypad is more than 10 years old, or if you notice frequent failures even after battery changes, consider an upgrade. Newer keypads offer:
- Backlit buttons for easier night use
- Weather-resistant designs
- Rolling code technology for better security
Upgrading can also solve compatibility issues with newer garage door openers. Most new Liftmaster keypads are universal for their openers made since 1993.
Example: If your old keypad won’t reprogram after a battery change, or the buttons are worn out, a new unit might be a better investment than repeated repairs.
Mistakes To Avoid
Even simple jobs have common pitfalls. Here’s what to watch for:
- Using the wrong battery size—always check before buying.
- Forcing the cover or battery—gentle pressure prevents cracks.
- Ignoring corrosion—clean terminals before installing the new battery.
- Skipping keypad reprogramming—some models require it after battery change.
- Using old batteries from your junk drawer—always use fresh, name-brand units for best results.
When To Call A Professional
Most battery swaps are DIY-friendly. But call a pro if:
- The keypad is damaged or won’t close after battery replacement.
- You see significant corrosion or water inside the unit.
- The garage door opener itself (not just the keypad) is malfunctioning.
A technician can diagnose deeper electrical or mechanical problems. Sometimes the opener, not the keypad, is the real issue.
Cost Of Battery Replacement
Replacing the battery yourself costs very little. Here’s a breakdown:
- 9V battery: $3 to $6 (alkaline), up to $10 (lithium)
- Screwdriver or tools: Most homes already have these
- Professional service call: $60–$120 (if you hire someone)
DIY replacement is almost always the better value, unless there’s a more serious problem.
Comparing Keypad Models
Liftmaster offers several keypad models. Here’s how they differ in battery access and features:
| Model | Battery Type | Weatherproofing | Backlit Buttons | Easy Battery Access |
|---|---|---|---|---|
| 377LM | 9V Alkaline | Basic Seal | No | Yes |
| 877LM | 9V Alkaline | Improved | Yes | Yes |
| 878MAX | 9V Alkaline | Best | Yes | Yes |
| 376LM (older) | 9V Alkaline | Basic | No | Somewhat |
If you’re buying a new keypad, the 877LM or 878MAX offer easier battery changes and better weather protection.
Environmental Impact And Battery Disposal
Old batteries can leak chemicals that harm the environment. Never throw them in your household trash. Instead:
- Take used batteries to a local recycling center or hardware store with a recycling program.
- If you must store old batteries before disposal, keep them in a cool, dry place, away from metal objects.
- For large numbers of batteries, check with your city or county for special collection days.
Proper disposal protects your community and keeps your garage safe.

Real-world Example: Changing The Battery In The 877lm Keypad
Let’s walk through a real example. The 877LM is a popular model. Here’s how a typical battery swap goes:
- Open the keypad by lifting the cover.
- Locate the battery compartment at the bottom edge.
- Slide off the battery cover—no screws are needed.
- Disconnect the old 9V battery.
- Clean the contacts with a dry cloth.
- Connect the new battery, matching the terminals.
- Slide the battery cover back and close the keypad.
- Test by entering your PIN. The keypad lights up, and the door opens.
Total time: 2–5 minutes. No tools needed, unless you want to clean stubborn dirt.
What If The Keypad Still Fails?
If you’ve replaced the battery, cleaned the contacts, and reprogrammed the code, but your keypad still won’t work, consider these options:
- Try a known-good battery from another device.
- Test the keypad at a different location (if possible).
- Check the main garage door opener unit; its batteries or wiring may be the issue.
- Replace the keypad if it’s over 10 years old or damaged.
Sometimes, repeated battery failures indicate internal circuit problems. In these cases, replacement is the best long-term solution.
Frequently Asked Questions
How Do I Know When My Liftmaster Keypad Battery Is Low?
Common signs are a dim or non-working backlight, slow keypad response, or the garage door not opening after entering your code. If you notice these, change the battery soon to avoid getting locked out.
Can I Use A Rechargeable Battery In My Liftmaster Keypad?
It’s not recommended. Rechargeable 9V batteries usually have lower voltage and shorter run time. For best results, use a high-quality alkaline or lithium battery.
Does Changing The Battery Erase My Code?
Usually, your code stays saved during battery changes. However, some older models may lose their programming, requiring you to re-enter your code. If your code doesn’t work after a battery change, follow the keypad’s programming instructions.
How Often Should I Change My Keypad Battery?
A good rule is once a year, or sooner if you use the garage often or live in a cold climate. Setting a yearly reminder helps avoid unexpected problems.
What If I Lost My Keypad Code After Changing The Battery?
If your keypad loses its code, you’ll need to reprogram it. This usually involves pressing the “Learn” button on your garage door opener motor unit, then entering a new code on the keypad. Check your user manual or the Chamberlain Group’s support website for exact steps.
Changing the battery in your Liftmaster garage door opener keypad is one of the simplest ways to keep your garage secure and avoid daily hassles. With a few minutes of effort and the right steps, you can do it yourself—saving both time and money. Don’t wait for your keypad to fail; make battery changes part of your home maintenance routine. If you ever run into trouble, resources are available online, or a local technician can help. Regular care ensures your garage stays safe, reliable, and easy to use for years to come.


