Now Reading: How To Manually Open Garage Door During Power Outage
- 01
How To Manually Open Garage Door During Power Outage

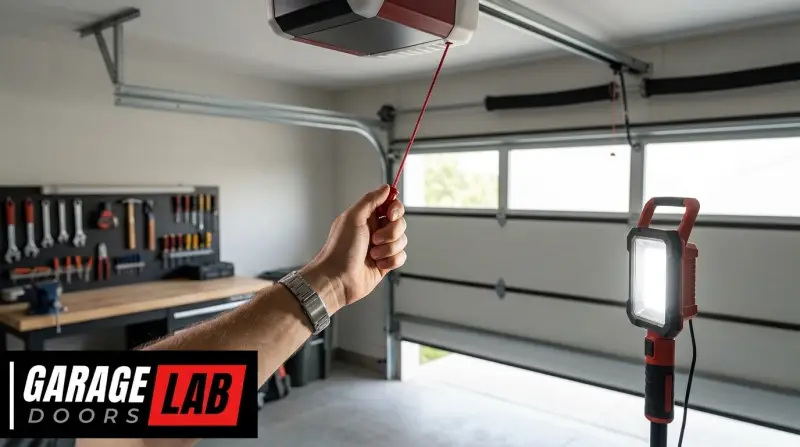
The sudden loss of power can leave you stranded, especially when your garage door opener is your primary means of entry and exit. While modern automatic garage doors offer unparalleled convenience, they rely entirely on electricity to function. This dependency becomes a significant inconvenience, and potentially a security concern, during a power outage.
Fortunately, most garage door opener systems are designed with a manual override mechanism, allowing you to operate your garage door without electricity. Understanding how to access and use this feature is crucial for ensuring you can still get in and out of your garage when the grid goes down.
This guide will walk you through the essential steps and considerations for manually opening your garage door during a power outage. We’ll cover identifying the emergency release, the proper procedure for disengaging the opener, and how to re-engage it once power is restored.
We will also explore common issues, safety precautions, and alternative solutions, ensuring you are prepared for any scenario.
Key Takeaways
- Locate the Emergency Release: Most garage door openers have a red cord hanging from the trolley; this is your emergency release.
- Disengage the Opener: Pulling the emergency release cord disengages the opener from the door, allowing for manual operation.
- Manual Operation: Once disengaged, you can lift the door by hand, but be prepared for its weight.
- Safety First: Ensure the garage is clear of people and obstacles before attempting manual operation.
- Re-engaging the Opener: Once power is restored, you’ll need to re-engage the opener mechanism, often by pulling the cord again or running the opener.
- Battery Backup: Consider installing a battery backup system for continuous operation during outages.
- Regular Checks: Periodically test your manual release to ensure it functions correctly.
Understanding Your Garage Door Opener System
Before you can manually open your garage door, it’s essential to understand the basic components of your automatic opener system. This knowledge will help you identify the critical parts needed for manual operation and ensure you perform the steps correctly and safely.
A typical garage door opener system consists of the motor unit, the drive mechanism (chain, belt, or screw), the trolley, and the emergency release cord. The motor unit, usually mounted on the ceiling, powers the drive mechanism. This mechanism moves a trolley along a rail, which is connected to your garage door via an arm.
The trolley is what actually lifts and lowers the door.
The emergency release cord is a safety feature designed specifically for power outages or mechanical failures. It’s typically a bright red cord that hangs from the trolley. When pulled, this cord disconnects the trolley from the drive chain or belt, effectively separating the opener mechanism from the garage door itself. This allows you to lift or lower the door manually. It’s vital to know where this cord is located and how it functions *before* you’re in an emergency situation. Many people never interact with this cord until a power outage occurs, which can lead to confusion or improper operation.
The Motor Unit And Drive Mechanism
The motor unit is the “brain” and “muscle” of your automatic garage door. It houses the electric motor that provides the power to open and close the door. Attached to the motor unit is the drive mechanism. The most common types are:
- Chain Drive: Uses a metal chain, similar to a bicycle chain, to move the trolley along the rail. These are generally the most durable and affordable but can be noisy.
- Belt Drive: Uses a rubber belt, similar to a car’s timing belt, to move the trolley. Belt drives are quieter than chain drives, making them ideal for attached garages.
- Screw Drive: Uses a threaded steel rod to move the trolley. These are also relatively quiet and require less maintenance but can be slower and more susceptible to temperature fluctuations.
Understanding your drive type isn’t strictly necessary for manual operation but provides context for how the system works. The key point is that the drive mechanism is what connects the motor to the trolley, and the emergency release severs this connection.
The Trolley And Rail Assembly
The trolley is the component that slides along the rail (or track). It has an attachment point for the opener arm, which connects to the garage door. When the opener is powered, the motor turns the drive mechanism, causing the trolley to move along the rail, thus opening or closing the door. The trolley is also where the emergency release cord is typically attached. When you pull the cord, a mechanism within the trolley disengages from the moving chain or belt, allowing the trolley to remain stationary while you move the door.
The Emergency Release Cord
As mentioned, the emergency release cord is the critical component for manual operation during an outage. It’s usually a bright red cord, about 6-10 inches long, attached to a mechanism on the trolley. Some older models might have a different colored cord or a different activation method, but the red cord is the most common across major brands like LiftMaster, Chamberlain, and Genie. It’s designed to be easily identifiable and accessible.

Credit: frontrangeraynor.com
Safety Precautions Before Manual Operation
Before you even think about pulling that red cord, it’s paramount to prioritize safety. A garage door is a heavy object, weighing anywhere from 100 to 400 pounds or more, depending on its size, material, and construction. Attempting to lift or lower it without understanding the risks can lead to serious injury.
Ensure no children or pets are in the path of the door’s movement. Also, be aware of any potential obstructions in the garage or driveway.
Clearing The Area
The first step is to ensure the path of the garage door is completely clear. This means checking both inside the garage and outside on the driveway. Remove any vehicles, bicycles, tools, boxes, or anything else that could obstruct the door’s movement or be damaged by it. If you are trying to open the door to get a car out, make sure there is ample space for the vehicle to maneuver once the door is open.
Securing The Door
Once the door is open or closed manually, it’s important to secure it. If you are opening it manually, you’ll need to be able to hold it in place. If you are closing it, ensure it latches properly. If your garage door has manual locks, consider engaging them for added security, especially if you anticipate a prolonged power outage.
Assessing Door Balance
A properly balanced garage door should stay open on its own when partially lifted. If your door feels excessively heavy or drifts down quickly when you release it, it may be out of balance. This is often due to issues with the torsion springs or extension springs. In such cases, manual operation can be dangerous, and it’s best to contact a professional garage door technician. Attempting to force an unbalanced door can cause further damage or injury. You can test the balance by disengaging the opener and lifting the door halfway. If it stays put, it’s balanced. If it slams shut or springs up, it’s not.

Credit: www.easygaragedoorrepair.com
How To Manually Open Your Garage Door
Opening your garage door manually during a power outage is a straightforward process, provided you follow the correct steps. The procedure generally involves locating and pulling the emergency release cord, then physically lifting or lowering the door.
Step 1: Locate The Emergency Release Cord
As previously discussed, the emergency release cord is usually a red rope hanging from the trolley of your garage door opener mechanism. The trolley is the part that moves back and forth along the opener’s rail (or track). In most cases, it’s located roughly in the center of the garage, directly above where the door would be if it were closed. Take a moment to identify this cord. If you can’t find it, consult your garage door opener’s manual. Some manufacturers may have slightly different placements or colors, though red is standard.
Step 2: Pull The Emergency Release Cord
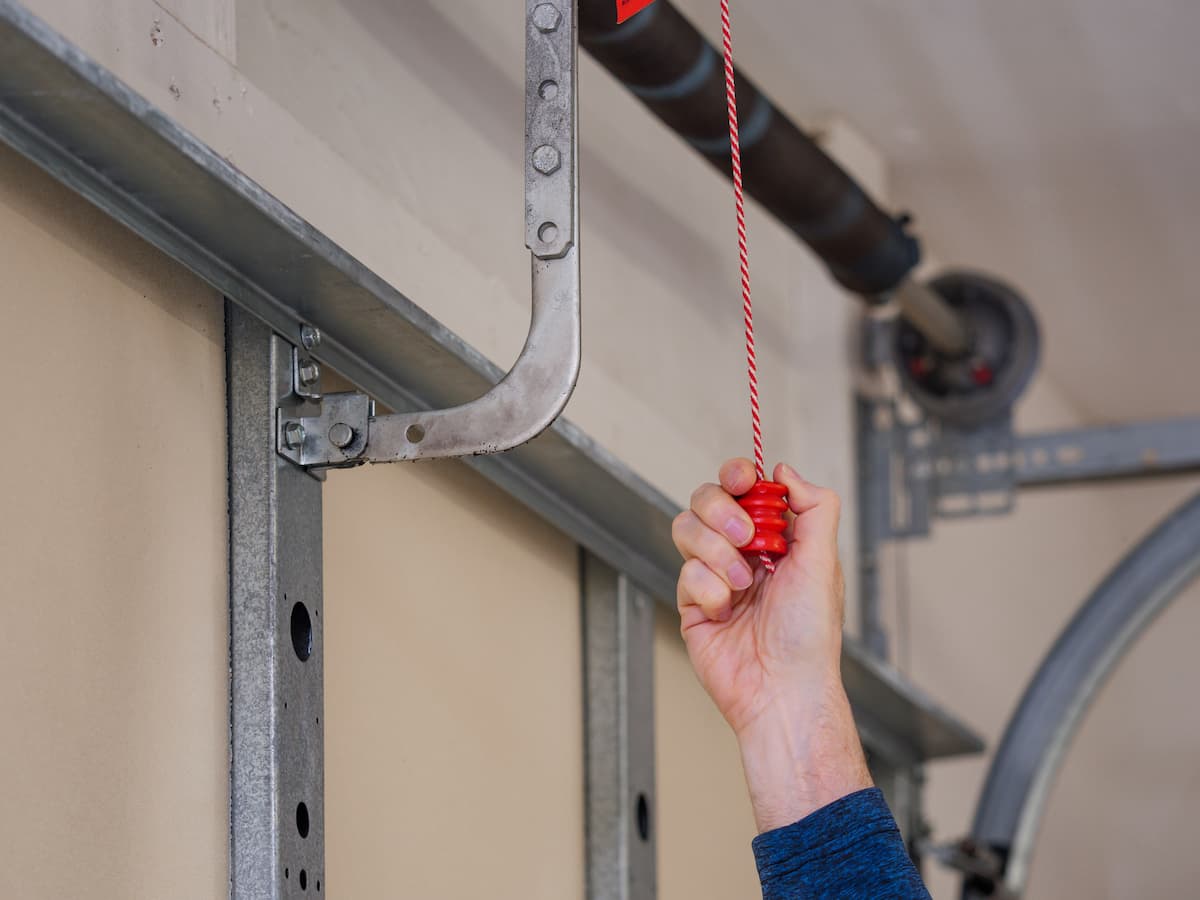
With the area clear and safety precautions in mind, firmly pull the emergency release cord downwards. You should feel a distinct “click” or release as the trolley mechanism disengages from the chain or belt. This action separates the opener from the door.
Be aware that pulling the cord might also cause the trolley to slide forward slightly along the rail, depending on its position.
Step 3: Disconnect The Door Arm (if Necessary)
In some systems, after pulling the release cord, the opener arm might still be attached to the door. If the door doesn’t move freely after pulling the cord, you may need to disconnect the opener arm from the door bracket.
This is usually done by removing a pin or a bolt. Refer to your opener’s manual if you are unsure about this step, as it can vary by model. However, for most modern openers, pulling the red cord is sufficient to disengage the trolley from the drive mechanism, allowing the arm to remain attached but inactive.
Step 4: Manually Lift Or Lower The Door
Once the opener is disengaged, you can now operate the garage door by hand.
- To Open: Grasp the handle on the bottom of the garage door. Lift the door upwards slowly and steadily. You will feel the resistance of its weight. Lift it high enough to clear your vehicle or allow passage. Once open, you may need to secure it in the open position using a C-clamp on the track or by propping it.
- To Close: Grasp the handle and slowly lower the door. Guide it down until it is fully closed and rests securely on the ground. Ensure it is closed completely for security.
Example: During a severe thunderstorm that caused a widespread power outage, I found myself needing to get my car out of the garage. I remembered seeing the red cord on my LiftMaster opener. I went to the garage, ensured no one was in the way, and pulled the cord. There was a distinct ‘snap’ sound, and the trolley disconnected. I then grabbed the door handle and, bracing myself, lifted the heavy door. It was a bit of a workout, but manageable.
Credit: doorproamerica.com
How To Manually Close Your Garage Door
Manually closing your garage door during a power outage follows a similar logic to opening it, focusing on controlling its descent and ensuring it is properly secured. It’s crucial to do this slowly and with control, as the door’s weight can be significant, and an uncontrolled descent can cause damage or injury.
Step 1: Ensure The Path Is Clear
Just as with opening, confirm that the path for the closing door is entirely clear. This includes checking for any obstructions on the floor of the garage and ensuring no people or pets are in the door’s downward path. A rapidly descending garage door can cause serious harm.
Step 2: Guide The Door Downward
Grasp the handle on the bottom of the garage door. Apply steady downward pressure. The door will likely feel heavy, and you’ll need to exert consistent force to control its movement. Avoid letting it drop quickly; instead, guide it down slowly and smoothly.
If the door feels excessively heavy or difficult to control, it might indicate an imbalance issue with the springs, and you should proceed with extreme caution or seek professional help.
Step 3: Secure The Door At The Bottom
Once the door reaches the ground, ensure it is fully closed and rests properly in its track. Many garage doors have a seal at the bottom that should make contact with the floor. If your garage door has manual locking mechanisms, such as slide locks on the inside or bolt locks, engage them now for added security.
These locks provide a physical barrier against unauthorized entry, especially important when the automatic opener is not functioning.
Re-engaging The Garage Door Opener After Power Restoration
Once the power is back on, you’ll want to reconnect your garage door opener so you can use it automatically again. This process is generally simple but requires attention to detail to ensure the opener and door are properly synchronized.
Step 1: Locate The Emergency Release Cord Again
You’ll need to access the emergency release cord once more. It should still be hanging from the trolley.
Step 2: Re-engage The Trolley
The method for re-engaging the trolley varies slightly by opener model.
- For Most Chain/Belt Drives: You typically need to pull the emergency release cord *again*. This action re-engages the trolley with the drive mechanism (chain or belt). Sometimes, you might need to pull the cord at a specific angle or with a specific force.
- For Some Screw Drives or Older Models: You might need to move the trolley manually back into position along the rail until it automatically couples with the drive mechanism, or there might be a specific lever or button on the opener unit itself.
Pro Tip: After pulling the cord to re-engage, you might hear a distinct click. This is a good sign that the trolley has reconnected.
Step 3: Test The Opener
After re-engaging the trolley, it’s crucial to test the opener.
- Manually Lift the Door Slightly: Lift the garage door about a foot or two by hand. If it stays in place, the opener is likely re-engaged correctly. If it immediately starts to lower, the opener is not properly connected, and you should try the re-engagement process again.
- Operate with Remote/Wall Button: Now, use your remote control or the wall-mounted button to operate the door. Watch carefully as it opens and closes. Ensure it moves smoothly through its entire range of motion. Listen for any unusual grinding or straining sounds.
- Check Synchronization: Make sure the opener is now fully controlling the door’s movement. If the door still feels very heavy or sluggish when operated by the opener, there might be an issue with the door’s balance or the opener’s alignment, and you should investigate further or call a professional.
If the opener still doesn’t work correctly after attempting to re-engage, or if the door operates erratically, it’s advisable to consult your owner’s manual or contact a qualified garage door technician. Sometimes, a power surge during an outage can damage the opener’s logic board, requiring professional repair or replacement.
Common Issues And Troubleshooting
Even with the right procedure, you might encounter some snags when trying to manually operate your garage door. Understanding these common issues can help you troubleshoot effectively and avoid unnecessary frustration.
The Door Is Too Heavy To Lift
As mentioned, garage doors are heavy. If you find the door is exceptionally difficult to lift manually, it’s a strong indicator of a spring issue. Torsion springs (mounted above the door) or extension springs (running along the tracks) provide the necessary counter-balance. If these springs are broken, weakened, or improperly tensioned, the door will feel extremely heavy.
- Troubleshooting: Do not force a heavy door. This can lead to the spring snapping completely or cause damage to the door or opener. The safest course of action is to call a professional garage door technician. They have the specialized tools and expertise to safely diagnose and repair spring problems. Attempting to fix springs yourself is highly dangerous.
The Emergency Release Cord Is Broken Or Missing
In rare cases, the emergency release cord might be broken, frayed, or have gone missing entirely. Without this cord, you cannot disengage the opener from the door using the standard method.
- Troubleshooting: If the cord is missing, you might be able to purchase a replacement kit from a hardware store or directly from the garage door opener manufacturer. The kit will typically include a new cord, bracket, and instructions for attachment. If the cord is broken but still attached, you might be able to tie a strong knot to create a grip, but this is a temporary fix. If you can’t reach the mechanism to attach a new cord, or if the cord attachment point is damaged, you will likely need professional assistance.
The Door Won’t Stay Open Manually
If you lift the door manually, and it immediately starts to fall back down, it suggests the door is out of balance. This is almost always a spring problem.
- Troubleshooting: Similar to the “too heavy to lift” issue, this requires professional attention. Do not rely on makeshift solutions like propping the door open with unstable objects, as this can be a safety hazard. A technician can adjust or replace the springs to restore proper balance.
The Opener Won’t Re-engage Properly
Sometimes, after the power is restored, the opener might not re-engage with the door smoothly. You might pull the cord, but the opener still won’t operate the door, or it might make grinding noises.
- Troubleshooting: Ensure you are pulling the cord correctly and that it has fully disengaged the trolley. Try pulling it again, perhaps with a slightly different angle or force. Check that the trolley is positioned correctly on the rail. If it’s too far forward or backward, it might not engage properly. Sometimes, running the opener for a cycle (if possible without damage) can help it realign. If problems persist, consult your opener’s manual for specific re-engagement procedures for your model or call a technician.
Alternative Solutions And Preventative Measures
While manual operation is a reliable fallback, there are ways to mitigate the inconvenience of power outages and ensure continuous access.
Battery Backup Systems
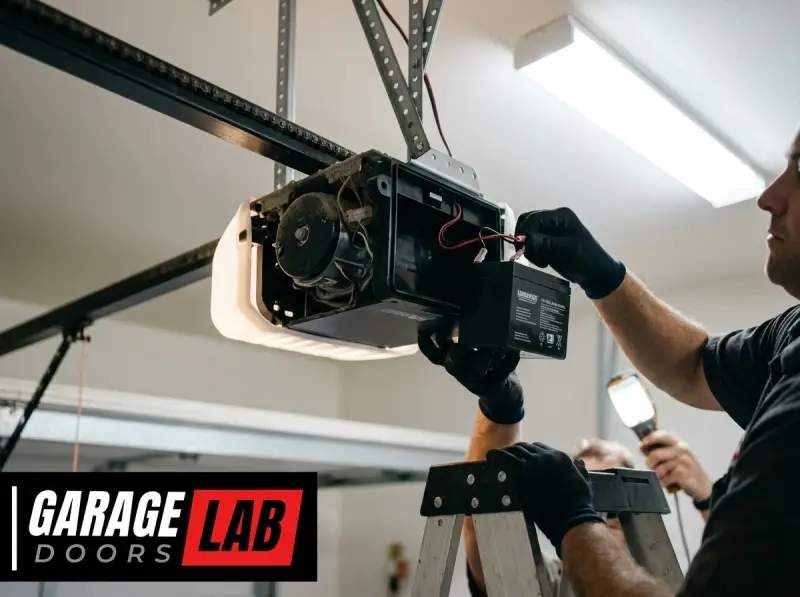
Many modern garage door openers come with or can be retrofitted with battery backup systems. These systems provide a limited number of open/close cycles during a power outage, allowing you to operate your garage door automatically even when the main power is out.
- How they work: The battery pack is typically installed on or near the motor unit. When the power goes out, the battery takes over, powering the opener. Once power is restored, the battery recharges.
- Benefits: Offers convenience and security without the need for manual operation. Crucial for those who rely on their garage for primary entry or have mobility issues.
- Considerations: Battery backups have a limited lifespan (typically 3-5 years) and need to be replaced periodically. The number of cycles they provide can also vary. Check your opener’s specifications for details.
Solar-powered Garage Door Openers
While less common for residential use, solar-powered openers are an option, particularly in areas with ample sunlight. These systems use solar panels to generate electricity, which powers the opener and charges an internal battery.
- Benefits: Environmentally friendly and can operate off-grid.
- Considerations: Performance can be affected by weather and shade. May be more expensive upfront and require professional installation.
Regular Maintenance And Checks
Preventative maintenance is key to ensuring your garage door system, including its manual override, functions correctly when you need it.
- Lubrication: Regularly lubricate the moving parts of your garage door and opener, such as rollers, hinges, and the opener’s chain or belt. This ensures smooth operation and reduces wear and tear. For instance, keeping your garage door rollers lubricated can make manual operation easier if needed.
- Balance Test: Periodically test your garage door’s balance by manually lifting it halfway after disengaging the opener. A balanced door should stay put. If it drifts, have the springs checked.
- Test Manual Release: Once a year, or before severe weather events, pull the emergency release cord to ensure it disengages properly and that you can manually operate the door. Then, re-engage it according to the manufacturer’s instructions and test the automatic function. This ensures you are familiar with the process and that the mechanism is working. You can also check on how to manually open a garage door for general knowledge.
Garage Door Opener Brands And Manual Operation Differences
While the core principle of manual operation, disengaging the opener via an emergency release, is consistent across most brands, there can be subtle differences in the design and location of the release mechanism or the re-engagement process. Understanding these variations can be helpful if you have a specific brand.
Liftmaster And Chamberlain
LiftMaster and Chamberlain are sister companies, and their garage door openers share many design similarities. The red emergency release cord is standard on most of their models. Pulling this cord disengages the trolley from the chain or belt drive. Re-engagement typically involves pulling the cord again or, in some cases, operating the wall button or remote after the power is restored. For specific models, refer to the LiftMaster garage door opener manual or Chamberlain’s documentation.
Genie
Genie openers also commonly feature a red pull cord for emergency release. The mechanism for disengaging and re-engaging is generally similar to LiftMaster and Chamberlain. Genie often emphasizes the ease of their “Intellicode” system, but the manual override functions independently of this security feature. If you need to reprogram your Genie remote after an outage, you might find this guide on how to reprogram a Genie garage door keypad useful.
Craftsman
Craftsman garage door openers, often manufactured by other companies (like Overhead Door Corporation or Chamberlain), typically follow the same industry standards. Expect a red emergency release cord attached to the trolley. The process for manual operation and re-engagement should be consistent. If you have issues with your remote after an outage, you might need to know how to reset a Craftsman garage door remote.
Other Brands
Less common brands or older models might have variations. Some might