
The smooth, reliable operation of your garage door opener relies on a delicate balance, and the chain tension is a critical component of that balance. Too loose, and you risk the chain slipping off its sprockets, leading to a non-functional door and potential damage. Too tight, and you can strain the opener’s motor, damage the chain and sprockets, and even compromise the structural integrity of your garage door system. Understanding how tight your garage door opener chain should be is essential for ensuring its longevity, safety, and efficient performance.
Many homeowners overlook the importance of proper chain tension, viewing it as a set-it-and-forget-it aspect of their garage door system. However, like any mechanical component, chains can stretch over time due to regular use, temperature fluctuations, and general wear and tear.
This gradual stretching can lead to the very issues that proper tension is designed to prevent. This comprehensive guide will walk you through why chain tension matters, how to assess it, and what the ideal tension looks like for various garage door opener systems.
We’ll explore the potential consequences of incorrect tension and provide clear, actionable steps for ensuring your chain is perfectly adjusted.
Key Takeaways
- Proper chain tension is crucial for the reliable operation and longevity of your garage door opener.
- A chain that is too loose can slip off sprockets, causing damage and preventing operation.
- A chain that is too tight can overwork the opener motor, damage components, and create excessive noise.
- The ideal chain sag is typically between 1/4 inch and 1/2 inch.
- Regular inspection of chain tension is recommended, especially after significant temperature changes or if you notice unusual noises.
- Adjusting chain tension is a manageable DIY task for most homeowners, but always prioritize safety by disconnecting power.
- Different opener drive types (chain, belt, screw) have varying tension considerations, though this guide focuses on chain drives.
Credit: www.youtube.com
Understanding Garage Door Opener Chain Drives
The chain drive garage door opener is one of the most common and robust types available. It operates much like a bicycle chain, using a motor to turn a sprocket that pulls or pushes a trolley along a rail, thereby opening or closing the garage door. The chain itself is a series of interconnected metal links, designed for strength and durability. The opener motor, typically mounted on the ceiling of the garage, drives a gear that rotates the sprocket at the front of the rail. This sprocket engages the chain, moving the trolley, which is attached to the garage door via a vertical arm.
The tension in this chain is paramount. It dictates how effectively the sprocket can grip and move the chain. If the chain is too slack, the sprocket might not engage all the links properly, leading to slippage. This slippage can cause a grinding noise, jerky movements, and eventually, the chain could jump off the sprocket entirely. Conversely, if the chain is pulled too taut, it puts immense stress on the motor, the sprocket, and the chain itself. This excessive strain can lead to premature wear of the motor, stripped sprocket teeth, and even chain breakage. Therefore, achieving the correct tension is a balancing act that ensures smooth, efficient, and safe operation.

Credit: learngaragedoors.com
Why Chain Tension Matters For Your Garage Door Opener
The importance of correct chain tension extends beyond mere operational smoothness; it directly impacts the lifespan and safety of your garage door system. A garage door opener is a complex mechanical device, and each component plays a vital role. The chain is the direct link between the motor’s power and the door’s movement. When this link is compromised by improper tension, the entire system suffers.
Consequences Of A Loose Chain
A loose chain is a common culprit for garage door opener malfunctions. When the chain has too much slack, it doesn’t maintain consistent contact with the drive sprocket. This can lead to:
- Slipping: The most immediate and noticeable problem is the chain slipping on the sprocket. This often manifests as a loud grinding or skipping noise during operation.
- Jerky Movements: The door may open or close in an uneven, jerky fashion because the chain is not being pulled or pushed uniformly.
- Inability to Lift/Lower: In severe cases, a significantly loose chain might not have enough grip to lift the heavy garage door, or it might slip completely, leaving the door stuck in position.
- Damage to Sprockets: When the chain slips, it can wear down the teeth of the drive sprocket, potentially leading to its premature failure. Replacing a sprocket is a more involved repair than adjusting tension.
- Chain De-railing: The ultimate consequence of a very loose chain is it jumping off the sprocket entirely. This can cause the chain to fall to the ground, potentially getting tangled in other moving parts or even causing damage to the opener unit or the garage floor.
Consequences Of A Tight Chain
While less common than issues arising from a loose chain, an overly tight chain can also be detrimental:
- Motor Strain: The garage door opener motor works harder to move a chain that is stretched taut. This constant strain can lead to overheating and premature failure of the motor. You might notice a burning smell or the motor stopping unexpectedly.
- Excessive Noise: A tight chain can create a whining or humming sound as it moves, which is distinct from the normal operating noise of the opener.
- Component Wear: The extra tension can accelerate wear on the chain links themselves, the sprocket teeth, and even the bearings within the opener unit.
- Chain Breakage: In extreme cases, a chain under excessive tension can snap, creating a sudden loud noise and rendering the opener inoperable. This is a significant safety hazard.
- Damage to Door/Track: While less direct, the increased stress on the system can sometimes contribute to other parts of the garage door mechanism experiencing undue force, potentially leading to misalignment or damage over time.
In my experience, most homeowners tend to err on the side of caution and overtighten rather than undertighten when attempting adjustments, often due to a fear of the chain falling off. However, the damage caused by excessive tightness can be more severe and costly to repair.
How To Check Your Garage Door Opener Chain Tension
Before you can adjust your garage door opener chain, you need to accurately assess its current tension. This is a relatively straightforward process that requires no special tools, only a careful eye and a gentle touch. The key indicator of proper tension is the amount of sag in the chain.
The Sag Test: What To Look For
The sag of the chain refers to how much it hangs down between the drive sprocket (at the opener motor) and the idler sprocket (at the other end of the rail).
- Ensure Safety First: Before touching anything, disconnect the power to your garage door opener. This can be done by unplugging the unit from the electrical outlet or by flipping the appropriate breaker in your home’s electrical panel. You do not want the opener to activate while you are working on the chain.
- Locate the Chain: Identify the chain running along the opener rail.
- Find the Loosest Point: Gently push upwards on the middle section of the chain, halfway between the two sprockets.
- Measure the Sag: You are looking for a specific amount of give. Ideally, the chain should have a slight sag. You can use a ruler or simply your finger to gauge this.
What Is The Ideal Chain Sag?
For most chain drive garage door openers, the ideal sag is between 1/4 inch and 1/2 inch. This range allows enough slack for normal operation and temperature fluctuations but is not so loose that it risks slipping off the sprockets.
- Less than 1/4 inch: The chain is likely too tight.
- More than 1/2 inch: The chain is likely too loose.
Visual And Auditory Clues
Beyond the physical sag test, pay attention to how your garage door opener sounds and behaves:
- Unusual Noises: Grinding, skipping, or clanking sounds during operation are strong indicators of improper tension, usually too loose. A whining or humming noise might suggest it’s too tight.
- Jerky Movement: If the door moves unevenly, it’s a sign the chain isn’t engaging smoothly with the sprocket, often due to looseness.
- Visible Slapping: If you can see the chain visibly “slapping” against the bottom of the rail as it moves, it’s definitely too loose.
Regularly performing this simple check, perhaps once every few months or whenever you hear new noises, can help you catch potential problems before they escalate.

Credit: www.diychatroom.com
How To Adjust Garage Door Opener Chain Tension
Adjusting the chain tension on a garage door opener is a task that many homeowners can perform themselves. The process typically involves adjusting a nut or bolt on the opener rail that controls the tension of the idler pulley or sprocket. Always remember to prioritize safety and disconnect the power before beginning any adjustments.
Tools You’ll Likely Need
- Wrench or Socket Set: To loosen and tighten nuts on the adjustment mechanism.
- Screwdriver: May be needed for some specific opener models.
- Measuring Tape or Ruler: To accurately gauge the chain sag.
- Safety Glasses: To protect your eyes from any debris.
- Work Gloves: To protect your hands.
Step-by-step Adjustment Process
The exact procedure can vary slightly depending on the manufacturer and model of your garage door opener, but the general steps are as follows:
- Disconnect Power: As mentioned, this is the absolute first step. Unplug the opener or turn off the circuit breaker. Never attempt adjustments with the power on.
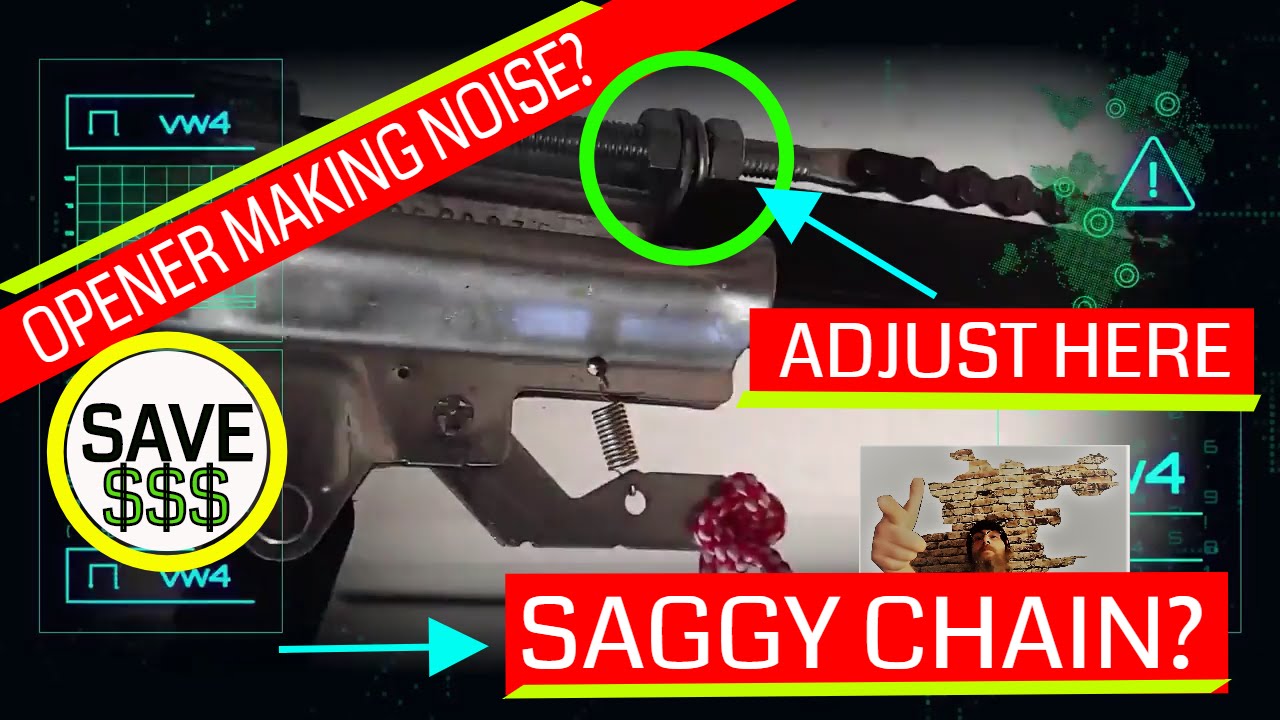
- Locate the Adjustment Mechanism: On most chain drive systems, the tension adjustment is located at the end of the rail assembly opposite the motor. You’ll typically find an idler pulley or sprocket with a bolt or nut that passes through a slotted bracket. This allows you to move the pulley/sprocket slightly to increase or decrease chain tension.
- Assess Current Tension: Perform the sag test described earlier to determine if the chain is too loose or too tight.
- Loosen the Locking Nut: If there is a locking nut securing the adjustment bolt, loosen it with your wrench. You don’t need to remove it completely, just loosen it enough to allow the bolt to turn.
- Adjust the Tension:
- If the chain is too loose: Turn the adjustment bolt clockwise. This will usually pull the idler pulley/sprocket closer to the motor, tightening the chain. Make small adjustments, about a quarter turn at a time.
- If the chain is too tight: Turn the adjustment bolt counter-clockwise. This will usually push the idler pulley/sprocket away from the motor, loosening the chain. Again, make small adjustments.
- Check Tension Frequently: After each small adjustment, gently re-tighten the locking nut (if applicable) and then perform the sag test again. You can also manually move the chain a few links to feel for smooth engagement. Continue adjusting until you achieve the desired sag of 1/4 to 1/2 inch.
- Secure the Adjustment: Once the correct tension is achieved, tighten the locking nut firmly to prevent the adjustment from shifting over time.
- Reconnect Power: Plug the opener back in or restore power at the breaker.
- Test Operation: Manually operate the garage door opener using the remote or wall button. Listen for any unusual noises and observe the movement of the door. Ensure it opens and closes smoothly without jerking or skipping. Make minor further adjustments if necessary.
Pro Tip: If you’re unsure about locating the adjustment mechanism on your specific model, consult your garage door opener’s owner’s manual. Many manufacturers provide detailed diagrams and instructions. If you can’t find your manual, a quick online search for “[Your Opener Brand and Model] manual” should yield results.
When To Call A Professional For Chain Tension Issues
While adjusting chain tension is often a manageable DIY task, there are specific situations where it’s best to call a qualified garage door technician. Attempting repairs beyond your comfort level or skill set can lead to further damage or safety hazards.
Signs You Should Seek Professional Help
- Uncertainty About the Cause: If you hear strange noises or the door operates erratically, but you can’t pinpoint whether it’s a chain tension issue or something else (like a problem with the springs, rollers, or opener logic board), a professional can diagnose the root cause accurately.
- Stripped Sprockets or Damaged Chain: If you inspect the chain and sprockets and notice visible damage, such as worn or broken teeth on the sprocket, or stretched or damaged chain links, these components will likely need replacement. This is a job best left to experienced technicians.
- Inability to Adjust: If you follow the adjustment steps and still cannot achieve the correct tension, or if the adjustment mechanism seems stripped or seized, there might be a more significant underlying issue with the opener rail or internal components.
- Opener Motor Issues: If you suspect the motor is straining or overheating due to tight tension, or if it fails to operate even after adjusting the chain, the motor itself might be damaged and require professional assessment or replacement.
- Safety Concerns: If you are uncomfortable working with electrical components, heights, or heavy machinery, it’s always safer to hire a professional. Garage doors are heavy, and improper handling can lead to serious injury.
- Complex Opener Systems: Some high-end or specialized garage door openers may have more intricate tensioning systems that are best handled by someone familiar with those specific models.
Example: A homeowner noticed their garage door opener was making a loud grinding noise. They attempted to tighten the chain, but the noise persisted, and the chain seemed to be slipping more frequently. Upon inspection, a technician discovered that the drive sprocket teeth were significantly worn down, not just a tension issue. Replacing the sprocket and then properly adjusting the new chain resolved the problem. Had the homeowner continued to overtighten, they might have damaged the motor.
Chain Drive Vs. Other Garage Door Opener Types: Tension Considerations
While this guide focuses on chain drive openers, it’s worth noting that other types of garage door openers exist, and their tension considerations differ significantly. Understanding these differences can help you appreciate why chain tension is specific to chain drive systems.
Belt Drive Openers
Belt drive openers use a rubber or composite belt running along a rail, driven by a motor and pulley system. These are generally quieter than chain drives.
- Tension: Belt drives also require proper tension, but it’s achieved differently. The belt itself has very little stretch. Tension is usually adjusted via a bolt on the motor unit or at the idler pulley. Overtightening can damage the belt or pulley, while a loose belt can slip on the pulleys, causing the door to move erratically or not at all. The adjustment is typically more about ensuring the belt is taut but not strained, often with a specific torque setting recommended by the manufacturer.
Screw Drive Openers
Screw drive openers use a long threaded metal rod (the “screw”) that the trolley moves along. The motor rotates this rod.
- Tension: Screw drive systems do not have a chain or belt, so there is no chain tension to adjust. The primary maintenance concern here is lubrication of the screw rod and ensuring the trolley moves freely. Issues with screw drives usually relate to the motor, the trolley assembly, or the rod itself.
Direct Drive Openers
In direct drive systems, the motor is integrated into the trolley that moves along the rail. There’s no separate chain, belt, or screw.
- Tension: Similar to screw drives, there is no chain tension to worry about. Maintenance typically involves lubricating the trolley’s movement and ensuring the motor runs smoothly.
Comparison Of Drive Types And Tension
| Drive Type | Primary Moving Component | Tension Adjustment Required? | Typical Tension Issues | Noise Level | Common Problems |
|---|---|---|---|---|---|
| **Chain Drive** | Metal Chain | Yes | Slipping, excessive sag, motor strain, noise, breakage | Moderate | Chain stretch, sprocket wear, motor strain |
| **Belt Drive** | Rubber/Composite Belt | Yes | Belt slippage, pulley wear, belt damage | Low | Belt wear, pulley damage, motor issues |
| **Screw Drive** | Threaded Rod | No | N/A (Lubrication is key) | Moderate | Lubrication needed, trolley binding, motor issues |
| **Direct Drive** | Motor within Trolley | No | N/A (Lubrication of trolley movement) | Very Low | Motor issues, trolley binding |
As you can see, the concept of chain tension is unique to chain drive openers. For other types, the focus shifts to the tension or condition of their respective drive components or the smooth operation of integrated motor systems.
Maintaining Your Chain Drive Opener For Optimal Performance
Proper chain tension is just one aspect of maintaining your garage door opener. A proactive approach to maintenance can prevent many common issues and ensure your opener operates reliably for years.
Regular Inspections
- Monthly: Visually inspect the chain for any signs of wear, rust, or damage. Check that all chain links are intact and that the chain is securely on the sprockets. Perform the sag test.
- Quarterly: Lubricate the opener’s moving parts. This includes the chain itself (use a garage door lubricant spray, not oil, which can attract dirt), the trolley, and the hinges and rollers of the garage door. For lubrication guidance, see how to lube garage door rollers.
- Annually: Have a professional inspect the entire garage door system, including springs, cables, tracks, and the opener mechanism. They can identify potential problems you might miss.
Lubrication Is Key
The chain lubricant you use is critical. Avoid using general-purpose oils like WD-40 for the chain, as they can attract dust and debris, which can quickly turn into abrasive grime, accelerating wear. Opt for a silicone-based or lithium-based garage door lubricant spray. Apply a light, even coat along the length of the chain. Don’t over-apply; a little goes a long way.
Cleaning The Chain And Rail
Periodically, wipe down the chain and the opener rail with a clean, dry cloth to remove any accumulated dirt or grease. A clean system operates more efficiently and with less wear.
Checking Other Components
While focusing on the chain, don’t forget other parts of the opener system:
- Sprockets: Ensure the teeth on both the drive sprocket and the idler sprocket are not worn down or damaged.
- Trolley: Make sure the trolley moves smoothly along the rail without binding.
- Rail: The rail itself should be straight and free of obstructions.
Example: A homeowner who consistently lubricated their chain drive opener and performed quarterly sag tests noticed their chain was starting to make a slight squeaking noise. Upon closer inspection, they found a few links were slightly dry. A quick re-application of lubricant solved the issue, preventing potential wear and tear that could have developed over time. This proactive maintenance saved them from a more significant repair down the line.
Troubleshooting Common Chain Tension Problems
When your garage door opener chain isn’t performing as expected, it’s often related to its tension. Here are some common issues and how they might be addressed, assuming the problem is indeed with the chain tension.
Problem: Chain Slips On Sprocket, Making Grinding Noises
- Likely Cause: Chain is too loose.
- Solution: Adjust the chain tension to reduce sag. Follow the adjustment steps outlined earlier, aiming for 1/4 to 1/2 inch of sag. Tighten the adjustment bolt incrementally, re-checking the sag and securing the locking nut.
Problem: Garage Door Moves Jerkily Or Unevenly
- Likely Cause: Chain is too loose or has uneven wear.
- Solution: First, try adjusting the tension to the correct sag. If the problem persists, inspect the chain for damaged or stretched links. If individual links appear worn or uneven, the entire chain may need to be replaced. A damaged chain can cause jerky movements even with proper tension. If you need to replace the chain, ensure you get the correct length and type for your opener model. You can find guides on how to adjust the chain on your garage door opener for smooth operation at this resource.
Problem: Opener Motor Seems To Strain Or Overheat
- Likely Cause: Chain is too tight.
- Solution: Adjust the chain tension to increase sag. Loosen the adjustment bolt incrementally, re-checking the sag and securing the locking nut. Ensure the sag is within the recommended 1/4 to 1/2 inch range. If the motor continues to strain after proper adjustment, there might be an issue with the motor itself or other binding components in the system.
Problem: Chain Falls Off Sprocket Completely
- Likely Cause: Chain is significantly too loose, or the sprocket teeth are severely worn.
- Solution: This is a more serious issue. First, manually open the garage door to relieve tension and carefully lift the chain