
Understanding and adjusting your Chamberlain Whisper Drive garage door opener can significantly enhance its performance, safety, and longevity. This model, known for its quiet operation and reliability, still requires occasional fine-tuning to ensure it functions optimally. Whether you’re dealing with issues like the door not closing fully, reversing unexpectedly, or simply want to ensure peak efficiency, knowing how to make these adjustments is a valuable skill for any homeowner.
This guide will walk you through the process step-by-step, covering common adjustments and troubleshooting tips to keep your Whisper Drive opener running smoothly.
Key Takeaways
- Safety First: Always disconnect power before making any internal adjustments and use extreme caution around moving parts.
- Limit Adjustments: These control when the garage door stops at the fully open and fully closed positions. Incorrect settings can lead to strain on the opener or the door.
- Force Adjustments: These settings dictate how much force the opener will exert before reversing. They are crucial for safety, preventing the door from closing on obstructions.
- Travel Control: This feature fine-tunes the door’s stopping points and is essential for a smooth operation.
- Remote and Keypad Programming: Understanding how to reprogram or reset your remotes and keypads is vital for access and security.
- Troubleshooting Common Issues: Many problems, such as the door reversing or not closing completely, can be resolved with simple adjustments.
- Regular Maintenance: Periodic checks and lubrication are key to preventing the need for frequent adjustments.

Credit: northsidegaragedoors.com
Understanding Your Chamberlain Whisper Drive Opener
The Chamberlain Whisper Drive is a popular garage door opener model celebrated for its quiet operation, thanks to its DC motor and screw drive system. This system typically requires less maintenance than chain or belt drives, but like any electromechanical device, it can benefit from periodic adjustments. The primary adjustments you’ll likely need to make involve setting the travel limits and force sensitivity.
The travel limits dictate precisely where the garage door stops when opening and closing. If these are set incorrectly, the door might not close all the way, or it might close too tightly, putting stress on the opener and the door track. The force sensitivity determines how much resistance the opener will tolerate before it automatically reverses direction. This is a critical safety feature to prevent the door from closing on a person, pet, or object.
Before diving into adjustments, it’s essential to understand the basic components of your opener and the safety precautions. The opener unit, mounted on the ceiling, connects to the garage door via a rail and trolley system. The motor is housed within the unit, and the control panel, usually located near the motor, houses the adjustment buttons and indicators.
Safety Precautions Before You Begin
Working with garage door openers involves electrical components and heavy moving parts. Safety must be your absolute top priority.
- Disconnect Power: Before touching any internal components or making adjustments, always unplug the garage door opener from the electrical outlet or turn off the corresponding circuit breaker. This prevents accidental activation and potential injury.
- Disengage the Opener: For manual adjustments to the door’s travel, you’ll need to disengage the opener from the door. This is typically done using a red emergency release cord that hangs from the trolley. Pulling this cord allows you to move the door manually.
- Clear the Area: Ensure no one, especially children or pets, is in the path of the garage door while you are making adjustments or testing the opener.
- Use a Sturdy Ladder: Make sure you have a stable ladder and are comfortable working at height.
- Wear Safety Glasses: Protect your eyes from dust or debris.
- Consult Your Manual: Always refer to your specific Chamberlain Whisper Drive model’s owner’s manual for detailed diagrams and instructions relevant to your unit. Manuals can often be found on the Chamberlain Group website.
Adjusting Travel Limits On Your Chamberlain Whisper Drive
The travel limits are arguably the most crucial settings for your garage door opener. They tell the opener when to stop moving up or down. Incorrectly set limits can lead to the door not closing fully, leaving a gap, or over-closing, which can damage the opener or the door itself. Chamberlain Whisper Drive openers typically use a system of buttons and indicator lights on the motor unit for these adjustments.
Identifying The Limit Adjustment Controls
Locate the motor unit mounted on the ceiling. On the side or front panel of the motor unit, you will find a set of buttons and indicator lights. These are typically labeled “Up Limit,” “Down Limit,” “Close,” “Open,” and “Program” or similar.
There might also be an LED indicator that changes color or blinks to show the opener’s status.
Setting The Down (close) Travel Limit
The down limit determines how far down the door travels before stopping in the closed position.
- Engage the Opener: Ensure the opener is engaged with the door. If you previously disengaged it, pull the release cord to re-engage.
- Access Adjustment Buttons: You may need to remove a cover plate to access these buttons.
- Manually Move the Door (if necessary): If the door is not already in a suitable starting position, you may need to use the opener to move it partially open or closed, then disengage it to position it manually.
- Initiate Downward Travel: Press the “Down” or “Close” button on the motor unit or your remote.
- Stop the Door: Watch the door as it moves down. When the door is about 1/2 inch from the floor or just touching the floor (depending on your preference and door type), press the “Stop” button or the “Program” button to halt its movement. Do not let it hit the floor forcefully.
- Enter Limit Adjustment Mode: Press and hold the “Down Limit” button. The indicator light on the opener should blink, or an LED may change color, indicating you are in down limit adjustment mode.
- Fine-Tune the Position: Use the “Up” and “Down” arrow buttons (or similar) to make minor adjustments. You want the door to stop precisely when it reaches the desired closed position without slamming into the floor.
- Save the Setting: Once the door is in the correct closed position, press and hold the “Program” button until the indicator light blinks or turns solid, confirming the down limit is set.
- Test the Down Limit: Press the “Down” button again. The door should travel down and stop at the position you just set.
Setting The Up (open) Travel Limit
The up limit determines how high the door travels before stopping in the fully open position.
- Manually Move the Door: Manually move the door to the desired fully open position. You want it to be high enough to allow ample clearance for vehicles, but not so high that it strains the opener or causes the door to sag. A common guideline is to have the bottom of the door about 6-7 feet off the ground.
- Initiate Upward Travel: Press the “Up” button on the motor unit or your remote.
- Stop the Door: As the door moves up, stop it at the desired fully open position by pressing the “Stop” button or the “Program” button.
- Enter Limit Adjustment Mode: Press and hold the “Up Limit” button. The indicator light should blink or change color.
- Fine-Tune the Position: Use the “Up” and “Down” arrow buttons to make small adjustments until the door is perfectly positioned.
- Save the Setting: Press and hold the “Program” button until the indicator light confirms the setting is saved.
- Test the Up Limit: Press the “Up” button. The door should travel up and stop at the position you just set.
Pro Tip: After setting both limits, run the door through a full open and close cycle several times to ensure smooth operation and that the limits are consistently met.

Credit: www.youtube.com
Adjusting Force Sensitivity Settings
The force sensitivity settings are crucial safety features. They tell the opener how much resistance it can encounter before it reverses. If the force is set too low, the door might reverse prematurely, causing inconvenience. If it’s set too high, the opener might not reverse when it encounters an obstruction, posing a significant safety hazard.
Understanding Force Sensitivity
Chamberlain Whisper Drive openers typically have separate force adjustments for opening and closing. The force is measured by the amount of pressure the opener exerts before it triggers the “Safety Reverse” mechanism.
Adjusting The Down Force
This setting determines how much force is applied when closing the door.
- Disconnect Power: Ensure the opener is unplugged.
- Locate Force Adjustment Controls: On the motor unit, find the controls for “Close Force” or “Down Force.” These are often dials or buttons, sometimes with indicator lights.
- Set Initial Force: Most manuals recommend starting with the force setting at a moderate level. For most Chamberlain models, this might be around the midpoint if using dials.
- Re-engage Opener and Test: Plug the opener back in. Manually move the door to the fully open position and engage the opener. Press the “Close” button.
- Perform a Safety Test: As the door is closing, place a 2×4 piece of lumber flat on the ground in its path. The door should hit the 2×4 and reverse immediately upon contact.
- Adjust as Needed:
- If the door does not reverse, the closing force is set too high. Turn the “Close Force” adjustment counter-clockwise (or lower the setting) to decrease the force.
- If the door reverses before hitting the 2×4 or stops when encountering light resistance (like a slight binding in the track), the closing force is set too low. Turn the “Close Force” adjustment clockwise (or increase the setting) to increase the force.
- Repeat Test: After each adjustment, re-test by closing the door and placing the 2×4 in its path. Repeat until the door reverses reliably upon contact.
Adjusting The Up Force
This setting determines how much force is applied when opening the door.
- Perform a Safety Test: With the door fully closed, press the “Open” button. As the door begins to open, gently try to stop its upward movement with your hands.
- Adjust as Needed:
- If the door immediately reverses when you apply even slight pressure, the opening force is too low. Turn the “Open Force” adjustment clockwise to increase it.
- If you have to apply significant force to make the door reverse, the opening force is too high. Turn the “Open Force” adjustment counter-clockwise to decrease it.
- Find the Balance: The goal is to set the opening force so that it’s easy to stop the door manually, but not so sensitive that it reverses due to minor resistance like a slightly sticky roller.
Important Note: The force settings are critical safety features. Always perform these tests diligently. If you are ever unsure or uncomfortable, it’s best to call a professional garage door technician.
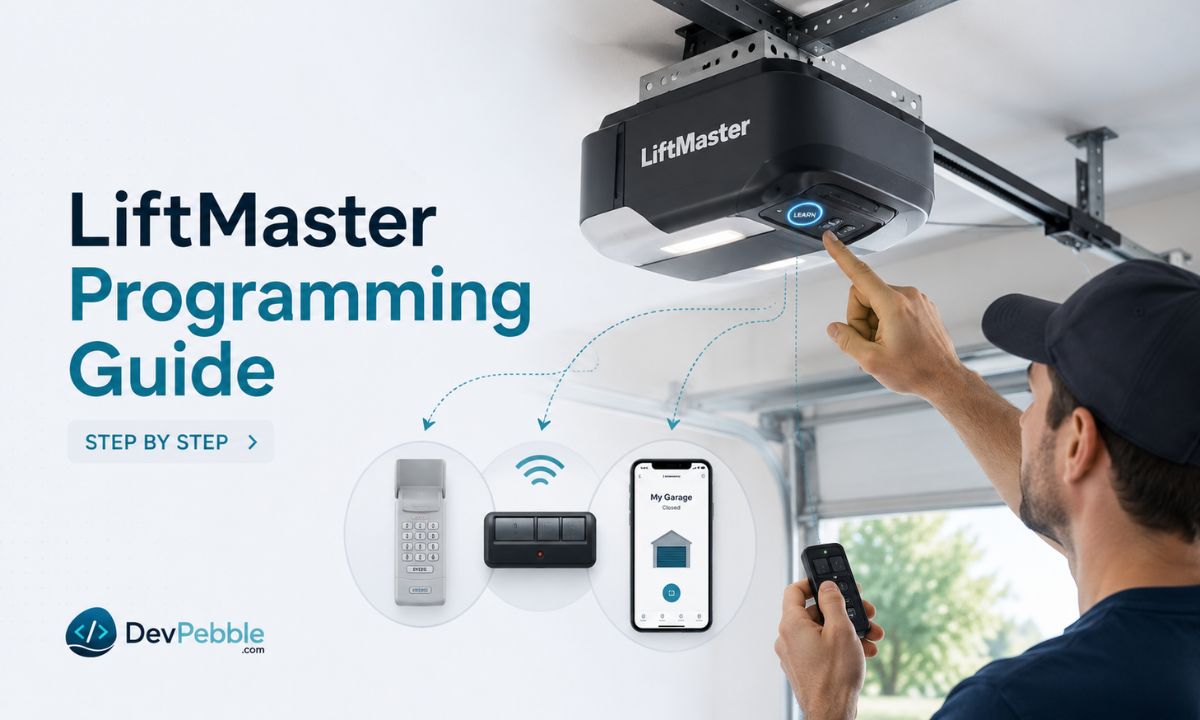
Credit: www.devpebble.com
Fine-tuning Travel Control And Smoothness
Beyond the basic limits and force settings, you might need to fine-tune the travel control for optimal smoothness and efficiency. This involves ensuring the trolley moves smoothly along the rail and that the door opens and closes without jerking or excessive noise.
Lubrication Of Moving Parts
One of the most common reasons for rough operation is lack of lubrication. This is essential for both the garage door itself and the opener’s components.
- Garage Door Rollers and Tracks: Regularly lubricate the rollers and tracks of your garage door. Use a silicone-based spray lubricant or a lithium-based grease. Avoid using petroleum-based lubricants, as they can attract dirt and grime. For detailed steps, refer to the guide on how to lubricate garage door rollers.
- Opener Rail: Apply a light coat of lubricant to the opener’s drive rail (screw drive, chain, or belt).
- Hinges and Springs: Lubricate the hinges and any exposed springs on the garage door.
Adjusting The Trolley Position
The trolley is the part that moves along the opener’s rail and connects to the garage door. Its position can sometimes affect how smoothly the door operates.
- Check for Obstructions: Ensure nothing is obstructing the trolley’s path along the rail.
- Trolley Engagement: Make sure the trolley is securely engaged with the drive mechanism (screw, chain, or belt). If it’s loose, it can cause jerky movements. Refer to your manual for specific instructions on checking trolley engagement.
- Chain/Screw Drive Tension: If your Whisper Drive model uses a chain or screw drive, ensure the tension is correctly set. An overly loose or tight chain/screw can cause operational issues. For chain drives, you might need to adjust the chain tension.
Addressing Jerky Movements
If the door still jerks or hesitates during operation after lubrication and limit/force adjustments:
- Inspect Rollers and Tracks: Check for any bent rollers, damaged tracks, or debris caught in the tracks. Bent tracks or damaged rollers can cause significant binding.
- Check Door Balance: A poorly balanced garage door can put extra strain on the opener. With the opener disengaged, the door should stay partially open on its own. If it slams shut or flies open, the springs may need adjustment by a professional.
- Motor Unit Issues: In rare cases, jerky movement could indicate an issue with the opener’s motor or internal components. If you suspect this, it’s best to contact Chamberlain support or a qualified technician.
Programming And Resetting Remotes And Keypads
Adjusting the opener’s settings often goes hand-in-hand with ensuring your access devices, remote controls and keypads, are working correctly. Sometimes, after adjustments or power interruptions, you might need to reprogram them.
Reprogramming Remote Controls
If your remote isn’t working after adjustments, it may need to be reprogrammed to communicate with the opener’s Security+ rolling code technology.
- Locate the “Program” Button: On the motor unit, find the “Program” or “Learn” button. This is often a small, colored button on the back or side panel, near the antenna.
- Press and Release: Press and release the “Program” button. The indicator light next to it should illuminate.
- Press Remote Button: Within 30 seconds, press and hold the button on your remote control that you want to use to operate the door.
- Confirm Pairing: The opener’s lights may blink, or you might hear a click, indicating the remote has been paired. Release the remote button.
- Test the Remote: Press the remote button again to test if it operates the door.
If you are having trouble with a specific Chamberlain remote, you may find detailed instructions on how to reprogram a Chamberlain garage door keypad, which often shares similar programming logic for remotes.
Resetting Or Reprogramming Keypads
Keypads provide convenient access without a remote. If yours isn’t working, a reset or reprogramming might be necessary.
- Locate the “Program” Button: As with remotes, find the “Program” or “Learn” button on the motor unit.
- Enter Program Mode: Press and hold the “Program” button for a few seconds until the indicator light illuminates.
- Enter New Code: Press the “0” button, then enter your desired 4-digit PIN code (or follow the specific sequence for your model, often involving pressing “Program” again between digits).
- Confirm Code: Press the “Program” button again to confirm the new PIN.
- Test the Keypad: Enter your new PIN and press the enter button (often marked with a star or checkmark). The opener should activate.
For specific instructions related to your model, consult a guide on how to reset garage door remotes, as many Chamberlain and Craftsman openers share similar programming procedures.
Troubleshooting Common Chamberlain Whisper Drive Issues
Even with proper adjustments, you might encounter common issues. Many of these can be resolved by revisiting the limit, force, or programming settings.
Door Reverses Immediately After Starting To Close
This is almost always a force sensitivity issue. The downward force setting is likely too low, causing the opener to interpret any slight resistance as an obstruction.
- Action: Increase the downward force setting slightly. Perform the 2×4 test again to ensure it reverses on contact with an obstruction but not prematurely.
Door Stops Partway Through Opening Or Closing
This can be caused by several factors:
- Limit Settings: The travel limits might be misadjusted, telling the opener to stop before reaching the fully open or closed position.
- Action: Re-adjust the up or down travel limits as described earlier.
- Obstruction: Something may be physically blocking the door’s path.
- Action: Inspect the tracks, rollers, and the opener’s rail for any obstructions.
- Binding Door: The door itself might be binding in the tracks due to misaligned tracks, worn rollers, or a lack of lubrication.
- Action: Check for and address any binding issues. Ensure the door is properly lubricated and balanced. Lubricating rollers is a common first step.
- Force Settings: In some cases, the force setting might be too low, causing the opener to stop if it encounters even minor resistance.
- Action: Slightly increase the relevant force setting (up or down).
Door Does Not Close Completely
This is typically a down travel limit issue. The opener stops before the door reaches the fully closed position.
- Action: Re-adjust the down travel limit to allow the door to close further. Ensure the limit is set so the door makes contact with the floor firmly but without excessive force.
Opener Lights Blink, But Door Doesn’t Move
This often indicates a problem with the safety sensors located near the bottom of the garage door tracks. These sensors must be aligned for the door to close.
- Action:
- Check the sensors for any obstructions or damage.
- Ensure the alignment indicators (usually LEDs on each sensor) are lit. If one is off or blinking, the sensors are misaligned.
- Adjust the sensors by gently bending them until both indicator lights are solid. The beam should be unbroken.
- If the problem persists, try resetting the opener. You can find instructions on how to reset your garage door opener.
Remote Or Keypad Not Working
This usually points to a programming or battery issue.
- Action:
- Check Batteries: Replace the batteries in your remote or keypad.
- Reprogram: Reprogram the remote or keypad to the opener, following the steps outlined in the previous section.
When To Call A Professional
While many adjustments can be made by a homeowner, there are times when it’s best to call a qualified garage door technician.
- Safety Sensor Malfunctions: If you cannot get the safety sensors aligned or they appear damaged.
- Door Balance Issues: If the garage door is difficult to lift manually or doesn’t stay balanced, the springs may need professional adjustment. Tampering with garage door springs can be extremely dangerous.
- Opener Motor Problems: If you suspect an internal issue with the motor unit itself, such as unusual noises or complete failure after checking power and connections.
- Damaged Tracks or Rollers: If the garage door tracks are bent or the rollers are significantly damaged, these require specialized tools and expertise to repair or replace.
- Lack of Confidence: If at any point you feel uncomfortable or unsure about performing an adjustment, it’s always safer to seek professional help. The cost of a service call is often less than the cost of an injury or further damage.
Regular maintenance and understanding these adjustment procedures can significantly extend the life of your Chamberlain Whisper Drive opener and ensure its safe, reliable operation.
Frequently Asked Questions
How Often Should I Lubricate My Chamberlain Whisper Drive Opener?
You should lubricate the moving parts of your garage door and opener at least once a year. If you live in an area with extreme weather conditions (very hot or very cold), or if you use your garage door very frequently, you may want to lubricate it