Now Reading: How to Open Chamberlain Garage Door Opener: Easy Step-by-Step Guide
- 01
How to Open Chamberlain Garage Door Opener: Easy Step-by-Step Guide
How to Open Chamberlain Garage Door Opener: Easy Step-by-Step Guide

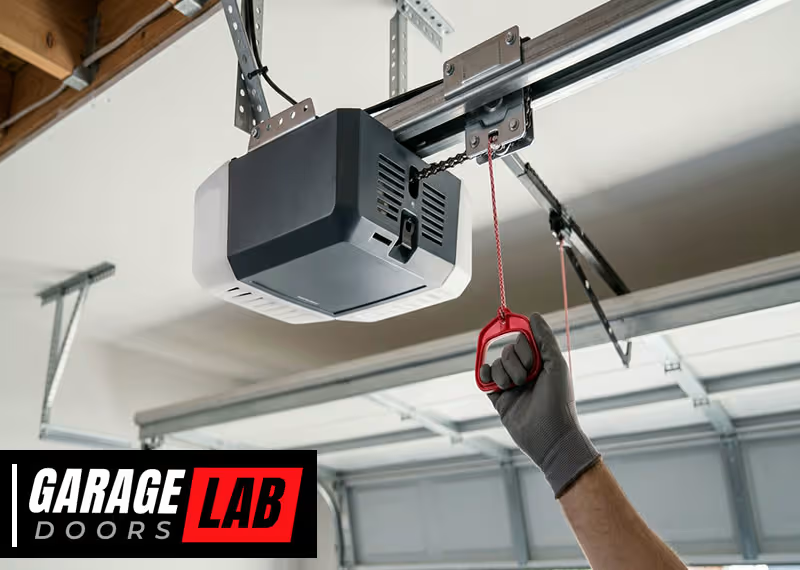
When you need to access your Chamberlain garage door opener, you might feel unsure where to start. Whether you want to replace the remote, check the wiring, perform maintenance, or reset the system, opening the unit safely is key. Many homeowners feel nervous about this task, but with the right steps, you can do it confidently—even if you’re not a technical expert.
This guide gives you everything you need to know. You’ll learn how to identify your model, gather tools, and follow step-by-step instructions to open your Chamberlain garage door opener. You will also discover important safety precautions, tips for common problems, and mistakes to avoid.
If you’re new to garage door openers, you’ll find clear explanations, real-life examples, and useful tables to compare models and features.
By the end, you’ll feel ready to open your Chamberlain garage door opener like a pro—and know what to do next, no matter your goal.
Understanding Your Chamberlain Garage Door Opener
Before you open your garage door opener, it’s important to know what type you have. Chamberlain makes several models, and each may look a little different inside.
What Makes Chamberlain Unique?
Chamberlain is one of the most popular brands in the US. Their openers are known for reliability, quiet operation, and advanced security features like rolling codes. Most openers are either chain drive, belt drive, or wall-mounted (also called jackshaft openers). While the basic structure is similar, the way you open the cover or access the electronics can change.
Where To Find Your Model Number
Look at the main unit, usually mounted on the ceiling. You’ll find a sticker or metal plate on the side or bottom. The model number often starts with “WD,” “B,” or “HD. ” Write this down before starting, as it helps when looking for instructions or replacement parts.
Main Parts Of A Chamberlain Opener
A typical Chamberlain garage door opener includes:
- Motor housing (main box)
- Light cover (for the bulb)
- Wiring terminals
- Manual release handle
- Control board (inside the housing)
- Limit switches (controls how far the door travels)
Knowing these parts helps you understand what you’ll see when you open the unit.
Why You Might Need To Open The Garage Door Opener
People open their Chamberlain garage door openers for many reasons. Here are some common situations:
- Changing the light bulb – Most openers have a built-in light for safety.
- Checking or replacing the remote control receiver – If your remote stops working, the receiver might need attention.
- Programming new remotes – Sometimes, you need to press a “learn” button inside the housing.
- Inspecting or repairing wiring – Loose or damaged wires can cause the door to malfunction.
- Cleaning and maintenance – Dust and insects can build up inside, affecting performance.
- Replacing the circuit board – If your opener is dead, a new board might fix the problem.
- Resetting the system – After a power surge or other issue, you may need to reset or reprogram.
Understanding your reason helps you prepare for what’s inside.
Safety Precautions Before You Start
Working with garage door openers can be dangerous if you’re not careful. Here’s what you must do before opening your Chamberlain unit.
- Unplug the opener – Always disconnect power to avoid electric shock. There’s usually a plug near the motor housing.
- Use a sturdy ladder – Make sure your ladder is stable and tall enough to reach the opener comfortably.
- Wear protective gear – Gloves and safety glasses protect you from dust, sharp edges, and electrical parts.
- Check for moving parts – Never open the unit while the door is moving or if someone else is operating it.
- Read your manual – Each model is a little different. If you have the manual, review it for warnings or special notes.
- Be mindful of springs – The opener itself is safe to open, but never touch the large torsion springs on the door—they store dangerous energy.
Pro tip: Take a photo of the unit before opening. This helps you remember where wires and parts go.
Tools And Materials You’ll Need
Having the right tools makes the job easier and safer. Gather these items before you start:
- Phillips screwdriver (most covers use Phillips screws)
- Flathead screwdriver (for prying covers or tabs)
- Small socket set (some models use hex bolts)
- Stepladder
- Flashlight (for better visibility inside the unit)
- Clean cloth (to wipe dust or debris)
- Multimeter (optional, for electrical checks)
- Zip ties or tape (to bundle wires if needed)
If you need replacement parts (bulb, circuit board, etc. ), order them after opening and confirming the correct type.
Step-by-step Guide: How To Open Your Chamberlain Garage Door Opener
Let’s get into the main steps. The process is similar for most Chamberlain models, but always adjust for your specific unit.
1. Disconnect Power
Unplug the opener from the ceiling outlet. If you can’t reach the plug, turn off the breaker that powers the garage. Never skip this step.
2. Set Up Your Ladder
Position the ladder under the opener so you can reach the housing comfortably. Make sure it’s steady and won’t wobble as you work.
3. Remove The Light Cover
Most Chamberlain openers have a plastic light cover. Look for small tabs or screws holding it in place.
- For tab covers: Squeeze gently and pull down.
- For screw covers: Use your Phillips screwdriver to remove screws, then pull off the cover.
Inside, you’ll see the light bulb and sometimes part of the control board.
4. Locate And Remove Housing Screws
The main opener housing is usually held by two to four screws, often on the sides or bottom. Use your screwdriver or socket set to remove these.
- Place the screws in a cup or pocket so you don’t lose them.
- Some models have snap tabs instead of screws. Use a flathead screwdriver to gently pry open these tabs.
5. Open The Housing
With screws or tabs released, carefully pull down or slide off the housing cover.
- Don’t force it—if it doesn’t move, check for hidden screws.
- Some covers are hinged and swing down; others slide off completely.
You’ll now see the circuit board, wiring terminals, and possibly the learn button.
6. Identify The Components
Take a moment to look inside. Identify:
- The circuit board (often a green or blue panel with wires)
- Wiring terminals (where wall button, sensors, and power wires connect)
- The learn button (small, often yellow or purple)
- Any visible fuses or relays
If you’re replacing a part, check the part number and compare it to your replacement.
7. Perform Your Task
Depending on your goal:
- To change the bulb, unscrew it and replace with a new one.
- To check the receiver, look for a small wire antenna and make sure it’s connected.
- To reprogram remotes, press the “learn” button and follow the remote instructions.
- For wiring repairs, gently move wires as needed.
If you need to remove the circuit board, unplug all connectors and remove the mounting screws.
8. Close And Secure The Housing
When finished, reverse the steps:
- Replace the housing cover, making sure it fits snugly.
- Reinstall all screws or snap the tabs back in place.
- Replace the light cover and bulb if removed.
9. Restore Power And Test
Plug the opener back in or turn on the breaker. Test the door and any features you changed. Make sure everything works before leaving the ladder.
Comparing Chamberlain Models: Opening And Access Features
Not all Chamberlain openers open the same way. Here’s a comparison of three popular types:
| Model Type | Housing Cover Type | Tools Needed | Common Access Steps |
|---|---|---|---|
| Chain Drive | Screw-on plastic or metal | Phillips screwdriver | Remove light cover, then unscrew housing |
| Belt Drive | Snap-fit plastic | Flathead screwdriver | Pry tabs, swing cover down |
| Wall-Mounted (Jackshaft) | Front or side panel screws | Socket set | Unscrew panel, slide off housing |
Insight: Some newer Chamberlain models have smart features. These may include extra wiring for Wi-Fi modules—handle these gently and avoid static electricity.
How To Open Chamberlain Garage Door Opener For Common Tasks
Let’s break down specific tasks so you can see what to expect inside.
Changing The Light Bulb
Open the light cover, remove the old bulb, and replace with a new one. Chamberlain openers usually use standard 60W or 100W bulbs—check your manual for the correct wattage. Avoid using LED bulbs unless the manual says they are compatible, as some LEDs can cause remote interference.
Accessing The Learn Button
The learn button is inside the housing. Open the light cover and look for a colored button (yellow, purple, or red). Press this button to program new remotes or keypads. Hold for 6-10 seconds to clear all remotes.
Inspecting The Circuit Board
If your opener is unresponsive, the circuit board may be faulty. After opening the housing, check for burned spots or damaged components. If you see black marks or a burnt smell, you likely need a replacement board.
Checking And Replacing Wiring
Loose or corroded wires can stop your opener from working. After opening the unit, gently tug each wire at the terminal to check for looseness. If needed, tighten with a screwdriver. Replace any frayed wires.
Cleaning Inside The Housing
Dust, spider webs, and insects often enter the opener. Use a cloth or compressed air to clean the interior. Avoid using water or sprays near electrical parts.
Troubleshooting: What To Do After Opening
Sometimes, opening your Chamberlain opener reveals a problem you didn’t expect. Here’s how to handle common issues:
The Opener Does Not Power On
- Check the power outlet with another device.
- Inspect the opener’s power cord for damage.
- Look for a blown fuse inside (not all models have a user-replaceable fuse).
Remotes Not Working
- Make sure the antenna wire is intact and hanging down.
- Reprogram remotes using the learn button.
- Replace the battery in the remote.
Door Only Moves Partway
- Check the limit switches inside the housing.
- Adjust using the screws or dials marked “up” and “down.”
- Inspect wiring to the sensors at the bottom of the door.
Noisy Operation
- Clean out dust and debris.
- Check for loose mounting screws.
- Lubricate moving parts outside the opener (not inside the motor housing).
Practical Tips For A Smooth Experience
Here are a few tips that can save you time and frustration:
- Label wires as you remove them (masking tape works well).
- Take photos before disconnecting anything inside.
- Keep screws and small parts in a container so you don’t lose them.
- Don’t overtighten screws when reassembling—plastic housings can crack.
- Test after each step so you can catch problems early.
Non-obvious insight: Many Chamberlain openers have a hidden service port or diagnostic LED inside. If you see a blinking light, check the pattern in your manual—it can tell you exactly what’s wrong.
When To Call A Professional
Opening a Chamberlain garage door opener is safe for most basic tasks. But call a professional if:
- You see burned wires or melted parts
- The circuit board is damaged and you’re not confident replacing it
- You suspect a problem with the torsion springs (these can be dangerous)
- The opener is still under warranty (DIY repairs may void it)
Don’t risk injury or further damage. Sometimes, expert help is the best choice.
Chamberlain Smart Openers: What’s Different?
Newer Chamberlain models like the myQ series come with smart features. These add extra components inside the housing:
- Wi-Fi module
- Diagnostic LEDs
- Additional wiring
Opening these models is similar, but be careful with the extra wires. Take photos and avoid static discharge (touch a metal object before handling the board).
Some smart openers can be updated or reset via the myQ app. Check the app for troubleshooting before opening the unit. For more information, the official Chamberlain site offers guides and updates: Chamberlain Official.
Common Mistakes To Avoid
Many beginners make the same errors when opening their garage door opener. Here’s what to watch out for:
- Forgetting to disconnect power – This is the number one safety risk.
- Forcing the cover – If it doesn’t come off easily, check for hidden screws.
- Losing screws or small parts – Use a cup or tray to keep them safe.
- Mixing up wires – Label or photograph before disconnecting.
- Using the wrong bulb – Too high a wattage can melt the cover.
- Touching the springs – Never touch the large springs near the door.
- Skipping the manual – Your model may have unique steps.
Non-obvious insight: Some Chamberlain units use special tamper-resistant screws. If your screwdriver doesn’t fit, look for a “security” bit set at a hardware store.
How Opening Differs By Model Age
Older Chamberlain openers (pre-2000) often have metal housings and more screws, while newer models use snap-fit plastic. Here’s a quick comparison:
| Feature | Older Models | Newer Models |
|---|---|---|
| Housing Material | Metal | Plastic |
| Cover Attachment | Screws | Snap tabs |
| Remote Programming | DIP switches | Learn button |
| Smart Features | None | Wi-Fi, myQ |
If you have an older model, expect to spend more time opening the unit and keep an eye out for sharp metal edges.
What To Do After Opening: Maintenance And Upgrades
Opening your Chamberlain opener is a good time to perform basic maintenance or even upgrade your system.
Cleaning And Lubricating
- Wipe away dust inside the housing.
- Lubricate moving metal parts outside the motor (never inside the motor housing).
- Check for insect nests or spider webs.
Replacing Old Parts
- Swap old bulbs for new ones.
- Replace worn wiring or connectors.
- Upgrade the circuit board if your opener is malfunctioning.
Adding Smart Features
If your opener is compatible, you can add a myQ upgrade kit. This lets you control the door from your smartphone. Check the Chamberlain website to see if your model supports smart upgrades.
Safety Recap: After The Job
Once you’ve finished and closed the unit:
- Double-check all screws and covers are secure.
- Plug the opener back in and test all functions.
- Make sure the door reverses if something blocks it (safety sensors).
- Store your tools and take notes about what you did for next time.
Extra tip: If you smell burning or see smoke after reassembly, unplug the unit immediately and call a professional.

Frequently Asked Questions
What Should I Do If My Chamberlain Opener Cover Is Stuck?
Check for any hidden screws or snap tabs you may have missed. Gently run your hand around the edge of the cover. Some models have a release tab inside the light cover. Never force the cover, as this can break the plastic or bend metal.
If you’re still stuck, consult your manual or look for online videos for your exact model.
Is It Safe To Open The Garage Door Opener Myself?
Yes, for most basic tasks like changing the bulb, programming remotes, or cleaning. Always disconnect power before starting. Avoid touching any large springs or making electrical repairs if you’re not experienced. For major issues, call a professional.
Can I Use Any Light Bulb In My Chamberlain Opener?
No, always use the recommended wattage (usually 60W or 100W). Some openers are not compatible with LED bulbs, which can cause remote interference. Check your manual for approved bulb types.
How Do I Know If My Circuit Board Needs Replacement?
If the opener has no power, won’t respond to remotes or wall buttons, and you’ve checked the power supply, the circuit board may be bad. Look for burned spots, melted parts, or a burnt smell. Replacing a circuit board is usually possible for handy homeowners, but take photos first to help with reassembly.
Where Can I Find More Information Or Get Replacement Parts?
For official manuals, guides, and parts, visit the Chamberlain Official website. You’ll find product support, part numbers, and upgrade kits for most Chamberlain models.
Opening your Chamberlain garage door opener is a practical skill every homeowner can learn. By following these steps and tips, you’ll save time, avoid mistakes, and keep your garage secure for years to come.