
The familiar rumble of a garage door opener is a daily convenience for millions, and for many, that trusty mechanism bears the Craftsman logo. While these openers are built for durability, like any piece of technology, they may occasionally require a reset or reprogramming, especially when you introduce a new remote or keypad, or if the system experiences a glitch. Understanding how to program an old Craftsman garage door opener is a valuable skill that can save you time and the expense of calling a technician.
This guide will walk you through the common programming and resetting procedures for older Craftsman garage door openers, covering everything from syncing a new remote to troubleshooting common issues. We’ll break down the process into manageable steps, making it accessible even for those who aren’t particularly tech-savvy.
Key Takeaways
- Identify Your Opener Model: Older Craftsman openers, particularly those manufactured before 1993, often use a “dip switch” system for programming, while later models utilize a “smart button” or “learn button” on the motor unit.
- Dip Switch Programming: This method involves matching a specific sequence of switches on the remote to a corresponding sequence on the garage door opener’s motor unit.
- Smart Button/Learn Button Programming: This is the more common method for post-1993 models. It involves pressing a colored button on the motor unit to enter programming mode, then pressing the remote button to be learned.
- Safety First: Always disconnect power to the opener before performing any internal adjustments or troubleshooting. Ensure the garage door is in a partially open or closed position to avoid accidental activation.
- Troubleshooting Common Issues: If programming fails, check battery strength, ensure compatibility, and consider a full system reset.
- Seek Professional Help: For complex issues or if you’re uncomfortable with the process, consult a qualified garage door technician.
Understanding Your Craftsman Opener Type
Before you can program your Craftsman garage door opener, it’s crucial to identify the type of system you have. Craftsman has produced openers for decades, and the programming methods have evolved significantly. Broadly, older Craftsman openers fall into two main categories: those using dip switches and those using a smart button (or learn button).
Dip Switch Systems (pre-1993 Models)
If your Craftsman garage door opener was manufactured before 1993, it most likely uses a dip switch system. These systems are characterized by a series of small, often red or black, switches located on both the garage door opener motor unit and your remote control. Programming involves manually setting these switches to match a specific code.
How to Identify Dip Switches:
- Locate the Motor Unit: This is the main unit mounted on the ceiling of your garage.
- Find the Switches: Look for a small panel, often with a cover, that reveals 8, 10, or 12 tiny switches. These switches can usually be flipped up or down.
- Check Your Remote: Your remote control will have a similar set of dip switches.
The idea behind dip switches is creating a unique code. Each switch can be in one of two positions (on/off, up/down, 1/0). By setting a specific pattern of these switches on your remote to match the pattern on the motor unit, you create a unique code that allows the remote to communicate with the opener.
This system is less secure than modern rolling code technology but was standard for its time.
Smart Button/learn Button Systems (post-1993 Models)
Most Craftsman garage door openers manufactured after 1993 utilize a smart button or learn button for programming. This button is typically located on the back or side of the motor unit, often near the antenna wire. It’s usually a colored button, commonly red, orange, green, or purple, and is used to initiate the learning process for remotes and keypads.
How to Identify the Smart/Learn Button:
- Inspect the Motor Unit: Examine the casing of the motor unit for a distinct button, often accompanied by an LED indicator light.
- Check the Color: Note the color of the button, as this can sometimes indicate the frequency or security type of the opener, which is important for compatibility. Common colors for Craftsman include red, orange, yellow, green, and purple.
- Look for Labels: The button might be labeled “Learn,” “Smart,” or have an antenna icon nearby.
This system simplifies the programming process significantly. Instead of manually aligning switches, you press the learn button on the motor unit, which tells the opener to enter a programming mode. Then, you press the button on your remote, and the opener learns its signal. Later Craftsman models even use rolling code technology, where the code changes with each use, enhancing security.
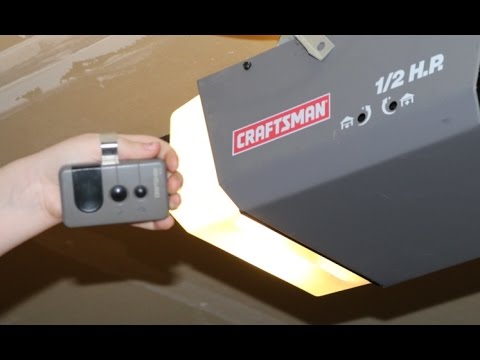
Credit: www.youtube.com
Programming With Dip Switches
Programming a Craftsman garage door opener using dip switches requires precision and patience. Since this method was common in older models, you might be trying to program a vintage remote or a replacement that mimics the original. The core principle is code matching.
Steps For Dip Switch Programming
- Locate Dip Switches:
- On the Motor Unit: Open the cover of your garage door opener’s motor unit to reveal the dip switches. Count them to determine if you have 8, 10, or 12.
- On the Remote: Open the battery compartment of your remote control. You should find a similar number of dip switches.
- Set the Code on the Remote:
- Decide on a unique code. This is a sequence of up or down positions for each switch. For example, you might set the first five switches to “up” and the last three to “down.”
- Carefully set the switches on your remote to match your chosen code. Use a small, non-conductive tool like a pen tip or a toothpick to avoid shorting anything out.
- Set the Code on the Motor Unit:
- This is the critical step. You need to set the dip switches on the motor unit to exactly match the sequence you just set on the remote.
- Important Note: If you are replacing an existing remote, you will need to set the motor unit’s dip switches to match the *old* remote’s configuration. If you are adding a new remote and want to keep existing remotes working, you’ll need to set the motor unit’s switches to a code that is compatible with *all* the remotes you wish to use.
- Test the Remote:
- Once the switches are set on both the remote and the motor unit, close the covers.
- Press the button on your remote. If the dip switches are matched correctly, the garage door should operate.
Example Scenario:
Let’s say your remote has 10 dip switches. You decide on a code: Up, Down, Up, Down, Up, Down, Up, Down, Up, Down. You carefully set the switches on your remote to this pattern. Then, you open the motor unit cover and set its 10 dip switches to the exact same pattern. If successful, pressing the remote button will now open or close the garage door.
Troubleshooting Dip Switch Issues:
- No Response: Double-check that every switch on the remote exactly matches the corresponding switch on the motor unit. Even one misplaced switch will prevent operation.
- Existing Remotes Stop Working: If you programmed a new code for a new remote, and your old remotes no longer work, it means the motor unit’s dip switches were changed. You’ll need to reprogram the old remotes by setting their dip switches to match the new code on the motor unit.
- Battery: Ensure the battery in your remote is fresh. A weak battery can cause erratic behavior or prevent the signal from being sent effectively.
Limitations Of Dip Switch Systems
While straightforward in concept, dip switch systems have significant drawbacks:
- Security: The code is fixed. Anyone with access to your garage or who can observe your remote’s switch settings can potentially replicate your code and gain access. This is why modern systems use rolling codes.
- Complexity: Manually setting switches can be tedious, and it’s easy to make a mistake.
- Compatibility: You must use remotes and keypads specifically designed for your opener’s dip switch configuration (e.g., 8, 10, or 12 switches).

Credit: www.reddit.com
Programming With A Smart Button/learn Button
The smart button or learn button method is significantly more user-friendly and is the standard for most Craftsman openers manufactured from the mid-1990s onwards. This process typically involves a sequence of button presses on the motor unit and the remote.
Steps For Smart Button Programming
The exact steps can vary slightly depending on the specific model year and the color of the learn button, but the general procedure is as follows:
- Locate the Learn Button: Find the colored learn button on your Craftsman garage door opener motor unit. It’s usually on the back panel, near the antenna wire or light bulbs. You may need to remove a cover to access it.
- Press and Release the Learn Button:
- Press the learn button once and then release it.
- An LED indicator light next to the button should illuminate, or blink, indicating that the opener is now in programming mode. This mode is usually active for about 30 seconds.
- Press the Remote Button:
- Within the 30-second window, pick up the remote control you want to program.
- Press and hold the button on the remote that you want to use to operate the garage door.
- Hold the button down until you see the opener’s light bulbs flash, or hear an audible click from the motor unit. This indicates that the remote has been successfully programmed.
- Test the Remote:
- Release the button on the remote.
- Press the remote button again. The garage door should now open or close.
Example Scenario (Red Learn Button):
You have a Craftsman opener with a red learn button. You climb a ladder to reach the motor unit. You press the red button once and release it. The red LED next to it lights up. You immediately grab your new remote and press and hold the desired button. After about 5 seconds, the garage door opener’s lights flash. You release the remote button. You then press the remote button again, and the garage door moves.
Programming Multiple Remotes Or Keypads
If you need to program additional remotes or a keypad, you generally repeat the process for each device.
- For additional remotes: Follow steps 1-4 for each new remote you want to add.
- For keypads: The process is similar.
- Press and release the learn button on the motor unit.
- On the keypad, enter your desired 4-digit PIN code.
- Press and hold the “Enter” or “Program” button on the keypad until the opener’s lights flash or you hear a click.
- Test the keypad by entering your PIN and pressing “Enter.”
Important Considerations for Smart Button Systems:
- Learn Button Color: The color of the learn button can be significant.
- Purple: Typically indicates a 10-dip switch system or an early rolling code system.
- Green: Often signifies a Security+ 315 MHz system.
- Yellow: Usually indicates a Security+ 390 MHz system.
- Red/Orange: Often indicates a Security+ 315 MHz system.
- Blue: May indicate a Security+ 315 MHz system with HomeLink compatibility.
Knowing the color helps ensure you’re using a compatible remote. You can find compatible remotes on sites like LiftMaster’s official site, as Craftsman openers are often manufactured by Chamberlain/LiftMaster.
- Holding the Learn Button: If you press and hold the learn button for an extended period (usually 10-15 seconds), you will erase all programmed remotes and keypads from the opener’s memory. This is a useful troubleshooting step if you suspect a security issue or if too many devices have been programmed over time. After erasing, you will need to reprogram all your working remotes and keypads.
- Range: Ensure you are within a reasonable distance of the motor unit when programming.

Credit: www.reddit.com
Resetting Your Craftsman Garage Door Opener
Sometimes, the best way to fix programming issues or system glitches is to perform a full reset of the garage door opener. This effectively erases all learned codes and returns the opener to its factory default settings. This is particularly useful if you’ve lost remotes, suspect unauthorized access, or if the opener is behaving erratically.
Erasing Existing Remote Codes
This is the most common type of reset for smart button systems.
- Locate the Learn Button: Find the learn button on your motor unit.
- Press and Hold: Press and hold down the learn button for approximately 10-15 seconds.
- Observe the Indicator: Watch the LED indicator light next to the learn button. It will typically blink rapidly and then turn off, or the garage door opener’s lights will flash. This signifies that all previously programmed remotes and keypads have been erased.
- Release the Button: Release the learn button once you see the indicator that the codes have been cleared.
- Reprogram: You will now need to reprogram all your remotes and keypads using the smart button programming method described earlier. This is a crucial step; without it, your opener won’t respond to any remotes.
Example: If you suspect someone has been using your garage door opener without permission, erasing all codes is a vital security measure. After erasing, you’ll need to reprogram your own remotes to ensure only authorized devices can operate the door. This process is similar to how you might reset a Craftsman garage door remote, but it’s done at the motor unit level.
Resetting Dip Switch Systems
Resetting a dip switch system is less about erasing codes and more about re-establishing them. If your dip switch system isn’t working:
- Verify Switch Settings: The most common issue is simply a mismatch. Double-check that the switches on the remote precisely match the switches on the motor unit.
- Try a New Code: If you’re unsure what the original code was, or if you’re trying to program a new remote and the old one is lost, you can set a completely new, arbitrary code on both the remote and the motor unit. Ensure you document this new code in case you need it again.
- Check Batteries: A weak battery in the remote is a frequent culprit. Replace it with a fresh one.
Power Cycle Reset
For some electronic glitches, a simple power cycle can resolve the issue.
- Disconnect Power: Unplug the garage door opener from the electrical outlet.
- Wait: Leave it unplugged for at least 30 seconds to allow any residual power to dissipate.
- Reconnect Power: Plug the opener back into the outlet.
- Test: Try operating the door with your remote. If the issue was a minor electronic hiccup, this might resolve it.
This type of reset is often a good first step before attempting more complex programming or erasure procedures. It’s a quick way to clear temporary memory issues.
Troubleshooting Common Programming Problems
Even with clear instructions, programming issues can arise. Here are some common problems and their solutions:
Remote Not Responding After Programming
- Check Battery: This is the most common reason. Ensure the battery in your remote is new and inserted correctly.
- Incorrect Programming Sequence: You might have missed a step or pressed a button too late or too early. Review the programming steps for your specific model and try again. Pay close attention to the timing required for the smart button method (the 30-second window).
- Compatibility Issues:
- Dip Switches: Ensure the remote is designed for your specific number of dip switches (8, 10, or 12) and frequency.
- Smart Button: Verify that the remote is compatible with the color of your learn button and the opener’s security system (e.g., Security+, Security+ 2.0). Craftsman remotes are often compatible with Chamberlain and LiftMaster openers of the same era and security type.
- Range: Try programming when closer to the motor unit.
- Motor Unit Lights: Some openers require the garage door lights to flash as confirmation. If you don’t see this, the programming likely failed.
- Antenna: Ensure the antenna wire hanging from the motor unit is not cut or obstructed.
Opener Only Responds To One Remote
- Dip Switch Mismatch: If using dip switches, this almost always indicates that the switches on the motor unit do not match the non-working remotes. You need to ensure all remotes have their switches set identically to the motor unit’s configuration.
- Memory Full (Smart Button): Most garage door openers can only store a limited number of remotes (often 4-7). If the memory is full, you’ll need to erase all codes and then reprogram all your desired remotes. You can find instructions on how to reset your garage door opener for more details on this process.
- Interference: Strong radio frequency interference from other devices could potentially disrupt communication, though this is less common.
Opener Works Intermittently
- Weak Battery: Again, a dying battery in the remote is a prime suspect.
- Obstructions: Ensure nothing is physically blocking the garage door’s path.
- Mechanical Issues: The opener’s chain or belt might need adjustment. Refer to guides like how to adjust the chain on a garage door opener for more information. Rollers might also need lubrication; check out how to lube garage door rollers for a smooth, quiet operation.
- Motor Unit Issues: The internal components of the motor unit itself could be failing.
Safety Sensor Issues
If the garage door starts to close and then immediately reverses, it’s likely due to the safety sensors located near the bottom of the door tracks. These sensors must have an unobstructed beam of light between them.
- Alignment: Ensure the sensors are properly aligned and pointing directly at each other.
- Obstructions: Check for anything blocking the beam (e.g., a broom, storage items).
- Wiring: Inspect the wires leading to the sensors for damage or loose connections.
- Clean Lenses: Dust or dirt on the sensor lenses can sometimes interfere with the beam.
When To Seek Professional Help
While many Craftsman garage door opener programming tasks are DIY-friendly, there are times when it’s best to call a professional.
- Uncertainty About Model: If you cannot identify your opener model or the type of programming system it uses, a technician can quickly diagnose it.
- Repeated Failures: If you’ve followed all the instructions multiple times and still cannot program your opener, there might be a more complex issue with the opener unit or the remote itself.
- Electrical Concerns: If you are uncomfortable working with electrical components or notice any damaged wiring, it’s safer to let a professional handle it.
- Mechanical Problems: If the door is not moving smoothly, is making unusual noises, or if you suspect mechanical wear and tear, a technician can perform necessary repairs or adjustments.
- Safety Concerns: Garage door openers involve heavy moving parts and electrical components. If you have any doubts about safety, do not proceed.
A qualified garage door technician has the expertise and tools to diagnose and fix issues efficiently, ensuring your opener functions correctly and safely. The cost of a service call is often less than the potential cost of further damage or injury from attempting repairs beyond your skill level. Understanding the general costs involved can help you budget for such services; refer to resources on garage door costs for an idea of what to expect.
Frequently Asked Questions
How Do I Know If My Craftsman Garage Door Opener Is Too Old To Be Programmed With A New Remote?
Most Craftsman openers manufactured after 1993 use the smart button/learn button system, which is generally compatible with modern remotes. Older models, particularly those before 1993, use dip switches. If your opener uses dip switches, you’ll need to find a replacement remote specifically designed for that dip