
The humble garage door opener, a marvel of convenience, often goes unnoticed until it falters. For homeowners with Craftsman garage door openers, understanding how to manage their systems, including the removal of a light cover, is a practical skill that can save time and money.
Whether you’re troubleshooting a flickering bulb, upgrading to an LED, or simply performing routine maintenance, knowing the steps involved in accessing the opener’s light component is essential. This guide will walk you through the process, providing clear, actionable steps to safely and effectively remove the light cover on your Craftsman garage door opener.
Key Takeaways
- Safety First: Always disconnect power to the garage door opener before attempting any maintenance, including light cover removal.
- Identify Opener Model: Craftsman openers vary; consult your manual to confirm the specific light cover design.
- Common Removal Methods: Light covers are typically secured by screws, tabs, or a combination thereof.
- Tools Required: Basic tools like a screwdriver (Phillips head is common), a stepladder, and possibly a small flathead screwdriver or pry tool will be needed.
- Gentle Approach: Avoid excessive force to prevent damage to the cover or the opener housing.
- Troubleshooting: If the cover is stuck, check for hidden screws or obstructions.
- Replacement: Reinstallation is the reverse of removal; ensure it’s securely fastened.
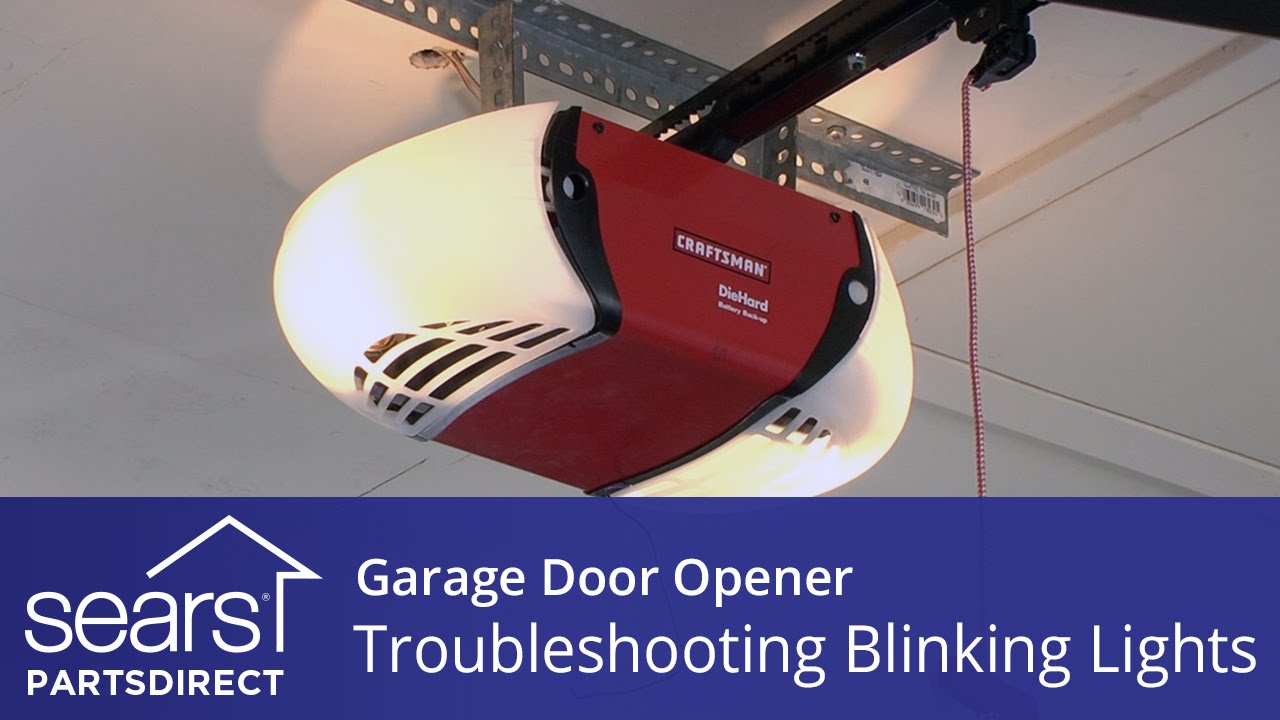
Credit: www.searshomeservices.com
Understanding Your Craftsman Garage Door Opener Light
Craftsman garage door openers have been a staple in homes for decades, known for their reliability and user-friendly design. The light feature on these openers serves a dual purpose: illuminating your garage for convenience and providing a visual indicator of the opener’s status. While the specifics of the light cover can vary slightly between models, the general principles of removal remain consistent. Most Craftsman openers feature an integrated light housing that is typically accessible from the underside of the motor unit.
The light cover itself is usually made of a translucent plastic designed to diffuse the light from the bulb, preventing glare while still providing ample illumination. This cover protects the bulb from dust, debris, and accidental impact. When it’s time to change a bulb, upgrade to a more energy-efficient LED, or investigate a lighting issue, removing this cover is the necessary first step.
Common Light Cover Designs
Craftsman has produced a wide array of garage door opener models over the years. While the core functionality is similar, the design of the light cover can differ. Generally, you’ll encounter one of a few common designs:
- Screw-Secured Covers: Many models feature screws that directly hold the light cover in place. These are often Phillips head screws located around the perimeter of the cover or within recessed housings.
- Tab-Based Covers: Some designs utilize small plastic tabs that fit into corresponding slots on the opener’s housing. These covers may require a gentle push, pull, or twist to release.
- Hinged Covers: Less common, but some openers might have a light cover that is hinged on one side, with a latch or screw on the other to secure it.
- Integrated Lens: In some newer or more streamlined designs, the lens might be an integral part of the motor unit housing, requiring removal of a larger section of the casing to access the bulb. However, for typical bulb replacement, this is rare.
The most prevalent types involve screws or tabs that allow for easy removal without disassembling the main motor unit. Identifying which type you have is the first step in the removal process.
Why You Might Need To Remove The Light Cover
There are several practical reasons why a homeowner might need to remove the light cover of their Craftsman garage door opener:
- Bulb Replacement: The most common reason is a burnt-out light bulb. Garage door opener bulbs have a limited lifespan and will eventually need replacing.
- Bulb Upgrade: Many homeowners opt to upgrade from traditional incandescent bulbs to more energy-efficient and longer-lasting LED bulbs. LEDs can also be less susceptible to vibration damage common in garage environments.
- Cleaning: Over time, dust and grime can accumulate on the inside of the light cover, dimming the light. Removing and cleaning the cover can restore brightness.
- Troubleshooting Lighting Issues: If the light isn’t working, removing the cover is necessary to inspect the bulb, socket, and wiring for any obvious problems.
- Access for Repair: In rare cases, access to the light socket or related components might be needed for minor repairs.
Understanding these scenarios helps contextualize the importance of this seemingly simple maintenance task.
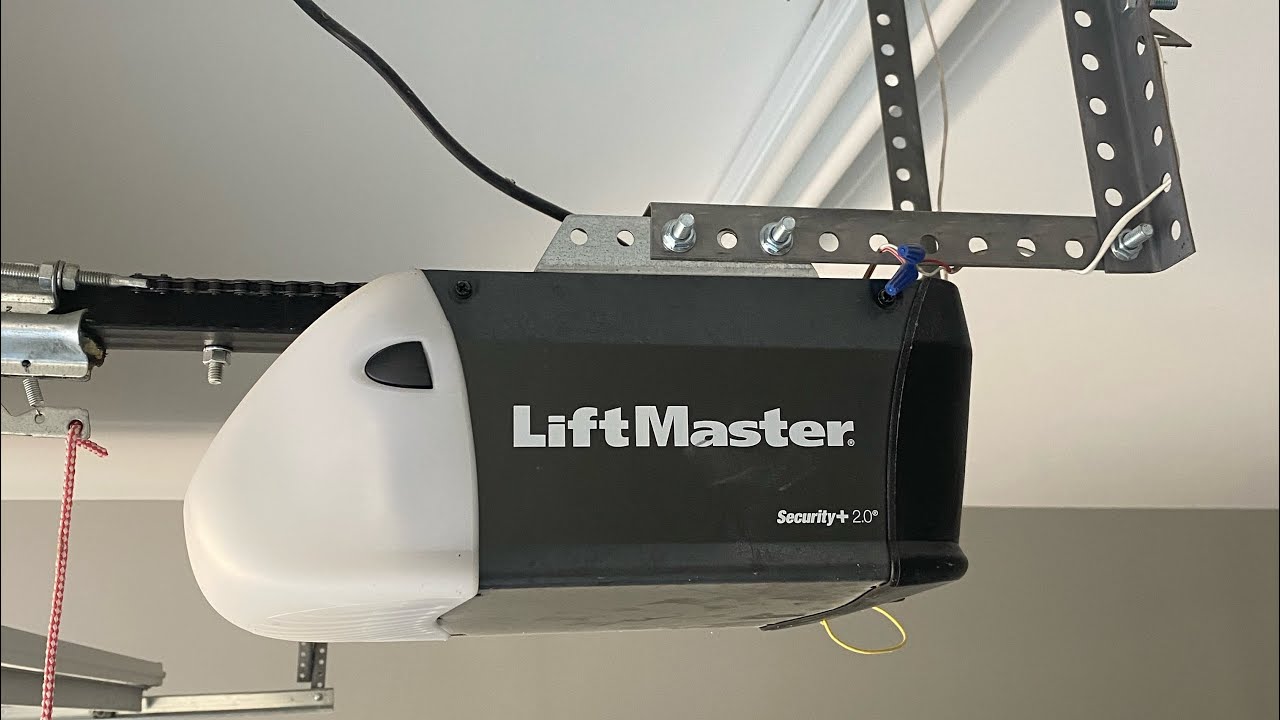
Credit: www.youtube.com
Safety Precautions Before You Begin
Working with any electrical appliance, including your garage door opener, necessitates a strong emphasis on safety. Failure to follow proper safety procedures can lead to electrical shock, injury, or damage to the opener. Craftsman garage door openers, like all powered devices, require careful handling.
Disconnecting Power Is Crucial
The absolute most important safety step before attempting to remove the light cover or perform any work on the opener is to disconnect the power supply. This prevents any accidental activation of the opener or electrical shock.
There are two primary ways to achieve this:
- Unplug the Opener: Most Craftsman garage door openers plug into a standard electrical outlet, usually located on the ceiling of your garage. Simply unplug the power cord from the outlet.
- Turn Off the Circuit Breaker: If the opener is hardwired or you prefer this method, locate your home’s electrical panel. Identify the circuit breaker that controls the garage door opener and switch it to the “OFF” position. It’s good practice to label this breaker for future reference.
Never assume the power is off. Double-check by trying to operate the garage door using a remote or wall button after you believe the power is disconnected. If the opener does not respond, you have successfully cut the power.
Other Safety Considerations
- Use a Stable Stepladder: You will likely need a stepladder to reach the opener. Ensure it is placed on a level, stable surface and is fully opened and locked. Do not overreach; reposition the ladder as needed.
- Wear Safety Glasses: While the risk is low, small pieces of plastic or dust could potentially fall into your eyes during the process. Safety glasses offer an extra layer of protection.
- Handle Components Gently: Garage door opener components, especially plastic parts like light covers, can become brittle over time. Avoid applying excessive force, which could lead to cracking or breaking.
- Keep Children and Pets Away: Ensure children and pets are not in the immediate vicinity while you are working on the opener to prevent accidental interference or injury.
- Consult Your Manual: If you are unsure about any aspect of your specific Craftsman opener model, refer to the owner’s manual. It will provide model-specific details and safety warnings.
By adhering to these safety precautions, you can ensure a smooth and secure process when removing your Craftsman garage door opener’s light cover.

Credit: www.amazon.com
Tools And Materials Needed
Fortunately, removing a Craftsman garage door opener light cover typically requires only basic tools that most homeowners already have in their toolbox. The specific tools might vary slightly depending on the exact model of your opener, but the following are generally sufficient.
Essential Tools
- Screwdriver Set: A set of Phillips head screwdrivers is almost always necessary. Craftsman openers commonly use Phillips head screws, and having a few different sizes (e.g., #1, #2) will ensure you have the right fit. A flathead screwdriver might also be needed for prying or if your model uses different screw types.
- Stepladder: As mentioned in the safety section, a stable stepladder is essential for reaching the opener unit safely.
- Safety Glasses: To protect your eyes from dust or debris.
Optional But Helpful Tools
- Small Flathead Screwdriver or Plastic Pry Tool: If your light cover uses tabs instead of screws, a small flathead screwdriver or a non-marring plastic pry tool can be very helpful for gently releasing the tabs without damaging the plastic.
- Gloves: Disposable gloves can keep your hands clean, especially if the opener unit is dusty.
- Magnetic Pickup Tool: If your opener is located in a high area or you’re prone to dropping small parts, a magnetic pickup tool can be invaluable for retrieving dropped screws.
Materials
- Replacement Bulb (if applicable): If you are removing the cover to replace a bulb, ensure you have the correct replacement bulb on hand. Check your owner’s manual or the existing bulb for specifications (e.g., wattage, type, often a rough service bulb designed for vibration).
- Cleaning Cloth: A soft, dry cloth for cleaning the inside of the light cover and the opener housing.
Having these tools and materials readily available will streamline the process and ensure you can complete the task efficiently and safely.
Step-by-step Guide To Removing The Light Cover
This guide provides a general procedure for removing a Craftsman garage door opener light cover. Remember that specific models may have slight variations. Always prioritize safety and refer to your owner’s manual if you encounter difficulties.
Step 1: Ensure Power Is Disconnected
As emphasized earlier, this is the critical first step. Go to your garage’s electrical outlet or circuit breaker and completely disconnect the power to the garage door opener unit. Verify that the opener is indeed powerless by attempting to activate it.
Step 2: Position Your Ladder And Access The Opener
Place your stepladder on a stable, level surface directly beneath the garage door opener motor unit. Climb the ladder carefully, ensuring it is secure. You should have a clear, unobstructed view of the underside of the opener where the light fixture is located.
Step 3: Locate The Light Cover And Fasteners
Examine the light cover on the underside of the opener. Look for screws that secure it to the main housing. These are typically visible around the edges of the cover or may be partially recessed.
- If screws are present: Identify the type and size of screwdriver needed (usually Phillips head).
- If no screws are visible: The cover likely uses plastic tabs. Look for small indentations or seams around the cover that suggest where to apply gentle pressure or prying.
Step 4: Remove Screws (if Applicable)
If your model uses screws, insert the appropriate screwdriver into each screw head. Turn the screws counter-clockwise to loosen and remove them. Place the screws in a safe place, such as a small container or a magnetic dish, so they don’t get lost. Some Craftsman models may have two or more screws holding the cover.
Step 5: Release Tabs (if Applicable)
If your light cover is secured by tabs, you’ll need to gently release them.
- Push and Pull: On some models, you might need to push the cover slightly in one direction (e.g., upwards or sideways) while simultaneously pulling it down.
- Pry Gently: If there are small gaps or slots, you can carefully insert a small flathead screwdriver or a plastic pry tool. Gently lever the cover away from the housing. Work your way around the edges, releasing each tab. Be extremely cautious not to apply too much force, as plastic tabs can break easily.
Step 6: Detach The Light Cover
Once all screws are removed or all tabs are released, the light cover should detach from the opener unit. Carefully pull it downwards. Some covers might still be connected by a wire if they are part of a larger assembly, but for most simple light covers, they will come off completely.
Step 7: Inspect And Perform Necessary Actions
With the cover removed, you now have access to the light bulb and socket.
- Bulb Replacement: If replacing the bulb, carefully unscrew the old bulb (turn counter-clockwise) and screw in the new one (turn clockwise) until snug.
- Cleaning: Use a dry cloth to wipe away dust and debris from the inside of the cover and the bulb area.
- Inspection: Check the socket for any signs of corrosion or damage.
Step 8: Reinstall The Light Cover
Reinstallation is the reverse of the removal process.
- Align the light cover with the opener housing.
- If it uses tabs, carefully guide them back into their slots. You might hear a soft click as they engage.
- If it uses screws, position the cover correctly and reinsert the screws. Tighten them clockwise until snug. Do not overtighten, as this can strip the threads or crack the plastic.
- Ensure the cover is securely attached and does not wobble.
Step 9: Restore Power
Once the light cover is securely reinstalled, you can restore power to the garage door opener by plugging it back in or switching the circuit breaker back to the “ON” position. Test the light to ensure it works correctly.
Troubleshooting Common Issues
Even with clear instructions, you might encounter a few snags when trying to remove or reinstall the light cover. Craftsman openers, like any mechanical device, can sometimes present minor challenges. Here’s how to address some common problems:
Light Cover Won’t Budge
- Hidden Screws: Double-check thoroughly for any small, recessed screws you might have missed. Sometimes they are hidden under labels or in tiny crevices.
- Stuck Tabs: If tabs are the issue, try applying gentle, steady pressure rather than sudden force. Sometimes a slight upward or sideways push on the entire cover can help disengage stubborn tabs before pulling down.
- Paint or Gunk: In older installations, paint or accumulated grime might be sealing the cover. Carefully try to score around the seam with a utility knife (be cautious not to cut too deep and damage the housing) or use a bit of penetrating oil (apply sparingly and wipe away excess) if you suspect it’s sticking.
- Wrong Removal Method: Ensure you’re using the correct method for your specific model. If you thought it had tabs but it actually has screws, you might be forcing it unnecessarily.
Screws Won’t Tighten Or Keep Stripping
- Damaged Threads: If the screw threads in the housing are stripped, the screws won’t hold. You might need to use slightly larger screws, or in some cases, a small amount of epoxy might help secure them temporarily. This often indicates a need for professional assessment if it’s a recurring problem.
- Wrong Screw Size: Ensure you are using the original screws or replacements of the exact same size and thread type. Using a screw that is too small or has the wrong thread pitch will not secure properly.
Light Cover Cracks Or Breaks
- Excessive Force: This is usually the result of applying too much force, especially on older, brittle plastic.
- Solution: If the cover is cracked but still functional, you can sometimes repair it with strong adhesive or epoxy. If it’s severely damaged, you’ll need to obtain a replacement cover. Craftsman replacement parts are often available through their website or authorized dealers. You can search for your specific Craftsman opener model number to find the correct part number for the light lens or cover.
Opener Malfunctions After Reinstallation
- Power Disconnection: The most likely cause is forgetting to reconnect the power or a tripped circuit breaker. Double-check that the opener is plugged in or the breaker is switched on.
- Loose Wiring: While less common for just a light cover removal, if you accidentally disturbed any wiring near the light socket, it could cause an issue. Re-open the cover and carefully inspect any visible wiring connections.
- Interference: Ensure the light cover is seated correctly and not obstructing any moving parts or sensors within the opener unit.
Pro Tip: Before starting, take a quick photo of the light cover and its surrounding area with your smartphone. This can serve as a helpful reference during reinstallation, especially if you’re unsure about the exact alignment.
Replacing The Light Bulb And Upgrading To Led
One of the primary reasons for accessing the light cover is to replace the existing bulb. While you’re there, upgrading to an LED bulb offers several advantages over traditional incandescent bulbs.
Choosing The Right Replacement Bulb
When selecting a replacement bulb for your Craftsman garage door opener, consider these factors:
- Type: Use bulbs specifically designed for garage door openers or “rough service” bulbs. These are built to withstand the vibrations that occur when the garage door operates, making them less prone to premature burnout.
- Wattage: Check your owner’s manual for the maximum recommended wattage. Using a bulb with too high a wattage can overheat the opener’s internal components or the light socket, potentially causing damage. Many Craftsman openers use bulbs up to 100 watts.
- Base Type: Most garage door openers use a standard E26 (medium) base, but it’s always best to confirm by checking the old bulb or your manual.
- LED Bulbs: Many LEDs are now designed for garage door openers. They offer significant benefits.
Benefits Of Upgrading To Led
Switching to an LED bulb for your garage door opener provides several compelling advantages:
- Energy Efficiency: LEDs consume significantly less electricity than incandescent bulbs. For example, a 10-watt LED can produce the same amount of light as a 60-watt incandescent bulb, leading to potential energy savings over time.
- Longer Lifespan: LEDs last considerably longer, often 25,000 hours or more, compared to incandescent bulbs (around 1,000-2,000 hours). This means far fewer replacements over the years.
- Durability: LEDs are more resistant to shock and vibration, making them ideal for the demanding environment of a garage door opener.
- Reduced Heat Output: LEDs generate much less heat than incandescent bulbs, which can be beneficial for the opener’s electronics and reduce the risk of heat-related damage.
- Instant On: LEDs reach full brightness immediately, with no warm-up time.
- Variety of Colors and Brightness: While most opt for a standard white light, LEDs are available in various color temperatures and brightness levels.
How To Install An Led Bulb
The process of installing an LED bulb is identical to installing an incandescent bulb:
- Ensure Power is OFF: Crucially, always disconnect the power to the opener before touching the bulb or socket.
- Remove Light Cover: Follow the steps outlined previously to safely remove the light cover.
- Remove Old Bulb: Carefully grip the old bulb and turn it counter-clockwise to unscrew it from the socket.
- Install New LED Bulb: Take your new LED bulb and screw it into the socket clockwise until it is snug. Do not overtighten.
- Reinstall Light Cover: Securely reattach the light cover.
- Restore Power: Reconnect the power to the opener and test the light.
When choosing an LED, look for models specifically marketed for garage door openers, as they are often designed to avoid interference with the opener’s radio frequency signals.
Maintenance And Care For Your Opener’s Light Assembly
Regular maintenance of your garage door opener, including its light assembly, can prevent issues and extend its lifespan. While the light cover itself is simple, keeping the area clean and ensuring the bulb is functioning correctly contributes to the overall health of your opener.
Cleaning The Light Cover And Socket Area
Over time, dust, cobwebs, and grime can accumulate on the inside of the light cover and around the bulb socket. This can dim the light and, in some cases, potentially lead to overheating if debris obstructs ventilation.
- Frequency: It’s good practice to clean the light assembly during routine garage door opener maintenance, perhaps once or twice a year, or whenever you notice the light appears dimmer than usual.
- Procedure:
- Disconnect Power: Always ensure the power is off.
- Remove the light cover as described earlier.
- Use a soft, dry cloth or a microfiber cloth to wipe down the inside of the light cover. For stubborn grime, you can slightly dampen the cloth with water, but ensure it’s not wet enough to drip. Avoid using harsh chemical cleaners, as they could damage the plastic.
- Gently wipe around the light socket and any accessible areas of the motor unit housing. A small brush (like a clean paintbrush or an old toothbrush) can be useful for reaching tight spots.
- Ensure the area is completely dry before reattaching the cover.
- Reinstall the light cover securely.
- Restore power and test the light.
Checking Bulb Security
A loose bulb can cause flickering or intermittent operation. Periodically, after ensuring the power is off and the bulb is cool, give the bulb a gentle check to ensure it’s screwed in tightly. This is particularly important after replacing a bulb.
Inspecting The Socket
While the cover is off, take a moment to visually inspect the light bulb socket for any signs of corrosion, melting, or damage. If you notice any issues, it might indicate a problem with the socket itself or potential overheating.
In such cases, it’s advisable to consult your owner’s manual or contact a qualified garage door technician for repair. Attempting to repair electrical components without proper knowledge can be dangerous.
Preventing Interference With Opener Signals (led Specific)
As mentioned, some older or poorly designed LED bulbs can emit radio frequency (RF) interference that disrupts the signals between your garage door opener and its remote control.
- Choose Wisely: Opt for LED bulbs specifically designed for garage door openers. These are typically shielded to prevent RF interference. Look for descriptions that mention “no RF interference” or “garage door opener safe.”
- Test Thoroughly: After installing an LED bulb, test your garage door opener remote from various distances and locations around your garage and driveway. If you experience delayed response times or the remote fails to work