Now Reading: How to Reprogram a Garage Door Opener Liftmaster Easily
- 01
How to Reprogram a Garage Door Opener Liftmaster Easily
If you’ve ever lost your garage door remote, bought a new car with a built-in opener, or moved into a new home, you may need to reprogram your LiftMaster garage door opener. Many homeowners feel nervous about this process, but it’s more manageable than you might think. With a bit of patience and the right guidance, you can restore control over your garage access and improve your home’s security at the same time.
A properly programmed garage door opener does more than just open and close the door—it protects your family, keeps your belongings safe, and gives you peace of mind. But confusion often arises because LiftMaster offers many different models, and the steps can change based on the age and features of your device.
This guide breaks everything down into clear, simple instructions. Whether you have a classic remote, a modern keypad, or need to clear out old codes, you’ll find all the help you need here.
Let’s look at how garage door opener reprogramming works, why it matters, and how to solve common problems that might show up along the way.
Understanding Liftmaster Garage Door Openers
Before you start reprogramming, it’s important to understand the basic features and variations of LiftMaster openers. Knowing which model you have will help you follow the correct steps and avoid frustration.
LiftMaster, a division of Chamberlain Group, is one of the most trusted names in garage door openers. Their devices are popular for their durability, advanced safety features, and compatibility with smart home systems. Over the years, LiftMaster has produced several types of openers, including:
- Chain drive models: Durable and affordable, but a bit noisy.
- Belt drive models: Quieter operation, ideal for attached garages.
- Screw drive models: Less common, but fast and reliable.
- Wall-mounted or jackshaft models: Save ceiling space and offer advanced features.
Each model typically uses a Learn or Program button to sync remotes and keypads. Modern LiftMaster units use Security+ 2.0 technology, which improves security by changing the code every time you use the remote. Older models may use dip switches or a fixed code.
If you don’t know your model, check the motor unit in your garage. There should be a label with the model number and manufacturing date. This information is crucial when you search for manuals or need customer support.
Why Reprogramming Your Garage Door Opener Matters
Many homeowners overlook the importance of reprogramming their garage door opener. But there are several reasons why you should know how to do it:
- Security: If you move into a new home or lose a remote, old codes might still work. Reprogramming ensures only your remotes can open the door.
- Convenience: Adding a new remote, keypad, or vehicle system (like HomeLink) requires programming.
- Troubleshooting: If your remote stops working or the opener acts strangely, reprogramming can fix glitches.
- Smart Features: Newer LiftMaster models may need reprogramming to connect to Wi-Fi or integrate with smart home devices.
Even if you haven’t had a problem yet, it’s good to know how to reprogram your system, so you’re ready for any situation.
Tools And Information You’ll Need
You don’t need many tools to reprogram a LiftMaster garage door opener. However, gathering everything first will make the process smoother:
- Step ladder (to safely reach the opener on the ceiling)
- Your remote(s) and/or keypad
- The model number of your LiftMaster opener
- A working light source (garage ceilings can be dark)
- Small screwdriver (for some remotes or keypads)
- User manual (optional, but helpful; you can find these on the LiftMaster website)
Don’t forget: If your opener is older, it may use a different method (like dip switches) instead of a Learn button. Check your unit before starting.
How To Reprogram A Liftmaster Remote Control
Most people want to program a new remote or replace a lost one. Here’s a detailed step-by-step guide for modern LiftMaster openers (Security+ or Security+ 2.0, 1993 and later):
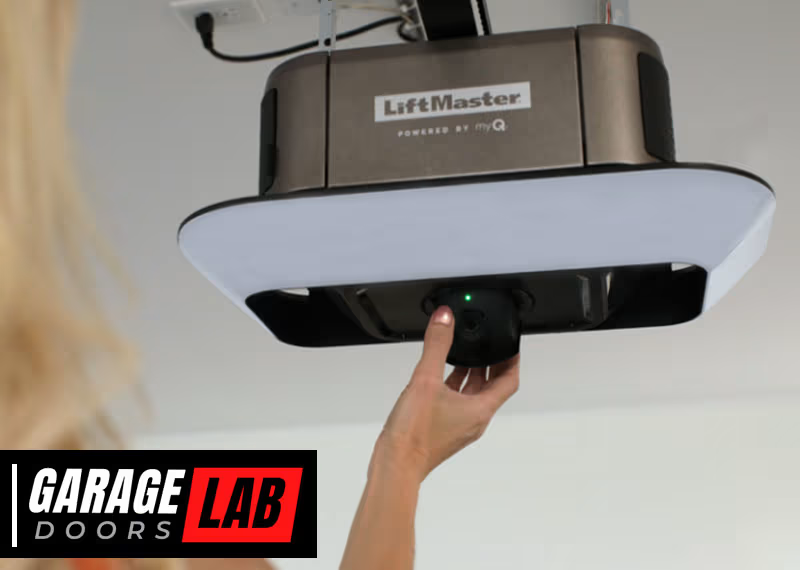
1. Locate The Learn Button
The Learn button is usually on the back or side of the garage door opener motor. It may be under a light cover. The button is often yellow, purple, red/orange, or green. The color tells you which technology your model uses.
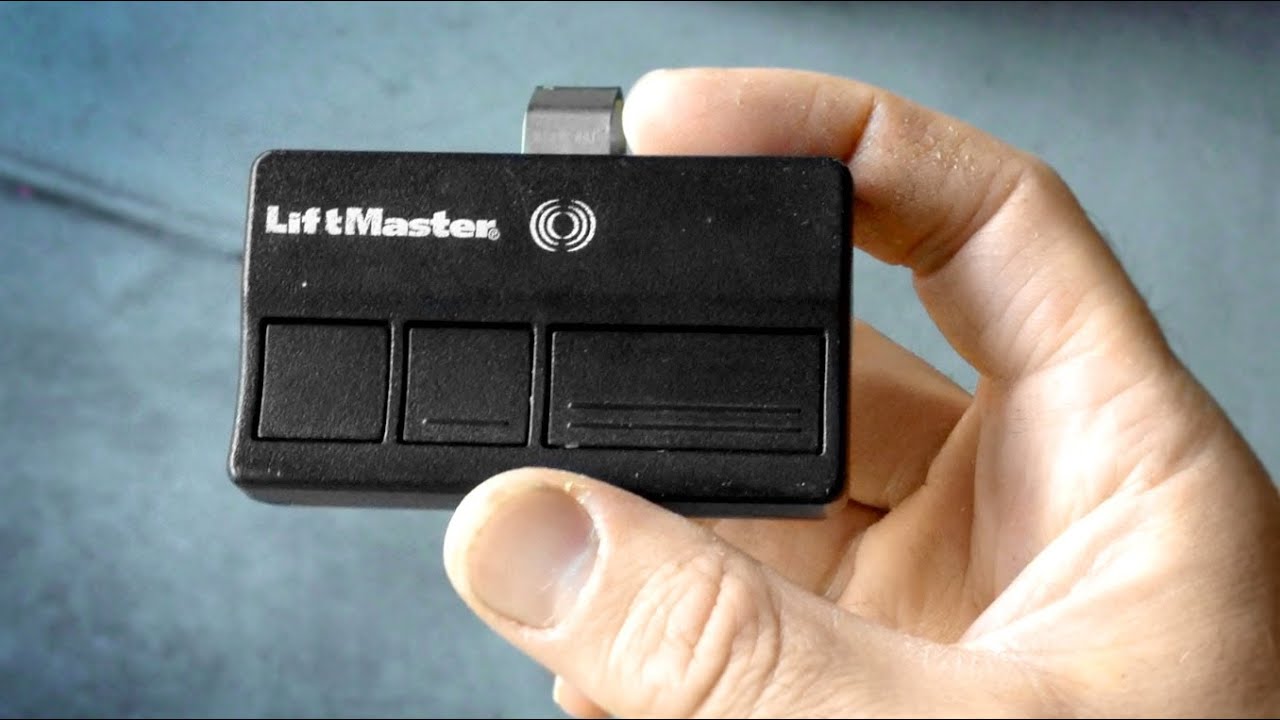
2. Prepare The Remote
Make sure the remote has a fresh battery. Stand on a ladder if needed, so you can safely reach the motor unit.
3. Press The Learn Button
Press and release the Learn button. A small LED next to the button will light up. You now have about 30 seconds to program the remote.
4. Press The Remote Button
While the LED is on, press and hold the button on your remote that you want to program. The opener light should blink, or you may hear a click—this means the remote is now synced.
5. Test The Remote
Step down from the ladder and try the remote. The door should open or close.
If you need to program more remotes, repeat steps 3 and 4 for each one. Most openers can store multiple remotes.
Example: Programming A Remote For A Yellow Learn Button
If your opener has a yellow Learn button (Security+ 2.0):
- Press and release the yellow Learn button.
- Press and hold the remote button until the LED on the opener blinks.
- Release the button and test the remote.
Common Mistakes When Programming Remotes
- Not pressing the remote button quickly enough after the Learn button.
- Using an old battery in the remote.
- Standing too far from the opener (be within 10–15 feet).
- Confusing the Learn button with the garage light button.

How To Erase Old Codes And Reprogram
If you want to erase all old remote codes (for example, after moving into a new house), you can do this easily:
- Find the Learn button on the opener.
- Press and hold the Learn button for about 6–10 seconds. The LED will turn off, or you may hear a click.
- This wipes all remotes and keypads from memory.
- Program your remotes and keypads as described above.
Important: After erasing, no remote or keypad will work until you program them again.
Programming A Keypad Entry System
Many homes use a LiftMaster keypad for keyless entry. Reprogramming the keypad lets you set your own PIN. The process depends on the keypad type (older keypads work differently). For most wireless keypads:
- Find the Learn Button on the motor unit.
- Press and release the Learn Button. The LED will light up for 30 seconds.
- Within 30 Seconds, enter your desired 4-digit PIN on the keypad, then press the Enter button.
- The garage door opener lights will blink or you’ll hear a click. The keypad is now programmed.
If you want to change the PIN, repeat the process above. If the keypad won’t program, try replacing the battery.
Example: Setting A New Pin
- Press and release the Learn button.
- On the keypad, enter your new 4-digit PIN and press Enter.
- Wait for the light to blink.
Tip: For added security, avoid using simple PINs like 1234 or your address.
How To Program Homelink (car’s Built-in Remote)
Many cars, especially those made in the last 15 years, have HomeLink—a built-in remote control system. You can program HomeLink to open your LiftMaster garage. The process is a little different than a standard remote.
- Clear HomeLink Memory (if needed): Hold the two outer HomeLink buttons until the indicator light blinks quickly (about 20 seconds).
- Train the HomeLink Button:
- Hold your LiftMaster remote a few inches from the car’s HomeLink system.
- Press and hold both the HomeLink button and the remote button at the same time.
- The HomeLink indicator will change from slow to fast blinking.
- Sync HomeLink with the Opener:
- Go to the garage door opener.
- Press and release the Learn button.
- Within 30 seconds, return to your car and press the programmed HomeLink button three times (hold each press for a second).
- The garage door should move, confirming programming.
Note: Some cars may require the ignition to be on. If you have trouble, consult your car’s manual or the HomeLink website.
Reprogramming After Power Loss Or Battery Change
If your opener or remote loses power (due to an outage or battery replacement), you might need to reprogram devices:
- Remotes: Most newer LiftMaster units keep memory during short power losses. If the remote stops working, repeat the Learn button process.
- Keypads: May need reprogramming after battery changes. Follow keypad instructions above.
- Homelink: Sometimes loses programming. Reprogram as described earlier.
Pro Tip: Always test your remotes and keypads after a power outage or battery change to ensure everything works.
Troubleshooting Common Problems
Even with clear steps, problems can occur. Here’s how to handle the most frequent issues:
Remote Or Keypad Won’t Program
- Check battery: A weak battery can prevent programming.
- Distance: Stand close to the opener during programming.
- Interference: LED light bulbs can sometimes cause interference. Try removing them while programming.
- Model mismatch: Make sure your remote is compatible with your opener’s technology.
- Memory is full: Most openers can hold 5–8 remotes/keypads. Erase old codes if needed.
Door Opens, Then Closes Immediately
This is rarely a programming problem. It often means:
- Safety sensors are blocked or misaligned.
- There’s an obstruction in the door’s path.
- Springs or door mechanism need maintenance.
Remote Works, Keypad Doesn’t (or Vice Versa)
- Each device must be programmed separately.
- Check for worn buttons on old keypads.
- Keypads are weather-exposed; replace if needed.
Opener Light Doesn’t Blink
- Some models confirm programming with a click instead.
- Always test the remote/keypad after programming.
Table: Learn Button Colors And Their Meaning
Different Learn button colors tell you about your opener’s technology and compatible remotes.
| Learn Button Color | Technology | Compatible Remotes | Year Range |
|---|---|---|---|
| Yellow | Security+ 2.0 | 893MAX, 890MAX | 2011–present |
| Purple | Security+ | 371LM, 373LM | 2005–2011 |
| Red/Orange | Security+ | 971LM, 973LM | 1997–2005 |
| Green | Billion Code | 81LM, 83LM | 1993–1997 |
Upgrading To Smart Garage Door Features
LiftMaster now offers smart openers you can control from your phone. Models with MyQ technology let you:
- Open/close your door remotely
- Receive alerts when the door opens
- Set schedules for automatic closing
If you upgrade to a smart opener, you’ll need to pair your device with the MyQ app, usually by scanning a QR code on the opener and following the on-screen steps.
Insider tip: If you have an older opener, you can often add smart features with a MyQ Smart Garage Hub, which works with most major brands made after 1993.
Table: Liftmaster Remote And Keypad Compatibility
If you need to buy a new remote or keypad, use the following guide to check compatibility.
| Opener Model Year | Learn Button Color | Compatible Remotes | Compatible Keypads |
|---|---|---|---|
| 2011–present | Yellow | 893MAX, 890MAX | 877MAX |
| 2005–2011 | Purple | 371LM, 373LM | 377LM |
| 1997–2005 | Red/Orange | 971LM, 973LM | 976LM |
| 1993–1997 | Green | 81LM, 83LM | Keypad 66LM |
Tip: Always double-check before buying. Many universal remotes work with most LiftMaster models, but not all.
Safety And Security Tips When Reprogramming
Keeping your garage secure is about more than just programming. Follow these tips for extra protection:
- Erase old codes when moving into a new home.
- Change PINs regularly if you use a keypad.
- Don’t share your PIN with people you don’t trust.
- Check for stuck remotes: Sometimes, a remote button gets pressed in a bag or car, which can drain the battery or even open the door accidentally.
- Test your safety sensors every few months: Place a block under the door and try closing. The door should reverse immediately.
- Update old openers: If your opener was made before 1993, it may not have rolling code technology and is less secure.
- Keep remotes out of sight in your car.
Non-obvious insight: Some home security systems can be connected with your LiftMaster opener for extra alerts, but this may require a professional installer.
When To Call A Professional
Most homeowners can program remotes, keypads, and HomeLink systems themselves. But some situations are best handled by a pro:
- The opener is very old or not responding.
- The safety sensors are misaligned or broken.
- The door isn’t balanced (it’s heavy or crooked).
- Wiring looks damaged, or you see sparks/smoke.
Did you know? Regular maintenance—like lubricating moving parts and checking springs—can help your opener last longer and avoid programming glitches.
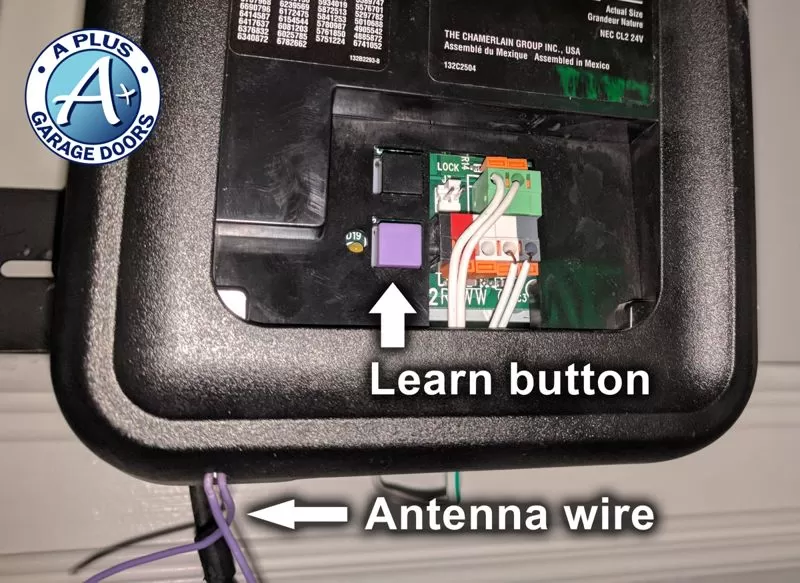
Table: Quick Troubleshooting For Reprogramming Problems
Use this chart to find fast solutions to common issues.
| Problem | Possible Cause | Solution |
|---|---|---|
| Remote won’t program | Weak battery | Replace battery, try again |
| Keypad not working | Wrong PIN or old battery | Reset PIN, replace battery |
| All remotes stopped working | Power surge erased memory | Reprogram all devices |
| Door won’t close | Sensor blocked | Clear path, align sensors |
| HomeLink won’t sync | Car not compatible | Check car manual, use repeater if needed |
Non-obvious Insights Homeowners Miss
- Program Order Matters: When erasing all codes, always program your main remote first, then keypads, then HomeLink. Some openers only allow a set number of devices, and the first ones programmed take priority.
- Light Bulb Interference: Certain energy-saving or LED bulbs installed in your opener can create signal interference, making remotes seem unreliable. Try changing to a standard bulb during programming if you notice problems.
- Rolling Code Security: Modern openers use rolling codes, which change every use. This makes it nearly impossible for thieves to “capture” your remote signal, but it also means universal remotes must be compatible with rolling code technology.
- Garage Door Position: Some openers won’t program new devices if the door is open. Always close the garage door before starting the reprogramming process.
Frequently Asked Questions
Why Won’t My Liftmaster Remote Program Even After Following All The Steps?
There are a few common reasons: the remote’s battery may be weak, you may be too far from the motor unit, or the remote is not compatible with your opener’s technology. Always check the color of your Learn button and compare with your remote. Also, ensure there are no sources of interference like LED bulbs near the opener.
How Do I Reset My Liftmaster Keypad If I Forgot The Pin?
If you forget your PIN, you need to reset the keypad. Press and hold the Learn button on the motor unit until the LED turns off (about 6–10 seconds). This erases all keypad and remote codes. Then, reprogram your keypad with a new PIN following the programming steps above.
Can I Program Multiple Remotes And Keypads To The Same Liftmaster Opener?
Yes, most LiftMaster garage door openers can store 5–8 devices (remotes, keypads, HomeLink systems). If you reach the limit, erasing all codes and reprogramming is necessary. Always check your opener’s manual for the exact number.
What Should I Do If My Homelink System In My Car Won’t Sync With My Liftmaster Opener?
First, confirm your car’s model and year are compatible with rolling code openers. Some cars (especially older models) need a HomeLink repeater kit, which acts as a bridge. Check your car manual or visit the official HomeLink website for step-by-step compatibility instructions.
Is It Safe To Give My Garage Keypad Code To Service Workers Or Neighbors?
It’s better not to share your PIN unless absolutely necessary. If you must, change your PIN immediately after the work is complete. Some newer keypads allow you to set temporary guest codes for extra security.
Reprogramming a LiftMaster garage door opener is a valuable skill for any homeowner. With the right steps, you can add or remove remotes, secure your garage, and even bring your system into the smart home era. Always keep your codes private, stay aware of your opener’s technology, and don’t hesitate to call a pro if things get complicated. Your garage is a major entry point to your home—keeping it secure and up to date is always worth the effort.


